Super Model With Bad Crack Habit Rehab Build-


#12
 09-17-2015, 06:31 PM

Speaking of dusty.........I had to pull off the road leaving the house last week thinking I had an electrical fire........See, here in NE Rural Kentucky, my roads are gravel........The holes in the floor kicked the road dust in the cab, the twinkling sunlight thru the forest brought it to my attention.......I was gagging.......not from my cigarette either.......something I need to work on very soon with winter coming.......mice already found these holes and ate my napkins from McDonalds in the glove box......must'a retained the scent of a fellay-o-fish...........Dunno.......possible mouse paper fetish?...
#13
09-19-2015, 01:51 PM
So, as stated above......being dry & the Princess already in my shop, I decided I'd take a peak to see just how bad this rust was......

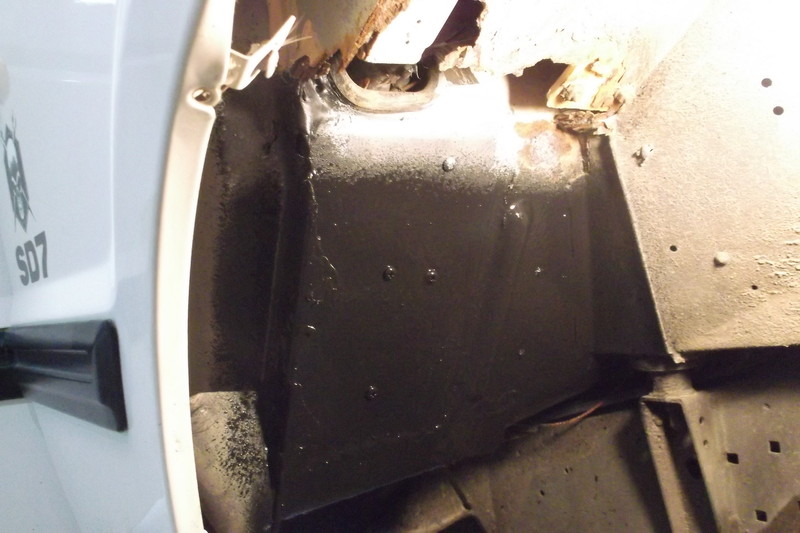
Alright.........You mean to tell me that the inner fender well is 'also' our floor?.....WOW, I thought only Yugo & the Volkswagen Thing had that engineering.......no inner/outer....no plastic inner liner.....no, no, no nothing??.......Explains the 4" of factory sound proofing padding. Needless to say, I have a very impressive amount of rust to now deal with.....

The good news is, I found 27 cents under the carpet!!
#14
09-19-2015, 04:17 PM
So after looking under the '****' last evening.....I awoke this morning and headed straight out for a 1/2 a sheet of 14ga steel for repairs.......Armed to the T, I set fourth to kick some imported steel butt!

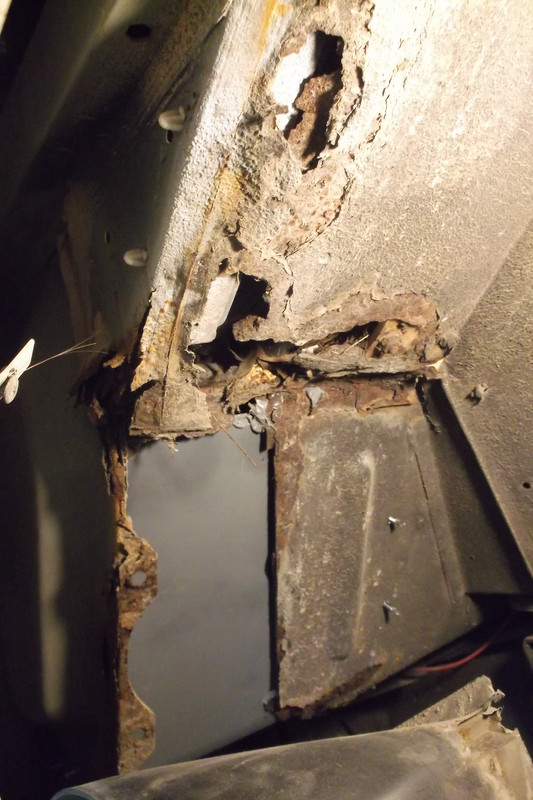
Here's the good, the bad & the ugly.......(only good part was the string of seam sealer remaining which allowed me to measure the bend line).....
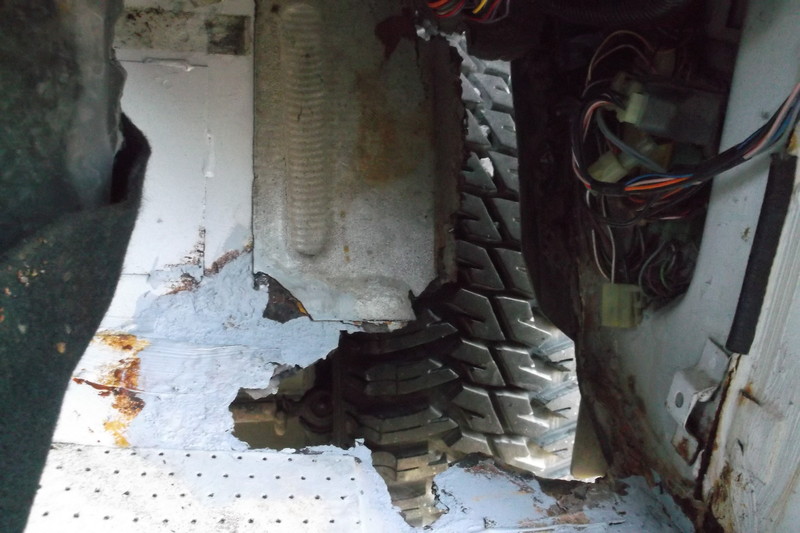
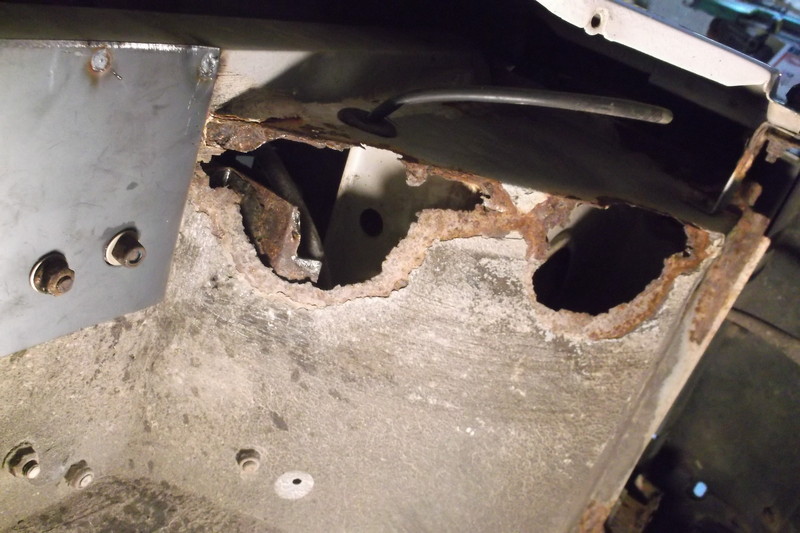
This is what I found on the pass. side last evening.......This is when it BLEW ME AWAY that the floor was ALSO the wheel well......WTH???
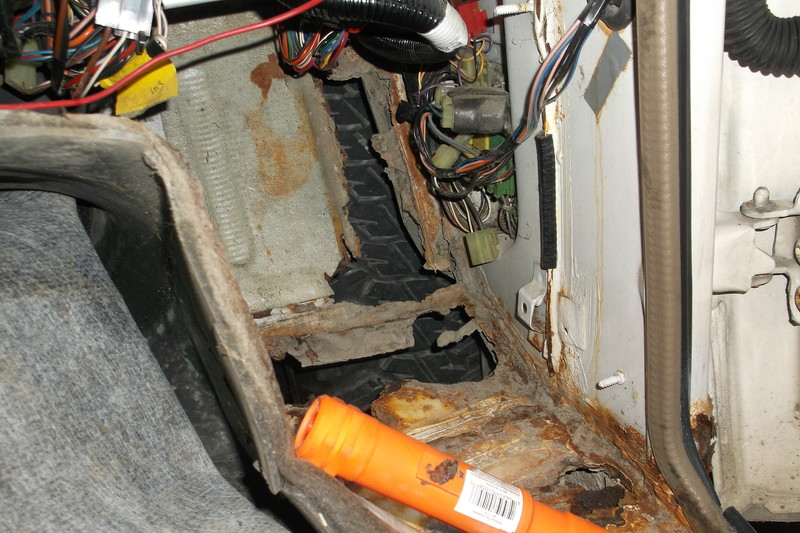
The goal here is a 'sympathetic' rust repair......I am unwilling to pull carpet, harness's, etc. to perform a resto repair. Last evening once I chipped away the loose stuff, created more holes.....I gave it a quick coat of primer 'sealer' to dry over night...
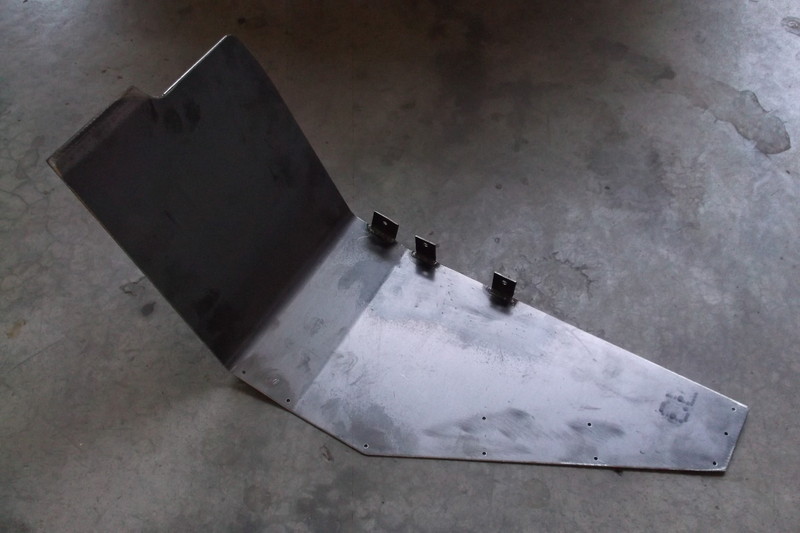
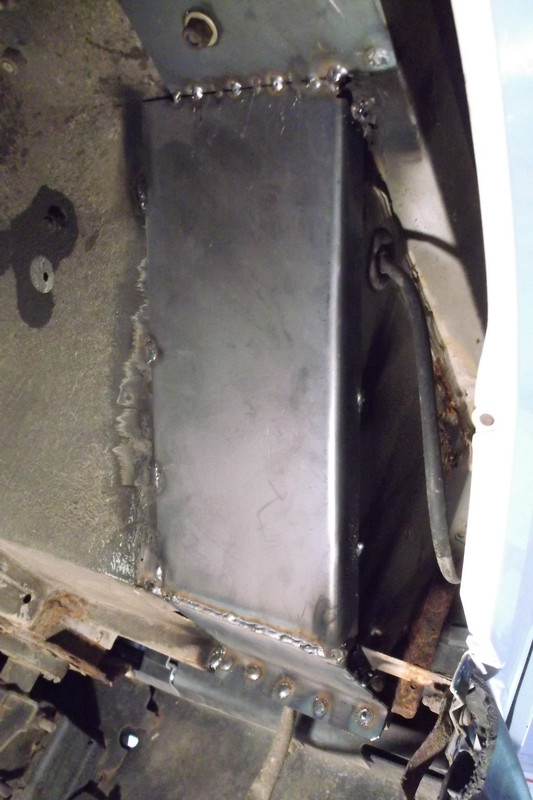
With fresh metal in hand, this is my repair panel.......welding around all the electrical in that corner would be touchy and risky without dislodging harness's.....I designed the patch to be self-drilling screwed & rivets with only minor welding......something I never do but again, 'sympathetic'....
Part in place, I used seam sealer in a big way between the floor & patch, it has multiple ribbons applied underneath..
Now in place, I repeat in the wheel well creating 2 layers.....Seems I need to do the entire wheel well to the front, so I'll be doing this in sections...problem is all the electrical on top of the wheel well....I'm not willing to disassemble as it'll just lead to broken bolts....so we'll see how this goes.....
I've been in worse spots over the years, but there was a return......unsure of the 'return' on this truck even if done right sooooo....it is, what it is!

Here's the good, the bad & the ugly.......(only good part was the string of seam sealer remaining which allowed me to measure the bend line).....
This is what I found on the pass. side last evening.......This is when it BLEW ME AWAY that the floor was ALSO the wheel well......WTH???

The goal here is a 'sympathetic' rust repair......I am unwilling to pull carpet, harness's, etc. to perform a resto repair. Last evening once I chipped away the loose stuff, created more holes.....I gave it a quick coat of primer 'sealer' to dry over night...

With fresh metal in hand, this is my repair panel.......welding around all the electrical in that corner would be touchy and risky without dislodging harness's.....I designed the patch to be self-drilling screwed & rivets with only minor welding......something I never do but again, 'sympathetic'....

Part in place, I used seam sealer in a big way between the floor & patch, it has multiple ribbons applied underneath..

Now in place, I repeat in the wheel well creating 2 layers.....Seems I need to do the entire wheel well to the front, so I'll be doing this in sections...problem is all the electrical on top of the wheel well....I'm not willing to disassemble as it'll just lead to broken bolts....so we'll see how this goes.....

I've been in worse spots over the years, but there was a return......unsure of the 'return' on this truck even if done right sooooo....it is, what it is!
#15
09-19-2015, 04:35 PM
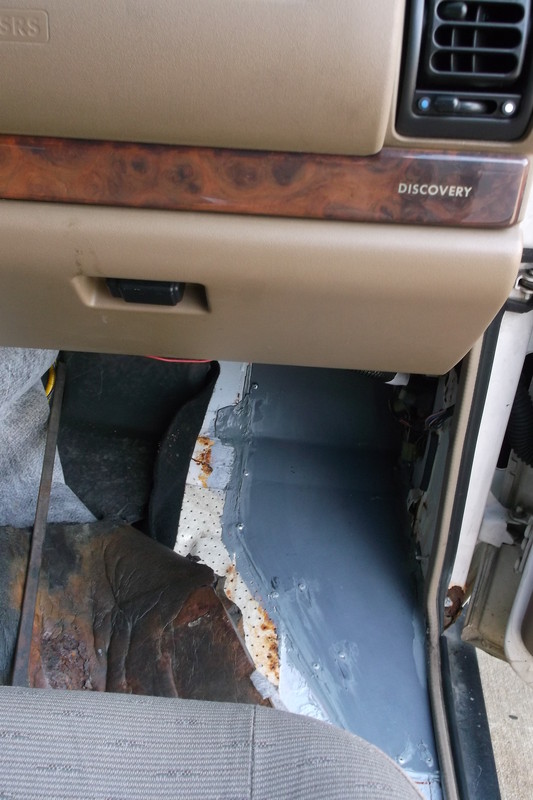
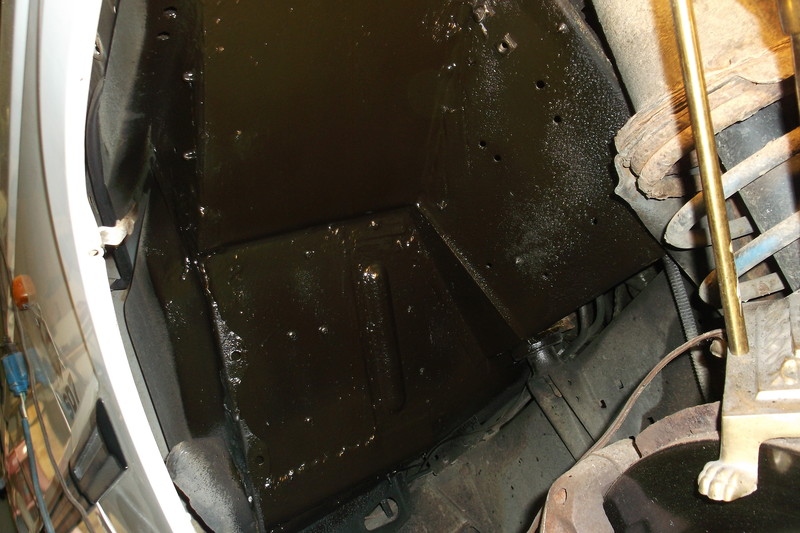
Here's the completed, repeated repair on the lower portion of the inner well, I used the 1st inside repair to attach the following repairs creating a sandwich.....it encapsulates the repair and should lead to a long term repair if sealed proper. I use bedliner sprays now a days over undercoating as a base over coat.....once 100%, I'll most likely undercoat over the bedliner for extra deadening and longevity.......

#16
09-20-2015, 05:36 PM
Over all I figure I have 9 hours into the passenger side repairs......That's a little extensive but it is what it is.......pretty happy with end results, next go inboard to go over all electrical connections in effected area.......
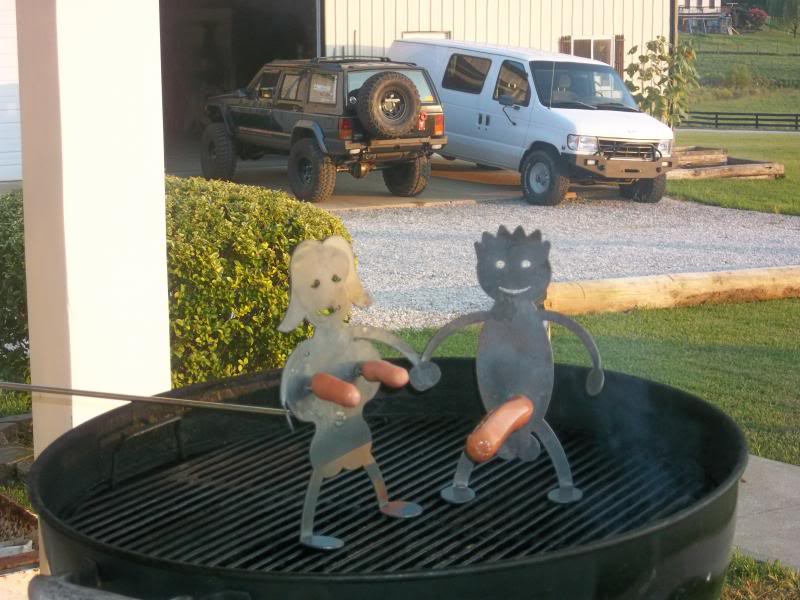
I'm sure rust rehab is nothing new here, but.....pretty happy with the results as well as no electronics' were effected by the welding........just time to sit back and do some grilling until I decide to do the driver's side.......ugh...


I'm sure rust rehab is nothing new here, but.....pretty happy with the results as well as no electronics' were effected by the welding........just time to sit back and do some grilling until I decide to do the driver's side.......ugh...

The following 2 users liked this post by Detoured Discovey:
gswillis65 (11-26-2021),
Karmakannon (03-07-2022)

#19
09-21-2015, 08:09 AM
Super Moderator
Can definitely tell a jeep guy , pillar lites and pre runner lol , better watch it those super models on crack can do some damage( they move fast)
Once u clean the throttle body, run several tanks of super,use the correct motor oil,and replace the pcv stuff will probly be fine, and yes they all look nice on the outside with the aluminum skinned body, though I think the van was worth more
Btw you patch panels look nice if you make em cheap and easy could be a small market, mines rotted like yours , guessing they all rott same places
Last edited by TOM R; 09-21-2015 at 08:21 AM.
#20
09-21-2015, 08:24 AM
Super Moderator
 It was the perfect 4wd pedo van just needed free candy on the sides