DI Dist. vacuum advance replacement
#1
 08-15-2010, 11:09 AM


Symptoms which caused me to investigate were unstable idle swinging from 500 - 1200 rpm and check engine light on. when driving engine ran well. So I pulled, checked for operation and cleaned the idle air control valve. The cone face and shaft were definitely dirty and needed cleaning. That is one of the most common causes of rough idle (and simplest to fix).
FIRST I should have just checked the vacuum line from the plenum to the vacuum advance. Pulled line off the plenum end and checked for leaks.... found free flow. Checked the line itself and had a good seal. As it turns out the diaphram on the vacuum advance was leaking, probably due to age and heat deterioration. Now to replace it...
An unnamed person at an unnamed parts supplier told me you couldn't replace the vac. adv. module in situ and I would have to pull the dizzy to perform the replacement. So I said BS and did it anyway. Here is how...
-----WARNING**** IF you pull the rotor arm off and pull too hard (if it is very securely stuck on) you could pull the cams and retaining springs (see pic #3) apart!!! Not the end of the world but will cause you about 30 more minutes of work. If you do need to remove the rotor arm it is best to simultaneously press down on the metal washer and C clip underneath the arm as you lift it off. Consider yourself warned....
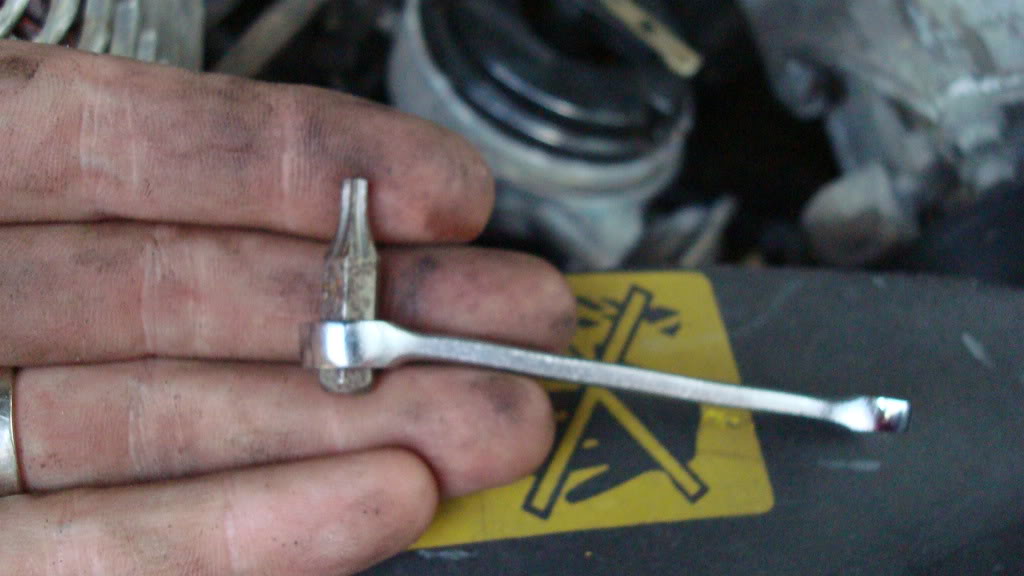
Tools needed - one Torx bit driver for the only two screws holding the module to the dizzy housing and a 1/4 spanner. a small dab of grease.
Simply unscrew the two Torx head screws holding it on.
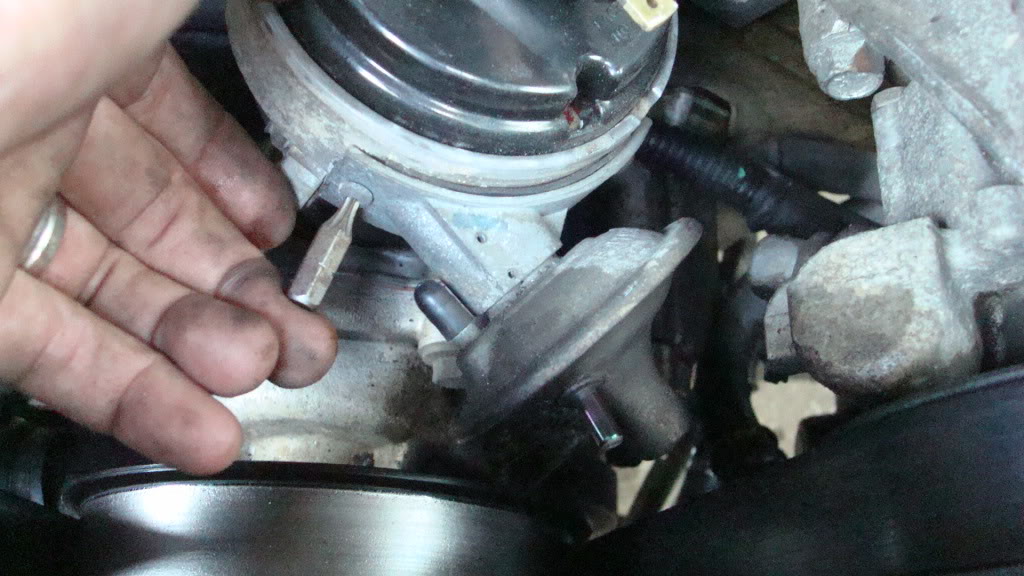
once loose it will not simply pull out as the end of the push rod coming out of the module has a hole in it which attached to a pin on the cam adjuster. In the following picture notice I have the dizzy apart: you will NOT need to pull the dizzy apart this much for the vac adv replacement. I did just to do a full cleaning and service
The push rod will come loose when you press down on it... no clip holding it in place.
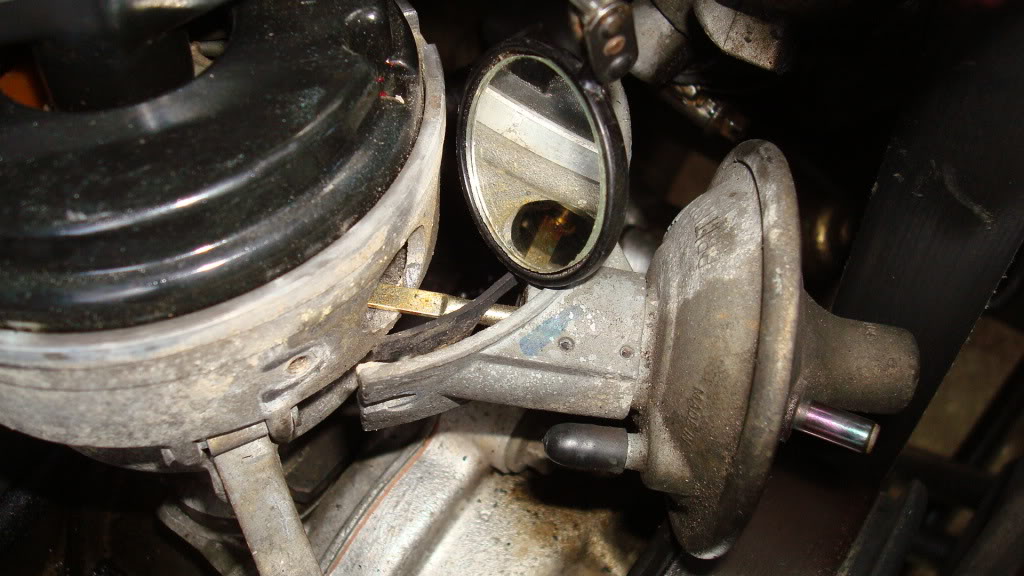
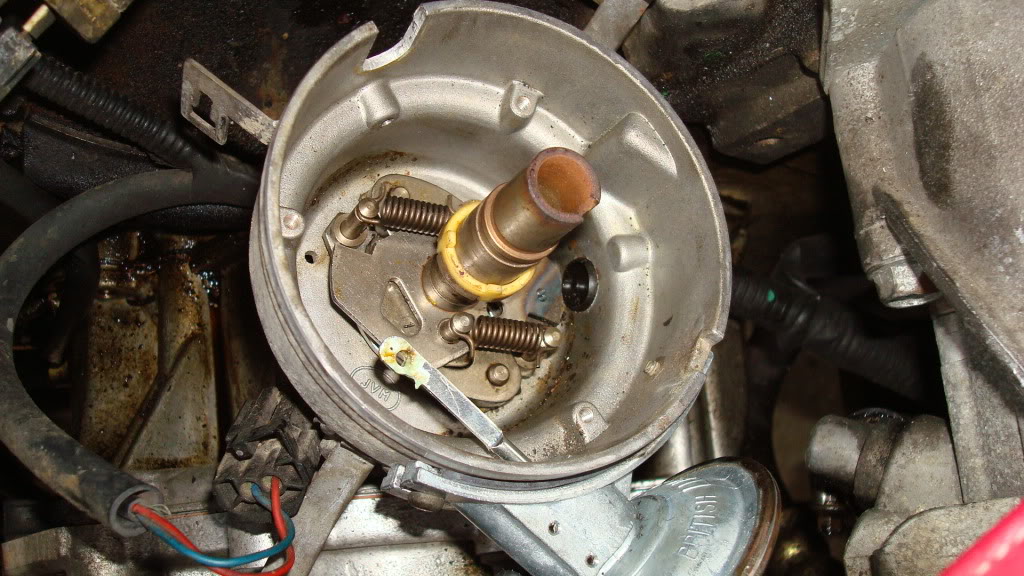
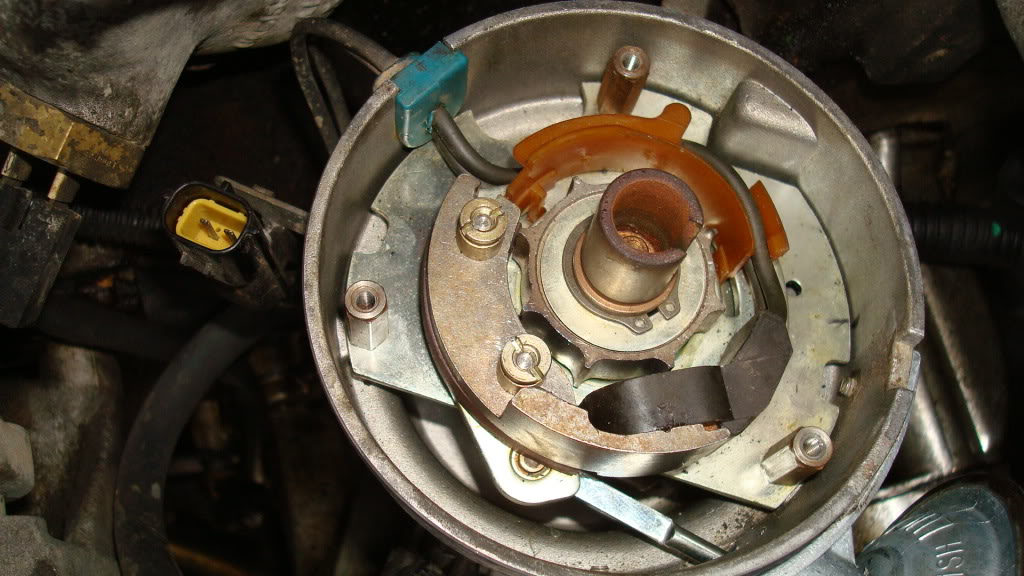
Toss the old module in the trash as it is not serviceable. Before you offer the new vac adv module up to the aperature it fits into, place a very small dab of grease on the end of the push rod (into the hole). THis is the tricky part that requires a bit of finesse... a small mirror will help here. you have to get that hole up and around the pin. once you get that part done just slowly push the vac adv module against the dizzy housing and reattach the mounting screws. replace the vacuum line and check for suction. You should be good to go. IF you really want to be 100% certain you did it right you should remove the rotor (*** see warning above***) and the black protective cap which is retained with 3 phillips screws. Pull it and check for movement when suction is applied.
enjoy your new, smooth idle.
FIRST I should have just checked the vacuum line from the plenum to the vacuum advance. Pulled line off the plenum end and checked for leaks.... found free flow. Checked the line itself and had a good seal. As it turns out the diaphram on the vacuum advance was leaking, probably due to age and heat deterioration. Now to replace it...
An unnamed person at an unnamed parts supplier told me you couldn't replace the vac. adv. module in situ and I would have to pull the dizzy to perform the replacement. So I said BS and did it anyway. Here is how...
-----WARNING**** IF you pull the rotor arm off and pull too hard (if it is very securely stuck on) you could pull the cams and retaining springs (see pic #3) apart!!! Not the end of the world but will cause you about 30 more minutes of work. If you do need to remove the rotor arm it is best to simultaneously press down on the metal washer and C clip underneath the arm as you lift it off. Consider yourself warned....
Tools needed - one Torx bit driver for the only two screws holding the module to the dizzy housing and a 1/4 spanner. a small dab of grease.
Simply unscrew the two Torx head screws holding it on.
once loose it will not simply pull out as the end of the push rod coming out of the module has a hole in it which attached to a pin on the cam adjuster. In the following picture notice I have the dizzy apart: you will NOT need to pull the dizzy apart this much for the vac adv replacement. I did just to do a full cleaning and service
The push rod will come loose when you press down on it... no clip holding it in place.
Toss the old module in the trash as it is not serviceable. Before you offer the new vac adv module up to the aperature it fits into, place a very small dab of grease on the end of the push rod (into the hole). THis is the tricky part that requires a bit of finesse... a small mirror will help here. you have to get that hole up and around the pin. once you get that part done just slowly push the vac adv module against the dizzy housing and reattach the mounting screws. replace the vacuum line and check for suction. You should be good to go. IF you really want to be 100% certain you did it right you should remove the rotor (*** see warning above***) and the black protective cap which is retained with 3 phillips screws. Pull it and check for movement when suction is applied.
enjoy your new, smooth idle.
Last edited by Cosmic88; 08-15-2010 at 07:19 PM. Reason: bad description


#5
08-15-2010, 07:16 PM
Whoops... Thankfully there is an edit feature here.
No the rotor won't move when the vac adv moves... underneath the black protective cap (under the rotor), if you were to remove it (3 phillips screws)you would see the advance cam move. However, you really don't need to do this; if you suck on the vac line and it free flows then your diaphram is gone. If you get resistance (vacuum) then all is good in the hood.
Sorry for the lame description at the end there.
I got it from (open wallet and dig deep) Rovers North. I normally would have bought it cheaper from a generic parts supplier but I already had an order put together from them and needed to go over $200 so I could get free shipping. I paid a bit more than I should but it was a wash with the shipping discount.
Last edited by Cosmic88; 08-15-2010 at 07:21 PM.
#7
08-15-2010, 07:37 PM
Was getting 44 (left bank)... my guess is it was running rich as the ECM was unable to compensate properly with no timing adjustment available. That code could be O2's but it could be a few other things freaking out the O2's and sending them into fault (as in my case) with a bad fuel mix / timing.
Got it at Rovers North but it is certainly available elsewhere for a bit less.
Rovers North part # RNI009 VACUUM UNIT - V-8 DISTBUTOR $143.96
Parts Geek part # W0133-1603627 $135
A bit of a difference but sometimes I like to support the Rover specific guys when possible... what the F would we do if THEY were gone.
#9
11-26-2010, 07:47 PM

Rock Crawling
#10
02-12-2014, 05:49 AM

Mudding
Can anybody tell me the difference between these two? In product details the 2nd one says "for three pin distributor". They are both for a 3.9ltr but one says for the disco and one is for the defender. Is there really a difference or not?
Stc 1186 | Stc1186 | - | Land Rover Discovery Distributor Vacuum Advance Genuine Brand New | New-Part.com
RTC 3201 | RTC3201 | - | Land Rover Defender 90 110 Vacuum Advance Unit Lucas O.E.M. Brand NEW | New-Part.com
Thanks
Stc 1186 | Stc1186 | - | Land Rover Discovery Distributor Vacuum Advance Genuine Brand New | New-Part.com
RTC 3201 | RTC3201 | - | Land Rover Defender 90 110 Vacuum Advance Unit Lucas O.E.M. Brand NEW | New-Part.com
Thanks