Headliner Replacement step-by-step
#1
 08-10-2010, 07:35 PM


Had to replace that old, dangling headliner. Thought I'd share some of the steps to make this relatively easy yet involved proceedure go smoothly for you. I went from factory OE tan to mud hiding, kid and juice-box friendly black.
1. Feel free to staple or spray glue onto your old headliner if you really just don't care what your rig looks like. When the headliner starts to fall it is primarily due to a breakdown of the foam backing (that horrible orange crap that gets everywhere). Simply spraying glue to the material with no foam will bleed through and look like a stain.
2. Buy about 10 razorblades, Headliner specific spray glue, replacement headliner material, OEM or aftermarket, it's up to whatever look you want. You'll need a phillips screwdriver, a socket for the seatbelt retaining bolt and a thin pry tool. Personally I'd call (or website) Bill at Headliner Express as he is definitely one of the best around.
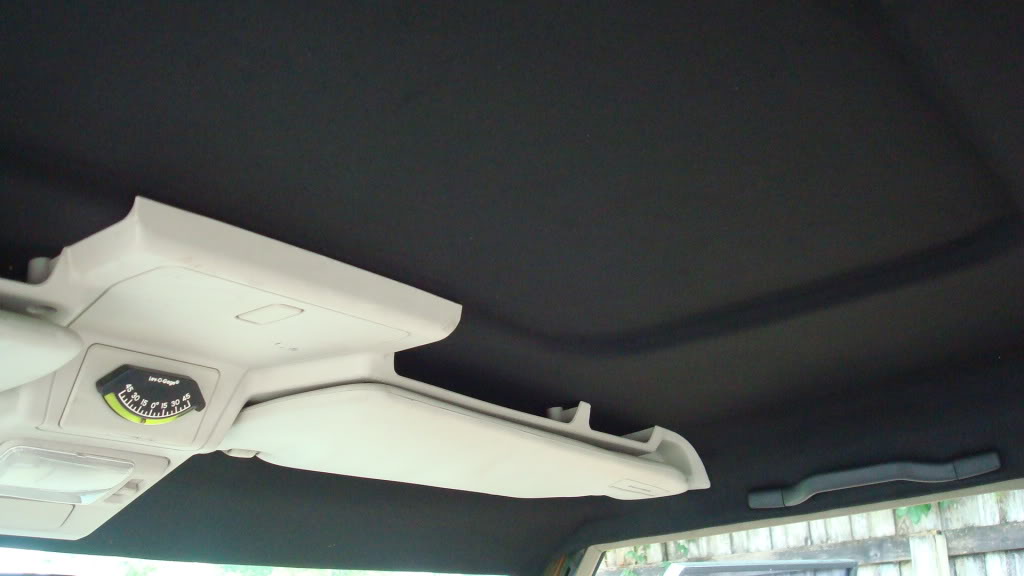
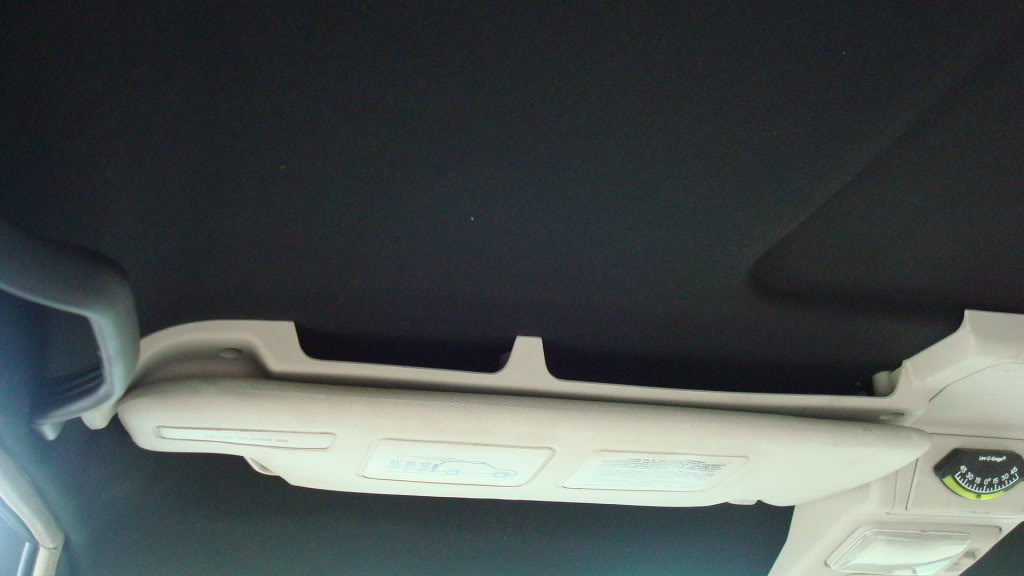
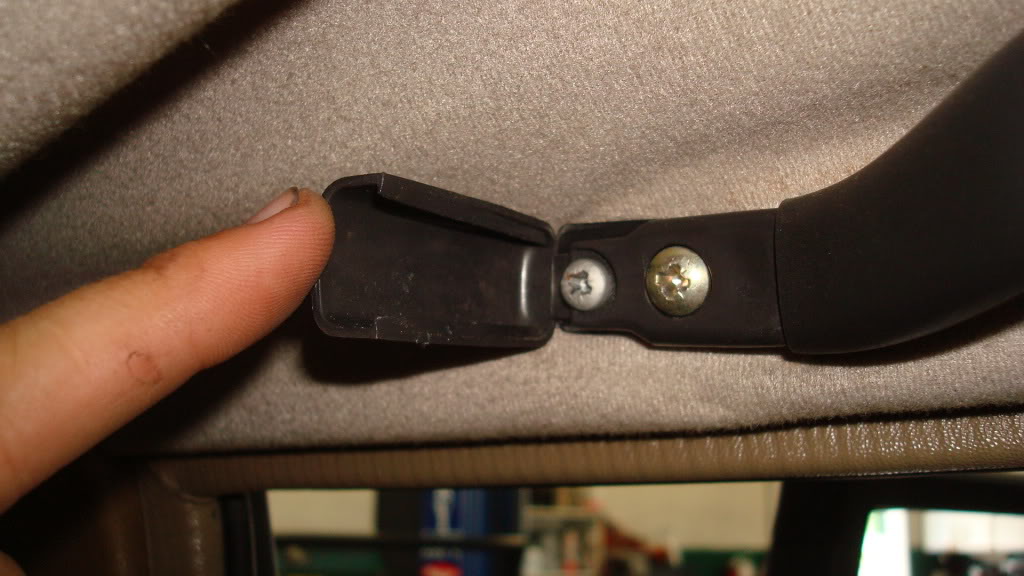
3. I found starting at the front and working your way aft to be best... begin removing all roof mounted hardware with phillips screwdriver... grab handles, visors, front overhead storage / dome light piece... once this piece is unscrewed disconnect the dome light connections (one plug, one ground) and any other electronic features you have. The sun visor clip (inboard) has a small plastic flap which covers the screw and should be carefully prised open from the bottom first as it is hinged at top. Once screw is removed you simply pull the clip out. It will be tight as there is a plastic nub also holding it in place. Just pull...
Grab handle cover... prise from the handle end...
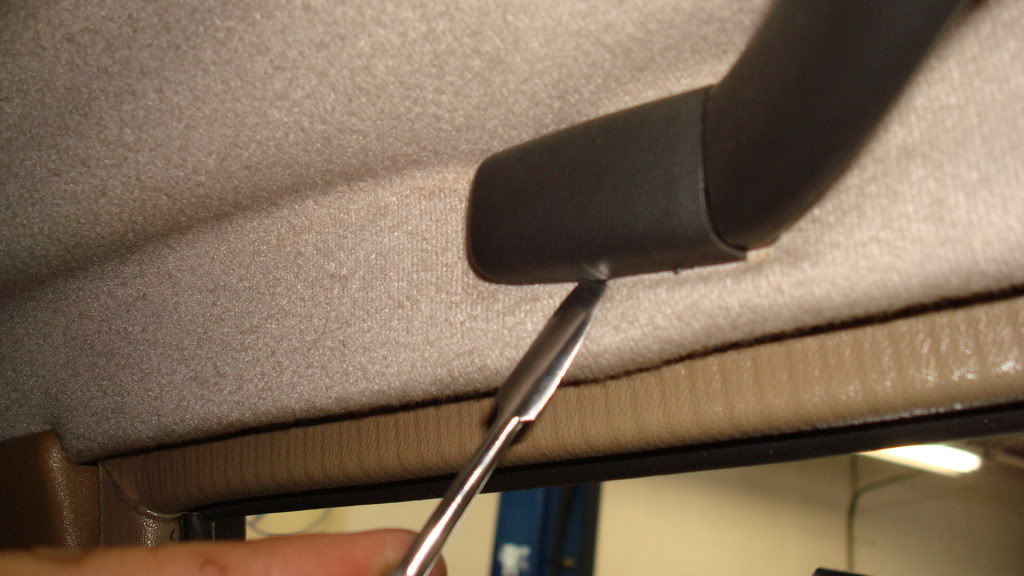
...or else you break this hinge...
At this point fold the rear seats down and not all the way forward. recline the front seats all the way back / down.
4. leave A post covers in place until ready to remove headliner.
5. NO need to remove front seat B pillar covers or seatbelt mounts. You can simply lift / manipulate the board away from the top of the B covers when you are ready to remove the board at the end. this will help keep it all up while you remove all hardware.
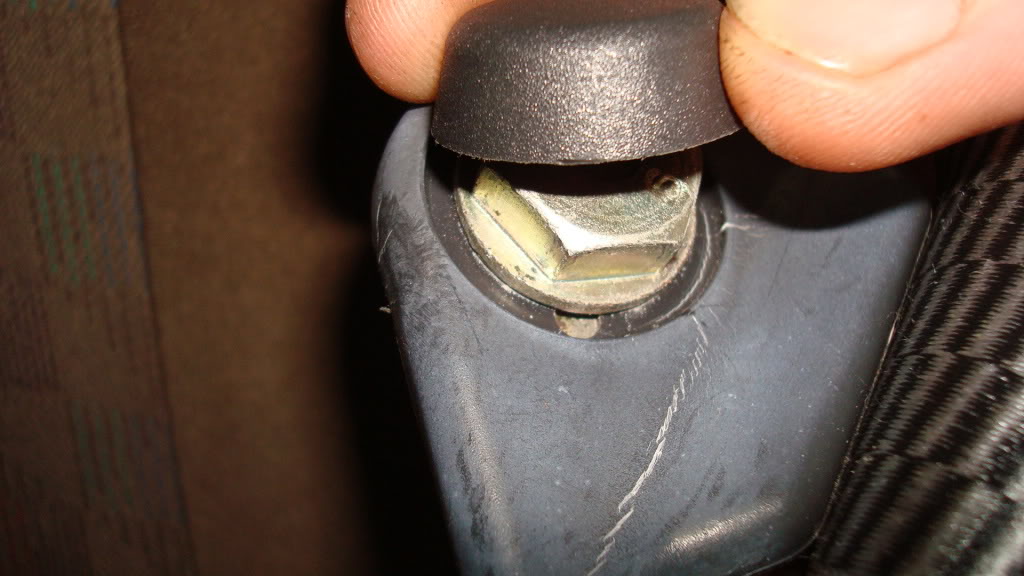
6. you DO need to remove the rear seat belt mounts and pop the top of the c pillar covers just at the top, NOT completely off. The black plastic cap over the seatbelt bolt has a small notch at the bottom where you can place a tool for removal...
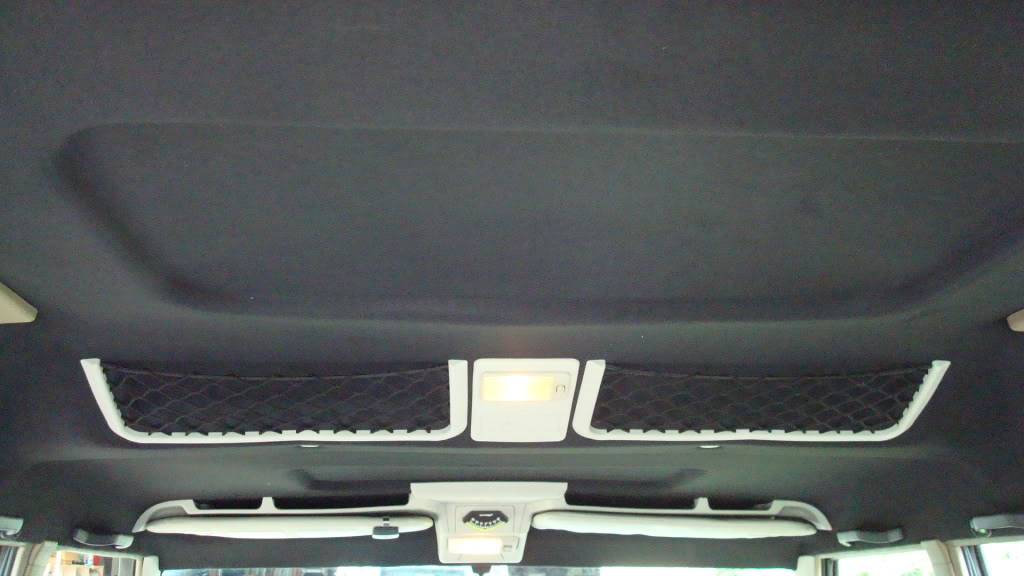
7. there are two plastic panel rivets mid-roof, just forward of the map pockets which need to be carefully pulled out.
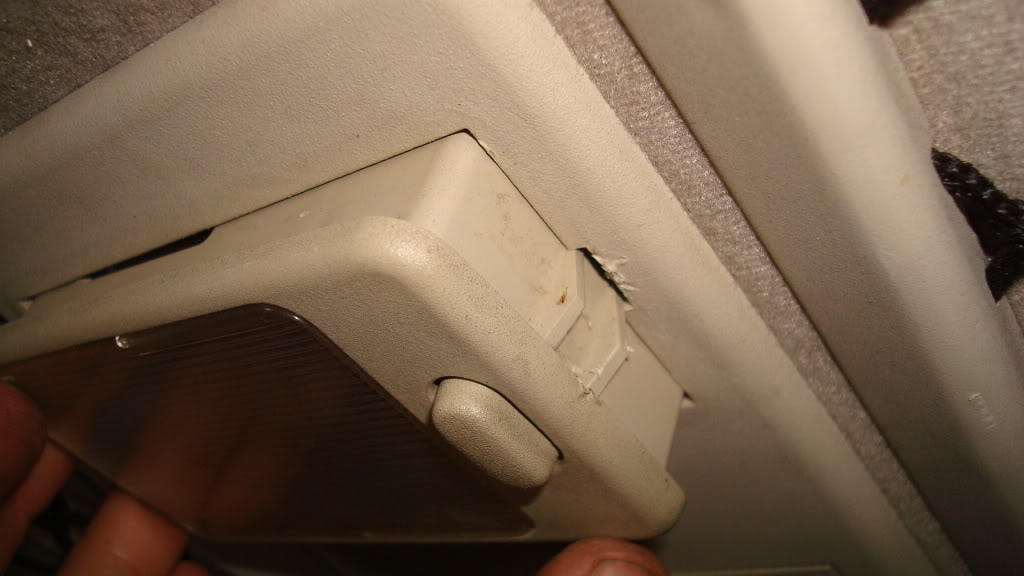
8. DO NOT try to remove the rear dome light frame or the map pocket frames at this time. They are held in place with small nuts on the plastic studs that pass through the headliner. These are removed once the headliner is completely out of the truck. DO prise the rear dome light out of the frame on either side. (See pic) No need to disconnect it... just push it up through the hole.
I swear the scratches are from the PO...
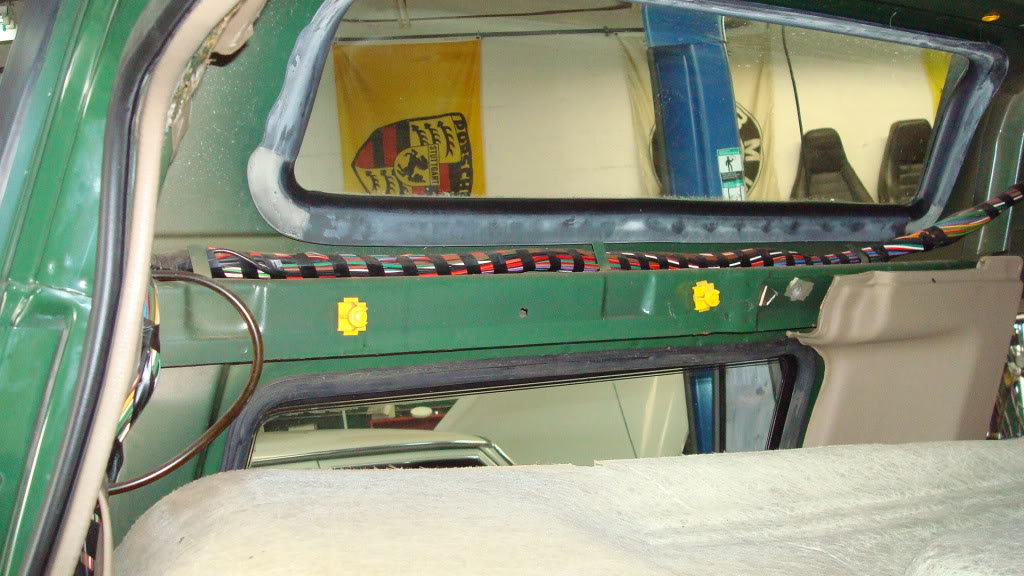
9. remove the alpine window frames... two plastic rivets hold the top to the roof and should be removed before trying to remove the plastic frame. There are also two plastic panel rivets (hidden behind panel) holding the frame to the side of the vehicle, between the alpine light and the quarter window. These are a B!tc# to get back in if the mount on back of the frame is broken when you remove the frame so remove it gently (laterally). Look for yellow rivets in pic... you should only see red rivet sockets but contrary to my advice I pulled a bit too hard and pulled the rivets off the board instead of OUT of the holes...
10. remove the rear speaker panels. these are partly held in place by the rear door seal / trim. ALSO, they lift UP and out...two retaining prongs at the bottom of the panel.
11. The rear edge of the headliner board is held in place by a lip behind the rear door seal. No need to completely remove the seal... just the upper edge. TRY NOT TO let the board 'fold' during this process. some sort of prop to keep the board up will be useful or get a helper.
12. Now have helper remove the A pillar covers (three metal snap clips) and ease the board through the rear door opening. You will need to tilt the board to one side (you choose) and slide it out the rear diagnally.
13. be careful not to get the orange foam/ glue crap everywhere.
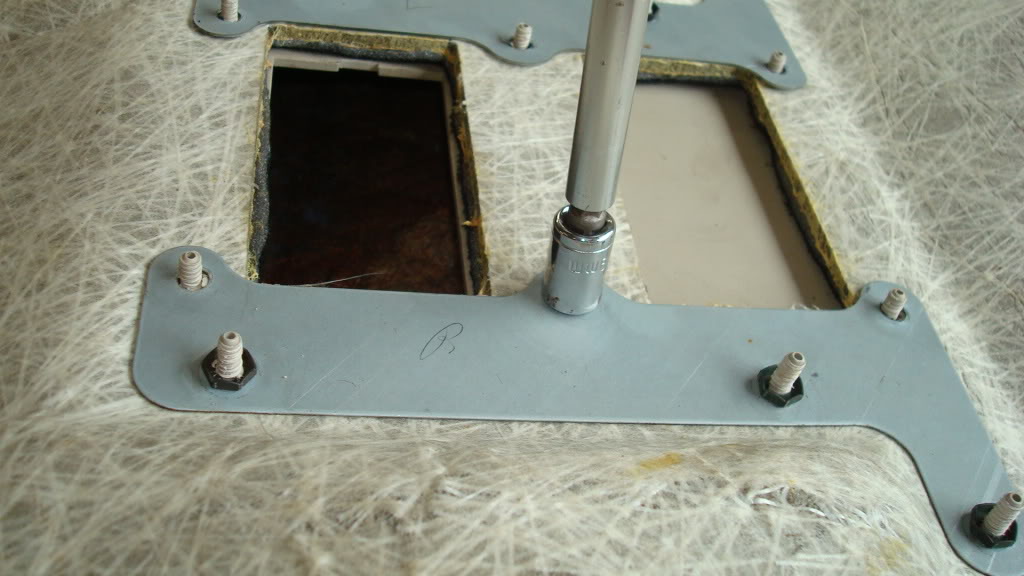
14. place the board no a flat surface or table big enough to support both ends. Now you can remove the small metal nuts that retain the map pocket frame and dome light frame...
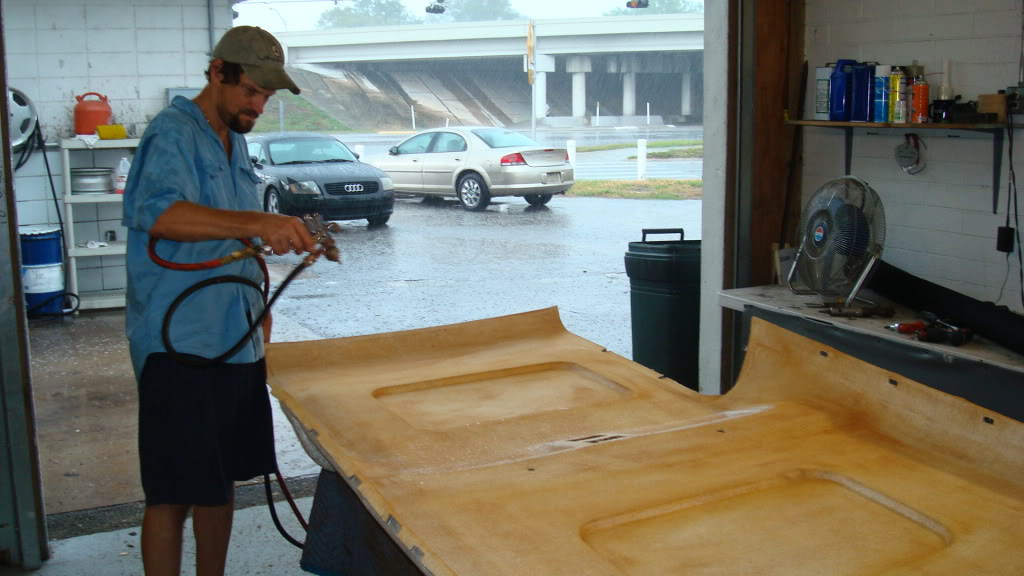
Now you have to clean all that loose glue and foam off...use a thick Nylon brush to scrub / remove all the foam resirue from the board. Maybe a brush from the kitchen... just don't get caught stealing the one from the sink... the wife will be pissed. DON'T use a grinder or rotary tool for this step. You may cut into the board and ALL imperfections will show through the finished product. Be thorough and get it ALL off.
From here you will need to follow the instructions for the glue you buy but definitely coat BOTH surfaces before mating. BEST way to do this is to FIRST ONLY spray the board thoroughly but don't soak it. then lightly place the material over the board, foam side down. DON'T press it down yet. Now carefully fold the material onto itself (in half from front to back...fabric onto the fabric).
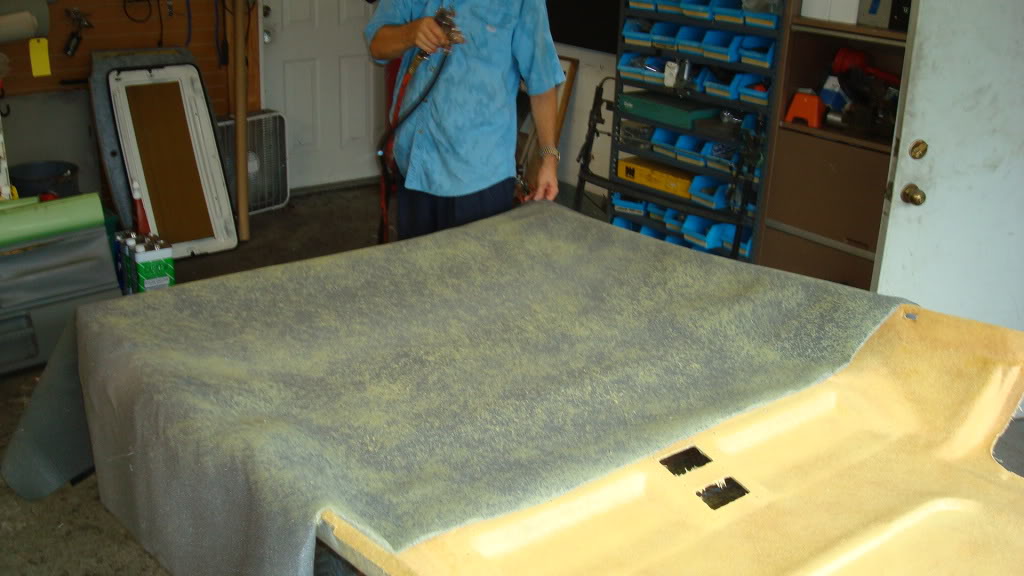
Here is the "point of no return" phase...Now spray the foam on the exposed half of the liner. When you are ready to mate the foam to the board do so evenly and start in the center and work your way toward the outside, but not all the way. This step really needs a light touch. Don't press down hard or you'll leave indentations and marks. IF you applied the glue evenly and properly you won't need to press hard. Work the coutours and slightly stretch the material around the corners so you don't get any creases or folds.

Repeat this step for the other half.
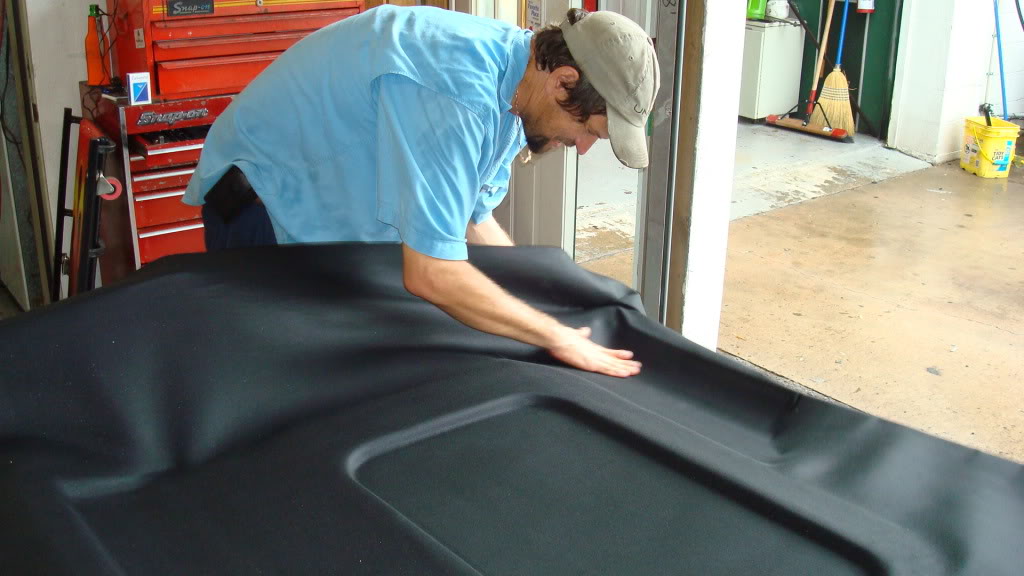
THIS IS THE MOST IMPORTANT PART!!!! Leave at LEAST 1/2 " of material around the edges (more is good) so you can glue and fold the material onto the the back side (top) of the board. Otherwise you will have exposed edges on the sides and you will have wasted your time and money.
Poke / cut holes for the hardware and sunroof openings if applicable. Same thing here with leaving extra material to fold over to the top of the board.
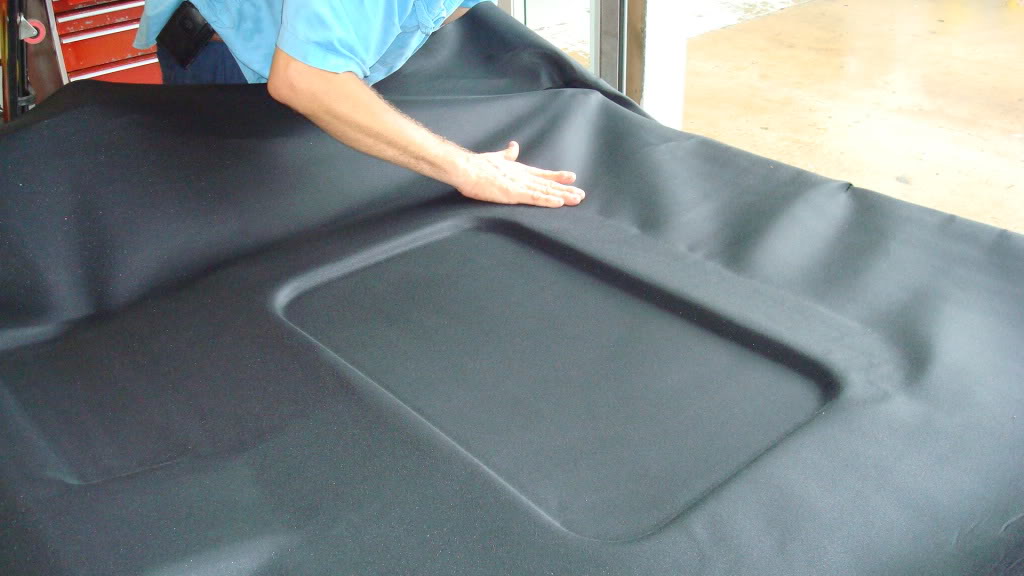
Now put it back in and be careful not to press to hard too hard with your fingers. Use your palms to handle the newly covered board.
This is just a guide from my experience. Use your own skill and finesse to get the job done... at your own risk.
I'll edit and post more pics later.
1. Feel free to staple or spray glue onto your old headliner if you really just don't care what your rig looks like. When the headliner starts to fall it is primarily due to a breakdown of the foam backing (that horrible orange crap that gets everywhere). Simply spraying glue to the material with no foam will bleed through and look like a stain.
2. Buy about 10 razorblades, Headliner specific spray glue, replacement headliner material, OEM or aftermarket, it's up to whatever look you want. You'll need a phillips screwdriver, a socket for the seatbelt retaining bolt and a thin pry tool. Personally I'd call (or website) Bill at Headliner Express as he is definitely one of the best around.
3. I found starting at the front and working your way aft to be best... begin removing all roof mounted hardware with phillips screwdriver... grab handles, visors, front overhead storage / dome light piece... once this piece is unscrewed disconnect the dome light connections (one plug, one ground) and any other electronic features you have. The sun visor clip (inboard) has a small plastic flap which covers the screw and should be carefully prised open from the bottom first as it is hinged at top. Once screw is removed you simply pull the clip out. It will be tight as there is a plastic nub also holding it in place. Just pull...
Grab handle cover... prise from the handle end...
...or else you break this hinge...
At this point fold the rear seats down and not all the way forward. recline the front seats all the way back / down.
4. leave A post covers in place until ready to remove headliner.
5. NO need to remove front seat B pillar covers or seatbelt mounts. You can simply lift / manipulate the board away from the top of the B covers when you are ready to remove the board at the end. this will help keep it all up while you remove all hardware.
6. you DO need to remove the rear seat belt mounts and pop the top of the c pillar covers just at the top, NOT completely off. The black plastic cap over the seatbelt bolt has a small notch at the bottom where you can place a tool for removal...
7. there are two plastic panel rivets mid-roof, just forward of the map pockets which need to be carefully pulled out.
8. DO NOT try to remove the rear dome light frame or the map pocket frames at this time. They are held in place with small nuts on the plastic studs that pass through the headliner. These are removed once the headliner is completely out of the truck. DO prise the rear dome light out of the frame on either side. (See pic) No need to disconnect it... just push it up through the hole.
I swear the scratches are from the PO...
9. remove the alpine window frames... two plastic rivets hold the top to the roof and should be removed before trying to remove the plastic frame. There are also two plastic panel rivets (hidden behind panel) holding the frame to the side of the vehicle, between the alpine light and the quarter window. These are a B!tc# to get back in if the mount on back of the frame is broken when you remove the frame so remove it gently (laterally). Look for yellow rivets in pic... you should only see red rivet sockets but contrary to my advice I pulled a bit too hard and pulled the rivets off the board instead of OUT of the holes...
10. remove the rear speaker panels. these are partly held in place by the rear door seal / trim. ALSO, they lift UP and out...two retaining prongs at the bottom of the panel.
11. The rear edge of the headliner board is held in place by a lip behind the rear door seal. No need to completely remove the seal... just the upper edge. TRY NOT TO let the board 'fold' during this process. some sort of prop to keep the board up will be useful or get a helper.
12. Now have helper remove the A pillar covers (three metal snap clips) and ease the board through the rear door opening. You will need to tilt the board to one side (you choose) and slide it out the rear diagnally.
13. be careful not to get the orange foam/ glue crap everywhere.
14. place the board no a flat surface or table big enough to support both ends. Now you can remove the small metal nuts that retain the map pocket frame and dome light frame...
Now you have to clean all that loose glue and foam off...use a thick Nylon brush to scrub / remove all the foam resirue from the board. Maybe a brush from the kitchen... just don't get caught stealing the one from the sink... the wife will be pissed. DON'T use a grinder or rotary tool for this step. You may cut into the board and ALL imperfections will show through the finished product. Be thorough and get it ALL off.
From here you will need to follow the instructions for the glue you buy but definitely coat BOTH surfaces before mating. BEST way to do this is to FIRST ONLY spray the board thoroughly but don't soak it. then lightly place the material over the board, foam side down. DON'T press it down yet. Now carefully fold the material onto itself (in half from front to back...fabric onto the fabric).
Here is the "point of no return" phase...Now spray the foam on the exposed half of the liner. When you are ready to mate the foam to the board do so evenly and start in the center and work your way toward the outside, but not all the way. This step really needs a light touch. Don't press down hard or you'll leave indentations and marks. IF you applied the glue evenly and properly you won't need to press hard. Work the coutours and slightly stretch the material around the corners so you don't get any creases or folds.
Repeat this step for the other half.
THIS IS THE MOST IMPORTANT PART!!!! Leave at LEAST 1/2 " of material around the edges (more is good) so you can glue and fold the material onto the the back side (top) of the board. Otherwise you will have exposed edges on the sides and you will have wasted your time and money.
Poke / cut holes for the hardware and sunroof openings if applicable. Same thing here with leaving extra material to fold over to the top of the board.
Now put it back in and be careful not to press to hard too hard with your fingers. Use your palms to handle the newly covered board.
This is just a guide from my experience. Use your own skill and finesse to get the job done... at your own risk.
I'll edit and post more pics later.
Last edited by Cosmic88; 08-10-2010 at 11:35 PM. Reason: because...
The following 4 users liked this post by Cosmic88:
#2
08-10-2010, 08:49 PM

#3
08-10-2010, 09:12 PM
#5
08-11-2010, 07:57 AM

Baja
#6
08-11-2010, 08:26 AM

Rock Crawling
Join Date: May 2006
Location: Fairfax, VA
Posts: 303
Likes: 0
Received 0 Likes
on
0 Posts
#7
08-11-2010, 08:56 AM
Yes, I bought the material from http://www.headlinerexpress.com/servlet/StoreFront and he is very helpful if not uber-detailed with the process... even more than me 
#9
08-11-2010, 09:15 PM
My pleasure Spike... I have a few more of these tech section worthy (i think) threads coming soon.
I figure the info I get from everyone else's experiences demands that I share mine.
Coming soon... Vacuum advance module replacement on 94-95 dizzy... Apline window seal replacement... door lock assembly repair (that stupid coil spring is a very common failure)...
I figure the info I get from everyone else's experiences demands that I share mine.
Coming soon... Vacuum advance module replacement on 94-95 dizzy... Apline window seal replacement... door lock assembly repair (that stupid coil spring is a very common failure)...