How To Change the Fuel Tank Breather/Vent Hose
#1
 07-02-2011, 12:36 PM


Step 1 – Disconnect the Negative Terminal on the battery – “Safety Safety”

Step 2 – Use the appropriate device to syphon any remaining fuel from the gas tank
Use This Device – It works just like a siphon should work – one end in the tank the other end in the proper storage (Gas Can) – Squeeze until you have fluid flow and you’re good to go.

Step 3 – Flip rear carpet up to expose the carpet padding/sound dampener

Step 4 – Flip the Carpet Padding/Sound Dampener up to expose the Fuel Pump Access Panel – Or you can do what the previous owner did on my Disco, and cut a flap above the fuel pump access panel

Step 5 – Remove the screws holding the access panel – Be Careful as they may have weathering (rust) and can easily strip

Step 6 – Mark at least one of the fuel tubes with tape and marker to help properly identify the proper tube for installation

Step 7 – Disconnect the Fuel Send and Return Pipes and Disconnect the Fuel Pump Electrical Relay

Step 8 – Remove the rear Sway Bar Brackets From Passenger and Driver Side Frame – Let the rear sway bar slide free downwards away from under the fuel tank


Step 9 – Locate and Remove the Tank Filler Hose – Loosen and slide the hose clamps out of the way – Also remove the straps holding the other tubes to the Tank Filler Hose

Step 10 – Disconnect Vent Hose Coupling

Step 11 – Disconnect Breather Hose Clamp and Bracket

Step 12 – Remove the Nut and bolt of the right hand side (passenger side) of the fuel tank strap – It runs from the left (driver) side to the right (passenger) side

Step 13 – Remove 2 Bolts from rear of the Tank Cradle and 2 Nuts and Bolts from Front of Tank Cradle – Remove the Cradle

Step 14 – Using Helper or a handy jack gently lower the tank from the left (passenger) side – Be Careful of any obstructions (bolts) that may get in the way of the tank on the left (passenger) side –


Step 15 – Be aware of any dangerous passengers – I found this only after I had removed the tank – I could feel her web, but thought the web was old – I don’t know how many times I reached my fingers up within striking distance of her – Thank God For His Protection when we put ourselves in dangers path.

This concludes the discussion regarding the removal of a Gas-Fuel Tank from a 94/95 Land Rover Discovery – Installation after repairs are completed is the reverse procedures – Make sure you’re keeping track of all the hoses – including the hoses and wire strap that connect to the fuel pump – if you forget these you might have to start over – Recommend having another set of eyes, hands, and brains helping at all times with this job. Makes the process less frustrating and more enjoyable – Especially in my case if you’re teaching a new driver (my daughter) exactly how her vehicle works.
I replaced and recommend replacing all of the Nuts that are removed during the process – These nuts were the self-locking type and easily/cheaply located and purchased at a local hardware store.
I also replaced all the hose clamps –
I recommend using a gas can to do the initial re-fill of your fuel/gas tank. This will provide you with the opportunity to locate any possible leaks in the filler tube and other locations if they were missed during the repair/replacement process.
I recommend that you leave the fuel pump exposed – After filling the fuel/gas tank with at least 1/4 of fuel, and power restored to the Disco, turn the key to secondary position without starting the vehicle – this will engage the fuel pump and provide you with immediate leak indications at the pump level.
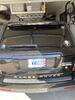
Below is the PIC of the repair done on my Disco – The Vent Breather Hose was cracked as seen above – Here is the resulting fix –
Step 16 – Replace the failed hoses – Including new clamps

PLEASE NOTE: There are more pictures in my photo gallery - I found out that there is a 20 pic limit to a single post..
Hope this helps someone else with either repairing/replacing their breather/vent hose and/or just needing to drop the tank.
In Peace and Agape,
Trav...
Step 2 – Use the appropriate device to syphon any remaining fuel from the gas tank
Use This Device – It works just like a siphon should work – one end in the tank the other end in the proper storage (Gas Can) – Squeeze until you have fluid flow and you’re good to go.
Step 3 – Flip rear carpet up to expose the carpet padding/sound dampener
Step 4 – Flip the Carpet Padding/Sound Dampener up to expose the Fuel Pump Access Panel – Or you can do what the previous owner did on my Disco, and cut a flap above the fuel pump access panel
Step 5 – Remove the screws holding the access panel – Be Careful as they may have weathering (rust) and can easily strip
Step 6 – Mark at least one of the fuel tubes with tape and marker to help properly identify the proper tube for installation
Step 7 – Disconnect the Fuel Send and Return Pipes and Disconnect the Fuel Pump Electrical Relay
Step 8 – Remove the rear Sway Bar Brackets From Passenger and Driver Side Frame – Let the rear sway bar slide free downwards away from under the fuel tank
Step 9 – Locate and Remove the Tank Filler Hose – Loosen and slide the hose clamps out of the way – Also remove the straps holding the other tubes to the Tank Filler Hose
Step 10 – Disconnect Vent Hose Coupling
Step 11 – Disconnect Breather Hose Clamp and Bracket
Step 12 – Remove the Nut and bolt of the right hand side (passenger side) of the fuel tank strap – It runs from the left (driver) side to the right (passenger) side
Step 13 – Remove 2 Bolts from rear of the Tank Cradle and 2 Nuts and Bolts from Front of Tank Cradle – Remove the Cradle
Step 14 – Using Helper or a handy jack gently lower the tank from the left (passenger) side – Be Careful of any obstructions (bolts) that may get in the way of the tank on the left (passenger) side –
Step 15 – Be aware of any dangerous passengers – I found this only after I had removed the tank – I could feel her web, but thought the web was old – I don’t know how many times I reached my fingers up within striking distance of her – Thank God For His Protection when we put ourselves in dangers path.
This concludes the discussion regarding the removal of a Gas-Fuel Tank from a 94/95 Land Rover Discovery – Installation after repairs are completed is the reverse procedures – Make sure you’re keeping track of all the hoses – including the hoses and wire strap that connect to the fuel pump – if you forget these you might have to start over – Recommend having another set of eyes, hands, and brains helping at all times with this job. Makes the process less frustrating and more enjoyable – Especially in my case if you’re teaching a new driver (my daughter) exactly how her vehicle works.
I replaced and recommend replacing all of the Nuts that are removed during the process – These nuts were the self-locking type and easily/cheaply located and purchased at a local hardware store.
I also replaced all the hose clamps –
I recommend using a gas can to do the initial re-fill of your fuel/gas tank. This will provide you with the opportunity to locate any possible leaks in the filler tube and other locations if they were missed during the repair/replacement process.
I recommend that you leave the fuel pump exposed – After filling the fuel/gas tank with at least 1/4 of fuel, and power restored to the Disco, turn the key to secondary position without starting the vehicle – this will engage the fuel pump and provide you with immediate leak indications at the pump level.
Below is the PIC of the repair done on my Disco – The Vent Breather Hose was cracked as seen above – Here is the resulting fix –
Step 16 – Replace the failed hoses – Including new clamps
PLEASE NOTE: There are more pictures in my photo gallery - I found out that there is a 20 pic limit to a single post..
Hope this helps someone else with either repairing/replacing their breather/vent hose and/or just needing to drop the tank.
In Peace and Agape,
Trav...
The following users liked this post:
Hagendaz28 (03-20-2021)
#2
07-02-2011, 03:00 PM
Winching
#3
07-02-2011, 03:03 PM
I understand the heat issue - It's been approaching 100 here, in Riverside, Ca. I did the job in the mornings taking afternoon off and returning to it in the evening. Took my time and 3 days to complete it.
In Peace and Agape,
Trav...
#5
07-02-2011, 07:08 PM
Hello,
I got the hose at a local (USA) Riverside, CA - Carquest - The size of the fuel (rated) line is 3/4 Carquest part number RBR 27010 - I paid for 2 feet (24 inches) but the counter cut me a couple extra inches. And it worked right!! So the tube is 3/4 inches by 27Inches -
It was a tight fit over the nipple and I used some petroleum jelly to make the way easier...
Now onto the next piece to the puzzle towards making this Disco dance floor ready!!! :-)
In Peace and Agape,
Trav...
#6
07-02-2011, 08:27 PM
Winching
#7
07-03-2011, 01:18 PM

Recovery Vehicle

#9
10-15-2011, 04:20 PM

Great Writeup. Thanks!
I am having an issue when fueling up. If I fill too fast, or if I top it off, the fuel leaks (more like pours) from what appears to be right behind the fuel port. Is this the same problem you were having?
Also, did it really take you 3 days? I was hoping to get this done in the morning. I have to schedule this around my daughters work schedule.
#10
10-15-2011, 05:25 PM
Winching
Great Writeup. Thanks!
I am having an issue when fueling up. If I fill too fast, or if I top it off, the fuel leaks (more like pours) from what appears to be right behind the fuel port. Is this the same problem you were having?
Also, did it really take you 3 days? I was hoping to get this done in the morning. I have to schedule this around my daughters work schedule.
I am having an issue when fueling up. If I fill too fast, or if I top it off, the fuel leaks (more like pours) from what appears to be right behind the fuel port. Is this the same problem you were having?
Also, did it really take you 3 days? I was hoping to get this done in the morning. I have to schedule this around my daughters work schedule.

