my 98 disco1
#21
 03-24-2013, 04:56 PM

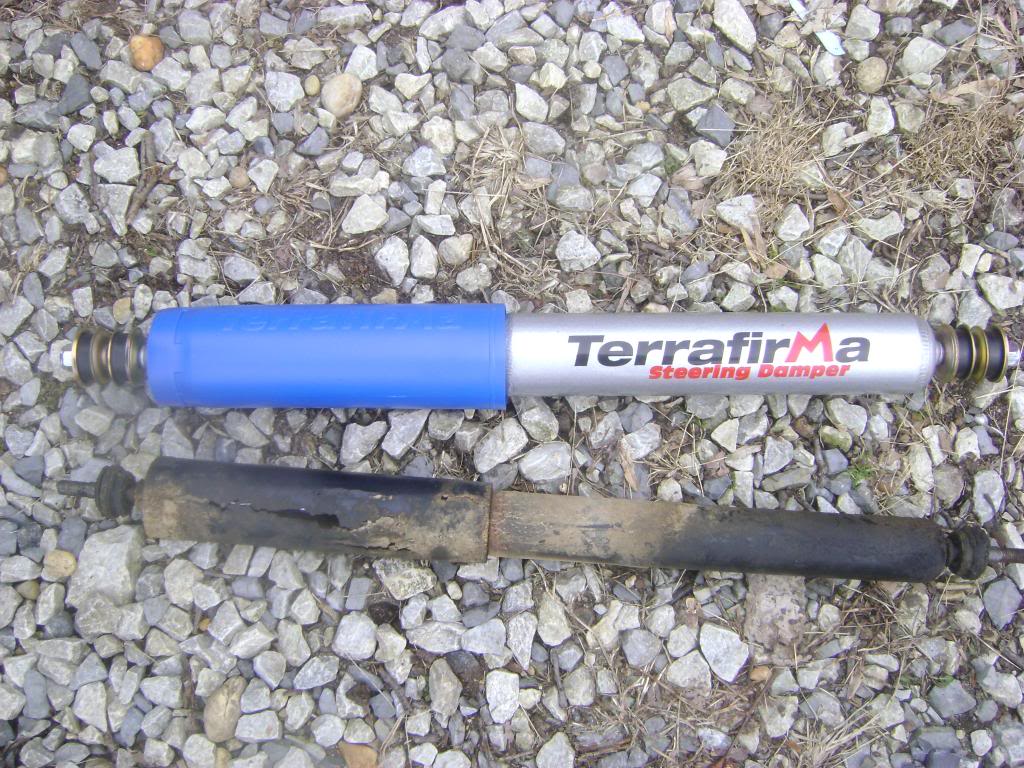
son and I replaced the original stock steering damper today with a terrafirma one , steering seems a little different now can't put my finger on the problem ( if there is one) the old one was rusty and barely working new one is like 2 times the diameter
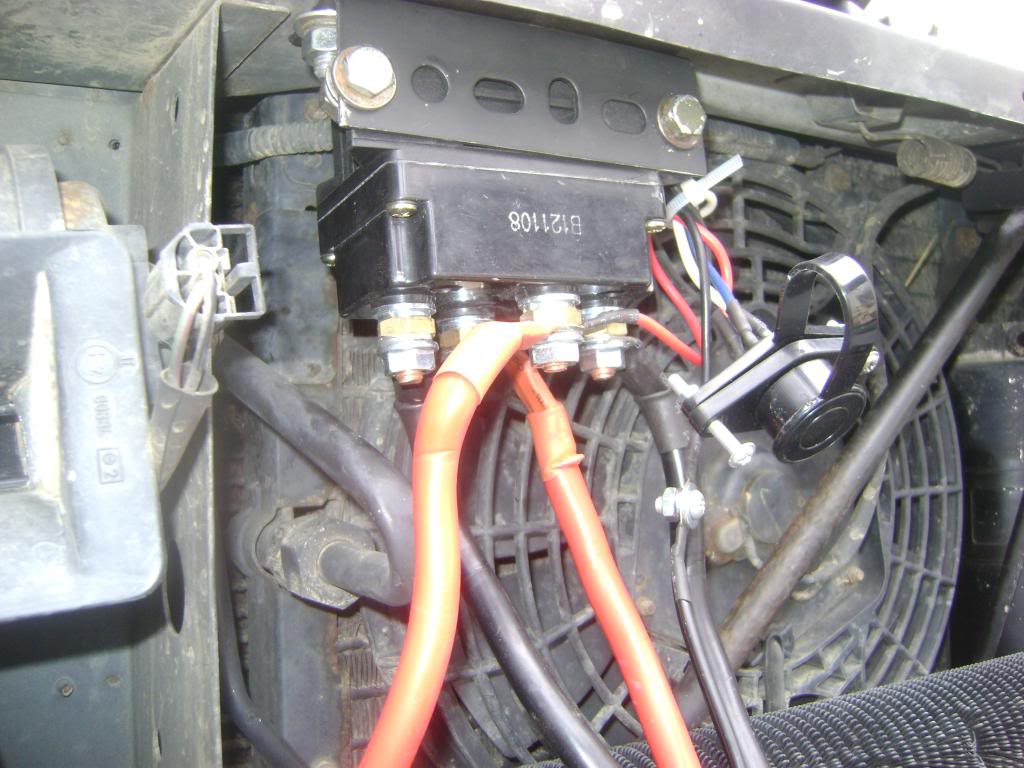
worked on the winch wiring today, we ended up removing the solonoid from the plastic box and took a piece of unistrut angle and mounted it to the rad support behind the grill all wires are now hooked to the winch and we did make sure the winch works, now just need to figure out where to put the remote socket unless I buy the wireless remote kit and leave it all tucked behind the grill
pics to follow

#26
04-07-2013, 06:39 PM
I finaly got the fuel pump assembly removed and it was all gunked up bad with rust and black goo all in the strainer sock too  got bad gas from somewhere whish i knew where, tank was almost empty and looked fine
cleaned the assembly and replaced the sock also put on some fuel injection hose since i had to reuse the plastic one when I rebuilt the assembly last year( maybe a little longer)
also found that my rear carpet insulation was soaked so pulled that for now to let it dry and fixed the rust from it except for a rott hole by the top of the pass rear shock tower that will be next
I also removed the headliner today and cleaned the backer for paint
IS THERE ANYTHING i SHOULD DO WITH THE HEADLINER OUT???
got bad gas from somewhere whish i knew where, tank was almost empty and looked finecleaned the assembly and replaced the sock also put on some fuel injection hose since i had to reuse the plastic one when I rebuilt the assembly last year( maybe a little longer)
also found that my rear carpet insulation was soaked so pulled that for now to let it dry and fixed the rust from it except for a rott hole by the top of the pass rear shock tower that will be next
I also removed the headliner today and cleaned the backer for paint
IS THERE ANYTHING i SHOULD DO WITH THE HEADLINER OUT???
#27
04-07-2013, 06:42 PM
not sure if it is common knowledge but since I see way more d2 in jyards then d1...
found out sat. that a d2 drivers regulator and motor fit the d1 all you need to do is swap out the big plastic block, it is held on by a phillips head screw the one for the d2 is much thicker then the d1
found out sat. that a d2 drivers regulator and motor fit the d1 all you need to do is swap out the big plastic block, it is held on by a phillips head screw the one for the d2 is much thicker then the d1
#28
04-10-2013, 06:53 PM
well now I know why my sunroofs rattled so bad, the glass screws were super loose on both and the front assembly screws were also loose, I just greasd everything real good and tightened it all up and reinstalled my painted headliner
winch is 99% finished got the wires extended for the remote socket and mounted it in front of the airbox on an L bracket we made using a factory welded nut on the rad support to hold it, we also mounted the wireless remote reciever there in front of the jack, got the wires made up for the battery just need to hook it to the batt and we are done
also finaly got the tralier wiring hooked up and reinstalled the rear carpet, so all in all it has been a very productive few days
Last edited by TOM R; 04-10-2013 at 06:58 PM.