Integrated Power Inverter System
#1
 02-11-2012, 12:47 PM


Was time for a power inverter upgrade, and seeing as I was upgrading to a much larger unit we decided it was time to sit down and actually do it properly. So I'm posting what was done here in case anyone wants to follow or do something similar.
The new inverter and a outline of where the face-plate will be positioned that will have two power outlets as well as the master on/off switch (New power inverter obviously has to be opened up to have it's master on/off switch rewired and routed to the new remotely mounted switch)-
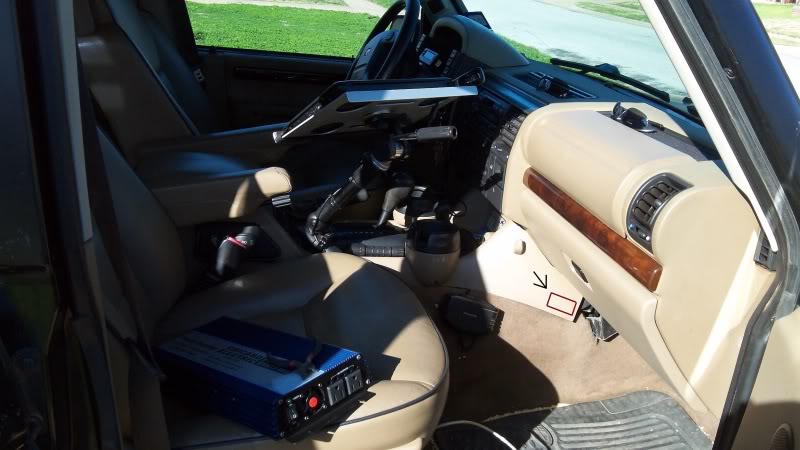
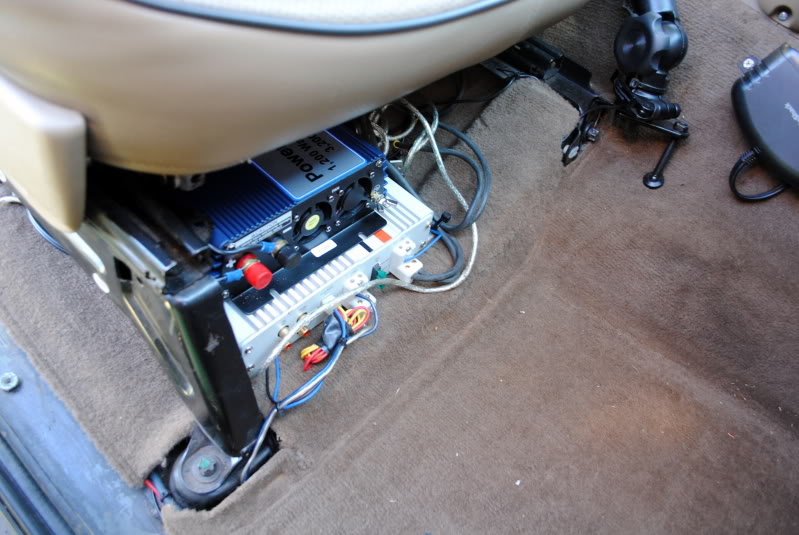
The new power inverter roughly in place positioned underneath the passenger seat-
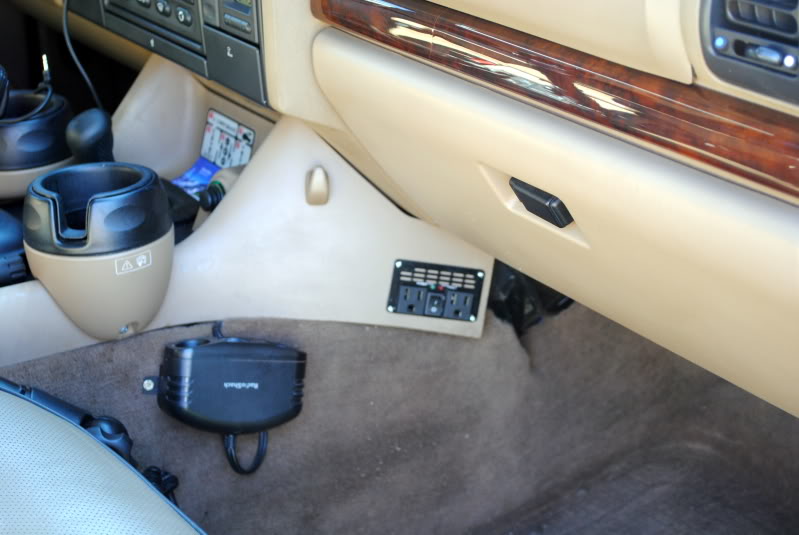
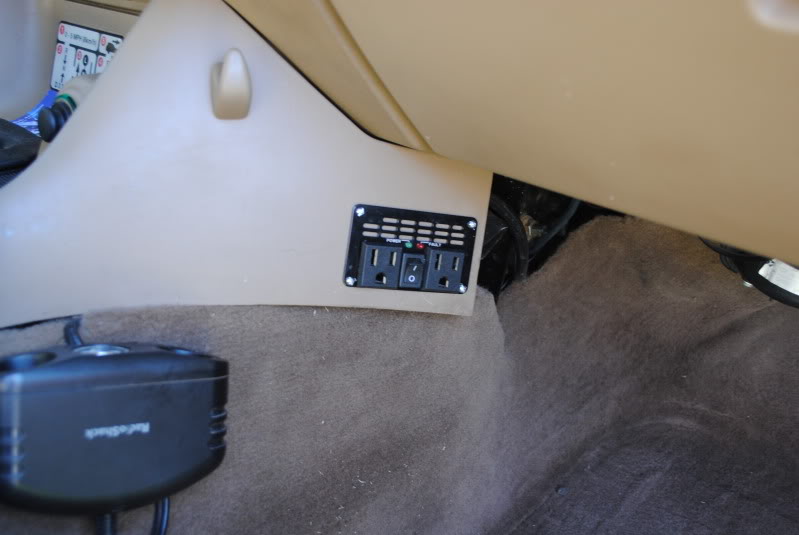
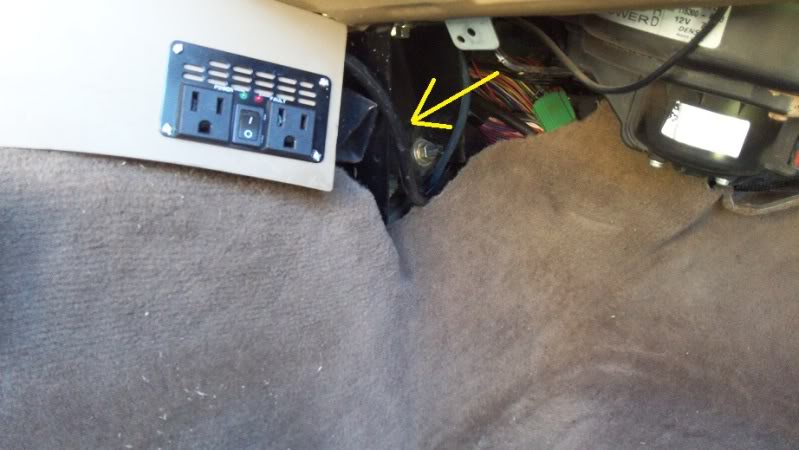
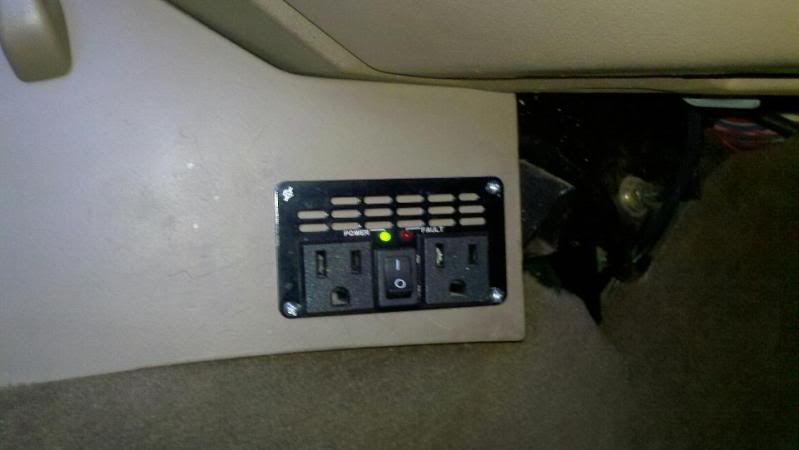
Faceplate, on/off switch, and plugs mounted up. (Just remove outlets and switch, then use face-plate as a template, mark with a permanent marker and cut. Use a Dremel for easiest and cleanest work)-
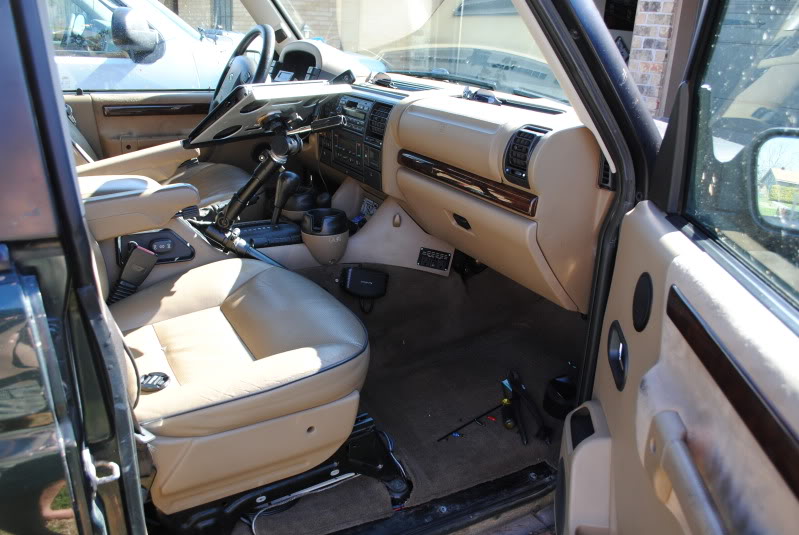
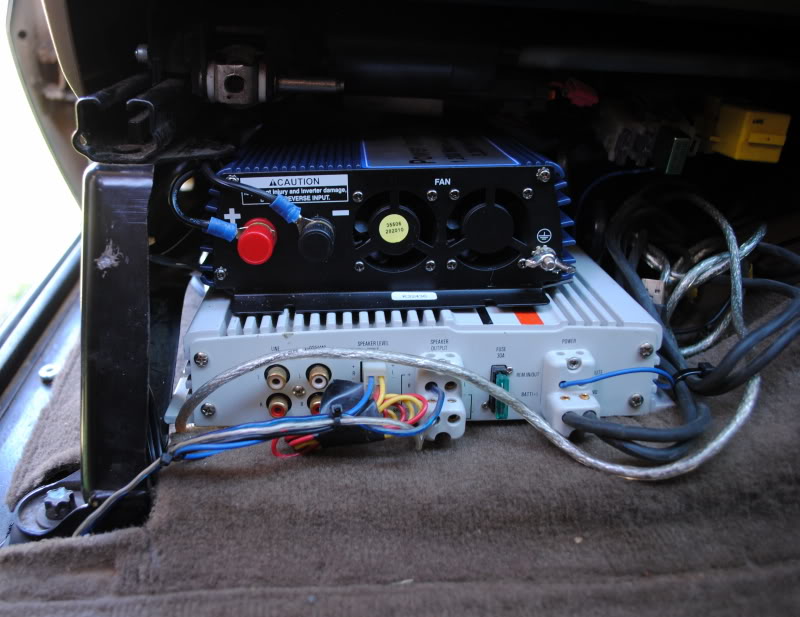
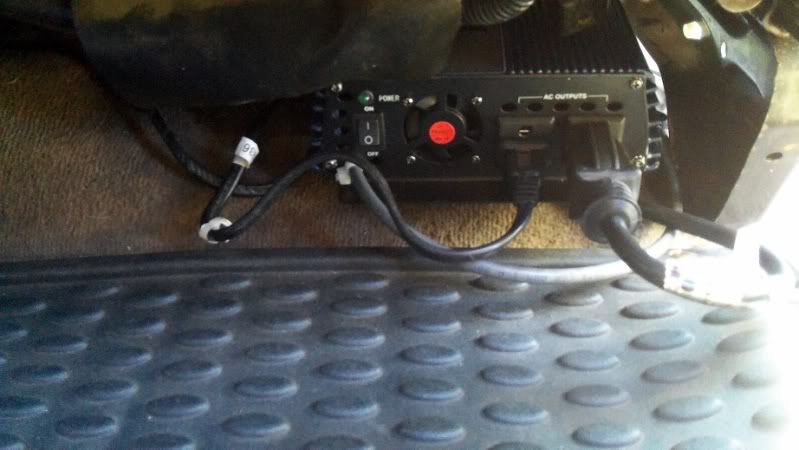
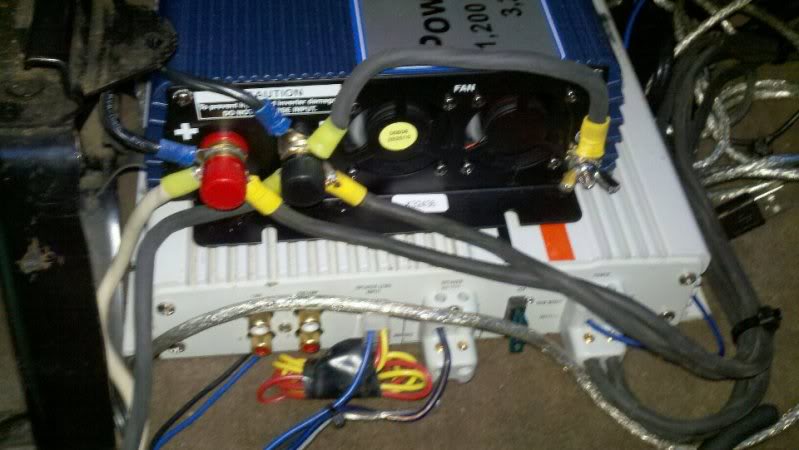
Power inverter in it's final position and wired up-
The new inverter and a outline of where the face-plate will be positioned that will have two power outlets as well as the master on/off switch (New power inverter obviously has to be opened up to have it's master on/off switch rewired and routed to the new remotely mounted switch)-
The new power inverter roughly in place positioned underneath the passenger seat-
Faceplate, on/off switch, and plugs mounted up. (Just remove outlets and switch, then use face-plate as a template, mark with a permanent marker and cut. Use a Dremel for easiest and cleanest work)-
Power inverter in it's final position and wired up-
#2
02-11-2012, 03:25 PM

Mudding
#3
02-11-2012, 05:36 PM
As requested on another forum, here is a rough write-up with a bit more information on the entire setup
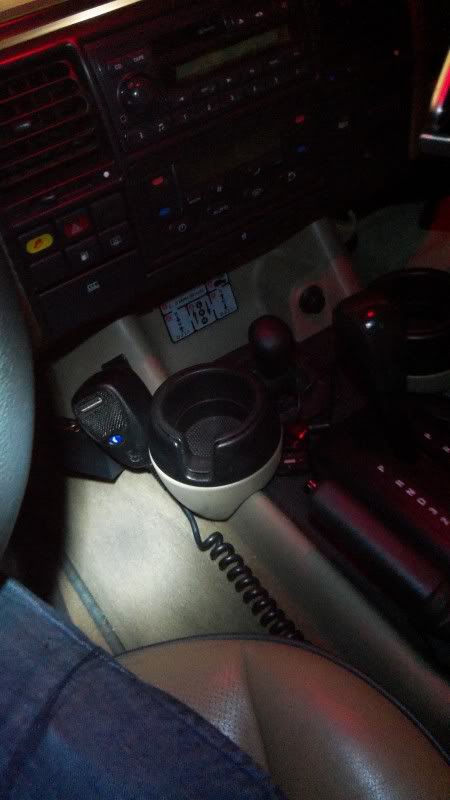
It may seem like a waste to go out and buy another small inverter to use just the face-plate, unless you already have a small power inverter that you can steal it from, but the face-plate you see attached to the center console is from a small 'RoadPro' inverter (Seen below) which is what I was replacing.

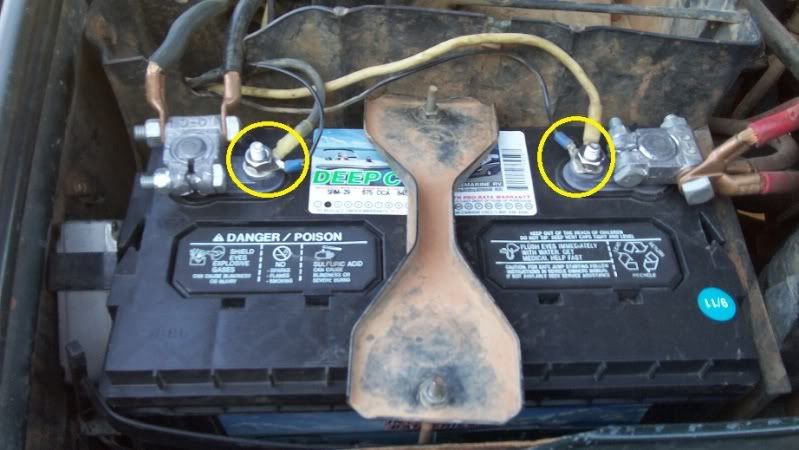
As far as the wiring goes, just attach the proper gauge wire needed to supply whatever size power inverter you are going to install to your battery. Works great if you have a place for accessory eyelets on your battery like seen below, if not just place them on the piece that holds the cable to the terminal.
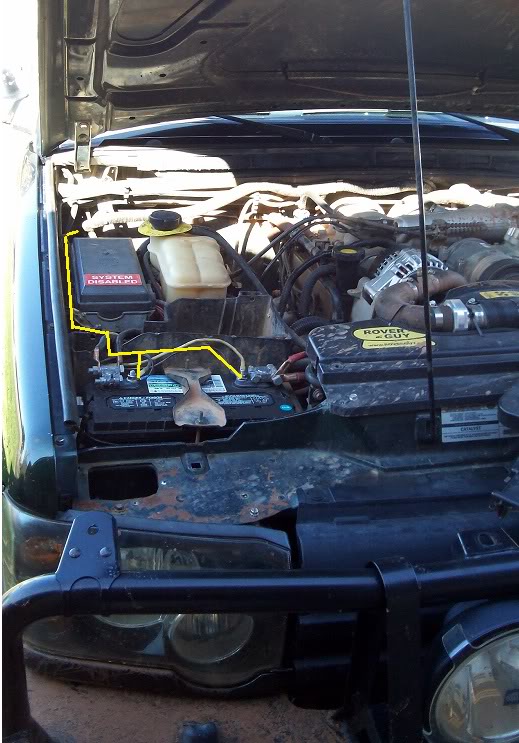
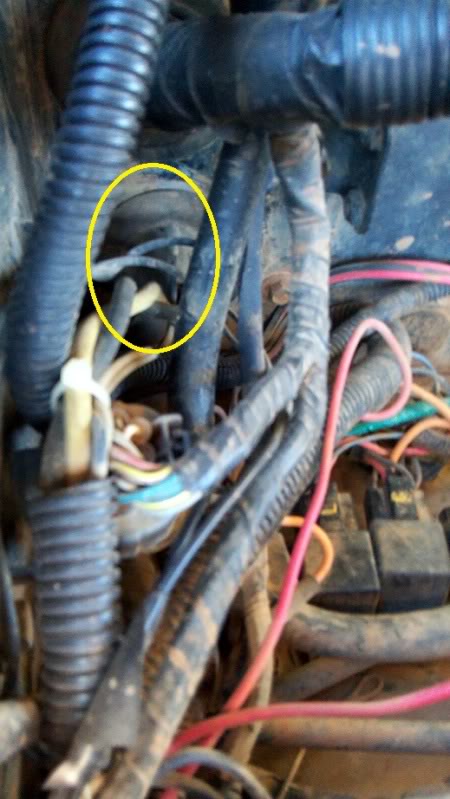
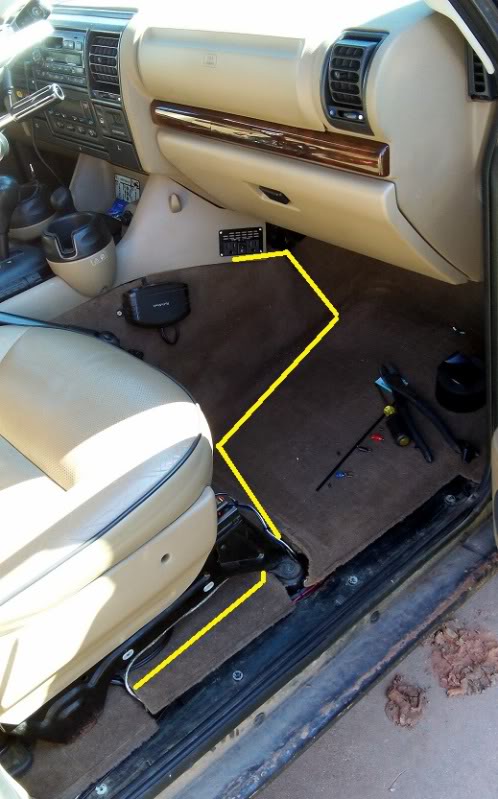
The best; and cleanest, way to route anything into the vehicle from the battery to the passenger size is demonstrated below by the yellow line
Once you make it to the firewall there will be a rather large rubber grommett that you can run them through and access the passenger floorboard. (Have a friend in the passenger floor board with the carpet pulled back so that he can grab them once they are shoved through)
From that point on just continue to run the wires wherever they are needed, in this case under the passenger seat. If you choose to put your power inverter in the same location, and do exactly as I did. Then....
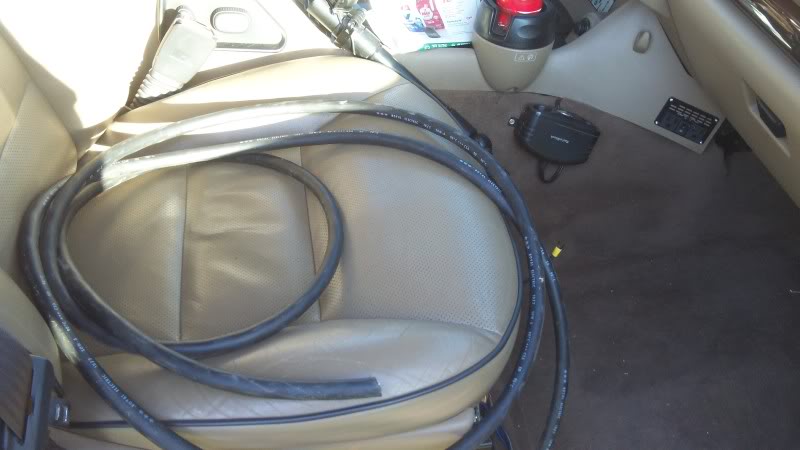
Purchase a 10foot extension cord in at least 14gauge size. (You can buy the kind with only one plug on the end and open wires on the other, and that's all your need since you will be wiring the other end up to the plug outlets)
Plug it in-
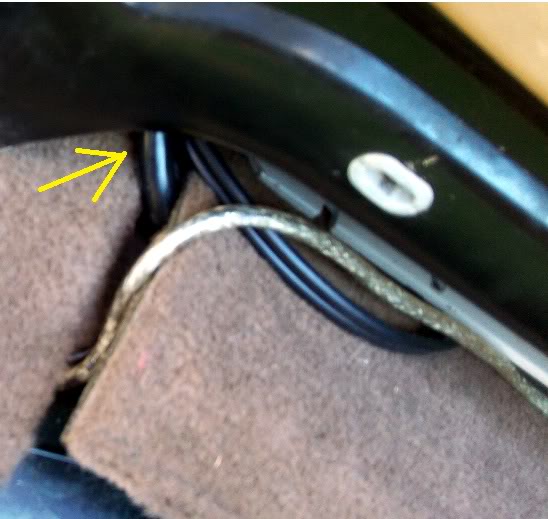
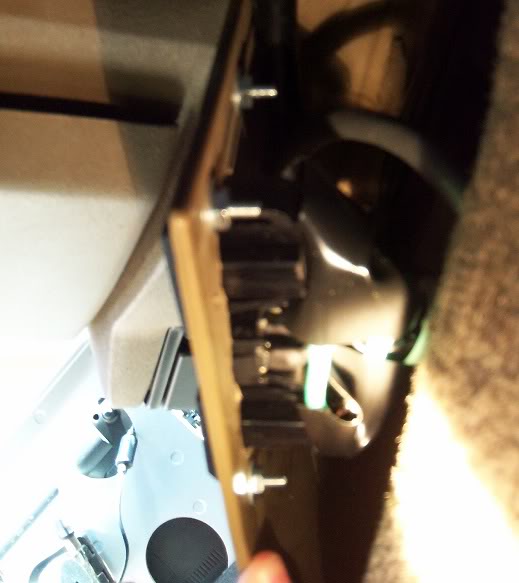
Run it into the underside of the carpet through this opening-
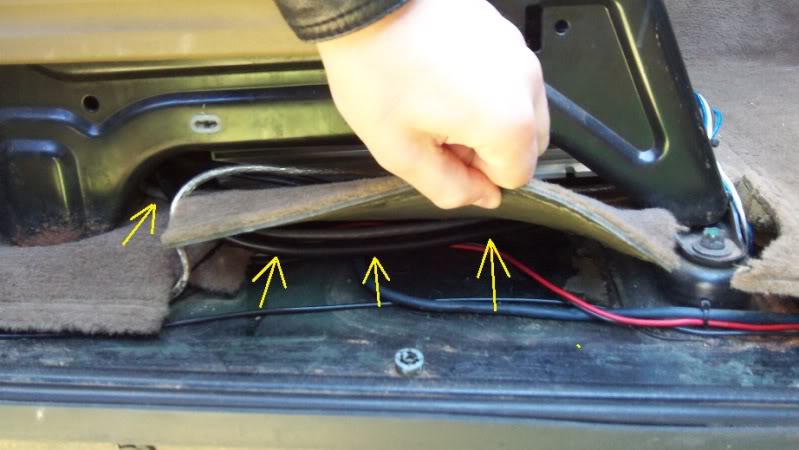
If you want to get real "nice and neat with it" use wiring harness electrical tape to secure it down onto the floor pan in a fashion similar to whats shown below-
(Otherwise just shove it underneath the carpet to where you need it an leave it unsecured. No issue in doing so)
Run it out the other side near the console where you need it-
And....attatch as needed. You will want to just shove the cord through the hole you cut out for the face plate. Splice and solder everything together as needed, either heat shrink the connections or cover them in electrical tape, and then secure the faceplate-
It may seem like a waste to go out and buy another small inverter to use just the face-plate, unless you already have a small power inverter that you can steal it from, but the face-plate you see attached to the center console is from a small 'RoadPro' inverter (Seen below) which is what I was replacing.
As far as the wiring goes, just attach the proper gauge wire needed to supply whatever size power inverter you are going to install to your battery. Works great if you have a place for accessory eyelets on your battery like seen below, if not just place them on the piece that holds the cable to the terminal.
The best; and cleanest, way to route anything into the vehicle from the battery to the passenger size is demonstrated below by the yellow line
Once you make it to the firewall there will be a rather large rubber grommett that you can run them through and access the passenger floorboard. (Have a friend in the passenger floor board with the carpet pulled back so that he can grab them once they are shoved through)
From that point on just continue to run the wires wherever they are needed, in this case under the passenger seat. If you choose to put your power inverter in the same location, and do exactly as I did. Then....
Purchase a 10foot extension cord in at least 14gauge size. (You can buy the kind with only one plug on the end and open wires on the other, and that's all your need since you will be wiring the other end up to the plug outlets)
Plug it in-
Run it into the underside of the carpet through this opening-
If you want to get real "nice and neat with it" use wiring harness electrical tape to secure it down onto the floor pan in a fashion similar to whats shown below-
(Otherwise just shove it underneath the carpet to where you need it an leave it unsecured. No issue in doing so)
Run it out the other side near the console where you need it-
And....attatch as needed. You will want to just shove the cord through the hole you cut out for the face plate. Splice and solder everything together as needed, either heat shrink the connections or cover them in electrical tape, and then secure the faceplate-
#4
02-11-2012, 07:55 PM

Super Moderator
#5
03-02-2012, 11:19 PM

#6
03-02-2012, 11:39 PM

TReK

Thread
Thread Starter
Forum
Replies
Last Post
blast20
Discovery II
7
09-03-2010 12:18 AM
Young
General Range Rover Discussion - Archived
1
07-05-2008 09:13 PM