Manual Seats


#12
 01-19-2017, 10:09 AM

The ones that I'm thinking about getting have a different base, and are from an 02. They have a base like what's in this picture.
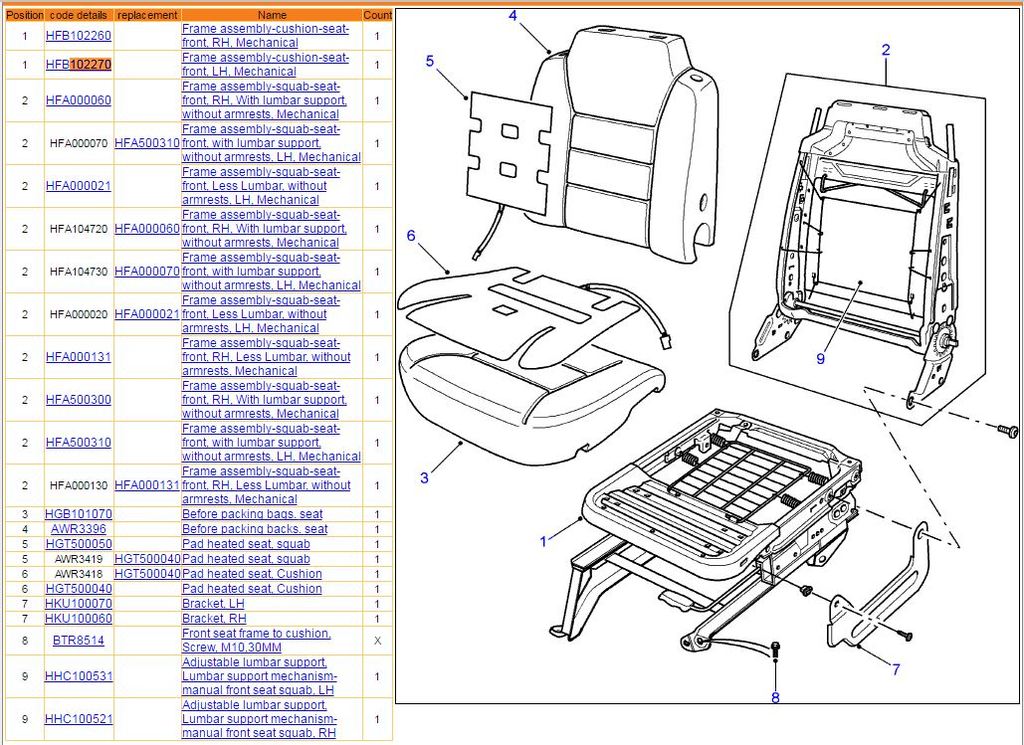
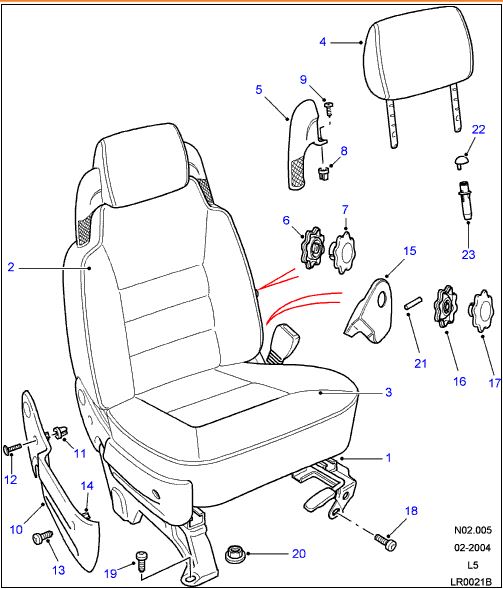
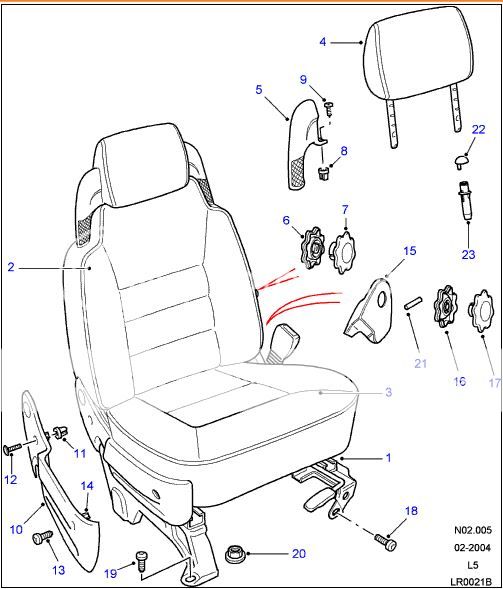
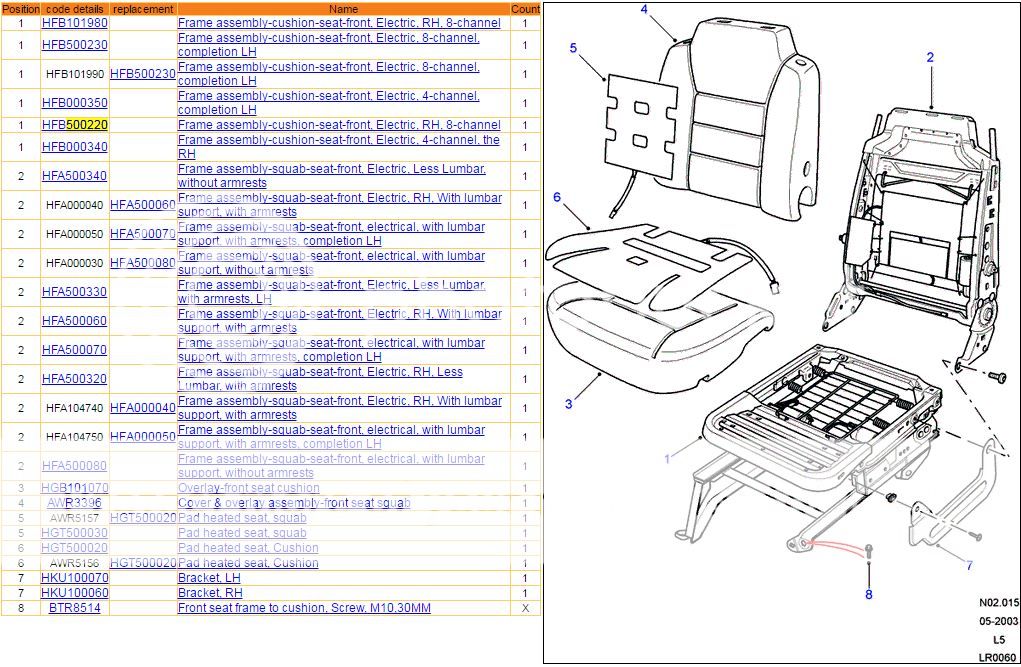
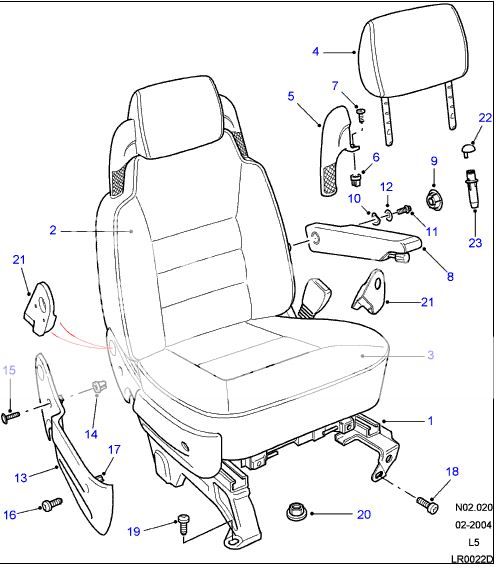
Comparing that manual diagram to an electric diagram doesn't so much of a difference.
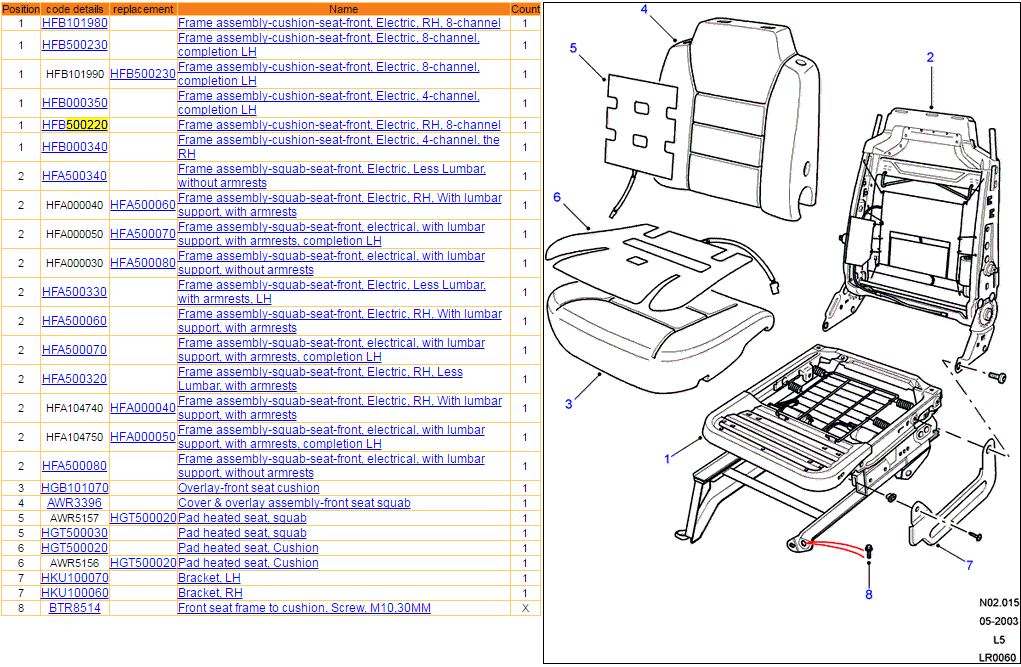
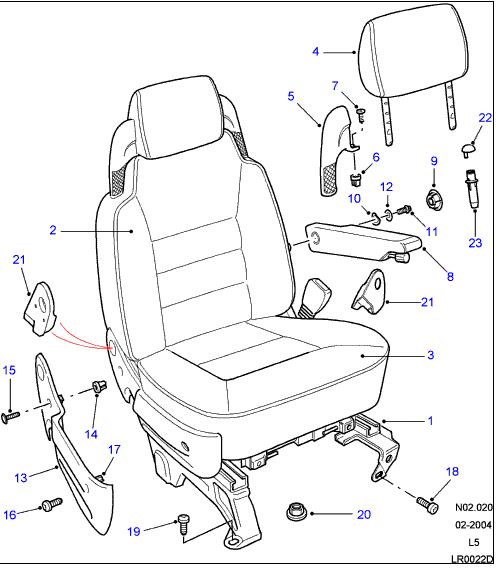
Looks like the frame in the seat bottom is the same. I should be able to mount the electric seat bottom to the manual slide. The upper frames look pretty close, but there does seem to be a couple differences. The frame itself looks the same, and should be to swap between the two. The difference is going to be the adjust ****, armrest, and motor. I should be able to remove the motor from the seat with no issues when swapping cushions. I'll have to make a couple small openings in the leather for the manual *****. It even looks like the manual seats are made to work with armrests too.
I'm waiting on some more pictures, but I think this is a go. May take a little work, but that's OK with me.
Comparing that manual diagram to an electric diagram doesn't so much of a difference.
Looks like the frame in the seat bottom is the same. I should be able to mount the electric seat bottom to the manual slide. The upper frames look pretty close, but there does seem to be a couple differences. The frame itself looks the same, and should be to swap between the two. The difference is going to be the adjust ****, armrest, and motor. I should be able to remove the motor from the seat with no issues when swapping cushions. I'll have to make a couple small openings in the leather for the manual *****. It even looks like the manual seats are made to work with armrests too.
I'm waiting on some more pictures, but I think this is a go. May take a little work, but that's OK with me.
Last edited by Mstudt; 01-19-2017 at 10:58 AM.
#13
01-19-2017, 07:13 PM

The ones that I'm thinking about getting have a different base, and are from an 02. They have a base like what's in this picture.
Comparing that manual diagram to an electric diagram doesn't so much of a difference.
Looks like the frame in the seat bottom is the same. I should be able to mount the electric seat bottom to the manual slide. The upper frames look pretty close, but there does seem to be a couple differences. The frame itself looks the same, and should be to swap between the two. The difference is going to be the adjust ****, armrest, and motor. I should be able to remove the motor from the seat with no issues when swapping cushions. I'll have to make a couple small openings in the leather for the manual *****. It even looks like the manual seats are made to work with armrests too.
I'm waiting on some more pictures, but I think this is a go. May take a little work, but that's OK with me.
Gotta ask ask where you got the part manual at. I've been searching everywhere for one.
#14
01-19-2017, 08:26 PM
It's was a lot of help, and lead me to purchase my new manual seats.
#15
01-19-2017, 08:29 PM
We're the proud new owners of some used 14 year old car seats.
The plan is to swap the leather cushions, and heated seats to the manual chair frame. All internals should be the same, and only a handful of parts need to be changed over. Two minor holes will need to be cut in the leather to allow for the manual controls.
As least I'm hoping it's that simple. The wife is skeptical, but I'm moderately confident.
#16
01-20-2017, 07:17 AM
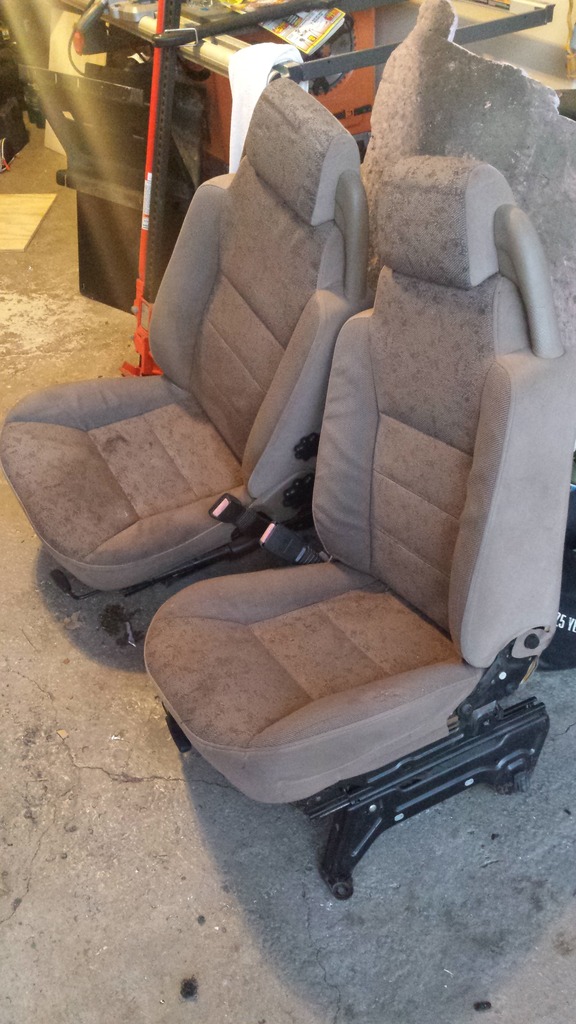
The new seats should be shipped today with hopes of having them mid next week. Here are a couple pictures of the cloth seats that are coming our way.
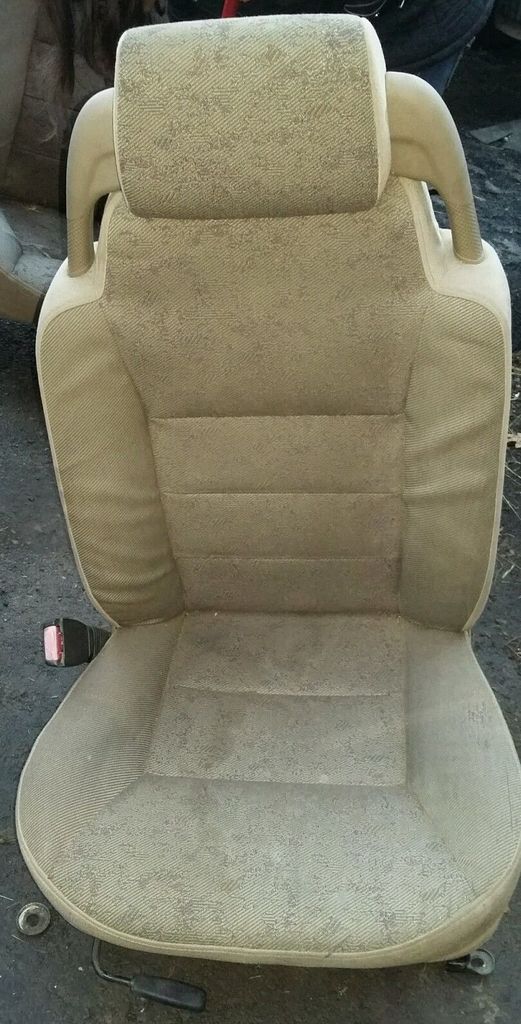
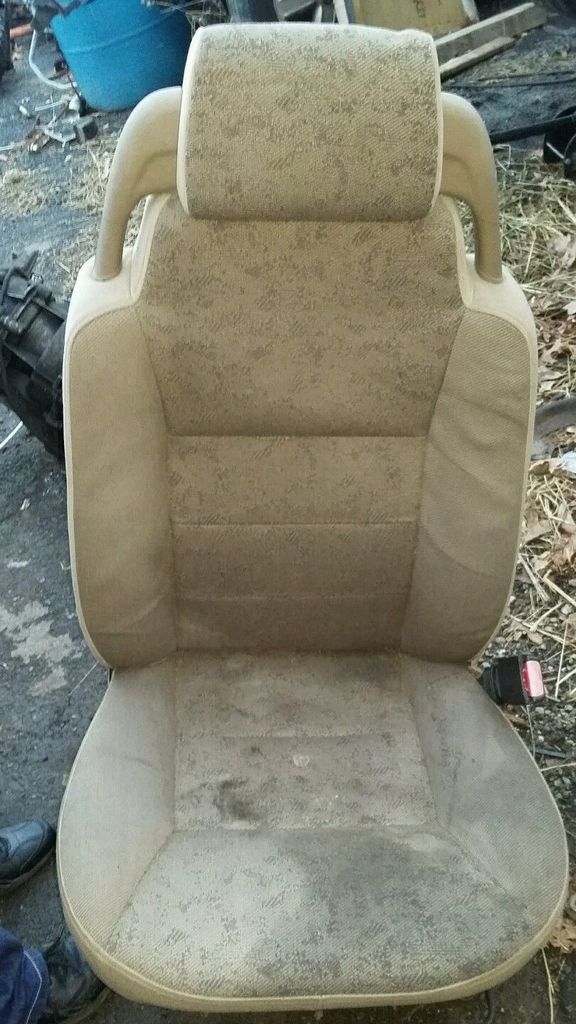
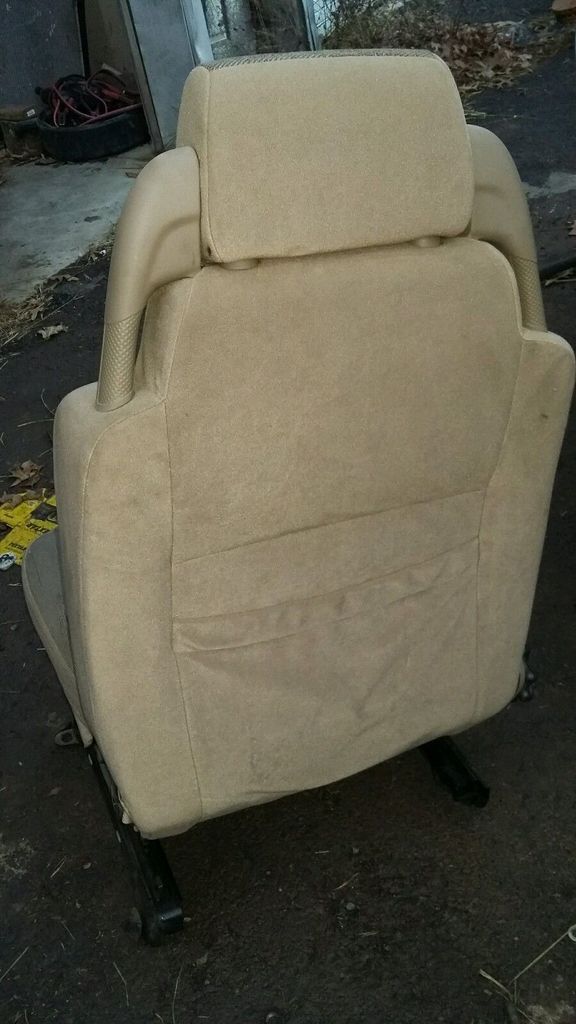
The seats are a little on the dirty side. That's OK since the fabric will be going in the trash anyways.
I'm going to document this swap as much as I can in case someone else is wanting to do the same thing.
Mike
The seats are a little on the dirty side. That's OK since the fabric will be going in the trash anyways.
I'm going to document this swap as much as I can in case someone else is wanting to do the same thing.
Mike
#18
01-24-2017, 07:01 PM
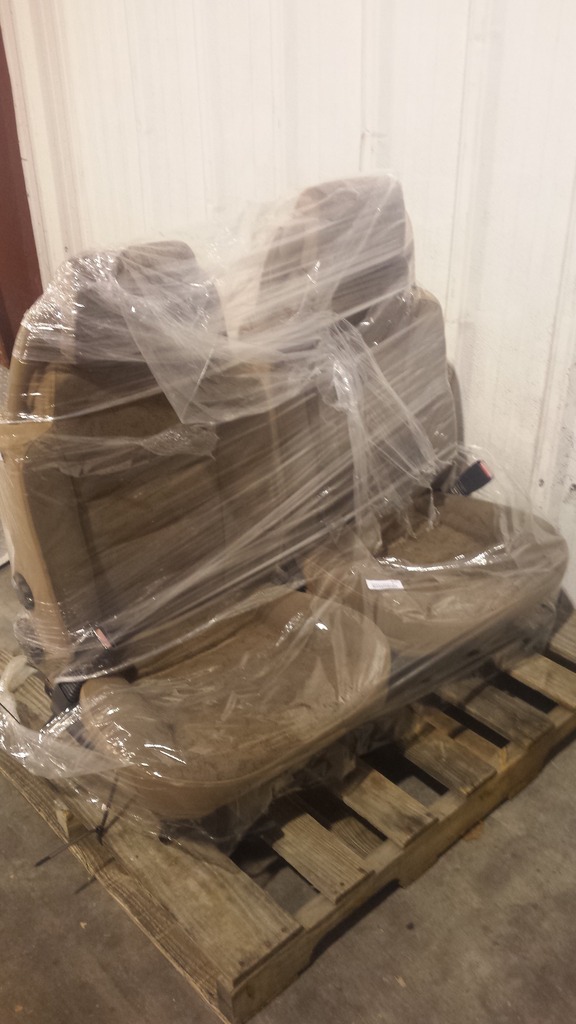
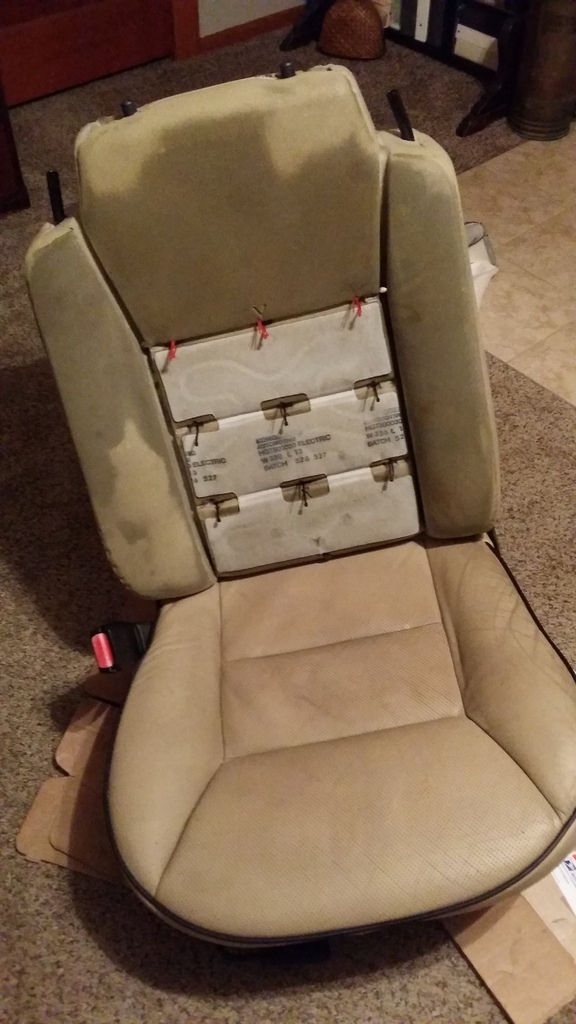
Had a little time this evening to start working on the seats. The fabric on these was awful, and smelled just as bad. First thing first, the seats.
Just after unloading them from my 4runner.
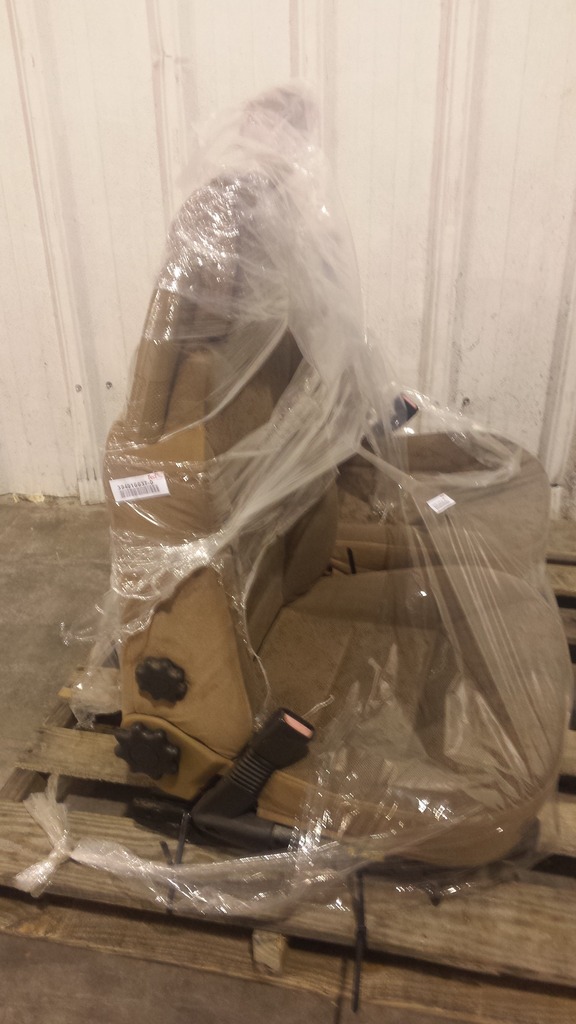
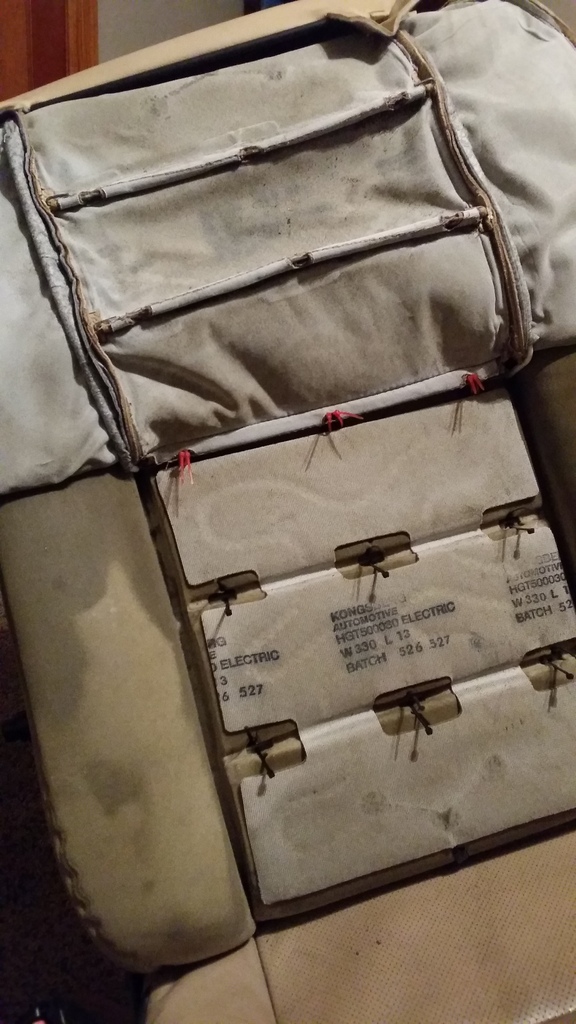
The bottoms came off very easy. These were hold on by a few metal clips, and four plastic strips that wrapped around the seat frame.
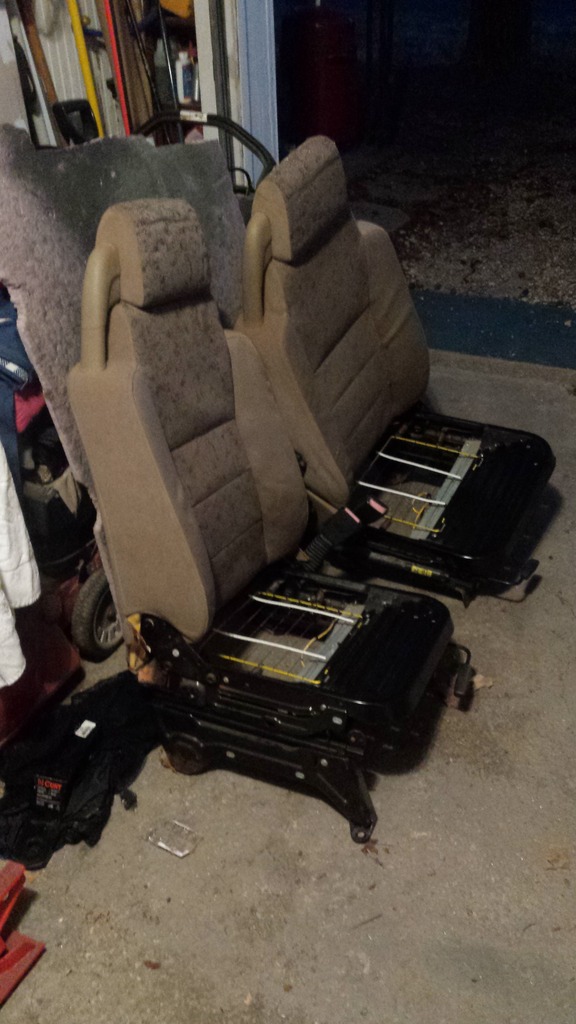
The backs were a little more difficult, and wasn't as smooth. I need to figure this part out before I try to remove my leather. I didn't get anymore pictures than that. Tomorrow I'll try to get some pictures of the parts I removed, metal clips, headrests, and so on. I meant to get more pictures of the process, but I was running out of light. Plus I was going to keep anything on this, and wanted it done fast.
Just after unloading them from my 4runner.
The bottoms came off very easy. These were hold on by a few metal clips, and four plastic strips that wrapped around the seat frame.
The backs were a little more difficult, and wasn't as smooth. I need to figure this part out before I try to remove my leather. I didn't get anymore pictures than that. Tomorrow I'll try to get some pictures of the parts I removed, metal clips, headrests, and so on. I meant to get more pictures of the process, but I was running out of light. Plus I was going to keep anything on this, and wanted it done fast.
Last edited by Mstudt; 02-04-2017 at 05:50 PM.
#19
02-04-2017, 05:49 PM
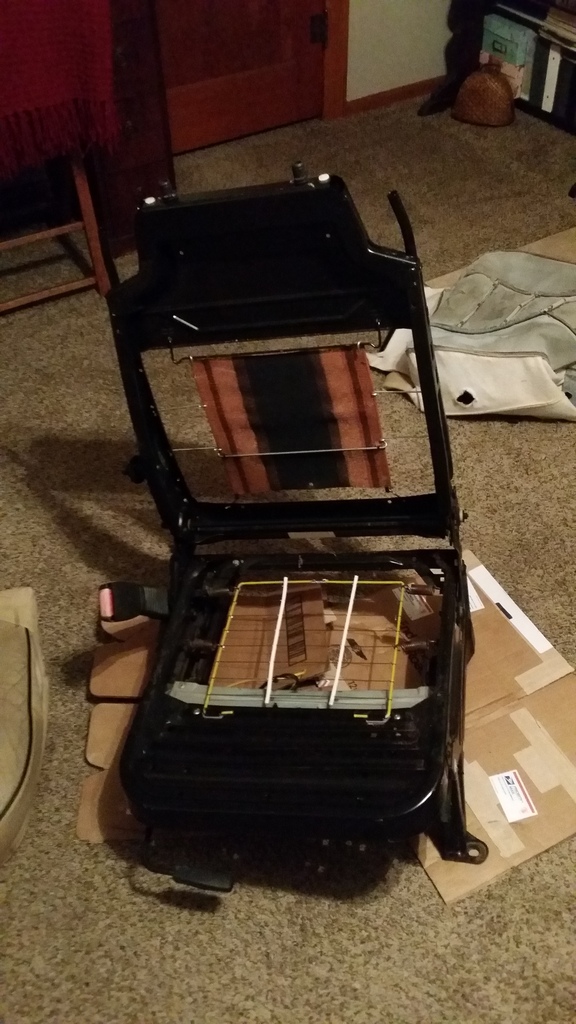
Progress has been made, and both seats will be installed tomorrow.
Now to the part about how this was NOT a direct swap of a few parts. There was a lot more work involved with this swap than I was thinking, but I got it to work .
Let's start with two stripped down seats. These ended up looking exactly like the diagram I found, and posted above.
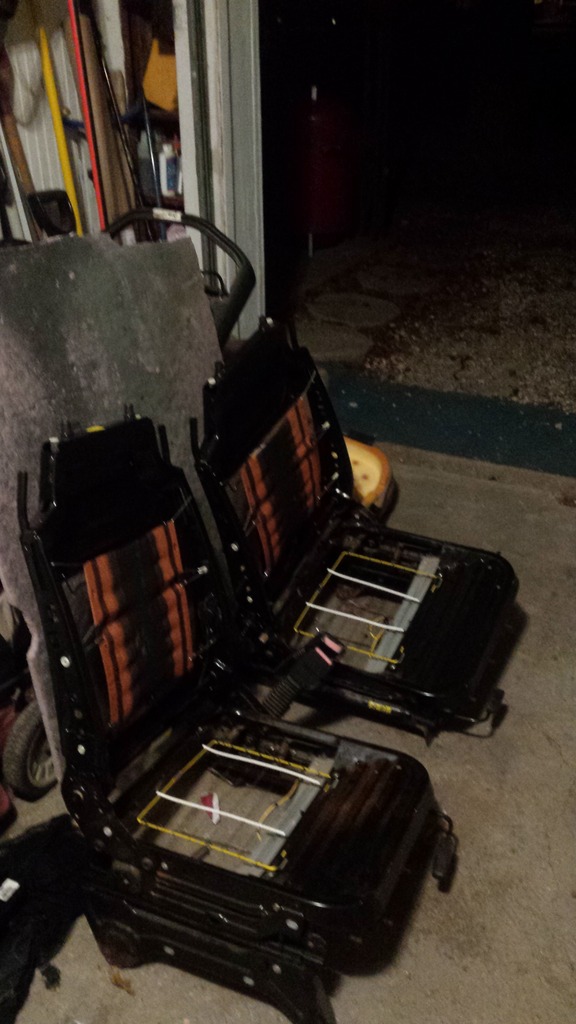
The first issue was the armrest on our powered seats. This was in the same location as the lumbar support on the manual seat. I was able to remove the lumbar support, and upper diaphragm. Then I has to use a grinder to cut the post the armrest mounts onto off of the powdered frame. The weld it onto the manual upper seat frame. This is the finished product.
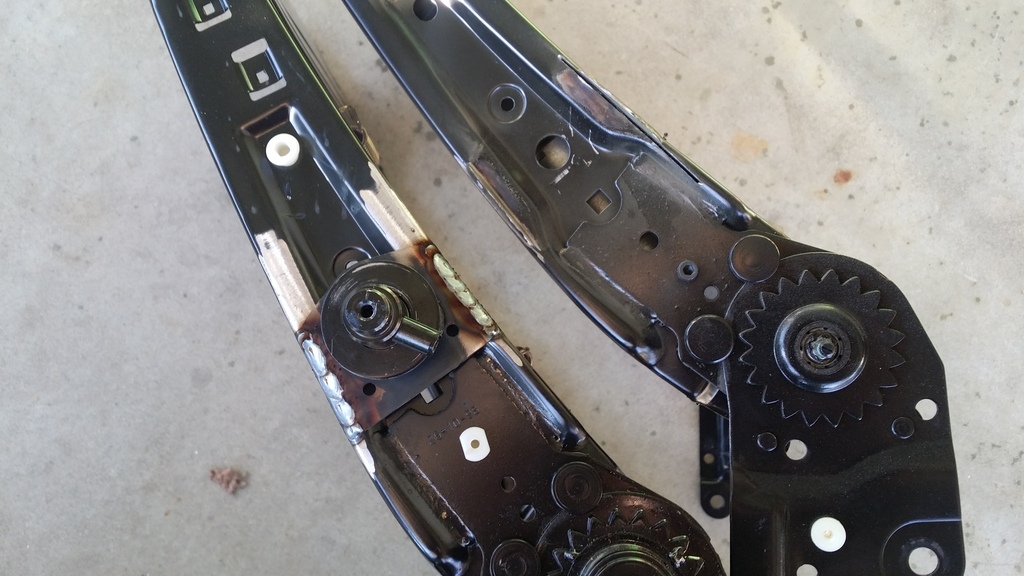
Next was drilling a couple new holes to mount the diaphragm from the powdered seats onto the manual seats.
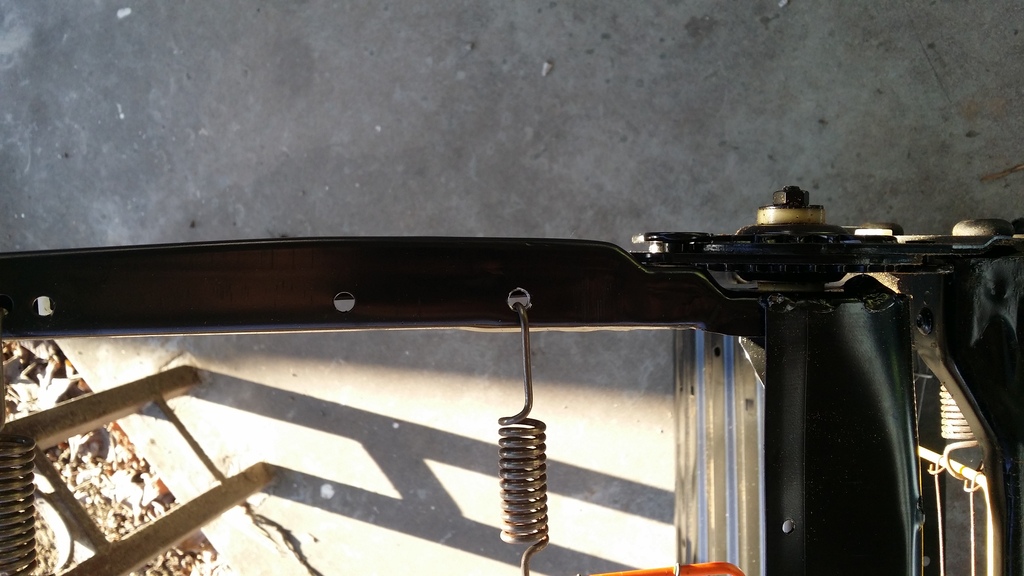
The fully assembled frame.
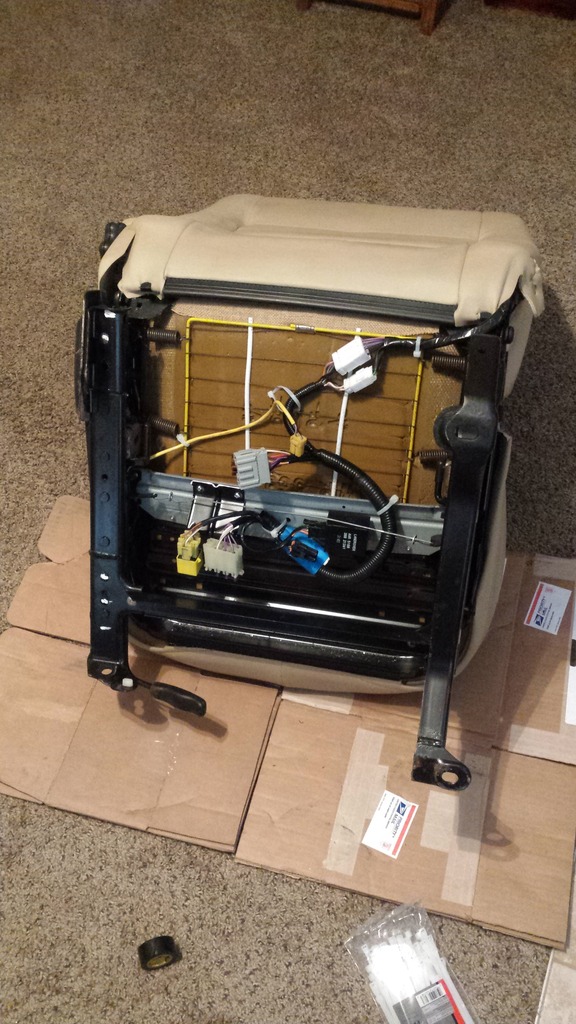
Putting the old leather on the seat cushions was another story. I found a video from a company that redid some D1 seats, and used their tricks to get ours back together. We looped cable ties under the metal wires so we could attach the leather again.
Pull the cable ties tight, cut of extra, and tuck the end under. Work your way down the seat, and do the same on all three.
Here's the wiring that I had to run on the manual seats.
Now to the part about how this was NOT a direct swap of a few parts. There was a lot more work involved with this swap than I was thinking, but I got it to work .
Let's start with two stripped down seats. These ended up looking exactly like the diagram I found, and posted above.
The first issue was the armrest on our powered seats. This was in the same location as the lumbar support on the manual seat. I was able to remove the lumbar support, and upper diaphragm. Then I has to use a grinder to cut the post the armrest mounts onto off of the powdered frame. The weld it onto the manual upper seat frame. This is the finished product.
Next was drilling a couple new holes to mount the diaphragm from the powdered seats onto the manual seats.
The fully assembled frame.
Putting the old leather on the seat cushions was another story. I found a video from a company that redid some D1 seats, and used their tricks to get ours back together. We looped cable ties under the metal wires so we could attach the leather again.
Pull the cable ties tight, cut of extra, and tuck the end under. Work your way down the seat, and do the same on all three.
Here's the wiring that I had to run on the manual seats.
Last edited by Mstudt; 02-04-2017 at 06:03 PM.
#20
02-04-2017, 06:02 PM
While I had the seats out I took the opportunity to install our Bull Dog car safe. It never hurts to have some locking storage that is welded to a frame that's also bolted to the floor.
This is the frame that I made from 1/4" flat steel. After it was welded together I used the 4 studs that were meant for the CD changer to mount it to the car.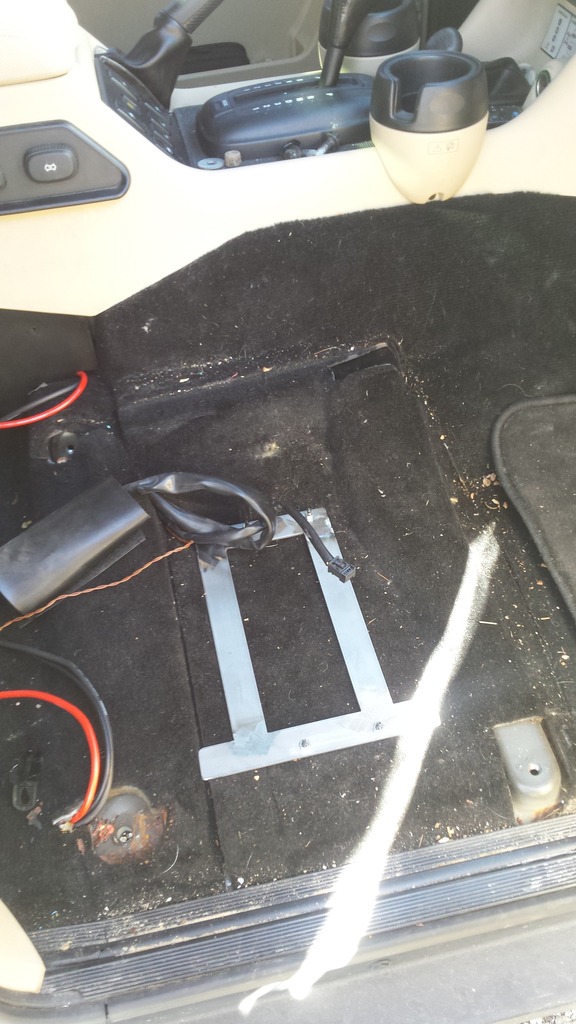

The safe fits in the same location that was used for removing the disc's from the changer. I had to make the opening in the trim a bit larger to accommodate the safe. The safe can be slid out of the front wit only having about 2" of the housing exposed. I'll have the finished pictures up tomorrow.
This is the frame that I made from 1/4" flat steel. After it was welded together I used the 4 studs that were meant for the CD changer to mount it to the car.
The safe fits in the same location that was used for removing the disc's from the changer. I had to make the opening in the trim a bit larger to accommodate the safe. The safe can be slid out of the front wit only having about 2" of the housing exposed. I'll have the finished pictures up tomorrow.
Last edited by Mstudt; 02-04-2017 at 06:10 PM.