My 04 D2 rebuild adventure.
#21
 03-07-2014, 06:50 PM


If the block checks out are you planning to install new liners? The original ones won't be long enough to stick above the block. You can get the block hot by sticking it under a few blankets and aiming a torpedo style heater at it. Put the liners in a cooler with dry ice and they will drop in nicely. You should make up some type of clamping jig to keep the liners from popping back out while the block cools. With top-hats they say to use the heads to clamp them down but I'm not sure if the original liners will all stick up evenly so that may not work.
#25
03-10-2014, 01:03 PM

Rock Crawling
Join Date: Mar 2013
Location: Oregon, north of Salem
Posts: 452
Likes: 0
Received 25 Likes
on
16 Posts
Regarding cracks/breaks in aluminum walls behind liners on these Rover 4.0/4.6L engines, and how to possibly find a workable solution to this serious problem, here are some thoughts for you all to contemplate (should anyone do any or all of what I am suggesting, let me know your results): You may already know, and/or you may want to research as to how some auto. manufacturers installed their liners in engines they called "wet" liner engines, as opposed to "dry" liner engines, meaning "dry" liners were installed in engines having a wall, though sometimes a thin wall (such as Rover 4.0/4.6 L), between outside diameter of liners and water jackets, while "wet" liners were installed in engines having no wall between water jacket (coolant passages) and liners. I am not sure if wet liners were used by any American makers, but I know that they were used by a few foreign makers, such as the V12 Jaguar, and some Peugeot engines too, and more, I am sure. Anyway, what I suggest you do, is try to learn how the makers using "wet" liners sealed them in the aluminum bores in their engine blocks, top and bottom, so that coolant flowing directly onto the exterior of liners, for cooling, did not escape into the oil pan or into the combustion chambers, as frequently happens with our Rover engines, when overheated, cracking walls behind lienrs. With that information, maybe you can learn of a good way to do the same with the Rover block, as Peugeot or other makers did, , turning it, essentially, from a "dry" liner engine to a "wet" liner engine; thus if you had cracks in aluminum wall behind liners, it wouldn't matter at all, because the liners would seal coolant from getting into combustion chambers or into the oil pan. With the best English made top hat liners, as used by Rover rebuilds, I know that those liners have a nice "O" ring near outside diameter, bottom, of each liner, blocking all coolant from escaping into oil pan. Now, seems to me that same concept could be applied to factory original Rover liners, by chucking each liner in a lathe, cutting a shallow groove close to bottom of each liner, and another groove close to top of each liner, outside diameter, for fitting on an appropriate size "O" ring in each groove. Thus, making it much same as Peugeot did, a "wet" liner engine, with "O" rings sealing coolant from escaping. This way, even if you have or later got, cracks in aluminum behind liners, it would matter not---end of worries, I should think.
#26
03-10-2014, 01:46 PM

Well, that was a long weekend.
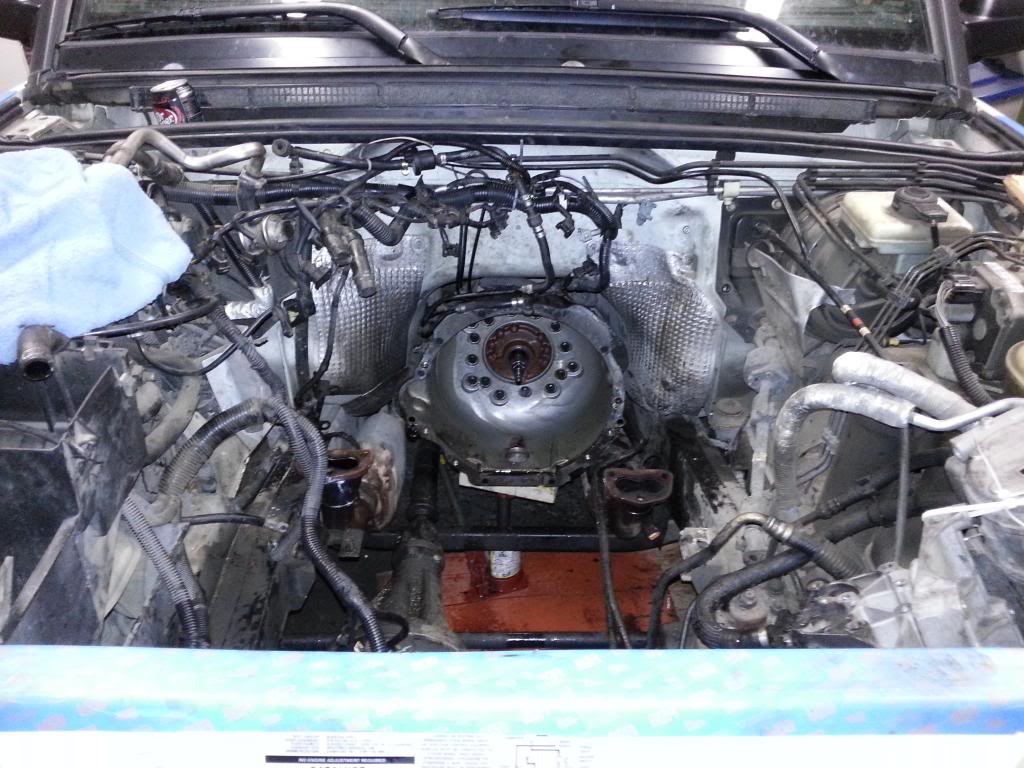
I managed to get the engine out and on the engine stand. (Darn good engine stand for $45 off amazon) My brother in law's forceful tactics cracked the flexplate while getting the engine out with the torque converter still attached. Next time around I'll mate up the engine and TC after the engine is back in. Much easier. $50 part I have to order now.
I was able to mock up all the block plates so I can pressure test the block, but I found that the bolts I have wont work. (Too long) I'm off to Lowes at lunch to get the bolts needed to get the block plates nice and tight. Then I'll pressure test the block to see if I have any coolant channel leaks. Fingers crossed.
I'll probably head back out there this week for the test so that I'm not waiting all week to find out which direction this engine is going to take.
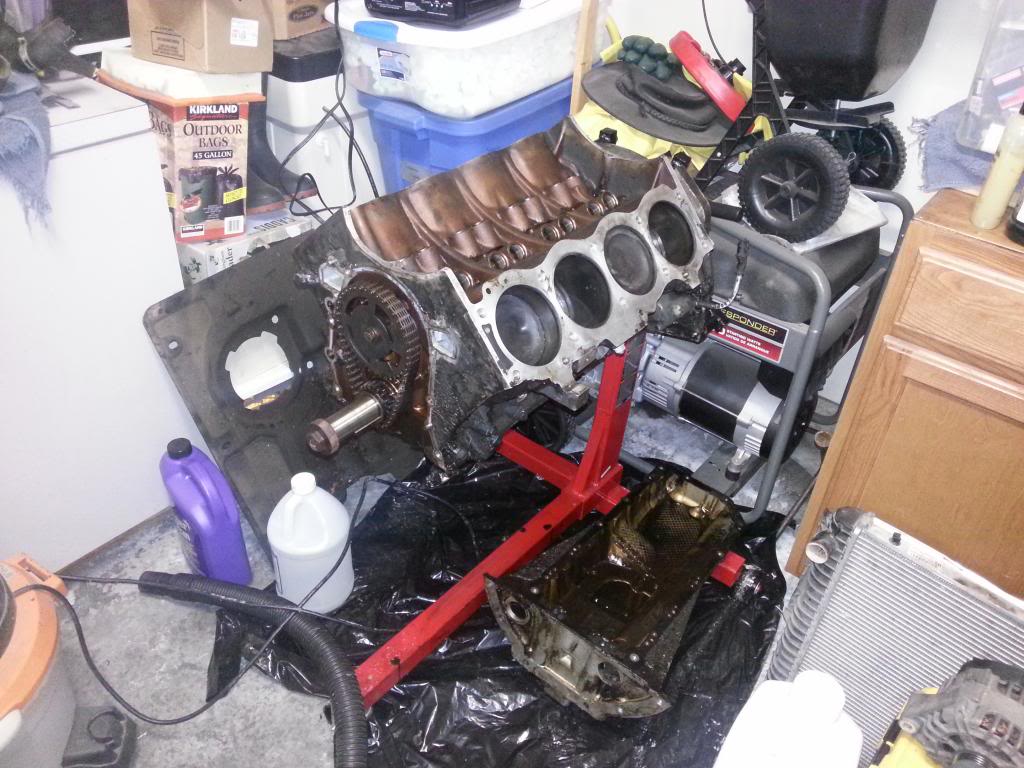
If the block is good, I'll get ready to Loctite and pin the sleeves and start ordering parts for the bottom end this week. I'll probably send it in to get hot tanked so it's nice and clean before I pin it down.
Then, hopefully start all the measuring on the crank, camshaft, etc to find out what bearings I need and what may need to be replaced. All the bearings will be replaced of course, I just need to know if I need over sized or not and if the cam and tappets are within tolerance. They all look to be in amazing condition, but a micrometer and full dry inspection will tell.
Block looks good. Pistons look good. No sludge in the pan, or miscellaneous pieces of metal, gold bullion, or spare nuts.
I managed to get the engine out and on the engine stand. (Darn good engine stand for $45 off amazon) My brother in law's forceful tactics cracked the flexplate while getting the engine out with the torque converter still attached. Next time around I'll mate up the engine and TC after the engine is back in. Much easier. $50 part I have to order now.
I was able to mock up all the block plates so I can pressure test the block, but I found that the bolts I have wont work. (Too long) I'm off to Lowes at lunch to get the bolts needed to get the block plates nice and tight. Then I'll pressure test the block to see if I have any coolant channel leaks. Fingers crossed.
I'll probably head back out there this week for the test so that I'm not waiting all week to find out which direction this engine is going to take.
If the block is good, I'll get ready to Loctite and pin the sleeves and start ordering parts for the bottom end this week. I'll probably send it in to get hot tanked so it's nice and clean before I pin it down.
Then, hopefully start all the measuring on the crank, camshaft, etc to find out what bearings I need and what may need to be replaced. All the bearings will be replaced of course, I just need to know if I need over sized or not and if the cam and tappets are within tolerance. They all look to be in amazing condition, but a micrometer and full dry inspection will tell.
Block looks good. Pistons look good. No sludge in the pan, or miscellaneous pieces of metal, gold bullion, or spare nuts.


#27
03-10-2014, 01:54 PM
Oh, I'd like to say this as it bears noting over every other car I've ever race tuned, ripped apart, or rebuilt. Integra, STi, 350z, Rav4, 370z, Sentra, Hondas, Nissans, etc etc.
This is the first vehicle ever that my hands can reach everything with decent ease. Every bolt is good and tight, but it doesn't take an act of God to remove. Every bolt was torqued to easily broken ability. I never felt like I was struggling to reach a bolt, or break one free.
Even the tight space bolts I could get a 1/4 socket in there and it would come free. Now I'm not saying these bolts were mere finger tight, but they all just popped loose with humanly respectable ease.
Thank you Land Rover.
So, after an entire 2 weeks of ripping this apart, I have one nick between my finger(from no idea what), and a sway bar that fell on my face and bloodied my nose. My bad...that cracker was 4 times heavier than it appeared.
I've got all my knuckles. No slipped wrench gashes, and no breaker bar blisters.
I LOVE IT!
Last edited by knightmetro; 03-10-2014 at 01:58 PM.
#28
03-10-2014, 02:36 PM

I'm still regrowing my knuckles and replacing the blood loss from my swap...mostly from getting those 4 side bell housing (2 on each side) bolts and the Dr side motor mount. It's the first engine swap I've ever done, so I suppose the fact that I did it at all without professional intervention and in 3 days is a testament to their workability (did I just create a word?).
That is a nice engine stand BTW. I just used the pallet it came in on and my son sitting on it when I needed leverage.
That is a nice engine stand BTW. I just used the pallet it came in on and my son sitting on it when I needed leverage.
#29
03-10-2014, 02:59 PM

#30
03-10-2014, 04:34 PM