My high mileage service..
#21
 10-05-2014, 08:02 AM


Recovery Vehicle
If you're leaking, and since you don't have anything to do haha, you may want to swing the fuse panel out down under the steering wheel and check the back of it for corrosion sometime in the future.
Not trying to create more work, just something that came to mind when you said leaking. They have been known to get wet and corrode over the years and cause problems... and if it is corroded you may be able to clean it up beforehand.
Not trying to create more work, just something that came to mind when you said leaking. They have been known to get wet and corrode over the years and cause problems... and if it is corroded you may be able to clean it up beforehand.
Last edited by RicketyTick; 10-05-2014 at 08:57 AM.
#22
10-07-2014, 10:10 PM

#23
10-07-2014, 10:13 PM
#24
10-08-2014, 06:10 AM
Recovery Vehicle
Lowes has single sockets and sears if you have a sears there.

#26
10-08-2014, 07:26 AM
Recovery Vehicle
That's right it's a female plug. You should be able to use just a ratchet and extension without any socket.
and just a tip...anytime you are working with any gear case that requires draining and refilling...always take the fill plug out first. That way, if you run into a problem with the fill plug, you won't be stuck with a drained gear case and no way to get oil back in it.
and just a tip...anytime you are working with any gear case that requires draining and refilling...always take the fill plug out first. That way, if you run into a problem with the fill plug, you won't be stuck with a drained gear case and no way to get oil back in it.
Last edited by RicketyTick; 10-08-2014 at 07:29 AM.
#27
10-08-2014, 04:25 PM
Ha, so when I was under it yesterday, I could have sworn the square female hole was far bigger than 1/2". I think it's cos it's so tight under there I'm looking at it from a distance of 4" away.
Anyway. Good progress today. Only had a couple of hours. Will do the transfer box tomorrow.
Did both diffs.
Looked for play in the front hubs. Couldn't find any. The hubs do look rather rusty, but there didn't seem to be any movement in the bearings.
Had a good look behind the panels under both foot wells. Looking for water ingress. Again, couldn't see anything. Everything looks very new and corrosion free. Didn't start unbolting things.
Had a moment when I starting rough running, and three codes popped up. One was for misfire on 4 (0304?), and a couple relating to vac hoses. Traced it to a bad repair of mine on a loose vac hose. Fixed properly and all is well.
Rechecked transmission fluid level. All good. Got a tiny bit more in.
That...... is a very good tip.
Might get the trans box, stat/coolant done tomorrow aft.
Friday could be plugs and wires day, if I'm feeling brave.
Saturday/Sunday is headliner, sunroof day.
Anyway. Good progress today. Only had a couple of hours. Will do the transfer box tomorrow.
Did both diffs.
Looked for play in the front hubs. Couldn't find any. The hubs do look rather rusty, but there didn't seem to be any movement in the bearings.
Had a good look behind the panels under both foot wells. Looking for water ingress. Again, couldn't see anything. Everything looks very new and corrosion free. Didn't start unbolting things.
Had a moment when I starting rough running, and three codes popped up. One was for misfire on 4 (0304?), and a couple relating to vac hoses. Traced it to a bad repair of mine on a loose vac hose. Fixed properly and all is well.
Rechecked transmission fluid level. All good. Got a tiny bit more in.
and just a tip...anytime you are working with any gear case that requires draining and refilling...always take the fill plug out first. That way, if you run into a problem with the fill plug, you won't be stuck with a drained gear case and no way to get oil back in it.
Might get the trans box, stat/coolant done tomorrow aft.
Friday could be plugs and wires day, if I'm feeling brave.
Saturday/Sunday is headliner, sunroof day.
Last edited by cappedup; 10-08-2014 at 04:58 PM.
#28
10-09-2014, 06:25 PM
Plugs and wires day.
A success. About 3 hours in total. Probably 90 mins on the actual plugs and wires bit. The other 90 mins effing and blinding and recovering dropped things. Took longer cos I didn't wait properly for the IM to cool down, ooh ah, ah, ooh, ah. Etc.
Anyway. Here is my method with a few things I found pertinent, in case anyone else finds it useful.
I managed to do the whole thing, just by sliding the shiny pipe that blocks the coils to the right. It moved about 8" and a big gap opened up. Had to remove a couple of 1.5" hoses on the left, and a smaller something on the right. With a bit of juggling it moved across no problem.
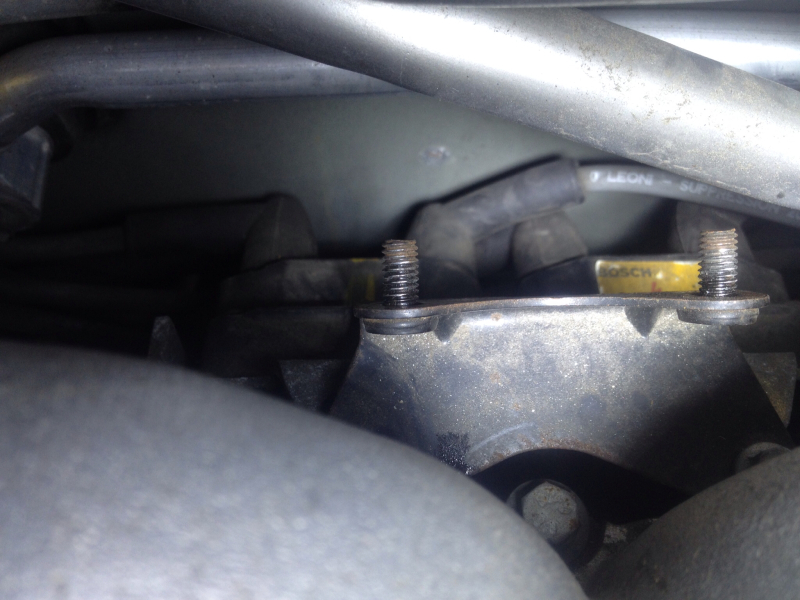
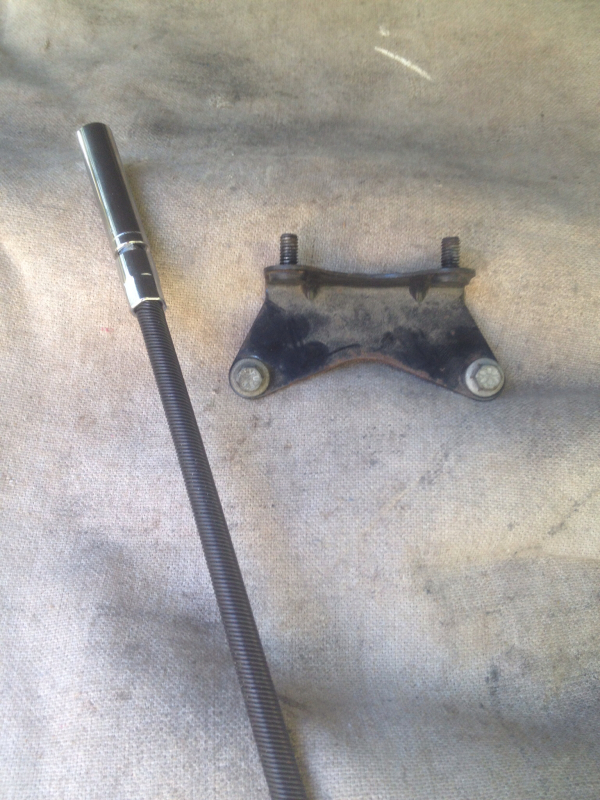
Have to remove the bracket holding the shiny pipe, otherwise there simply wasn't the room, and it's only two bolts. 8mm socket on a long extension. I had a nice bendy thing.
Hand behind coils and have a feel around. Have a look at this diagram, and keep a copy handy. http://www.landroversonly.com/forums...ring-order.jpg
Unplug each wire from the coil in turn, pull it out from behind and number it with a sharpie. Trace it back to the plug end to confirm against the drawing, "measure twice, cut once"
Do this for all the plugs, top row first. After that there will be four wires, coil ends hanging out together on each side.
I started on the right side of engine, back to front. I bought a plug removal tool specially for the purpose. I was able to do every plug with it.
 AMPRO T33338 3/8-Inch Drive by 5/8-Inch Extendable Flex Spark Plug Socket - Ampro Tools - Amazon.com
I always try and stop with the tool and do the last couple of threads by hand. I feel it reduces the chance of damaging the threads as the tool is putting odd forces on the plug. I don't think one of them came out square to the block.
Same with putting them in, after a couple of turns by hand I'm quite confident I won't cross the threads and the tool can do the rest.
After each plug, find the corresponding new wire that is about the same length. Number it with the right number, check it's the right number, click it on. I found all the Magnacor wires were slightly longer than the ones I was taking off. After 4 plugs and wires I routed all of them up towards the coils.
Rinse and repeat the other side. Remove the MAF to inlet section for access.
The Mangacor wires fitted on the Bosch +4s really well. It's easy to get the satisfying click that it is seated properly.
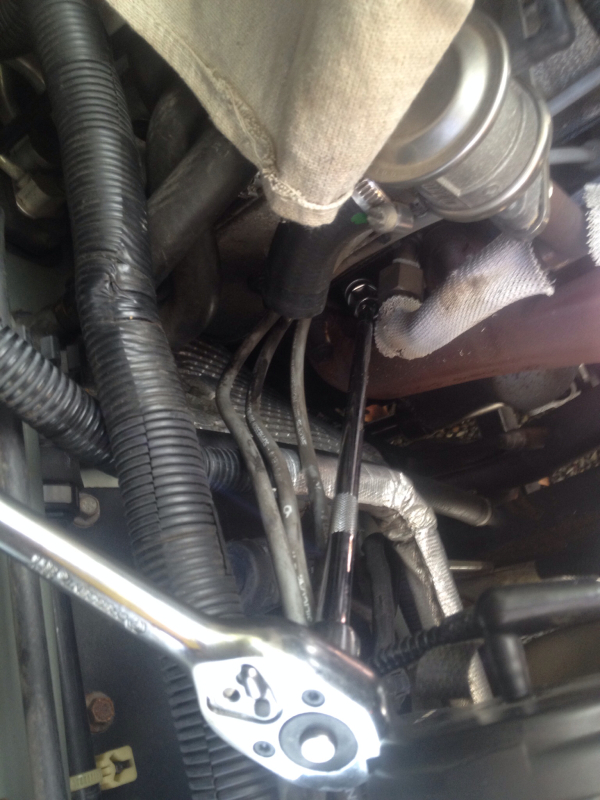
Number 7 plug was a PiTA. Just the angle, and the length of my bar, it was difficult to get the socket on properly. But as I say, one tool did them all, in the end.
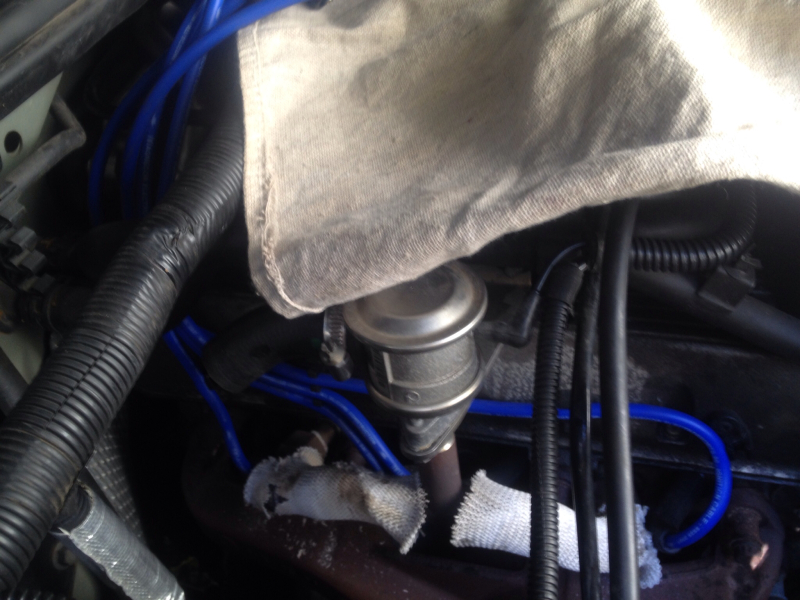
What's that white fabric stuff on that piping that is always in the way? Just a heat shield material? I kinda trashed some of it in the process.
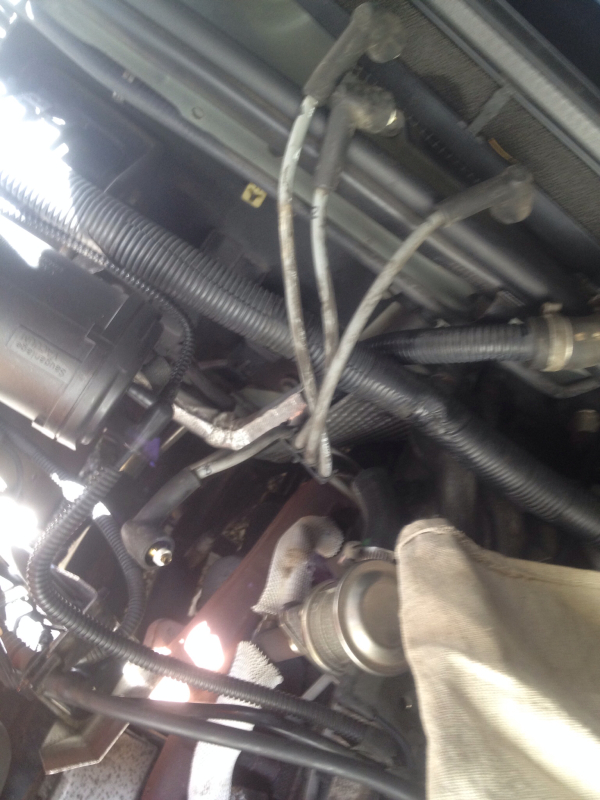
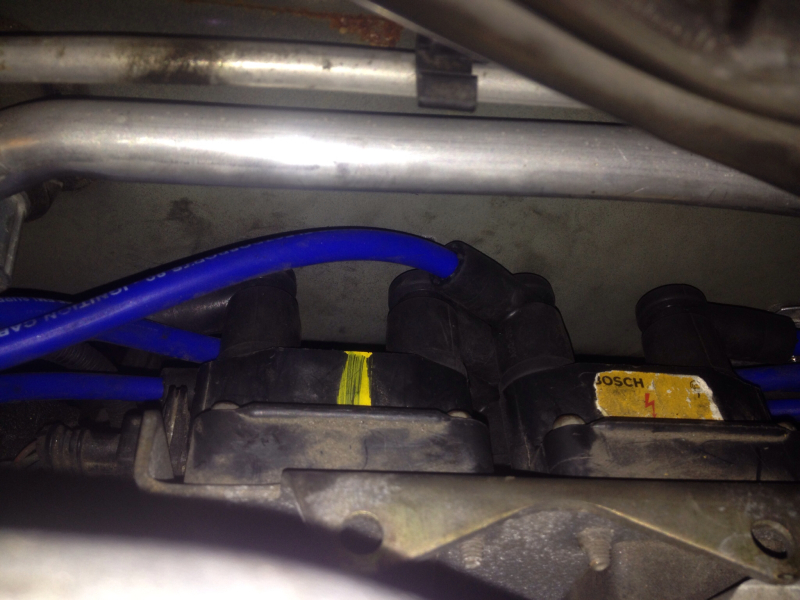
After. The sides are fully plugged and wires routed to the top it should look something like this.

Now the fun really begins, the coil end.
Starting on the bottom row, have a feel around and familiarize yourself with the plug sockets. Seeing in there is pretty impossible. It's all by feel. One by one find the correct numbered wire and maneuver it into position. I found it quite difficult to get the satisfying click on this end. I had to remove it a couple of times to put it on again to be sure it had clicked.
Also, be sure to route them on the correct side of the shiny pipe.
I struggled with the top row more than the bottom row, later found out its because the bracket that holds the coils was bent out where someone had removed the inlet manifold, so there was less room.
All wires on.
I checked and double checked evereytime I routed a wire, took something off, labelled something. I didn't want to do this twice. I've also been studying the drawings for a while.
That's it.
Biggest noticeable difference I could tell was low down at slow speeds. It takes of much smoother now. More responsive at a throttle of between 5-15%. I'm sure this is better for mpg. Makes the ride better. Will help my mrs drive it, as she isn't the most subtle on the throttle. It smoothes everything out a bit.
That's that.
Wasn't as bad as I expected. Due to reading so many posts here I think. Actually, the most satisfying bit was seeing each old plug come out one by one and be in great, but used condition. Nothing sinister or odd at all. just huge gaps.....
A success. About 3 hours in total. Probably 90 mins on the actual plugs and wires bit. The other 90 mins effing and blinding and recovering dropped things. Took longer cos I didn't wait properly for the IM to cool down, ooh ah, ah, ooh, ah. Etc.
Anyway. Here is my method with a few things I found pertinent, in case anyone else finds it useful.
I managed to do the whole thing, just by sliding the shiny pipe that blocks the coils to the right. It moved about 8" and a big gap opened up. Had to remove a couple of 1.5" hoses on the left, and a smaller something on the right. With a bit of juggling it moved across no problem.
Have to remove the bracket holding the shiny pipe, otherwise there simply wasn't the room, and it's only two bolts. 8mm socket on a long extension. I had a nice bendy thing.
Hand behind coils and have a feel around. Have a look at this diagram, and keep a copy handy. http://www.landroversonly.com/forums...ring-order.jpg
Unplug each wire from the coil in turn, pull it out from behind and number it with a sharpie. Trace it back to the plug end to confirm against the drawing, "measure twice, cut once"
Do this for all the plugs, top row first. After that there will be four wires, coil ends hanging out together on each side.
I started on the right side of engine, back to front. I bought a plug removal tool specially for the purpose. I was able to do every plug with it.
I always try and stop with the tool and do the last couple of threads by hand. I feel it reduces the chance of damaging the threads as the tool is putting odd forces on the plug. I don't think one of them came out square to the block.
Same with putting them in, after a couple of turns by hand I'm quite confident I won't cross the threads and the tool can do the rest.
After each plug, find the corresponding new wire that is about the same length. Number it with the right number, check it's the right number, click it on. I found all the Magnacor wires were slightly longer than the ones I was taking off. After 4 plugs and wires I routed all of them up towards the coils.
Rinse and repeat the other side. Remove the MAF to inlet section for access.
The Mangacor wires fitted on the Bosch +4s really well. It's easy to get the satisfying click that it is seated properly.
Number 7 plug was a PiTA. Just the angle, and the length of my bar, it was difficult to get the socket on properly. But as I say, one tool did them all, in the end.
What's that white fabric stuff on that piping that is always in the way? Just a heat shield material? I kinda trashed some of it in the process.
After. The sides are fully plugged and wires routed to the top it should look something like this.
Now the fun really begins, the coil end.
Starting on the bottom row, have a feel around and familiarize yourself with the plug sockets. Seeing in there is pretty impossible. It's all by feel. One by one find the correct numbered wire and maneuver it into position. I found it quite difficult to get the satisfying click on this end. I had to remove it a couple of times to put it on again to be sure it had clicked.
Also, be sure to route them on the correct side of the shiny pipe.
I struggled with the top row more than the bottom row, later found out its because the bracket that holds the coils was bent out where someone had removed the inlet manifold, so there was less room.
All wires on.
I checked and double checked evereytime I routed a wire, took something off, labelled something. I didn't want to do this twice. I've also been studying the drawings for a while.
That's it.
Biggest noticeable difference I could tell was low down at slow speeds. It takes of much smoother now. More responsive at a throttle of between 5-15%. I'm sure this is better for mpg. Makes the ride better. Will help my mrs drive it, as she isn't the most subtle on the throttle. It smoothes everything out a bit.
That's that.
Wasn't as bad as I expected. Due to reading so many posts here I think. Actually, the most satisfying bit was seeing each old plug come out one by one and be in great, but used condition. Nothing sinister or odd at all.
just huge gaps.....
Last edited by cappedup; 10-09-2014 at 06:27 PM.
#29
10-10-2014, 04:14 PM
Swapped t stat today.
Previously my temps were solidly between 188 and 194. Thought it was due to a previous owner fitting a motored 180.
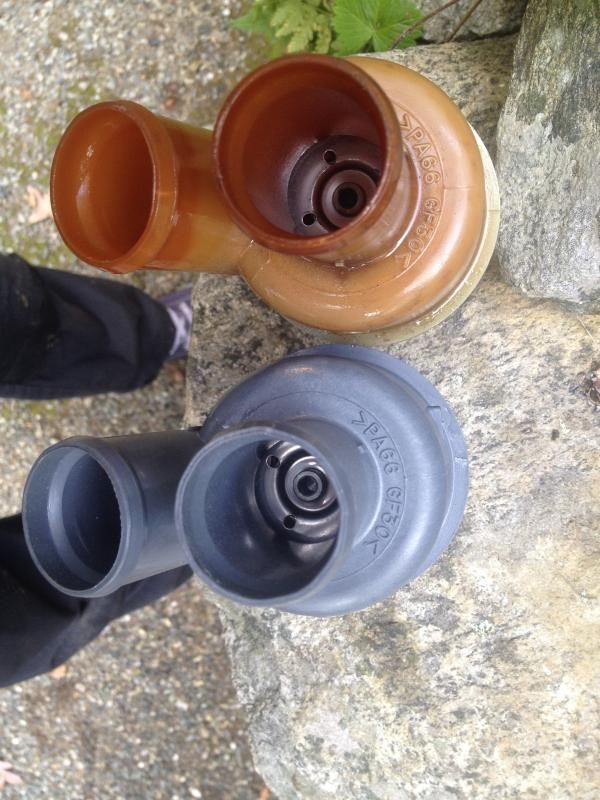
But the stat I took out looks 'exactly' like the grey LR one. Only difference is the colour and the date stamp. Other than that it's precisely the same. Down to the serial number and the little plastic casting marks.

Do I assume it was the original LR part supplied? If so I'm surprised how low the temps were.
Havnt run properly with the new stat yet. Will update.
Also did the transfer case gear oil. Crikey that was some nasty old stuff in there. Really pleased to have swapped that out.
Previously my temps were solidly between 188 and 194. Thought it was due to a previous owner fitting a motored 180.
But the stat I took out looks 'exactly' like the grey LR one. Only difference is the colour and the date stamp. Other than that it's precisely the same. Down to the serial number and the little plastic casting marks.

Do I assume it was the original LR part supplied? If so I'm surprised how low the temps were.
Havnt run properly with the new stat yet. Will update.
Also did the transfer case gear oil. Crikey that was some nasty old stuff in there. Really pleased to have swapped that out.
Last edited by cappedup; 10-10-2014 at 04:17 PM.
#30
10-10-2014, 06:18 PM
Recovery Vehicle
Swapped t stat today.
Previously my temps were solidly between 188 and 194. Thought it was due to a previous owner fitting a motored 180.
But the stat I took out looks 'exactly' like the grey LR one. Only difference is the colour and the date stamp. Other than that it's precisely the same. Down to the serial number and the little plastic casting marks.
Do I assume it was the original LR part supplied? If so I'm surprised how low the temps were.
Havnt run properly with the new stat yet. Will update.
Also did the transfer case gear oil. Crikey that was some nasty old stuff in there. Really pleased to have swapped that out.
On the t-stats:
I have three old ones and one grey 180 and all of them have PA66 GF 30 molded into the plastic. One has the numbers molded into the side and the others have them molded into the top.
I know two of these are 180, one is an allmakes (I assume motorad) and the other 180 is the genuine gray one.
So I guess they use the same numbers on all of them?
I do know your temps were more like a 180 than a 190.
Nice work! at the rate your going you'll have a new truck in no time.
Last edited by RicketyTick; 10-10-2014 at 07:43 PM.