Panhard Bar Conversion w/ Pics!
#1
 10-21-2014, 08:12 PM

Been brainstorming for a while (and waiting for some time to open up at the shop) to get this panhard bar conversion going. Coming from a road racing/ auto-x background, I did not want to just put the bar in all *****-nilly (technical term). I wanted to maintain the roll-center that Land Rover designed into the watts link geometry, and also keep minimal lateral axle shift under daily driving suspension movement. Heres what I came up with:
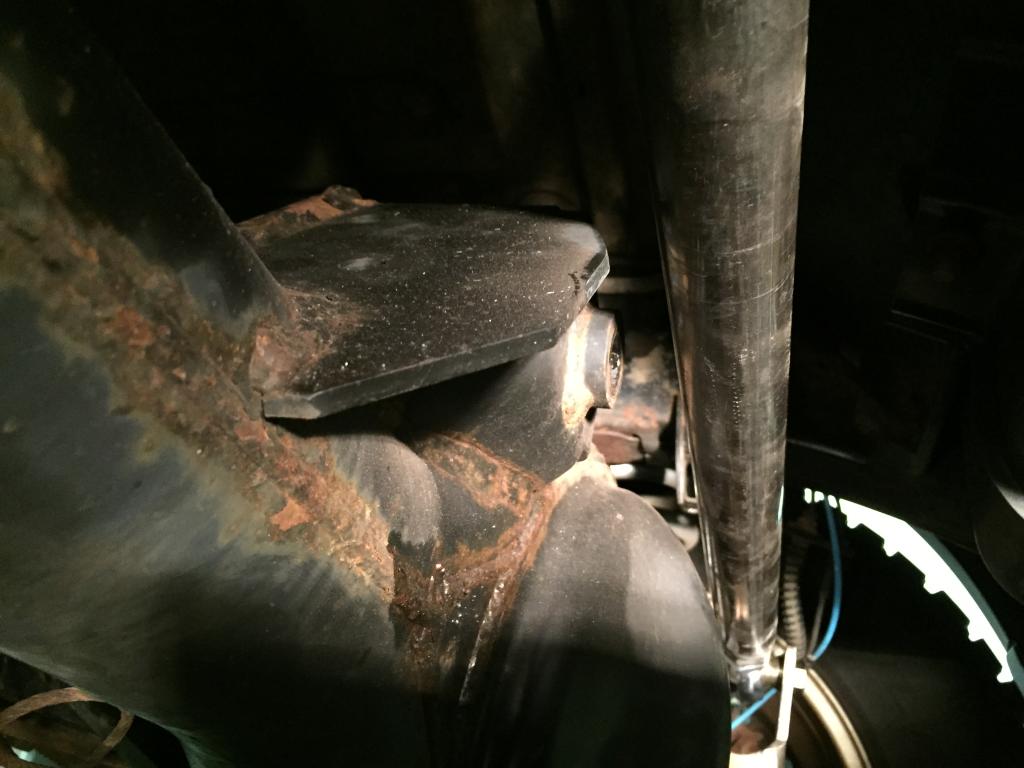
Using the Ruff Stuff Universal trac bar/panhard bar kit with axle offset, outside frame brackets. I modified the Ruff Stuff axle bracket to sit on top of the radius arm bracket. There will be a 1.5" tube welded to the face that will brace it to the axle tube better.
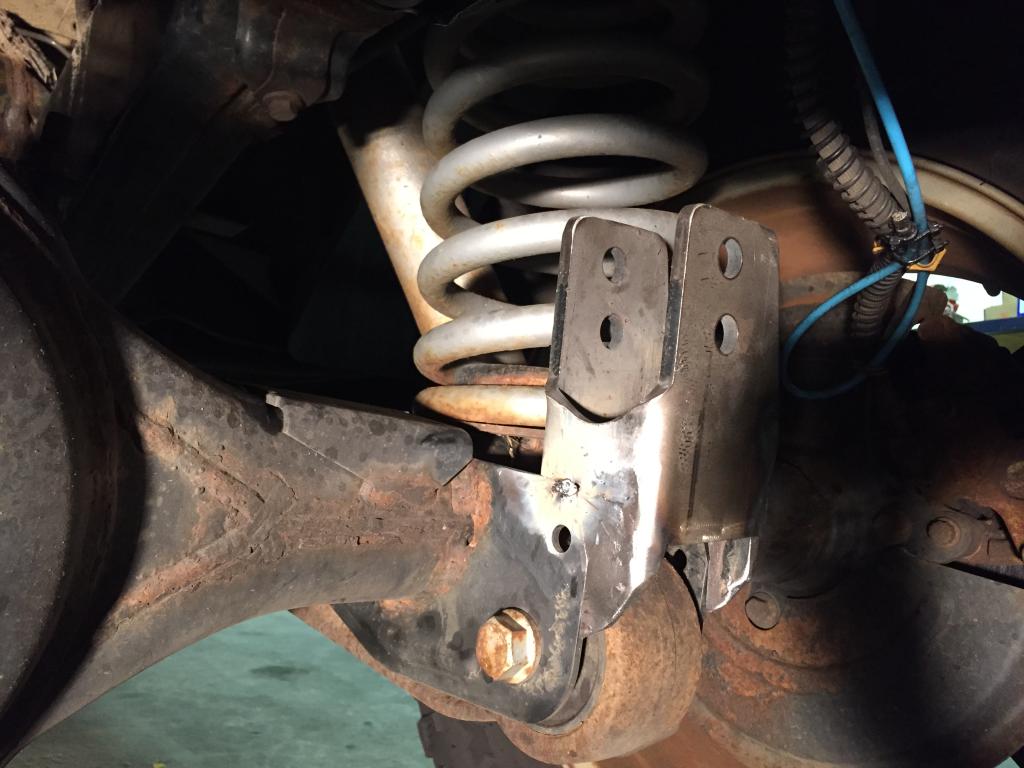
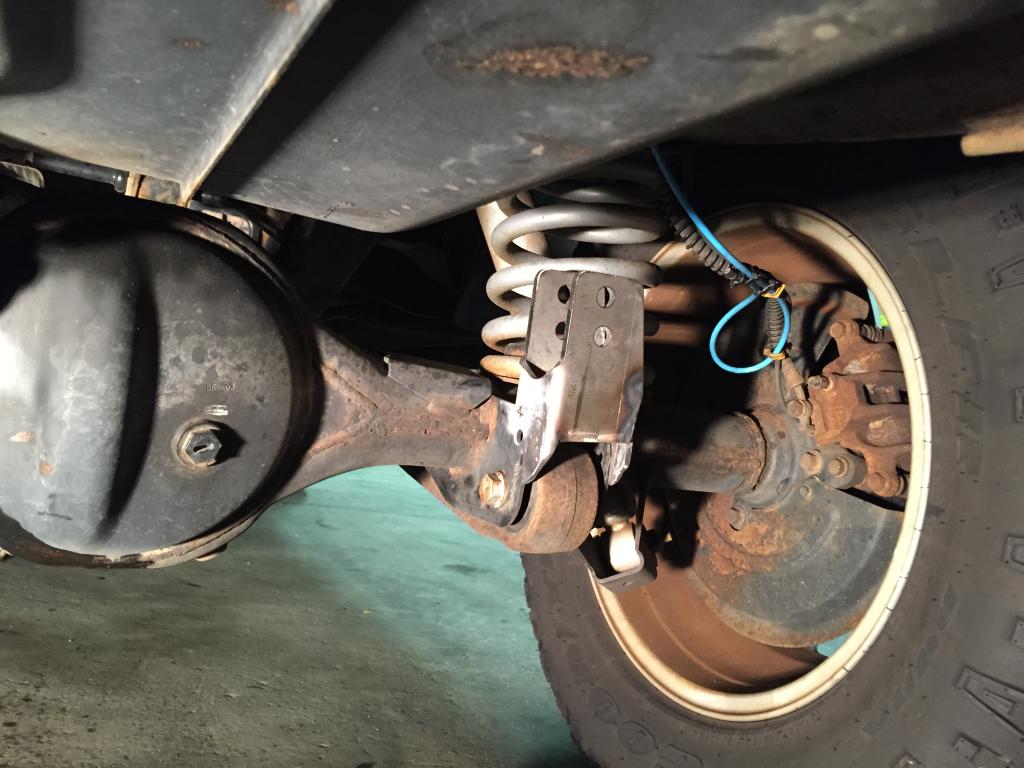
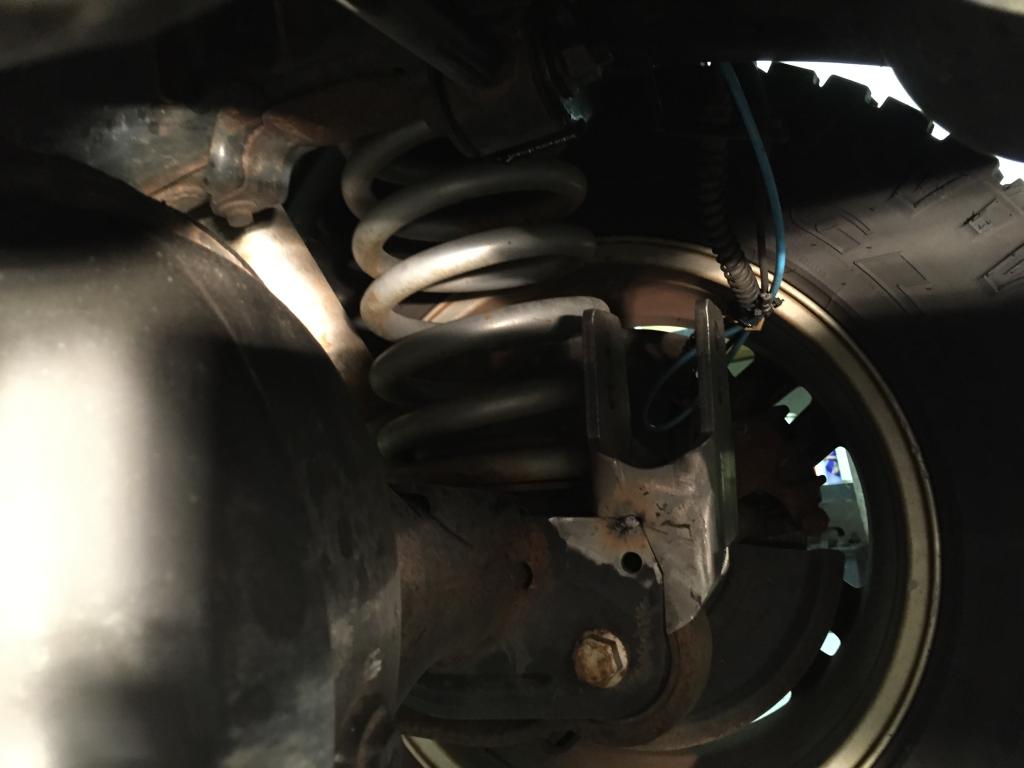
For the frame mount, I am using the factory watts link drivers side frame bracket. Main reasons being; it was already there and it places the bar in a pretty much ideal height to keep the roll center close to factory, and keep the bar as horizontal as possible. The Ruff Stuff rod ends and spacers measure ~1.9" outside to outside and the factory bushings measure ~1.75" so I had to machine down the spacers a bit to get them to fit.

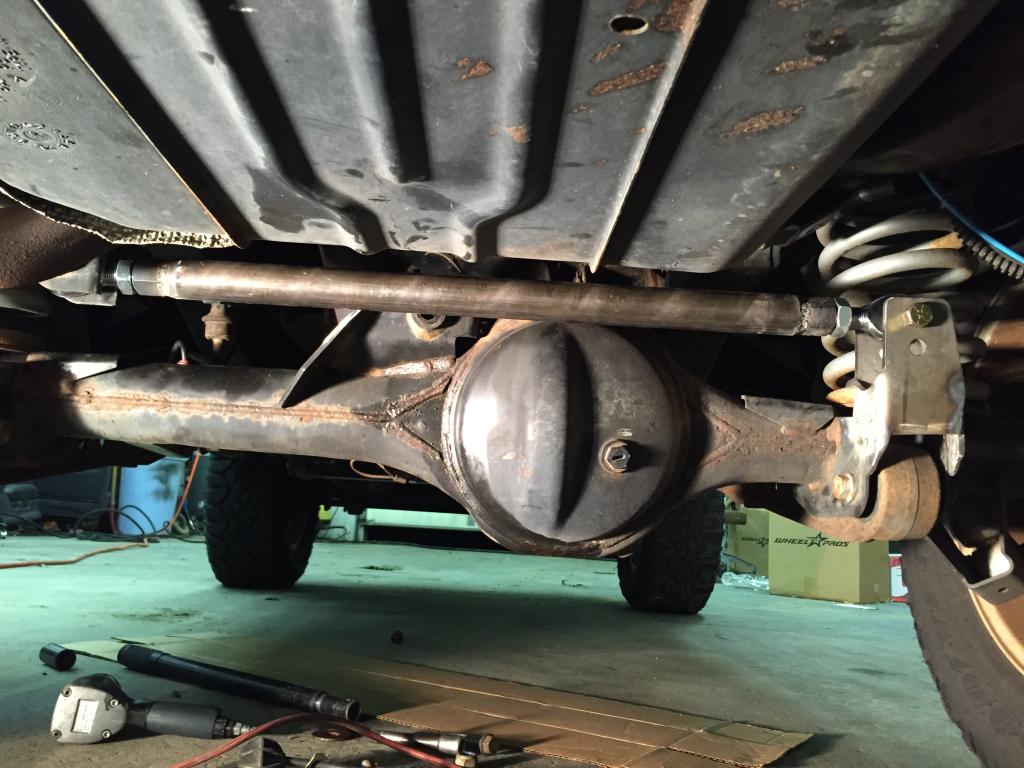
The tube is close to the rear but I cant think of a situation where the axle will articulate and come in contact with it.
This is where I left off 10 minutes ago... Hopefully tomorrow I can get the axle bracket brace finished up. More pics to come
Using the Ruff Stuff Universal trac bar/panhard bar kit with axle offset, outside frame brackets. I modified the Ruff Stuff axle bracket to sit on top of the radius arm bracket. There will be a 1.5" tube welded to the face that will brace it to the axle tube better.


For the frame mount, I am using the factory watts link drivers side frame bracket. Main reasons being; it was already there and it places the bar in a pretty much ideal height to keep the roll center close to factory, and keep the bar as horizontal as possible. The Ruff Stuff rod ends and spacers measure ~1.9" outside to outside and the factory bushings measure ~1.75" so I had to machine down the spacers a bit to get them to fit.


The tube is close to the rear but I cant think of a situation where the axle will articulate and come in contact with it.

This is where I left off 10 minutes ago... Hopefully tomorrow I can get the axle bracket brace finished up. More pics to come
#2
10-22-2014, 08:55 AM


#4
10-22-2014, 09:55 AM

Looks good!
I'm going to be doing the same install this coming weekend on my D2. After I priced replacement watts link bushings, it was a no brainer to go with the $175 Ruff Stuff kit.
I don't think you'll have an issue with the track bar contacting your diff housing. As the suspension compresses, that end of the track bar will rise with the axle, so you'd have to REALLY get that axle up there before contact would be an issue.
Question for ya though. I see that you ran the track bar from driver side frame rail, to passenger side axle housing. Basically mimicking the setup that's used on the front axle.
Is there an advantage in doing it that way, versus running it in the opposite direction (passenger side frame rail to driver side axle housing)?
Just curious. I've owned FZJ80 land cruisers in the past, and they run the rear track bar opposite of the front.
However, that may be simply due to the fact that they were primarily designed as RHD vehicles, and in that case, both track bars would be running the same direction.
Maybe I just answered my own questions, but am curious if you have any insight into that.
Looks good!
#5
10-22-2014, 10:07 AM
However, my panhard is further away from the axle and hits occasionally with a 4" lift.
#6
10-22-2014, 12:27 PM
Thanks Guys! The pic makes it look much closer than it is... Ill get some logs or something to flex it on to make sure nothing hits. But like adventr said, the bar will move up with the axle when the suspension compresses. We shall see what happens though...
As for the left side frame bracket matching the front bar, I coudnt find any conclusive evidence that said not to do it that way. The way I thought about it was if you were going down the highway and hit a dip or rise where the front and rear suspension moved in unison (or close to it), the suspension would shift the car over evenly. If the frame brackets were opposed, the car would go into a "crab walk" shift. I havent done any of the lateral shift calculations with this length bar but I imagine its fairly minimal under daily driving suspension movement. This is all assuming that the front bar is flat at ride height...
As for the left side frame bracket matching the front bar, I coudnt find any conclusive evidence that said not to do it that way. The way I thought about it was if you were going down the highway and hit a dip or rise where the front and rear suspension moved in unison (or close to it), the suspension would shift the car over evenly. If the frame brackets were opposed, the car would go into a "crab walk" shift. I havent done any of the lateral shift calculations with this length bar but I imagine its fairly minimal under daily driving suspension movement. This is all assuming that the front bar is flat at ride height...
#8
10-22-2014, 05:39 PM


#10
10-22-2014, 07:21 PM
Copy away! I do owe some credit for inspiration to Dusty and Zach after seeing their setups though...
I just got back from a little mall crawl. Got to flex the drivers side up as high as I could, figuring this would create the worst case scenario for bar-to-axle contact. All clear with some room to spare! My one concern now is that Im not sure if a watts link splits the lateral load in half on the frame brackets... I would have to think that it does. So now I am putting twice as much load on that original frame bracket than it was designed for. I think next Im going to beef up that bracket just to be on the safe side.
I just got back from a little mall crawl. Got to flex the drivers side up as high as I could, figuring this would create the worst case scenario for bar-to-axle contact. All clear with some room to spare! My one concern now is that Im not sure if a watts link splits the lateral load in half on the frame brackets... I would have to think that it does. So now I am putting twice as much load on that original frame bracket than it was designed for. I think next Im going to beef up that bracket just to be on the safe side.

