Seat Cushion Replacement Write Up
#1
 02-18-2017, 10:58 PM


Introduction
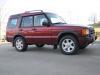
I had my 2001 Disco for awhile. The tired 4.0 died on me(@154,000 miles) shortly after having the vehicle shipped across the country for my move from the east coast to the west almost 1.5 years ago.
I figured instead of buying a used car of unknown history, I decided to keep my Disco that I kept it in its best possible mechanical condition aside from the blown engine. It received 4.6L rebuilt engine about 14 months ago and I have put about 6000 trouble free miles (knock on wood). I am keeping her awhile.
Anyways, long story short, my driver side seat cushion was getting a bit worn. Rest of the interior is near new condition as I don't usually have passengers in this truck unless I am going away for a weekend.
I found replacement seat covers for around $350. I also found repair shops quoting me around $200+. One simply declined to fix as he felt that the repair won't last long. So I figured, replacement is the only way to go at this point.
Even though I have been wrenching for almost 20 years now but I have never worked on upholstery part of a car. I have put in bucket seats and such but never replaced cushion/cover.
So I bought a set of used replacement seat cushions at a discounted price from a guy/vendor and he told me that it was dirty and he did not try to clean it. My thinking from that comment was that the smudge on the picture was that just a dirt stain.

It was not a smudge. It was a wear on the leather finish, exposing the actual leather grain underneath.
I got to try refinishing the leather. It just happened to work out quite nicely but I still had to buy quite expensive leather finish and hours of search for the right color.

Anyways, I felt a little deceived because the seat cushions (I received) did not have the side clips/retainers that hold its sides down against the seat frame. I found out as I was dismantling my old seat. Apparently, the seat cushions I received, the retainer clips broke off and in the process undid seams that were sewn together. This was also not been disclosed. This is something that you would not know unless you work on these seats. Also the whatever the retainer clips available were cracked and damaged but luckily still usable. I feel like if this was disclosed or at least some of these information, I would not have felt as bad about the whole thing, but knowing this and still sold me these used parts as if everything was good other than being just "Dirty".... That was hardly so.
Enough rant.
Tools you Need..
17mm socket or wrench
E14 Torx socket
Philips screw driver
Zip ties
Needle nose plier
Work bench
Beach towel to place the seat on top of.
Procedure
1. Get the trim pieces off. There are two screws holding the side trim on the seat cushion. There are 3 screws holding the bottom trim piece and a plastic rivet.


2. Once the trim pieces are removed, you can see the Torx E14 heads. Remove the front mounting bolts and one of the rear bolt located to the center of the vehicle. You will need 17mm wrench to hold the nut on the bottom of the vehicle to remove the 4th Torx located rear driver side bolt.


3. With all the mounting bolts removed, before undoing any electrical cables. Lean the seat back down. Move the seat forward and make the seat come up as well so you can create more space underneath to work. You will see why we are doing this later.

4. From the back of the seat, remove two electrical connectors colored brown and gray. You may have faux leather velcro cover wrapped around this. There is small tab you can push and pull towards the center. They should come apart relatively easy. If you are fighting it, you are doing something wrong. White connectors are for seat warmer. No need to disconnect those at this time.

5. Move to the front of the vehicle now and lean the seat assembly back you that you can visualize the bottom of the seat better. There are two electrical connectors that are held in place with plastic rivets that expand. You can just pull on them hoping that it won't break or you can simply squeeze the back it to release from the hole.


6. Once the cables are release from the frame, undo the connections. Here is another view of the connectors once disconnected.

7. Remove the seat belt. There is plastic cover over the bolt. It is simple friction fit. Use flat head to remove it and you can undo the bolt.
Now you can lean/rotate the chair and snake it out of the truck. Be careful, the seat weighs around 40lbs and is awkward to handle. The seat frame is made of metal so you can scratch the door panel or the paint easily. You were warned.
8. Here is the view of what has been disconnected and left behind. This would be a good time to get your vac and go nuts.

9. Place the seat upside down on someplace where you can work on it without having to squat.
10. This view is the back rest facing up. If you have leaned the chair back like I told you. Removing the plastic clip/retainer for the back rest cover will be easy.

11. There will be total of 8 clips holding each corner of the upholstery. You will see 4 at a time. Once the back seatrest cover clips are removed. You will see the seat bottom cushion cover clips underneath. Save these clips and keep the previous 4 clips separate from the other 4 from the seat bottom cushion cover as they have different width. I used screw driver to remove these clips and only took seconds to remove them.

12. This part is the MOST difficult part of the project. Removing the old seat cushion. I don't have many pictures as I was a little bit frustrated and just wanted to finish the project. At the same time, there is not much of anything to show. As you will see on the bottom of the cushion, there are black clips that hold the seat down. You basically have to unclip this very long clip/retainer. There are total of 4 long clips/retainers. The front and the back ones are the long ones and the left and right ones are shorter. I basically broke mine removing it so I cannot tell you how to do it without damaging it. I don't think there is a way to remove these without damaging them but the idea is not to completely destroy the retainers. All said and done, your seat should separate from the frame. Make sure to undo the heated seat element wire.

13. Install the new seat cushion/cover combo. Remember the volume is created by foam, you can compress these to create space and move things. Don't be shy. Put your weight on it to move these seat cushion foam into place. This will work well, if you placed the seat where you can put your weight on. As you do so, pull the black clips/retainers onto the seat frame. It should go on pretty easily.
14. Once the clips/retainers are place back on the frame, reclip the cover material in the corners using the 8 clips we saved. You may have to adjust the opening of these clips to hold onto the thickness of the material.
15. Reconnect the heated seat element wire connector. Place the seat back in the car. Reconnect all the connectors. Check for proper operations.
16. Install all the mounting bolts and get the trim pieces back on.

I didn't have to cut any zip ties but if you have to cut any zip ties, make sure you replace them. There are a lot of moving parts underneath your seat. You don't want anything getting caught and catch fire.
Conclusion
It was definitely a learning experience as all the write ups available was without a single photo. Rave manual hardly shows you anything. I only needed to do the seat bottom. If I have to work on seat back, I would just drop this off to a shop to get it done.
Overall, it took me about 3 hours from start to finish at a leisure and "learning-as-I-am-doing pace" while taking pictures, alone.
Hope this helps someone. If any questions feel free to ask.
The following users liked this post:
eitydeuce (03-18-2021)

#3
02-19-2017, 07:00 AM

Baja
Useful info. My D2 has leather which seems OK but the internal squab is 'sagging' a bit, unsurprisingly, it's 14 years old (looks like the wife somewhat). One of these nicer sunny days I'll try refurbish it with a new internal squab, which I assume is part foam rubber, and hopefully it'll refresh the seat position.
#4
02-19-2017, 09:47 AM
It is one of those jobs that takes time but not much is being done.
#5
02-19-2017, 09:51 AM
Useful info. My D2 has leather which seems OK but the internal squab is 'sagging' a bit, unsurprisingly, it's 14 years old (looks like the wife somewhat). One of these nicer sunny days I'll try refurbish it with a new internal squab, which I assume is part foam rubber, and hopefully it'll refresh the seat position.
I haven't done the actual upholstery part of the replacement. You gotta deal with hog rings.... Fun times.
#6
02-19-2017, 10:20 AM

Pro Wrench
Useful info. My D2 has leather which seems OK but the internal squab is 'sagging' a bit, unsurprisingly, it's 14 years old (looks like the wife somewhat). One of these nicer sunny days I'll try refurbish it with a new internal squab, which I assume is part foam rubber, and hopefully it'll refresh the seat position.
#7
04-24-2017, 09:34 AM
Winching
#8
04-24-2017, 04:25 PM
Pro Wrench
you have remove the back seat clips to get to the seat cushion clips (or at least I had to). You don't have to completely remove the back seat.
#9
04-25-2017, 09:07 AM
Recovery Vehicle
#10
04-29-2017, 11:48 AM
Winching

Swapped out the passenger seat cushion with the drivers and treated it with Obenauf's Leather Oil
I just did this and swapped out the passenger seat cushion with the drivers cushion. It's really not too bad of a job. While I was at it, it did a complete interior vacuum, cleaning and treated all the leather seats to a conditioning with Obenauf's Leather Oil. Obenauf's is really great stuff, first time I used it on leather seats and it works great. Here is a picture of my driver seat after the swap with the passenger cushion.