When you click on links to various merchants on this site and make a purchase, this can result in this site earning a commission. Affiliate programs and affiliations include, but are not limited to, the eBay Partner Network.
Not sure now many DIY people or DIY Ham radio people there are on the LR4 forum, Since I shared my installation adventure of my LR3, I thought I would do the same for the LR4. After a very successful HF /VHF/UHF installation in my LR3, I was able to talk my wife into allowing a VHF/UHF radio in her LR4.
Since most of the hard decisions had already been made while researching where the install the radio on the LR3, I thought it would be a quick and somewhat painless activity (as if working on these things is ever quick and painless). One difference was the radios I have in the LR3 is an Icom IC-7000 HF/VHF/UHF All mode transceiver, and in her LR4 That I would occasionally drive, I wanted a Kenwood TM V71 VHF/UHF FM transceiver that I had in the closet collecting dust.
I was wrong. Since it had been more than 2 years since the last install, I seem to have forgotten a lot about what I had done before.
This is my journey. Your adventure could be different depending on where you mount your ham radio equipment and what type of antenna you choose or even how adventurous you are in tearing into your Land Rover. This was my adventure. No guarantees for fit are fitness is implied. If you disassemble your car, you do so at your own risk. If you are not sure you can do it....Well I offer this advice, Since I live in Houston Texas I will quote Red Adair the world renown Hot Shot oil fire expert: "If you think it's expensive to hire a professional to do the job, wait until you hire an amateur." One difference this time is I remembered to take a few pictures along the way and this time I will also describe it by the numbers.
1. GET PERMISSION from the wife.
2. Park in an area where you can get all four doors and the hatch/ tail gate open.
3. Open all four doors and the rear tail gate (top and bottom).
4. Remove the trim covers at the rear of the right seat bolts pulling on the friction fasteners.
5. Remove right rear seat bolts using a T25 Torx wrench. This may require moving the seat, that is why you do it before you disconnect the battery.
6. Remove cover in front of right front seat by pulling on friction fasteners.
7. Remove the front right seat bolts using a T25 Torx wrench.
8. Remove brake reservoir cover.
9. Remove Battery cover.
10. Remove battery terminal connectors using a 10mm socket
11. Remove dash cover below steering wheel by pulling on top of panel.
12. Remove cover above the pedals using a No. 2 Phillip screwdriver then disconnect the small connector to the light. (it has a short wire so be careful when pulling down)
13. Remove rubber grommet in firewall just below large wire bundle.
14. Remove cover under the glove box using a No. 2 Phillip screwdriver. See warning about the light connector above.
15. Remove the right side kick plate by pulling on the friction fasteners.
16. Remove the small plastic cover on the A Pillar labeled “AIR BAG”
17. Remove the A pillar trim using a T15 Torx wrench.
18. Remove trim piece from front legs of right front seat by pulling on friction fasteners.
19. Remove trim in fron of right front seat.
20. Remove plug to the right front seat using a 7mm socket.
21. Remove right front seat allowing for at least one strained muscle (this is age dependent; I think).
22. Remove trim on right B pillar by pulling on friction fasteners.
23. Remove the black threshold moulding by pulling on the friction fasteners.
24. Remove plastic wire channel cover by pulling on 2 round plug fasteners (one in the front door and one in rear door).
25. Remove the middle row right seat seatbelt using a T25 Torx wrench.
26. Remove small plastic cap on trim above seatbelt attachment point using a small flat blade.
27. Remove panel attaching screw using a No.2 Phillips screwdriver.
28. Remove right rear D Pillar cover (seat belt can stay attached as this will stay out of the way.
29. Remove the right side tie down rings using a 7mm Hex wrench.
30. Remove the tail gate filler flap using 10mm socket wrench.
31. Remove the tail gate cable from the tail gate using a small flat blade to raise the fastener over the round hub. and allow it to SLOWLY retract back through the hole, making sure it does not fully retract into the case (use a hose clamp tool to prevent this).
32. Pull on the right rear trim panel by pulling on the friction fasteners.
Now you have the car ready to start the radio install!
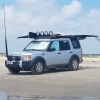
I chose the Lab Electronics in Australia aerial mount and placed it on the drivers’ side of the hood to keep the coax run short and this would also avoid running it across the engine compartment. It would be mounted to one of the hood hinge bolts. I then placed a 1 � inch wide 1 � inch long braided strap from the hood to the body near the plastic cowling using � inch long # 8 self-tapping screws with a star lock washer for RF bonding. This allowed me to use a Breedlove NMO/PL-259 mount and a 90 degree angle UHF angle adapter so the coax would fit under the hood with less strain. Once under the hood I just followed the current wire bundle and the down through the infamous only available single hole in the firewall next to the wire bundle
Antenna Location
I rearranged the digital and satellite radio boxes to make room for the Kenwood TM V71 VHF/UHF FM transceiver in the equipment rack behind the right rear trim panel. I used a 6-inch-long 1 1/3 braded strap to make an RF ground from the radio chassis to the car body.
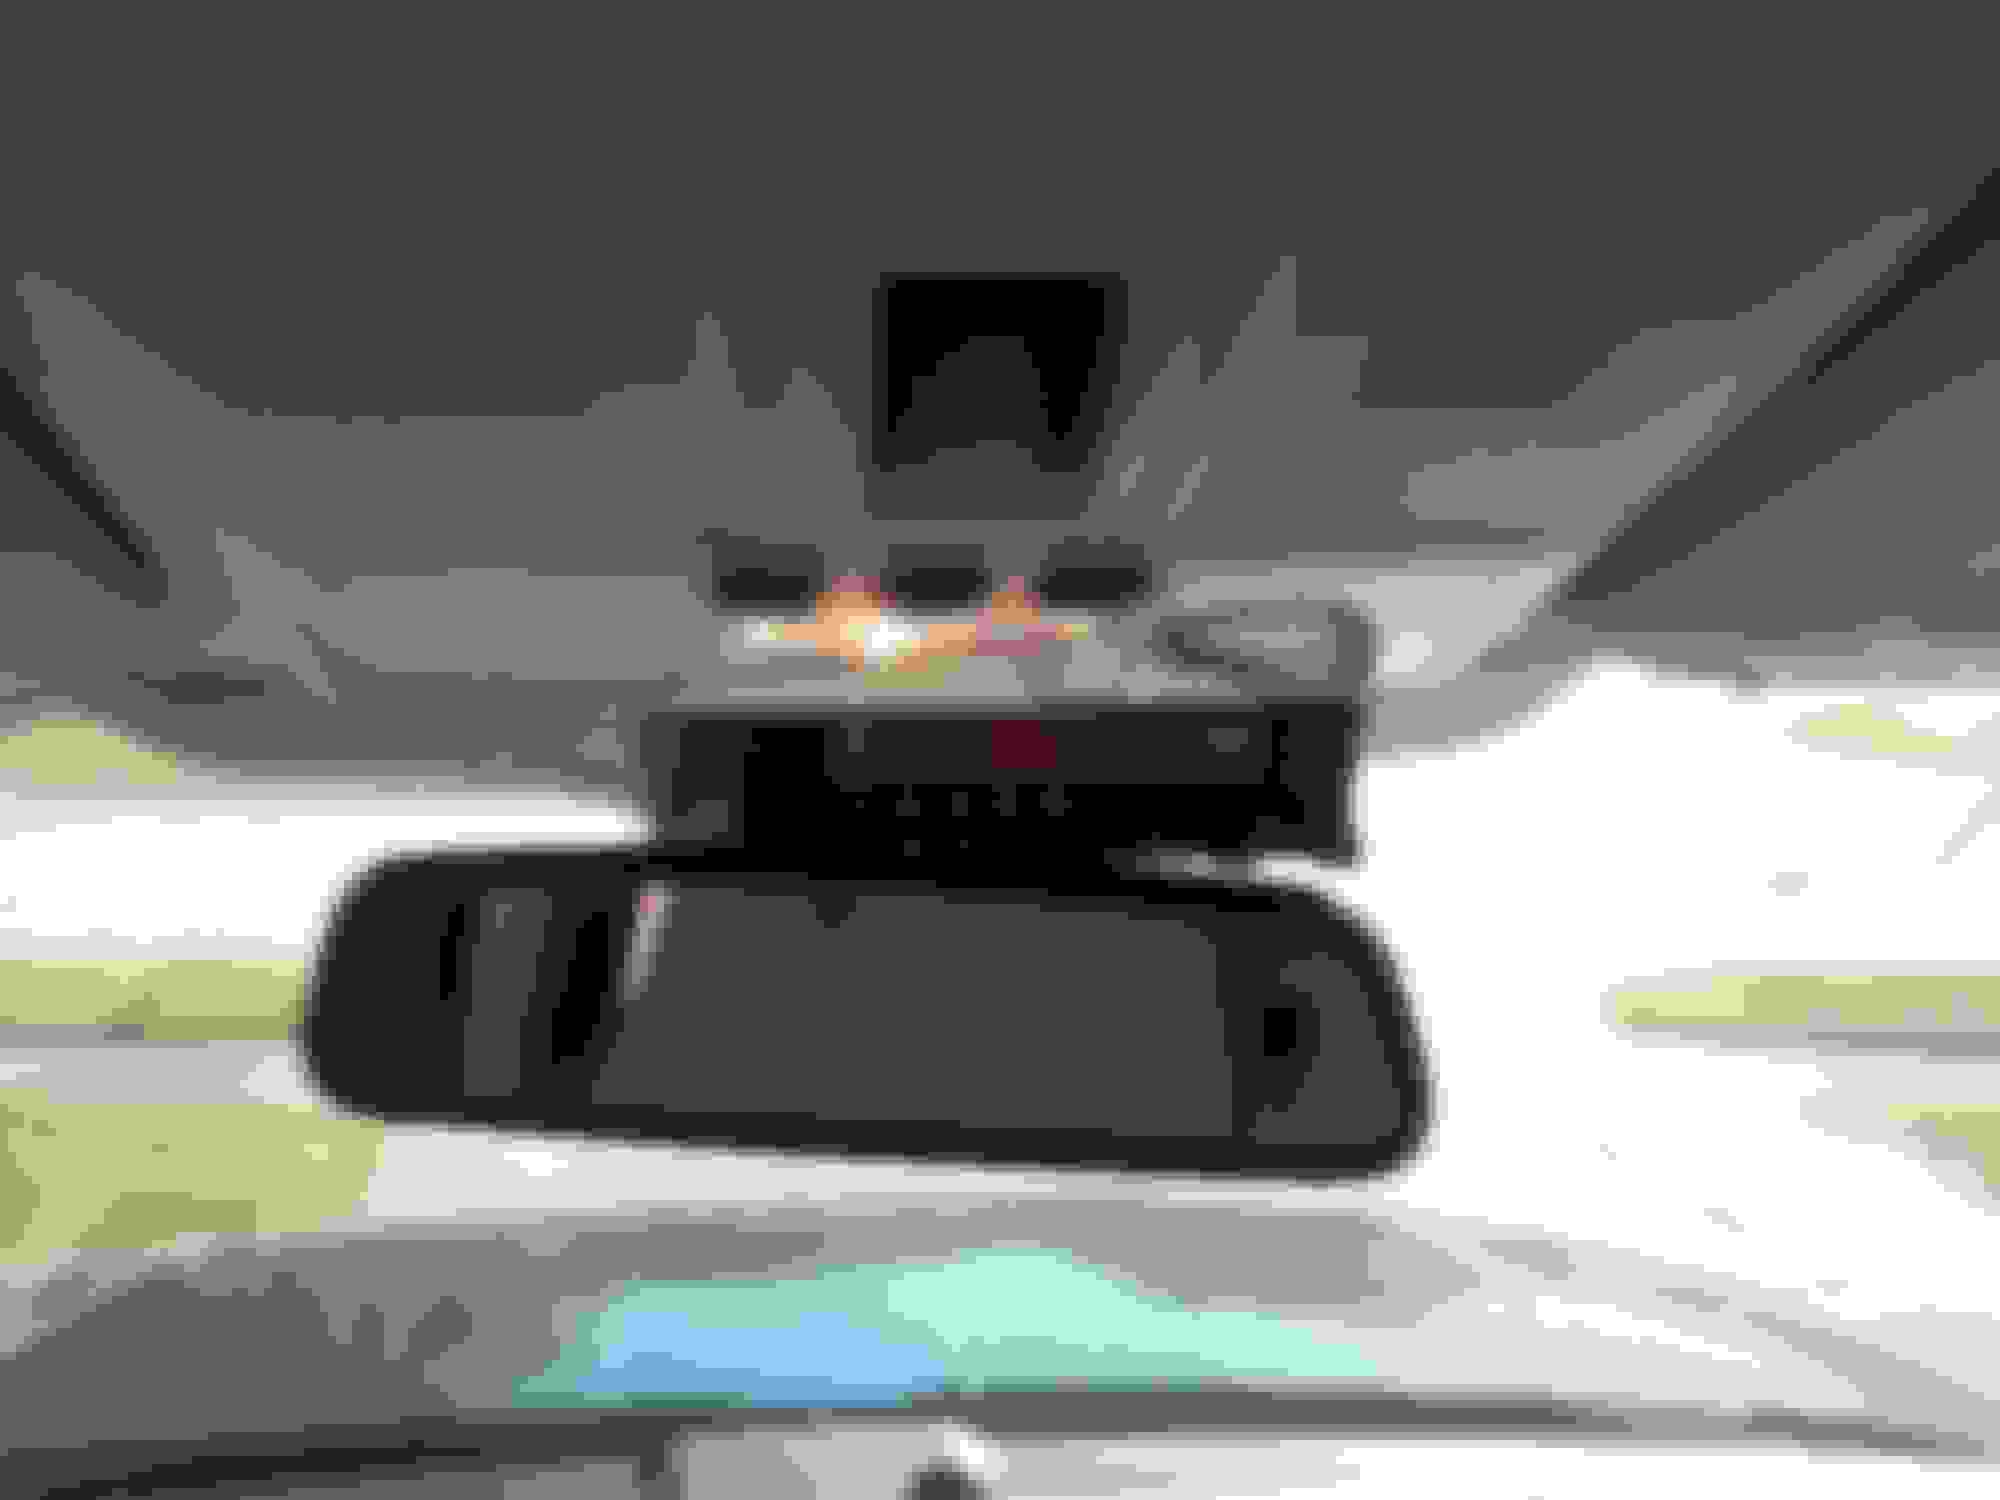
I did not want the control head in the sun all day, so I mounted it up near the rear view mirror with a paddle mount that extended up behind the ceiling panel. The factory control head cable ran along the top of the windshield and then down the A pillar. I fed the factory control cable across the top of the windshield inside of the roof liner and down along the wires bundle in the A pillar making sure to avoid the airbags. If you look from the outside of the windshield, you can see a hole that opens up the foot well. I fed the control cable down the hole and connected it to the cat 5 cable in a place that will be behind the kick panel.that then ran back to the radio.
I estimated that the power leads would be about 24 feet long. Land Rover does not give any specifc information about mounting radio transmitting equipment but Ford does, and since Ford designed the LR 3/4 I thought I would use there advice and connected the power leads directly to the battery. The radio specifications said 13.8 volts +/- 15 %. Based upon this I would need 13 gauge wire to keep it within those specs for 24 feet of wire. I used 23 feet of 12 gauge power cord. I started under the steering wheel and pushed the power cord into the engine bay. I fed in enough line that it would reach the battery box and a few inches past. At this point I could make up the connections for the battery. I used a fuse holder on both positive and negative leads that was about 3-4 inches from the battery or ground point and selected two 20 amp fuses to be installed AFTER everything else was done. I used a 13 mm socket to remove the ground cable that is attached to the body chassis behind the fuse box that is next to where the battery was. (this is why I removed the battery). This car has a Battery Monitoring System and I could not connect the ground lead directly to the battery as the monitoring system judges current drain and helps determine how much to charge the battery, If it does not know the radio is discharging the battery, it will not plan to have additional charging when the engine starts. I then used a 10 mm wrench to remove the main power cable from the battery terminal and attach the connector under the existing power lead.
I then fed it under the top of the carpet past the accelerator pedal, past the air conditioner drain and into the passenger side floor area. I then pushed it under the top of the carpeted area, down near the floor in the kick panel area. From there it was a straight shot along the threshold next to the other wires in the wire bundle. I have seen some installations where they did not remove the wire channel cover and ran the wires under the carpet or the plastic threshold. This will eventually lead the threshold coming loose or pinching a wire. That is why I went through all the trouble to remove the seats and the channel cover.There are three obstacles on the passenger side wire bundle channel. One is a wire intersection in the front just behind the audio amplifier, the second is a metal brace to support he right passenger seat at the B pillar and the third is a wire bundle that would be just in front of the middle row seat in the rear door opening. Place the power cord near the rear wheel arch and leave enough wire to complete the connection later on.
Repeat the process for the radio antenna coax making sure you have enough coax to reach the location on the hood you want. I used an aerial bracket from as I located the antenna on the left side of the hood (or bonnet for our cousins across the pond). A compromise location, but one I can live with. If you are locating the antenna on the rear, disregard this and run it along the wire bundle that head back the right tail light.
This radio has a Cat 5 cables for the control head and the microphone. I ran the cat 5 cable for the control head from the radio to the right kick panel along the wire bundle previously described. I ran the microphone from the drivers’ foot well just like the other two wires up near the top of the carpet, making sure there was enough at each end to accommodate servicing if required.
Radio install is complete. Now we just need to put the car back together.
Reassemble in reverse order and all is well making sure that connecting the battery is connected AFTER the seat wiring is connected (SRS airbags are in the seat and we want make that connection without power from the battery)
Last edited by Rufflyer; 02-25-2017 at 12:45 PM.
Reason: added/ corrected photos and text

 02-25-2017, 11:59 AM