No Cut Rear Door Storage (sorta)
#1
 04-18-2016, 11:20 AM


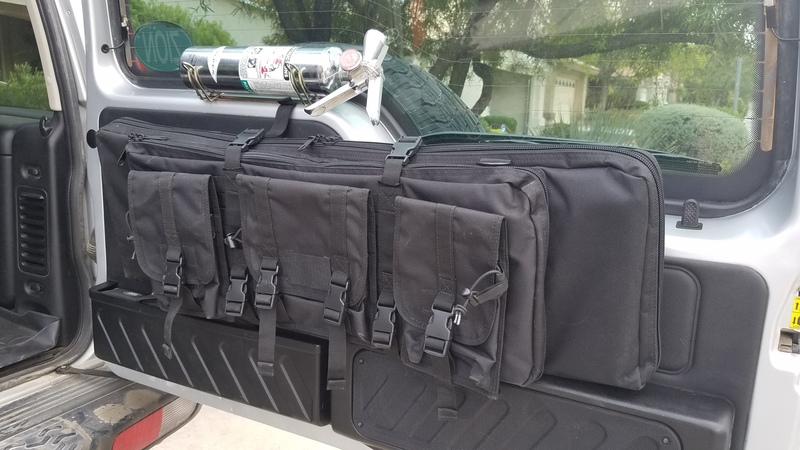
I've been wanting to add storage to the waisted space on the rear cargo door panel. But mine was in really good shape and I didn't want to cut/drill it. I decided to remove the useless internal handle and use those mounting points to mount a soft storage bag. I want to store small hand tools, ratchet straps, small trail spare sensors, a flash light and my folding saw. Nothing to heavy but annoying to have all over the truck. So I came up with this set up using a soft rifle case I got on ebay.
Removing the rear panel was the second worst part of this. I was dreading those stupid little plastic clips. I found that 2 trim removers works best. One to gently pry up the other to find the clip and work it out. This took me almost an hour. My patience paid off. Only one broken clip.
Once it was off I needed something to replace the downward facing handle brackets with something that faced completely forward. So I used a small piece of unistrut. We use it all the time in the fire sprinkler industry. I know it's strong and plentiful at my shop. For those unfamiliar it's basically a grown up version of an erector set. It uses a steel channel with a spring loaded nut that you can position anywhere in the channel. This is a factory pic showing how it works.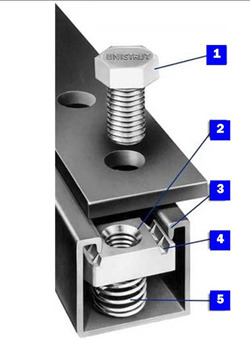
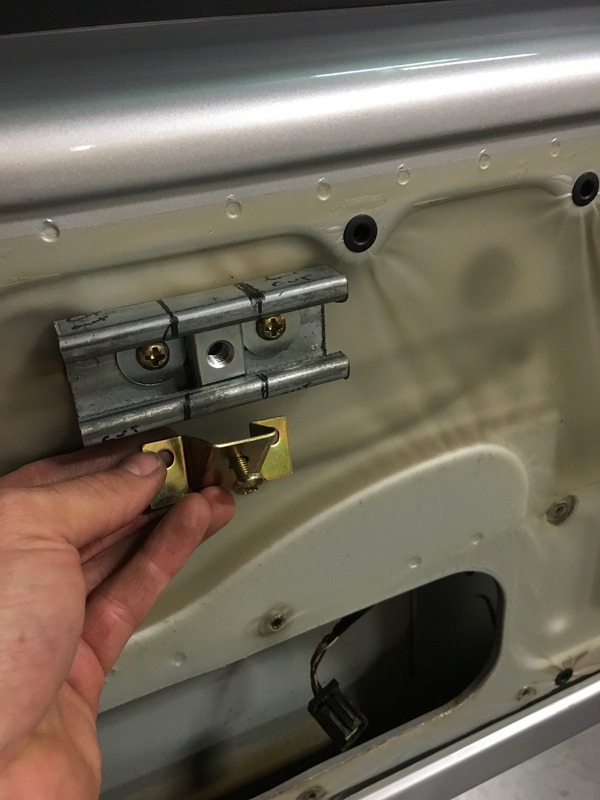
Here I have my rough piece screwed in to get my measurements. A comparison with the original bracket.
Here is the measurements mocked up to fit the unistrut through the original holes in the door panel.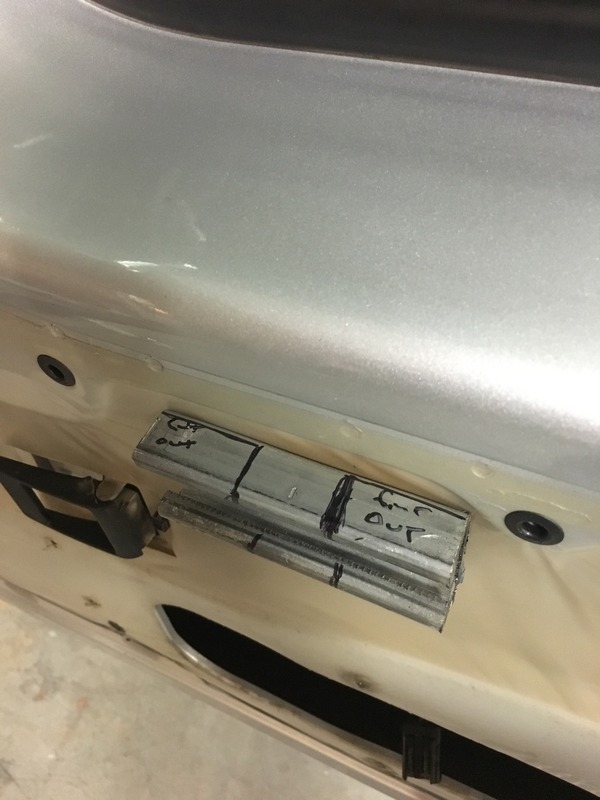
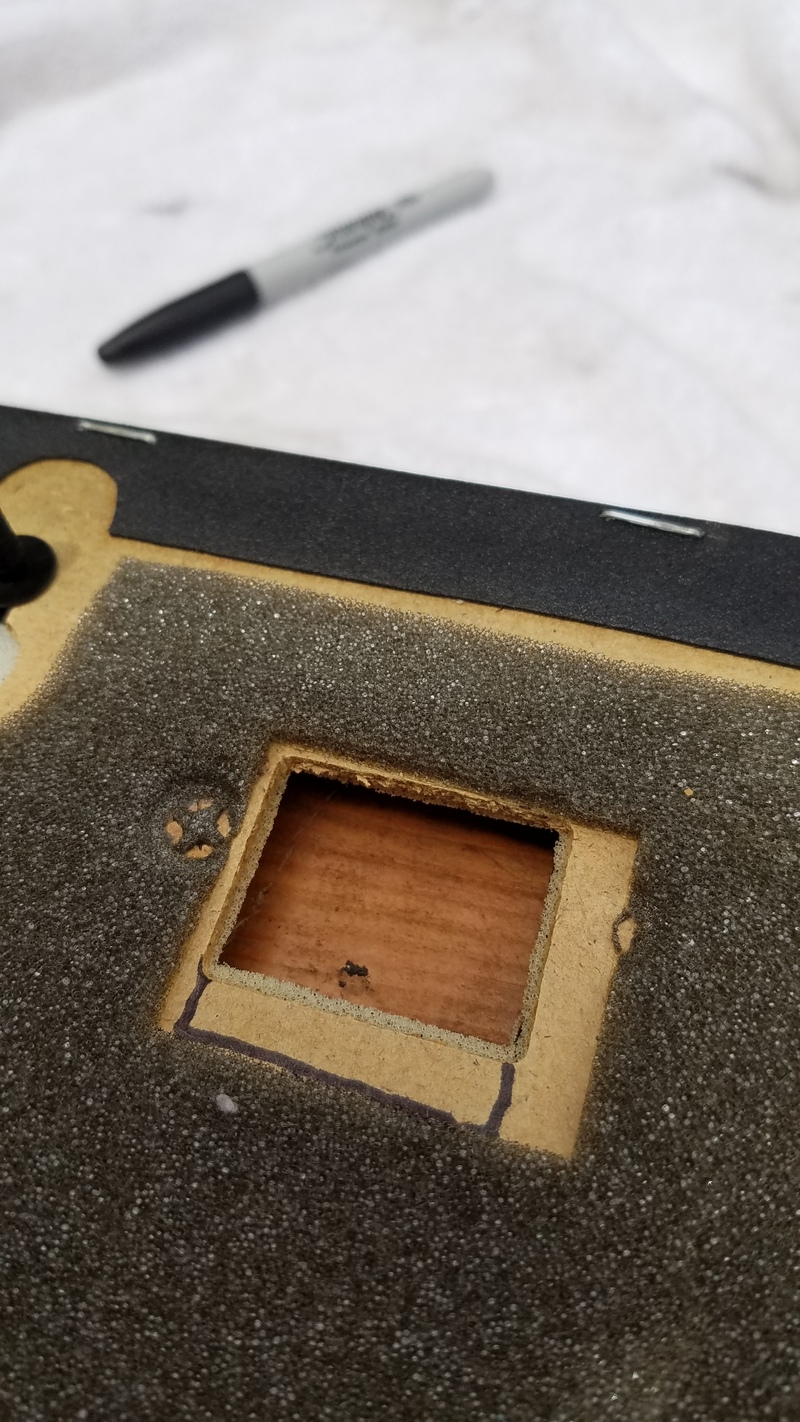
Then I realized I screwed up in my brilliant no cut plan. The unistrut channel is wider that the hole was tall. So reluctantly I had to trim the panel to fit. The vertical mount on the left (when looking at the open door) needed far less trimming than the other horizontal mount. I screwed up yet again and only trimmed the lower half of the hole. But that put the panel out of alignment. So I wound up trimming the top too. All in all I took about a 1/4 inch out of the panel using a razor blade. This was the hardest part for me. I wanted a factory look. I wanted to be able to completely reverse this mod if I wanted too. No huge holes. So I'd test fit again and again until it all lined up.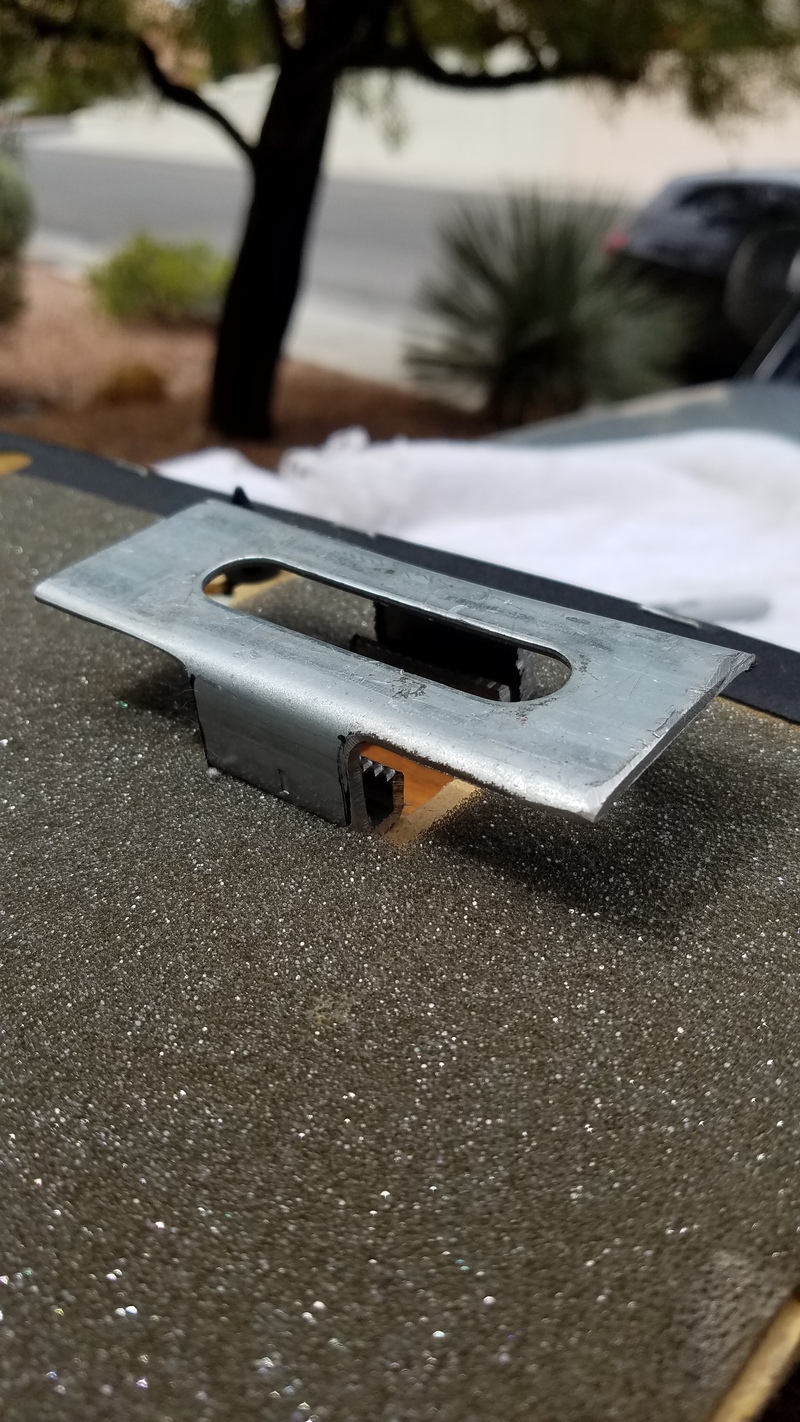
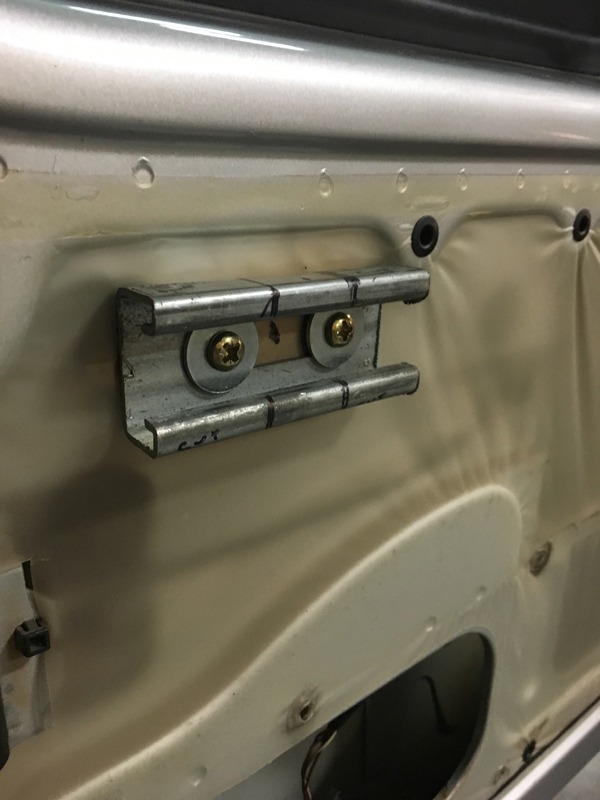
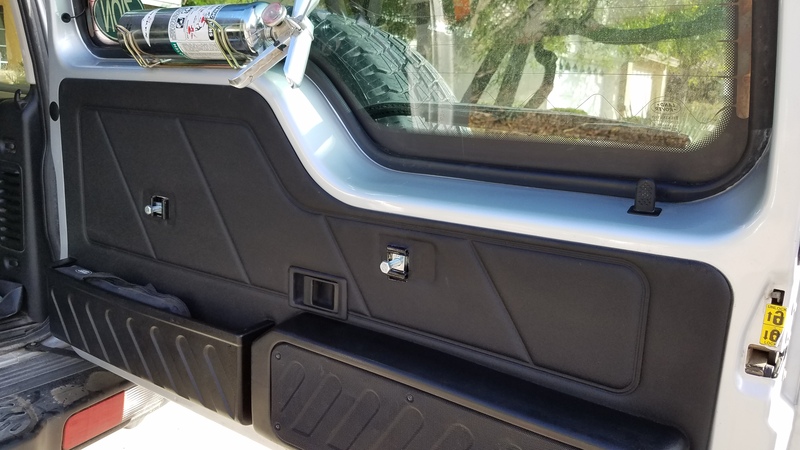
Finally it I got both brackets to fit. Even though the hole is enlarged it's still covered by the factory handle if I ever wanted to go back to that.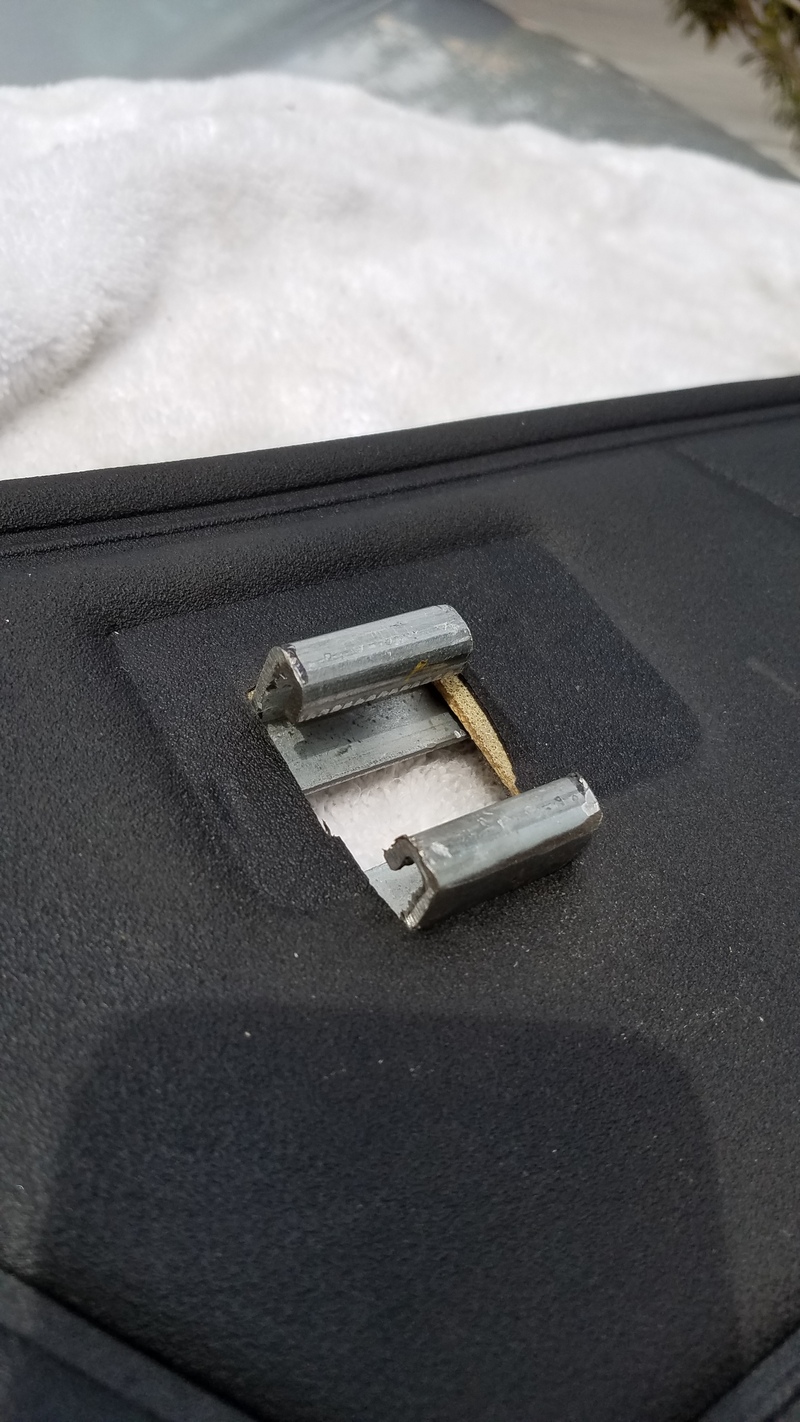
After some time on the grinder to smooth the edges and a coat of paint was good to go...or so I thought.
Then vertical bracket needed to be trimmed and shaped to be countersunk in the door frame like the original was. Otherwise the door panel would sit on top of it. Back to the grinder and a dremmel to get this..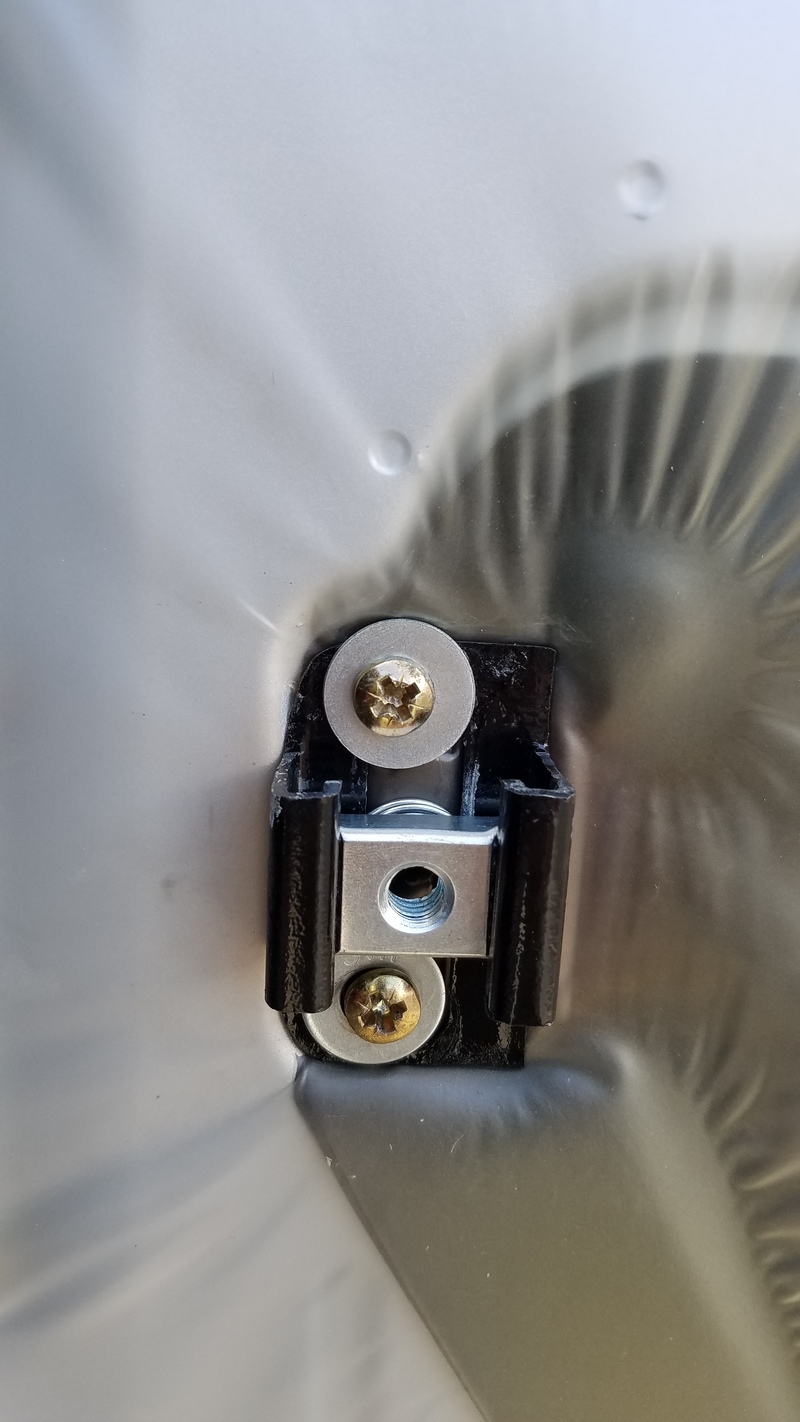
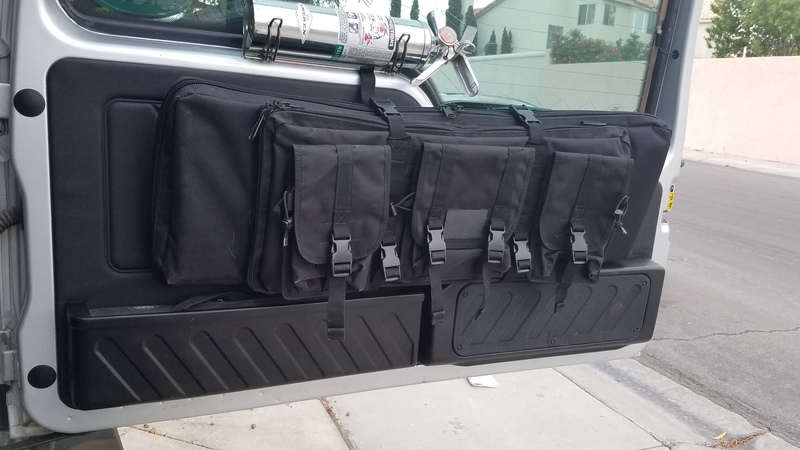
The finished products..
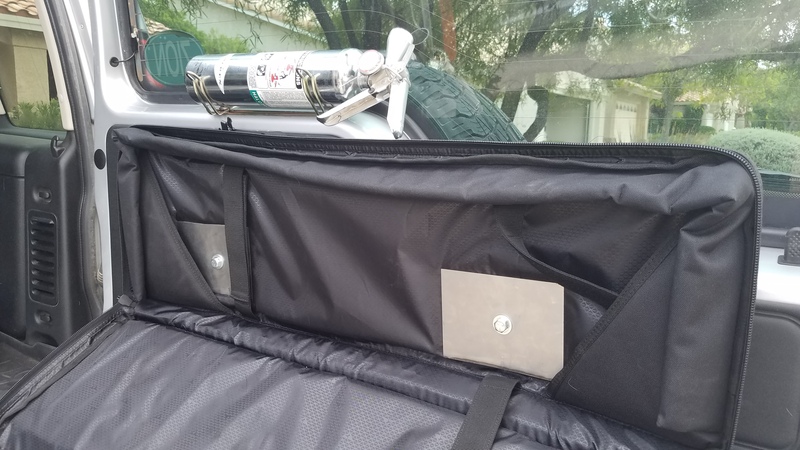
Now it was time to mount the bag. I used flat steel sheets on both the back and front to sandwich the bag itself. I didnt bother making these look pretty since the will never bee seen. I might paint them black later. Luckily the bags construction is heavy duty. Even so I want to add two vertical supports to keep the case from dropping while fully loaded since the mounts are so close to the bottom.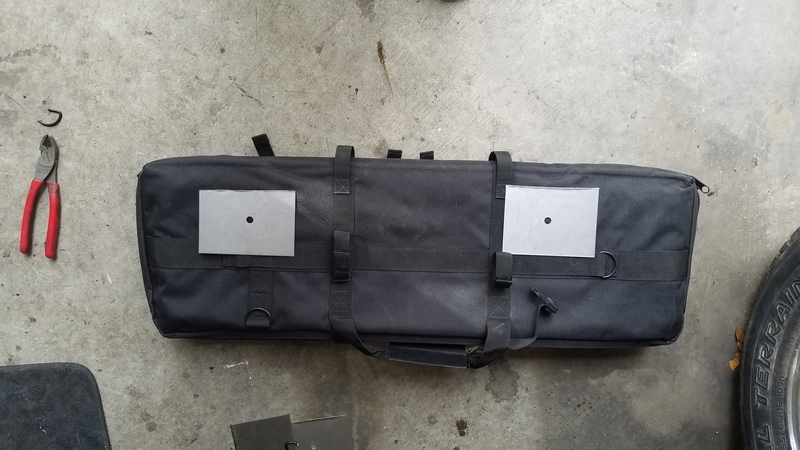

Removing the rear panel was the second worst part of this. I was dreading those stupid little plastic clips. I found that 2 trim removers works best. One to gently pry up the other to find the clip and work it out. This took me almost an hour. My patience paid off. Only one broken clip.
Once it was off I needed something to replace the downward facing handle brackets with something that faced completely forward. So I used a small piece of unistrut. We use it all the time in the fire sprinkler industry. I know it's strong and plentiful at my shop. For those unfamiliar it's basically a grown up version of an erector set. It uses a steel channel with a spring loaded nut that you can position anywhere in the channel. This is a factory pic showing how it works.

Here I have my rough piece screwed in to get my measurements. A comparison with the original bracket.

Here is the measurements mocked up to fit the unistrut through the original holes in the door panel.


Then I realized I screwed up in my brilliant no cut plan. The unistrut channel is wider that the hole was tall. So reluctantly I had to trim the panel to fit. The vertical mount on the left (when looking at the open door) needed far less trimming than the other horizontal mount. I screwed up yet again and only trimmed the lower half of the hole. But that put the panel out of alignment. So I wound up trimming the top too. All in all I took about a 1/4 inch out of the panel using a razor blade. This was the hardest part for me. I wanted a factory look. I wanted to be able to completely reverse this mod if I wanted too. No huge holes. So I'd test fit again and again until it all lined up.


Finally it I got both brackets to fit. Even though the hole is enlarged it's still covered by the factory handle if I ever wanted to go back to that.

After some time on the grinder to smooth the edges and a coat of paint was good to go...or so I thought.

Then vertical bracket needed to be trimmed and shaped to be countersunk in the door frame like the original was. Otherwise the door panel would sit on top of it. Back to the grinder and a dremmel to get this..

The finished products..


Now it was time to mount the bag. I used flat steel sheets on both the back and front to sandwich the bag itself. I didnt bother making these look pretty since the will never bee seen. I might paint them black later. Luckily the bags construction is heavy duty. Even so I want to add two vertical supports to keep the case from dropping while fully loaded since the mounts are so close to the bottom.


The following users liked this post:
clint70 (04-30-2016)

#5
04-30-2016, 06:38 PM
My company buys it in bulk. I believe we get this from Ferguson supply. We also buy from HD supply. I'll do a search and see if I can find some. Also, the unistrut that I used here was the low profile version. I didn't want it sticking out from the door panel too far. If any one needs a chunk or two I can snag some from work.
This set up definitely needs more support. Fully loaded the bag droops too much. I'm going to revise my mounts and post back.
The following users liked this post:
clint70 (05-01-2016)
#6
05-01-2016, 11:27 AM
Rock Crawling
My company buys it in bulk. I believe we get this from Ferguson supply. We also buy from HD supply. I'll do a search and see if I can find some. Also, the unistrut that I used here was the low profile version. I didn't want it sticking out from the door panel too far. If any one needs a chunk or two I can snag some from work.
This set up definitely needs more support. Fully loaded the bag droops too much. I'm going to revise my mounts and post back.
This set up definitely needs more support. Fully loaded the bag droops too much. I'm going to revise my mounts and post back.
 Let me know what I'll owe you... my address I'll PM or email you if you give me contact info.
I'll look for your mod update too. But super excited to get this set up, been looking at similar ones on FJs and Jeeps... nice to build one for the Rover

Cheers!!
#8
05-02-2016, 04:59 PM

Thanks for sharing. I think this is a good idea.
This may be a stupid question, but what is the benefit of using the strut material as standoffs? Why not just bolt through the steel plate from the inside of the bag to the 4 handle bolt holes that are already in the door's sheetmetal?
If you're worried about crushing the door panel, you could use short steel/alum/copper tubes (or even stacked washers) as bushings or spacers.
Last edited by squirt; 05-02-2016 at 05:05 PM.
#9
05-02-2016, 05:59 PM

Thread
Thread Starter
Forum
Replies
Last Post