When you click on links to various merchants on this site and make a purchase, this can result in this site earning a commission. Affiliate programs and affiliations include, but are not limited to, the eBay Partner Network.
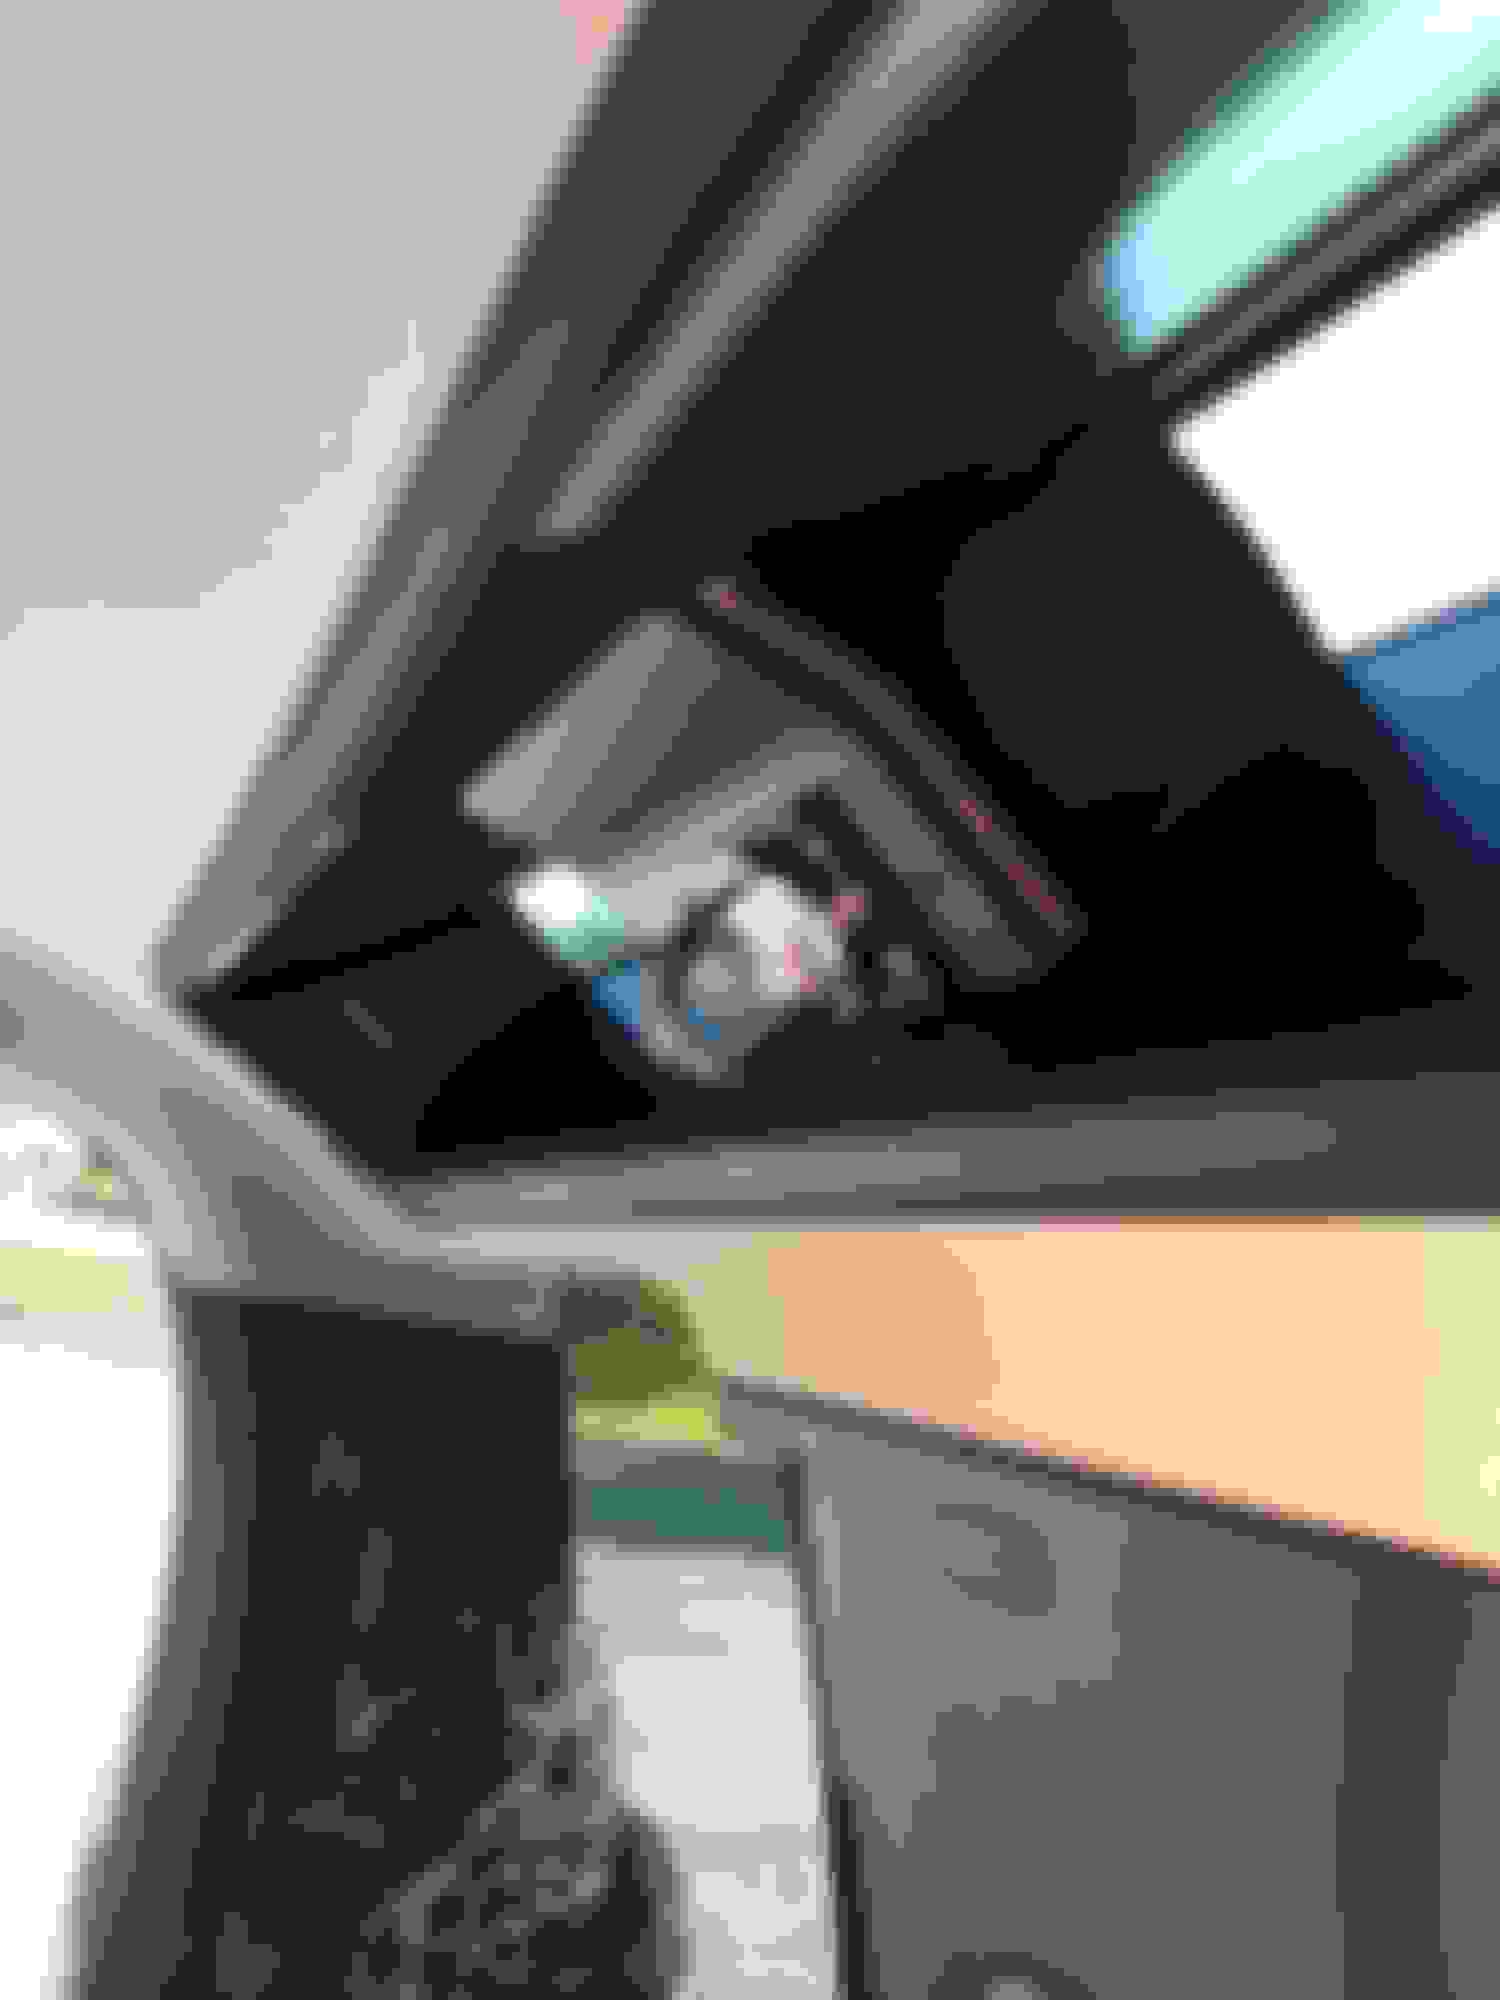
I removed the third row successfully. No fault warnings! It gives a great deal of useable space. I did a video that's pretty rough, so my daughter is going to clean it up before I post it. I made a few mistakes that will be helpful to avoid. I'm currently working on a custom lid for the space so that the deck will still be at the same height as when the seats were folded. I'm also in the process of making a floor to protect the exposed wiring. Here's a peek at the space you have to work with: With 3rd row seats removed.
Check out the Autoplicity guy on YouTube. He removed his 3rd Row seats to install a secondary battery system. Didn't go into too much detail but it's a cool setup
@Carl Dali Can you just quickly note where you would have done things differently / things to avoid when removing the third row? I'm looking at getting this done over the weekend so I can install by aux battery, etc.
Finally managed to get the seat out. The thing that was tripping me up was the foam insert for the jack, it was wedged in there such that it took some serious tugging to get it out.
For future reference, see sheets from the Workshop Manual that detail the removal.
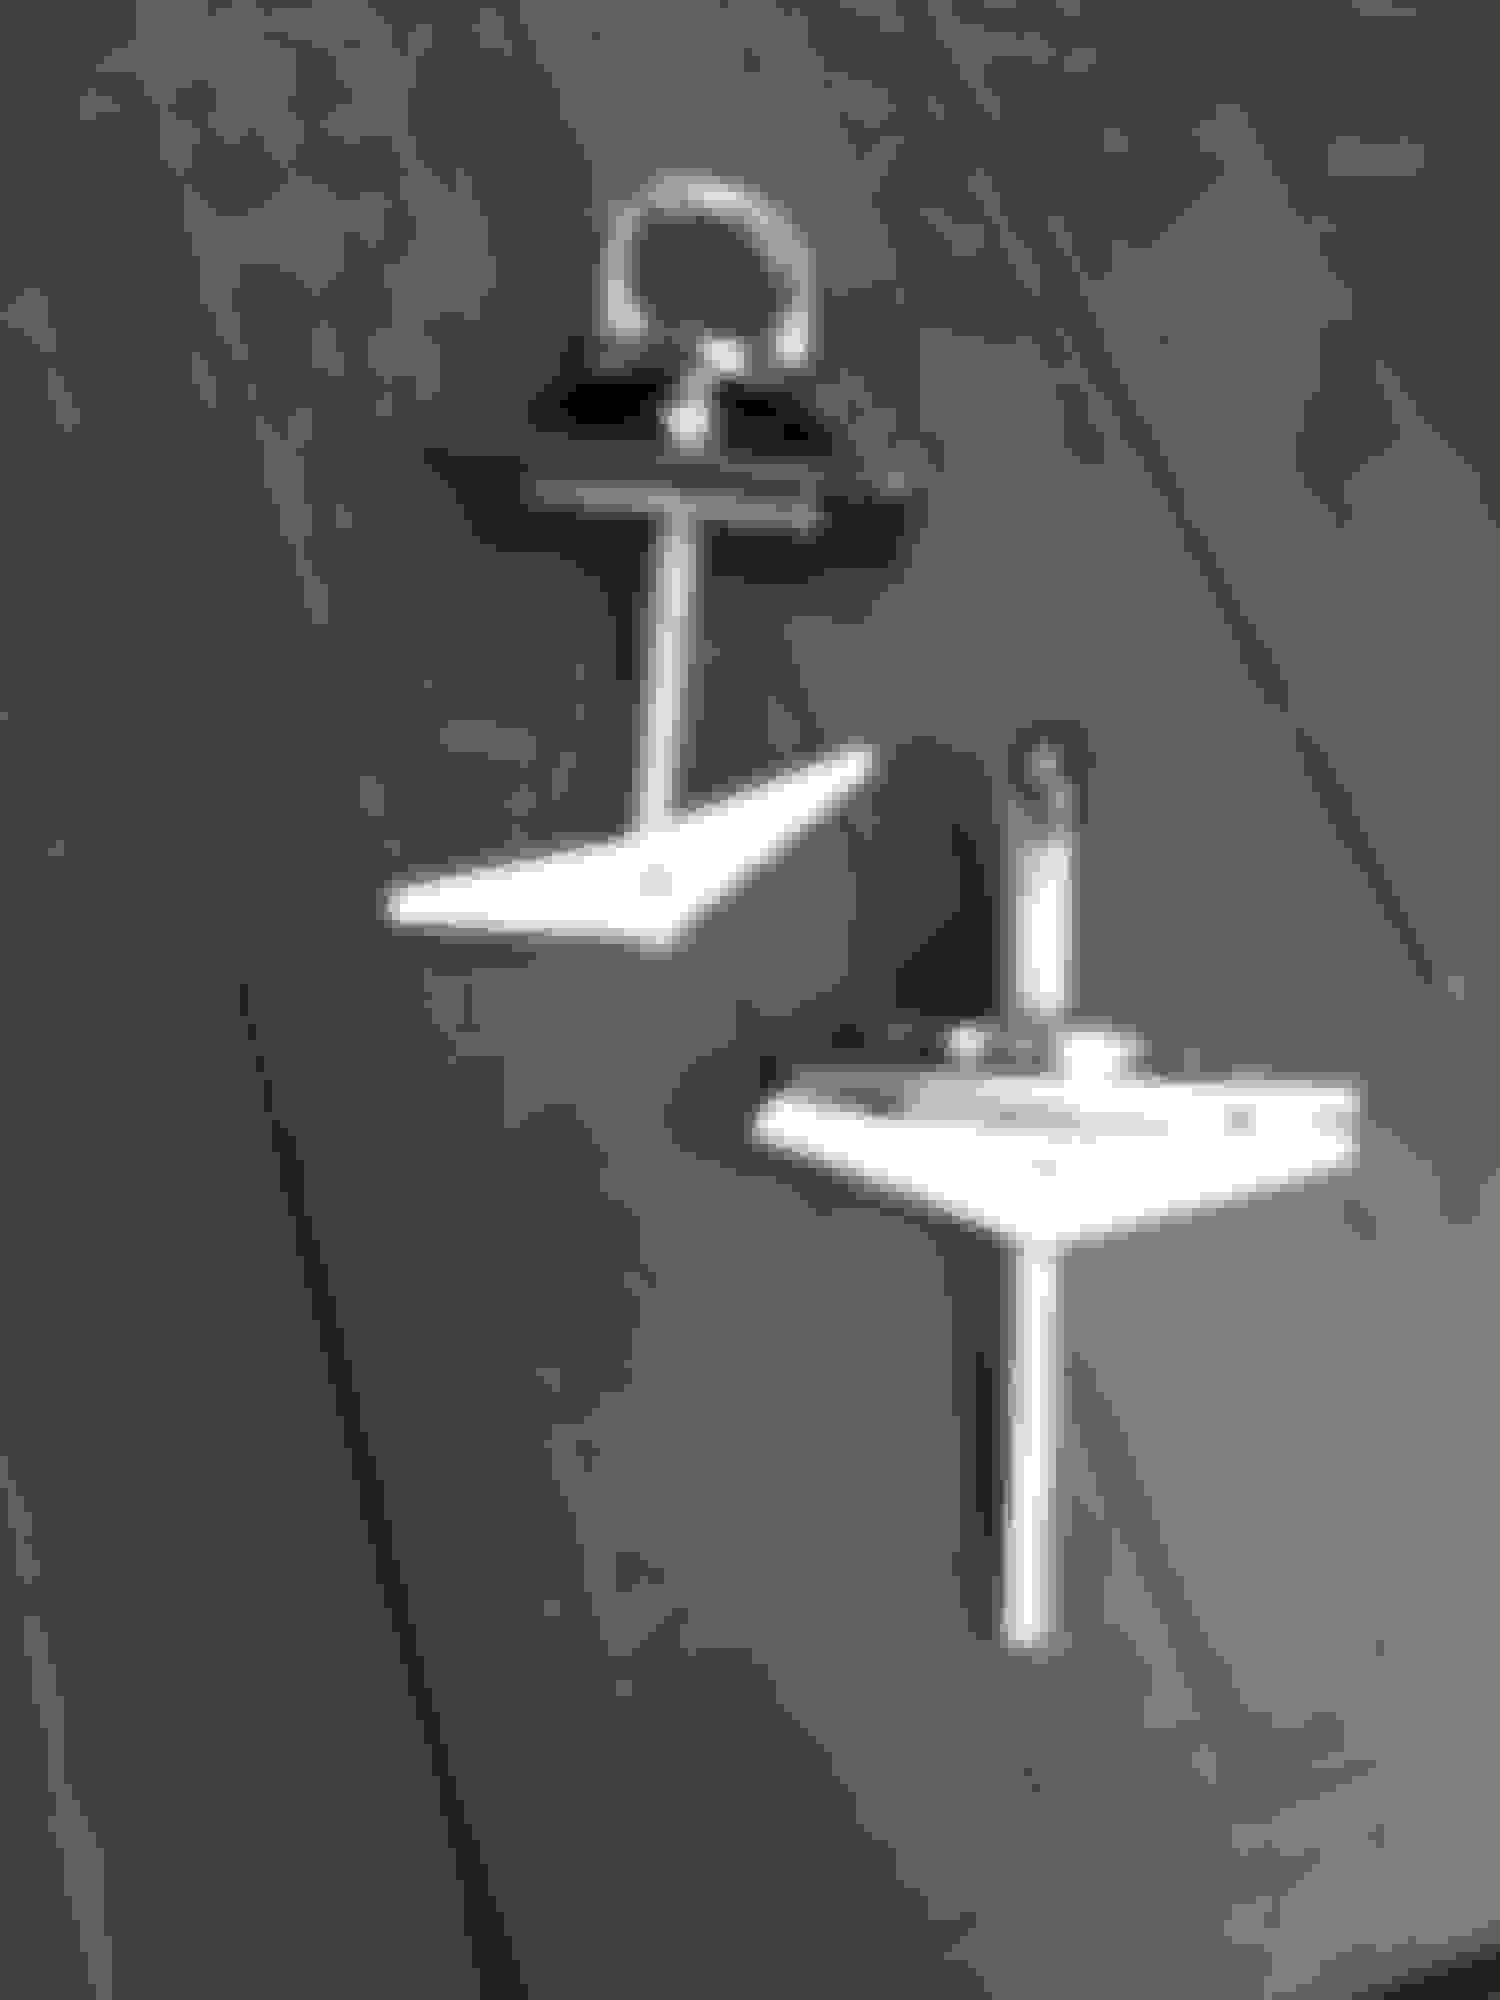
I'll sell my 3rd row, I'm too attached to the space it gave me. Here are some pics of the finished product. Lid is 5/8" plywood with a rubber matting glued on the top side and automotive felt glued on the underside. I added a badge that I got from isaydingdong.com.uk I made a cardboard template as a pattern for my 3/8" plywood floor to cover over the electronic stuff at the bottom of the boot area. To fit the plywood floor into the boot I had to split it in half and reassemble it by screwing into blocks underneath...which actually turned out to be a great way to stabilize it. It is cut so it rests on the perimeter metal at the edges and not on anything underneath. The blocks used at the seam support the middle of the deck perfectly. I also used plywood to create the wall that separates the space from the back seat area. I used 3/4" ply for that since I knew I was going to use a piano hinge for the lid. I slid a piece of 5/8" plywood between the air-conditioning duct and the rubbery material over it so I could firmly secure that back wall with screws. So, here's the finished interior. I boxed out the compressor tank and some of the other exposed mechanicals with plywood and lined it with sound deadening material. It all can be easily unscrewed if necessary for maintenance. I'm currently using a rod to hold the lid open. I haven't been able to find a suitable hinge to handle the load. The ones you see connected to the back really didn't do much. Here's that back wall in what would have been the footwell for those third row seats. This is also another handy storage area. I also wanted to show you the tie-downs that I installed at the factory accessory area at the ceiling. I saw that Simon from Powerfuluk was developing something similar, but these seem to be much better. There was some minor drilling to the opening required because of the size of the toggle, but that factory fitting is backed with metal, so this is an extremely solid installation. I think these were about $12.00 on Amazon. Probably the best bang for the buck in the entire vehicle!


 04-29-2021, 11:33 AM