When you click on links to various merchants on this site and make a purchase, this can result in this site earning a commission. Affiliate programs and affiliations include, but are not limited to, the eBay Partner Network.
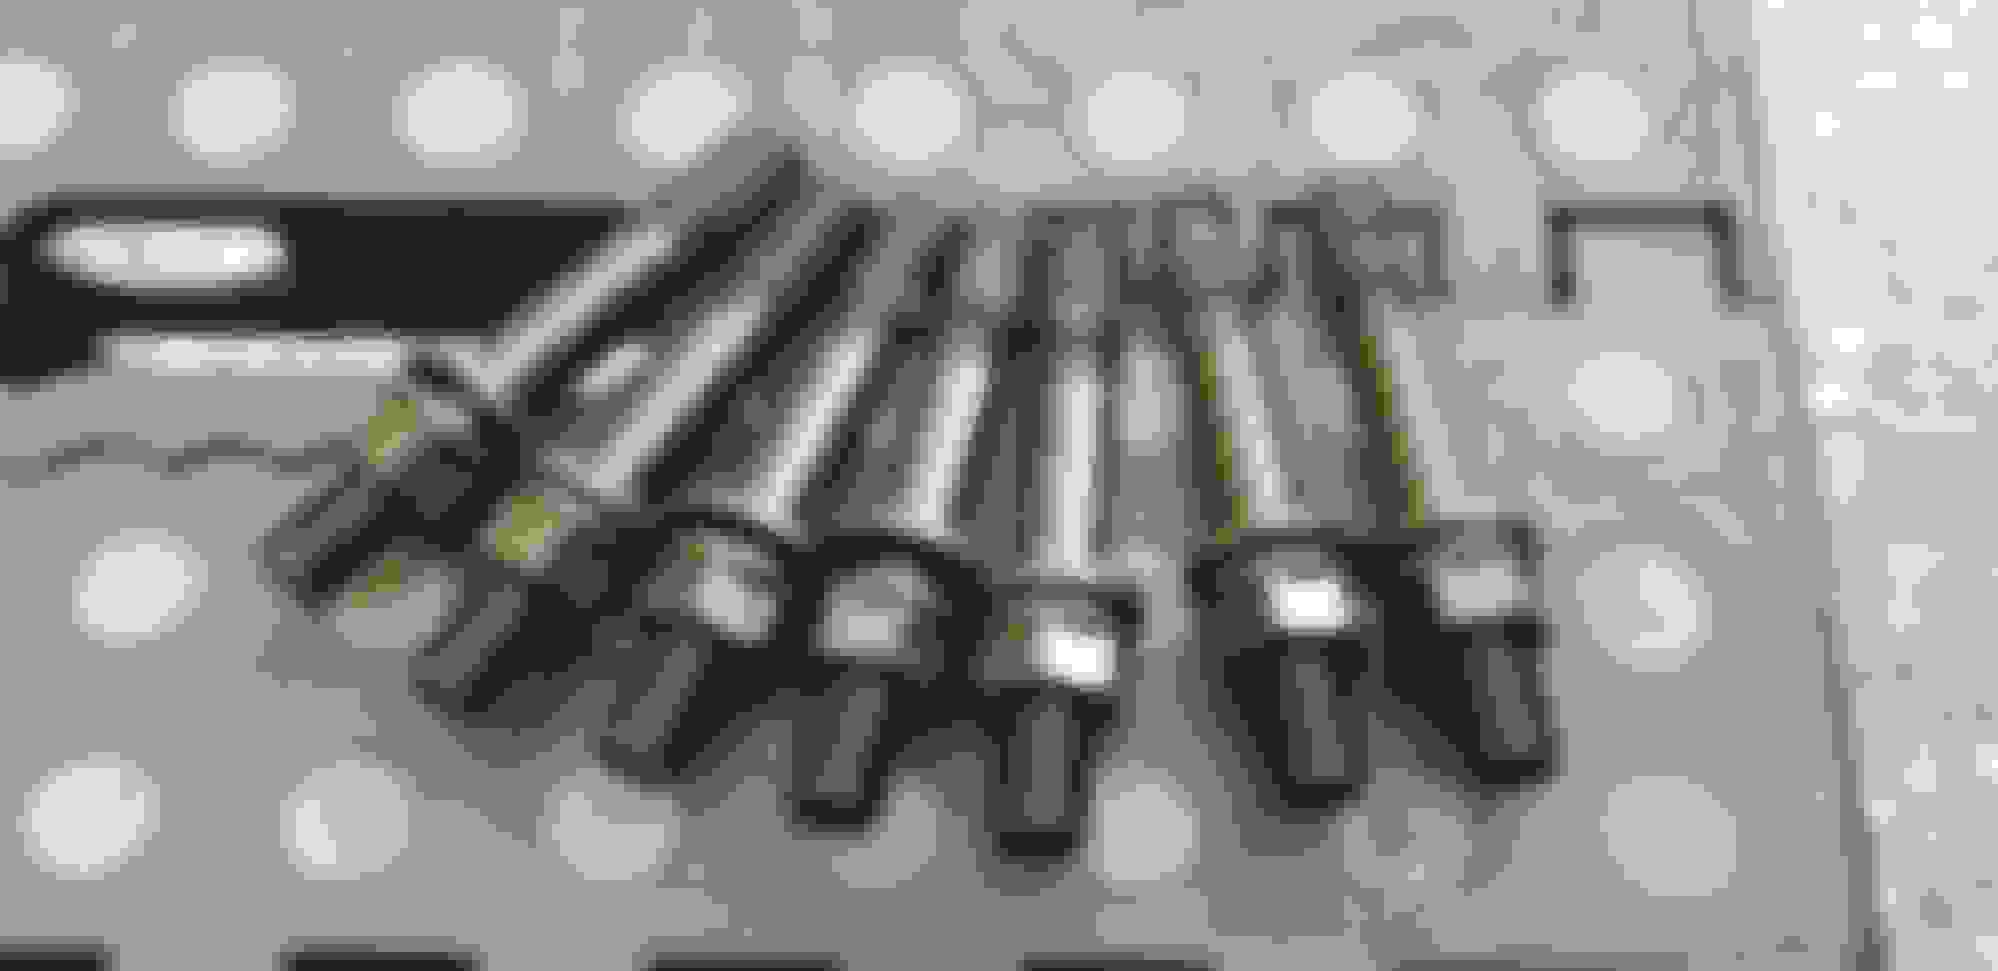
The loose stud ended up eating away the threads inside the block. So I had to remove all the studs and pull the head off. Initially I thought the stud broke but it did not. This occurred while I was doing the final torque to 80 ft lbs. None of the other studs gave me any trouble. In fact i was able to get the passenger side head installed and all the studs torqued to 80 ft lbs with no issues. But I'm at another standstill with the driver side.
The loose stud ended up eating away the threads inside the block.
And now your new best friend is either a Time-Sert or a Big-Sert to fix those boogered threads.
If you haven't used one before there are a ton of good vids on Youtube. It's quite simple IF you follow the instructions.
The kit is around $100 but well worth the money. And I would NEVER waste the time or money with a Helicoil kit for this type of repair.
Good Luck!
This was and continues to be a big job. My first ever head gasket job. I've learned alot. But still soon much to learn and fine tune.
I was unable to get some of the original head bolts off so I hired a mechanic friend with better tools to remove the stubborn bolts. From there I continued with the job. Once the heads were free I pulled them with the manifolds still attached. I cleaned them up and inspected them for cracks. Did not see any cracks or damage. The lifters that I pulled looked flat on the bottom, grant I did not pull every lifter. I examined maybe 4 of them and they all looked flat. Reinserted in their respective homes. Next I cleaned the heads using mild dish soap and simple green. I used a razor blade for removing the remnants of the old gasket material still stuck on the surface. Next I removed the exhaust manifolds, cleaned the mating surface then installed new gaskets and torqued to recommended specs, in circular sequence starting in the middle and working my way outwards. Next I pulled the old plugs and fitted Champion plugs. A dap of dielectric grease on the nipple portion of each plug. Next I cleaned up the block and mating surface. Removed most of the oil and gunk and started reassembly. Along the way I replaced a few o rings and even the water pump and gasket. I also replaced the coil packs with new genuine Bosch coils and blue Magnecore wires. Using dielectric grease on all connecting points. Once everything on the block was reassembled I went on to replace the expansion tank and the radiator. Visually everything is looking pretty good and I've accomplished so much. But now the trouble shooting.
So now that everything is back together here is a summary of what's been going on.
1) a shielded black wire located behind the ac compressor bracket got pinched and consequently had to be repaired. I'm uncertain weather my efforts are sufficient or inadequate. I'm been told that it's a wire for one of the knock sensors. I'm not familiar with knock sensors and how they work.
2) Since the truck has been sitting for roughly 3 weeks with the battery and alternator disconnected the battery eventually lost its juice and consequently I had to hook up some battery cables just to get the lights on again.
3) The water pump was leaking from a tiny hole underneath the pulley bearing. Failure. I replaced the pump with the unit from my Turner block. That pump was newly installed on the Turner block when I got it so plenty of life left. The newer water pump does not appear to be leaking. But i cant say for sure until I start the truck and bleed the cooling system.
4) one of the long bolts that secures the alternator bracket to the block snapped during disassembly. I had that bolt extracted and replaced. During reassembly another bolt snapped in same area.
5) I cant get the truck to start up. The starter kicks on and the fan spins but it's not coming to life at all. I followed Doug from Atlantic British advise and referred to his DIY videos for doing the head gasket job. After reassembly he pulled the fuel pump fuse then proceeded to turn over the key as if to try and start the truck and he kept it like that for 15 seconds. Stopped and let off. Then again for 15 more seconds. I tried that 3 times before reinstalling the fuel pump fuse. I went on to try and turn the key to start the truck again a couple more times but nothing. My mechanic friend suggested I hook up a diagnostic tool and check the live data to see if the rpms is being read by the computer, while trying to turn over the key. Nada. He believes then that the CPS may be the culprit or something relevant to that. The cps is plugged in and again I added dielectric grease to it. The connector is on the bracket where it should be. The ground on the back of the driver side cylinder head is attached to the wall via its respective nut. The ground wires in front of the air box are also connected and cleaned up.
I'm not sure where or how to proceed at this point. Diagnosing is not my strong point at all.
Today I had a mechanic friend take a look at the truck. He said the fuel pump is working but that the computer is not getting any signal to turn on the coils.
I'm going to inspect the crankshaft position sensor as he advised. I replaced it a few months ago. Has worked fine every since. During the head gasket job I used dielectric grease on the cps connector behind the driver side cylinder head then plugged it in and slid it onto the bracket. Not sure if using too much grease would interfere with the operation of the sensor.
1. You would have said if you smelled or saw gas, but I have forgotten to be sure the fuel line is firmly attached (right between the coils). It does take a LONG time--lots of cranking--to get the fuel pressurized and to the cylinders.
2. Be sure to push the big button on the firewall, passenger side (inertia switch). If it clicks when you push it that was probably the issue.
3. Check crank sensor and, as you said, and connector. Be sure you haven't pinched the wires somewhere on reassembly. I have never used dilectric grease on the connector (but I a not saying it is wrong to do so).


 08-28-2019, 08:24 AM