
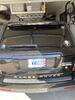
replacing brake pads
#1
 05-10-2011, 04:44 PM


#2
05-10-2011, 04:55 PM

Baja
Join Date: Mar 2010
Location: Pittsburgh PA suburbs.
Posts: 5,584
Likes: 0
Received 7 Likes
on
7 Posts
What about your wheel Bearings? When were they last greeased? It's a good thing to be prepared to do them when you do the pads.
If you are only doing the pads, you may not need to, but if you are pulling the rotors, you will be removing the hubs and need to have all the stuff on hand for the wheel bearings.
It is all in the RAVE, I would suggest you get totally familar with it in advance. It is unlike any other vehicle I am familar with, don't know about your experience though.
#3
05-10-2011, 05:02 PM
your right, I should be doing wheel bearing greese job If I was smart. I dont have a hub socket to fit this truck, I usually use a chisel and a hammer to get hub socket off, is that even possible on a disco?. I just always wonder if I'm tightening the bearings to much or to little whenever I re-assemble, but past experience shows that I must be doing it right.
#4
05-11-2011, 08:58 AM
Yes, you can get away with a chissel and hammer, or in my case the first time I did them, a large flat-head and hammer. But, like you said, it's a little hard to judge tighness with that method.If you do go with just pads, you do need a specialty tool called needle nose pliers. Just kidding, but seriously, thats it. I can swap pads faster than I can remove and install the wheel. Once the retaining pins are removed, remove only 1 pad. Clean the pistons. Press them into the bores with a small pry bar, large flat-head, whatever fits and works. Put new pad in there and do the 2nd pad the same way. No need to remove the caliper.
BTW, I'm sure you already knew, but crack the bleeder screws open or remove the resivoir cap from the master when compressing the pistons.
BTW, I'm sure you already knew, but crack the bleeder screws open or remove the resivoir cap from the master when compressing the pistons.
Last edited by kenk; 05-11-2011 at 09:03 AM.
#5
05-11-2011, 10:30 AM
Baja
Join Date: Mar 2010
Location: Pittsburgh PA suburbs.
Posts: 5,584
Likes: 0
Received 7 Likes
on
7 Posts
Trevor at RovahFarms has the hub socket for less than 10 bucks, I paid 20 or so from RoversNorth.
Mine had terrible corrosion such that I had to replace the rear calipers, rotors were shot, mounting hardware was so bad I had to go thru a terrible time with the left rear caliper, so I went with the Proline calipers and rotor pad set from RN as well as all new mounting hardware, new mounting kit that has the springs and pins and such. It went back together really well, has held up great and should be much easier next time around. I may throw in the ceramic pads like Disco Mike mentioned now that everything else is right.
One note on the wheel bearings, a buddy with a 95 DI had his weld itself to the stub axle while driving down to the MAR last year. Luckily for him, he was in a convoy of Land Rover Owners from FPLRG and they had spare wheel bearings, all the necessary tools and the knowledge needed top fix it on the side of I-95 southbound at midnight on Thursday. He stood back and watched as the Club President, the Club Sage and the rest of the group tore it down, assessed the situation and completed the repair to his absolute amazement.
The next night he treated them all to a steak dinner and all the beer they could swill.
He was one lucky camper.
#6
05-11-2011, 12:20 PM

Trevor at RovahFarms has the hub socket for less than 10 bucks, I paid 20 or so from RoversNorth.
Mine had terrible corrosion such that I had to replace the rear calipers, rotors were shot, mounting hardware was so bad I had to go thru a terrible time with the left rear caliper, so I went with the Proline calipers and rotor pad set from RN as well as all new mounting hardware, new mounting kit that has the springs and pins and such. It went back together really well, has held up great and should be much easier next time around. I may throw in the ceramic pads like Disco Mike mentioned now that everything else is right.
One note on the wheel bearings, a buddy with a 95 DI had his weld itself to the stub axle while driving down to the MAR last year. Luckily for him, he was in a convoy of Land Rover Owners from FPLRG and they had spare wheel bearings, all the necessary tools and the knowledge needed top fix it on the side of I-95 southbound at midnight on Thursday. He stood back and watched as the Club President, the Club Sage and the rest of the group tore it down, assessed the situation and completed the repair to his absolute amazement.
The next night he treated them all to a steak dinner and all the beer they could swill.
He was one lucky camper.
Mine had terrible corrosion such that I had to replace the rear calipers, rotors were shot, mounting hardware was so bad I had to go thru a terrible time with the left rear caliper, so I went with the Proline calipers and rotor pad set from RN as well as all new mounting hardware, new mounting kit that has the springs and pins and such. It went back together really well, has held up great and should be much easier next time around. I may throw in the ceramic pads like Disco Mike mentioned now that everything else is right.
One note on the wheel bearings, a buddy with a 95 DI had his weld itself to the stub axle while driving down to the MAR last year. Luckily for him, he was in a convoy of Land Rover Owners from FPLRG and they had spare wheel bearings, all the necessary tools and the knowledge needed top fix it on the side of I-95 southbound at midnight on Thursday. He stood back and watched as the Club President, the Club Sage and the rest of the group tore it down, assessed the situation and completed the repair to his absolute amazement.
The next night he treated them all to a steak dinner and all the beer they could swill.
He was one lucky camper.
#7
05-11-2011, 01:07 PM
Yes, you can get away with a chissel and hammer, or in my case the first time I did them, a large flat-head and hammer. But, like you said, it's a little hard to judge tighness with that method.If you do go with just pads, you do need a specialty tool called needle nose pliers. Just kidding, but seriously, thats it. I can swap pads faster than I can remove and install the wheel. Once the retaining pins are removed, remove only 1 pad. Clean the pistons. Press them into the bores with a small pry bar, large flat-head, whatever fits and works. Put new pad in there and do the 2nd pad the same way. No need to remove the caliper.
BTW, I'm sure you already knew, but crack the bleeder screws open or remove the resivoir cap from the master when compressing the pistons.
BTW, I'm sure you already knew, but crack the bleeder screws open or remove the resivoir cap from the master when compressing the pistons.
#8
05-11-2011, 02:51 PM
Winching
Trevor at RovahFarms has the hub socket for less than 10 bucks, I paid 20 or so from RoversNorth.
Mine had terrible corrosion such that I had to replace the rear calipers, rotors were shot, mounting hardware was so bad I had to go thru a terrible time with the left rear caliper, so I went with the Proline calipers and rotor pad set from RN as well as all new mounting hardware, new mounting kit that has the springs and pins and such. It went back together really well, has held up great and should be much easier next time around. I may throw in the ceramic pads like Disco Mike mentioned now that everything else is right.
One note on the wheel bearings, a buddy with a 95 DI had his weld itself to the stub axle while driving down to the MAR last year. Luckily for him, he was in a convoy of Land Rover Owners from FPLRG and they had spare wheel bearings, all the necessary tools and the knowledge needed top fix it on the side of I-95 southbound at midnight on Thursday. He stood back and watched as the Club President, the Club Sage and the rest of the group tore it down, assessed the situation and completed the repair to his absolute amazement.
The next night he treated them all to a steak dinner and all the beer they could swill.
He was one lucky camper.
Mine had terrible corrosion such that I had to replace the rear calipers, rotors were shot, mounting hardware was so bad I had to go thru a terrible time with the left rear caliper, so I went with the Proline calipers and rotor pad set from RN as well as all new mounting hardware, new mounting kit that has the springs and pins and such. It went back together really well, has held up great and should be much easier next time around. I may throw in the ceramic pads like Disco Mike mentioned now that everything else is right.
One note on the wheel bearings, a buddy with a 95 DI had his weld itself to the stub axle while driving down to the MAR last year. Luckily for him, he was in a convoy of Land Rover Owners from FPLRG and they had spare wheel bearings, all the necessary tools and the knowledge needed top fix it on the side of I-95 southbound at midnight on Thursday. He stood back and watched as the Club President, the Club Sage and the rest of the group tore it down, assessed the situation and completed the repair to his absolute amazement.
The next night he treated them all to a steak dinner and all the beer they could swill.
He was one lucky camper.
#9
05-12-2011, 10:35 AM
Holy crap that took all of 35 minutes to do!!........EASIEST brake job ever. Seriously a flat head and some needle nose pliers is all you need. My pads were damn near gone, glad I chaged when I did. I'm gonna order some new bearing s and the gaskets this week and do my wheel bearing in a couple weeks. But WOW, that was so simple, I even questioned myself because it was just to simple.
#10
05-12-2011, 04:19 PM
Baja
Join Date: Mar 2010
Location: Pittsburgh PA suburbs.
Posts: 5,584
Likes: 0
Received 7 Likes
on
7 Posts
Go to this link:
YouTube - PhilSheredan's Channel
He has multiple clips on various LR tasks well documented.
YouTube - PhilSheredan's Channel
He has multiple clips on various LR tasks well documented.