When you click on links to various merchants on this site and make a purchase, this can result in this site earning a commission. Affiliate programs and affiliations include, but are not limited to, the eBay Partner Network.
For the last few months my driver’s side window of (front left) has been randomly not functioning. Each day I get in my truck, it’s a roll of the dice whether my window will work. Most of the time - no. Especially in these colder months.
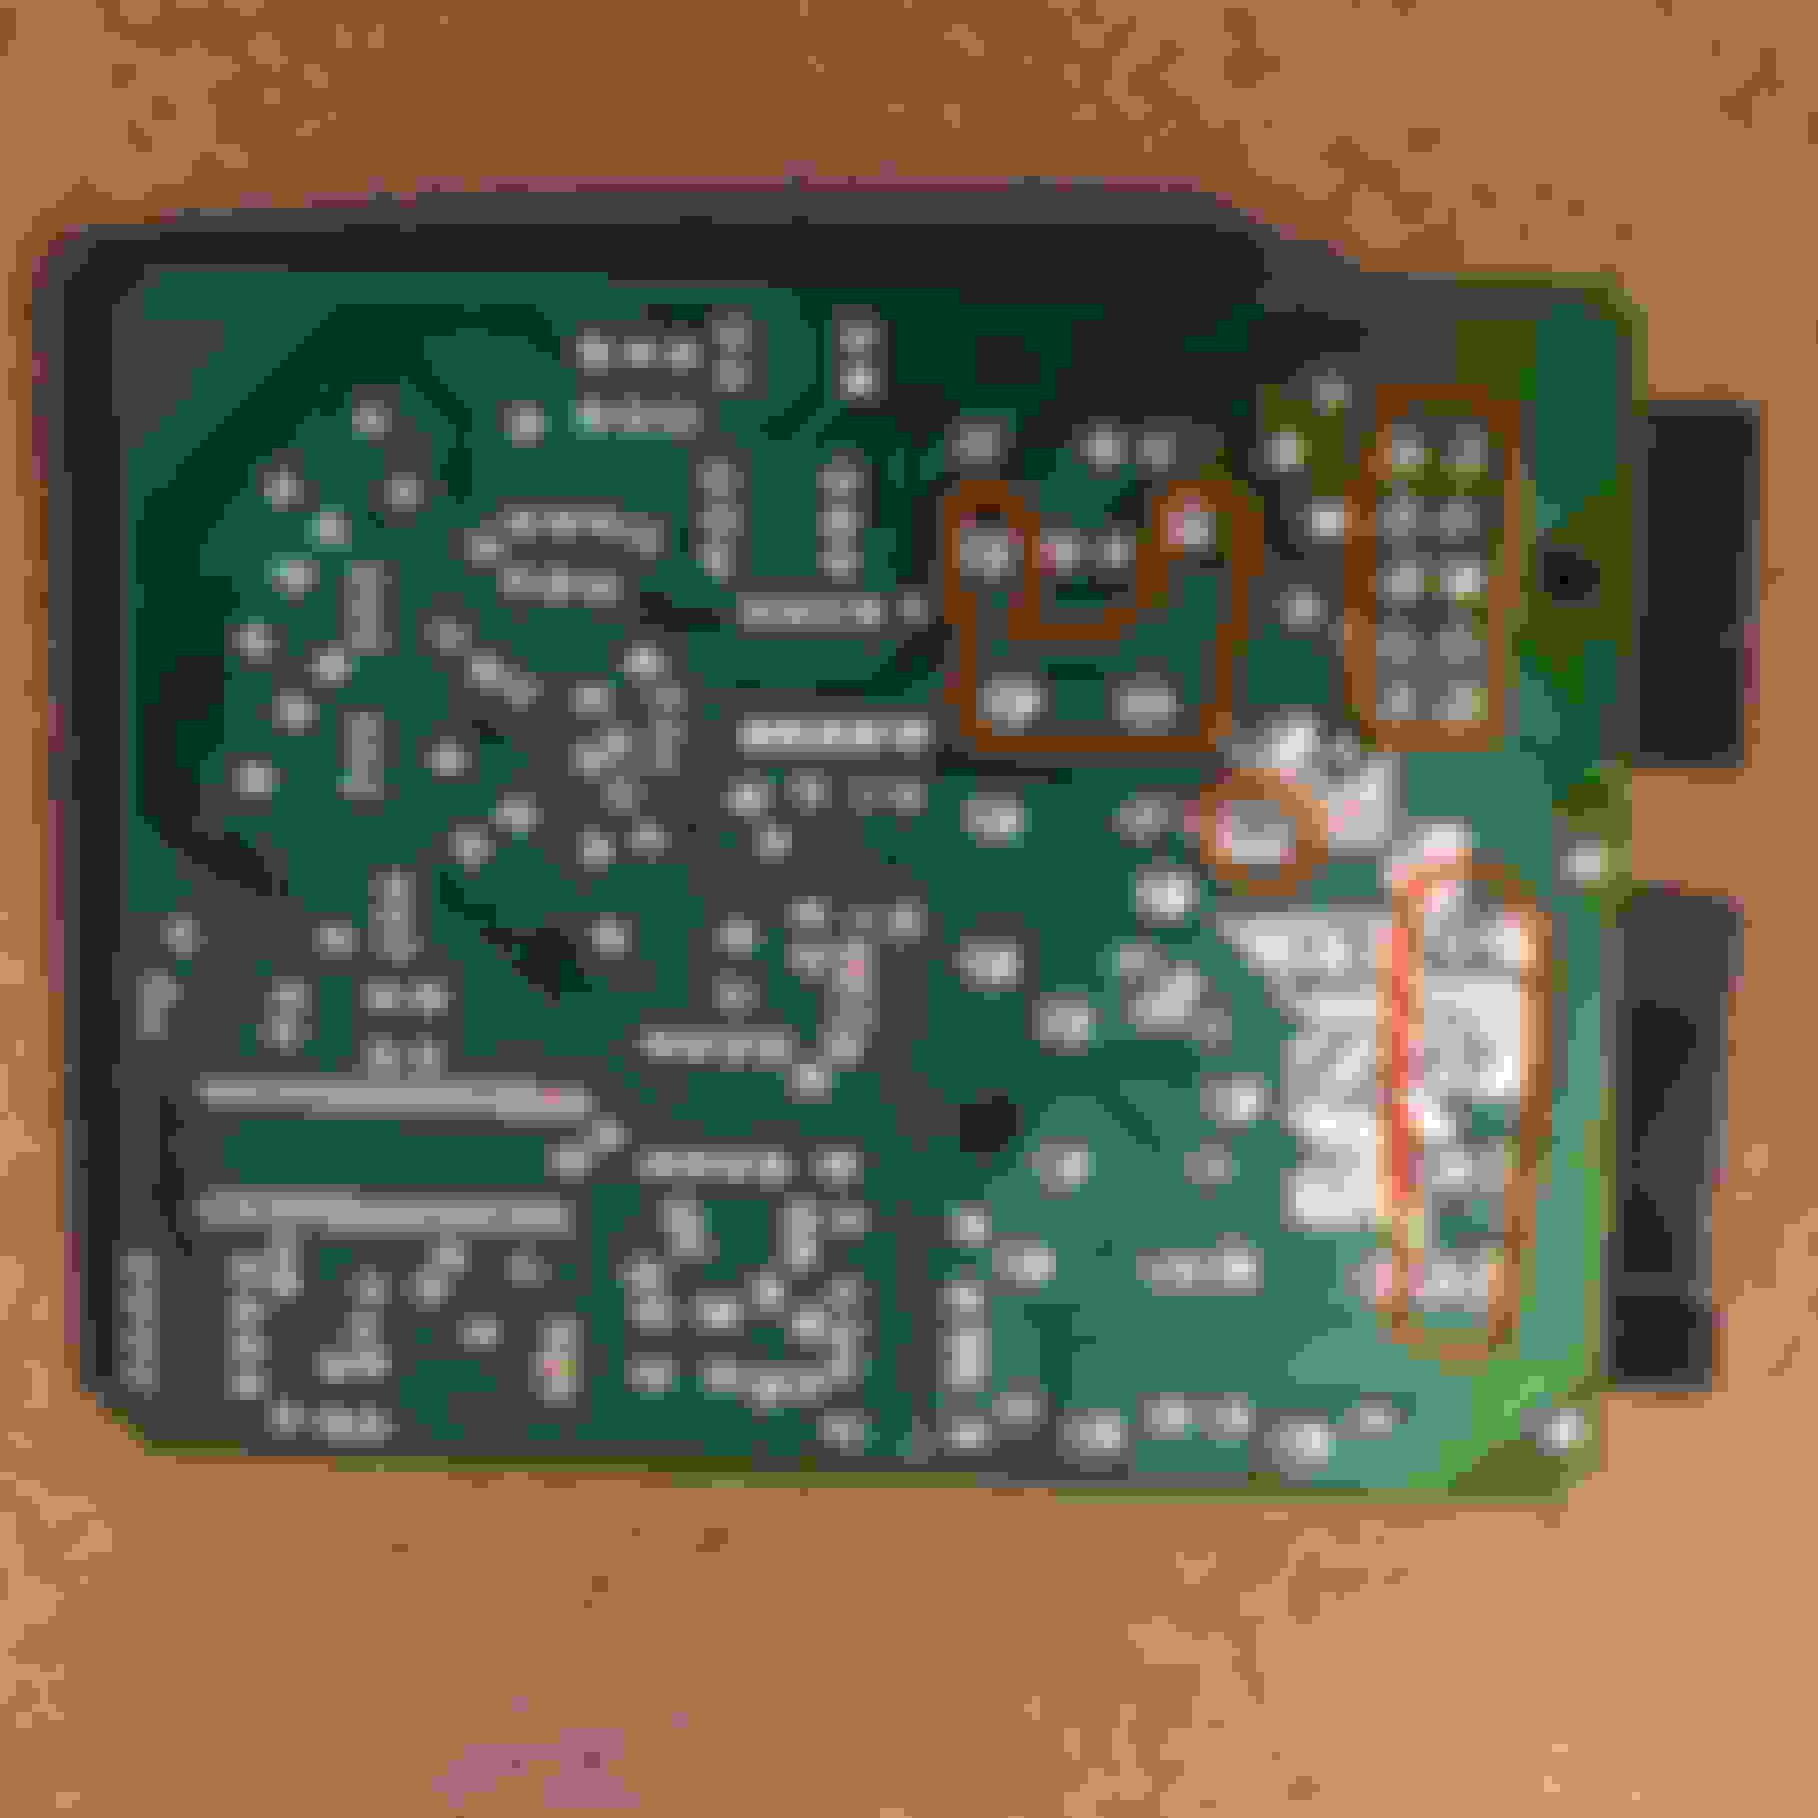
This weekend I took action and removed the window control module from my under the glovebox and re-soldered one of the joints that typically cracks for most people’s discos (it was bad on mine too).
Great video on this: https://youtu.be/kt6odNB3c8s
After reinstalling the module, the only window that would work is my passenger’s side!
This was the case for 3 days, until today when I decided start the truck and probe the plugs going to the window ECU my test light. On this run of my disco (it’s a ‘97) ALL window were functioning!
This tells me all 4 window motors and regulators are fine.
BUT why would my driver’s window and rear windows be simultaneously malfunctioning while the two window fuses beneath the steering wheel are only dedicated to front (30amp fuse) and another (30 amp fuse) for rear. Something mysterious is going on at the control module (ECU), or somewhere else in the wiring. Are there places that typically get moisture and start shorting?
Well, in the photo, there are two others towards the left that need to be fixed too. I can see the ring around the wires even in the photo. Is that your circuit board?
This failure is caused by too thin application of the original solder, that fails by heat and vibration. The electrical current causes a ring to form a slight connection or open circuit. So, many points could use a touch up. I need a magnifying glass to check them.
So, I took the board out once more. Come to find out there were PLENTY of other cracked solder joints that I missed due them being less obvious. Windows all work now. I’ve circled the the bad joint clusters in this picture:
Most of the problem joints were from the incoming pins from the 2 plugs.
Make sure your board is oriented correctly when putting it back in the its housing. The box has a little divider thats slots between parts of the board, making the tricky job of maneuvering it back in without breaking it even more of a task.
Also, my windows switches on the center console had badly burnt plugs that I sanded off with 2000 grit sandpaper. So maybe that cured something as well 🤷♂️
Pick up a spare board and go through it. next time a window quits, slide in the spare and fix the one that doesn't work, put it on the shelf for next time.
Thanks for the info. My Disco has these issues too every once in a while. I'm going to take a look one of these days.
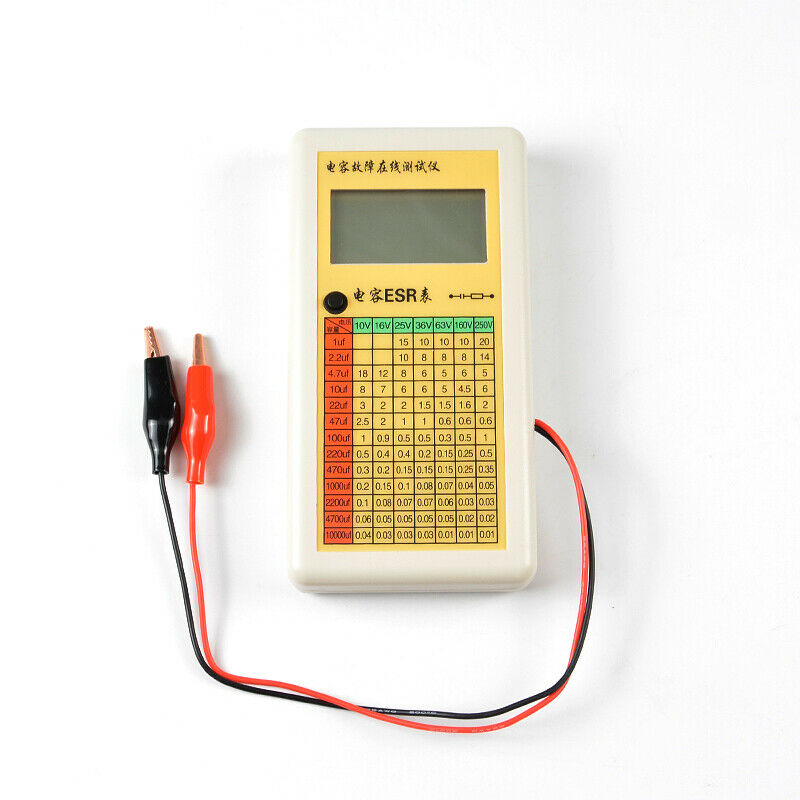
If your re-solder job didn't resolve your issue, Check the electrolytic capacitors with an ESR meter (not multimeter). One like this (link below) is probably a good inexpensive tester. You compare the ESR value to the chart on the meter ..and it should not exceed that value. Pretty simple.
Capacitors' ESR can be tested in-circuit which is nice ...but best to de-solder one leg or remove and re-test if it appeared out of spec on an in-circuit test. Honestly, I've used my ESR meter so much over the last 20 years, it's saved my hide on numerous persnickety electronic issues. Good item to have in the toolbox. They used to run about a couple hundred bucks for a good one, but now there are a lot of affordable units available (from China). If you're a DIY guy and want to sort out simple electronic issues, they're a must have ..next to a multi-meter. Sometimes its good to have a big bag of misc capacitors of like 900 ...for like $10 ...to have around bc a guy can usually find what ya need in such an assortment (ebay). Or buy as you go. Esp nice if you have an electronics store in your area (use used to but they closed).
Film-type capacitors eventually corrode too ...although usually not as problematic as electrolytic capacitors. There are good videos on youtube how to check these. The first thing guys who restore vintage electronic's do is replace are the capacitors, diodes & resistors. Because they commonly go out of spec. Anyway, consider looking at the capacitors and see if it helps resolve your issue, if there are diodes, check them for leakage. Lastly, you might also touch all of the solder joints on your board too and re-flow them, although they don't look too bad from the picture. Sometimes it's easy to miss a pesky cold joint.
 01-04-2022, 07:17 PM


 .
.