
Disco 2 Questons


Thread Starter
|
7th Gear
Joined: Sep 2012
Posts: 7
Likes: 0
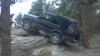
Got a buddy with an 01 D2, that's about to purchase a full OME lift and has 265/75/16 BFG KOs that are about to be put on. I own an Toyota FJC and was talking about sliders with him. Can anyone recommend some sliders for him? Price is a big issue so that'll have to be factored in. Saw the sliders on tactical rover, but damn those seem expensive. I'm located in Orange County, California. Anyone around here fab their own? He's got two OEM lights on the chrome OEM brush guard, but doesn't know how to turn them on. Can anyone help out here? Anyone plastidipped that thing? I can't stand chrome. What are some cheap ways to set up a CB? He doesn't have a roof rack.
Sorry for the cluster**** of questions. Thanks.
Sorry for the cluster**** of questions. Thanks.
Last edited by NPB; Sep 28, 2012 at 12:58 AM.

Recovery Vehicle
Joined: Sep 2009
Posts: 1,135
Likes: 14
From: Roanoke Valley, VA
He should have a switch in the column of switches to the left of the speedometer cluster that controls the front lights in the brush bar. It is the bottom one with the "2' on it, if it is factory. If they are like mine, they come on when they want to once I push the button. The button will have an orange light in the center to indicate they are on.
In regard to CB install, there are lots of post on multiple forums and you can Google " land rover discovery CB install" and get lots of information. Basically most folks mount the antenna to the tire carrier if they do not have a roof rack or do not care to mount it on the roof. Some also mount it to or near the rear bumper depending on the mount they make or can find to get it secure to something metal. They run the antenna cable through the hole where the wiper washer tubing goes. That hole has to be me made a little larger and maybe another grommet used to seal it. The cable then goes in the door and over toward the hinges and through the large cable conduit that contains the electrically wires to the rear door. Then run it down the side under the carpet and cross over at some point to the driver side under the front seats, or some folks just cross it over in the cargo area and then run it down the drivers side under the carpet up to the driver seat area. Some mount it on the dash, some on the passenger side of the center console, and some in the upper console if they do not have sunroofs where the sunroof controls would go, and I have seen some mounted behind the center console facing the roof.
In regard to sliders, there are some plans that I have seen around that a lot of guys have used to make their own if they have access to welders. Used ones are always a good route to go, but you have to wait and watch for them, and it seems they will always be on the wrong coast when you find some used ones you would like to grab for a good price.
Here are a few links that will give you some information on these topics.
Fog Light Switch is in this link, with a nice chrome factory A-Bar/Bull Bar to make you feel like it is what you are working on LOL! I have the same chrome A-Bar.
http://www.discovery2.co.uk/spots.html
Last edited by Rover_Hokie; Sep 27, 2012 at 12:41 AM.
Recovery Vehicle
Joined: Sep 2009
Posts: 1,135
Likes: 14
From: Roanoke Valley, VA
CB Install Links
http://www.discovery2.co.uk/cbradio.html
https://landroverforums.com/forum/di...cations-47907/
Land Rover Discover Complete CB System CB Radios, Stryker Radios, CB Radio Antennas and Accessories - Experienced CB Technicians at WalcottCB.com
Land Rover Discovery
And a Video link which is always more fun and this one is in 3 parts with a right hand drive Discovery I, so it will be close, but not exact.
Last edited by Rover_Hokie; Sep 27, 2012 at 12:54 AM.

Thread Starter
|
7th Gear
Joined: Sep 2012
Posts: 7
Likes: 0
Thanks for the responses! Are there any companies that produce the metal mount for the rear tire carrier? I have neither the tools nor skills to produce the part. Are runs and meet n greets posted on this forum or is there a more specific southern California that would be better for those things? Lastly, are there certain sliders/companies to steer clear from? What are some of the more preferable ones?
Rock Crawling
Joined: Aug 2011
Posts: 295
Likes: 1
From: Denver, CO
Thanks for the responses! Are there any companies that produce the metal mount for the rear tire carrier? I have neither the tools nor skills to produce the part. Are runs and meet n greets posted on this forum or is there a more specific southern California that would be better for those things? Lastly, are there certain sliders/companies to steer clear from? What are some of the more preferable ones?
As for the rear tire carrier you can flip it around to fit up to a 33" tire.
Pull the rear door trim...remove the 6 bolts....flip...and re-install bolts (only 4 will line up correctly with the holes, you can drill out the other two or just go with the 4....there are plenty of people that only have 4 and i haven't heard any horror stories...)
Thread Starter
|
7th Gear
Joined: Sep 2012
Posts: 7
Likes: 0
RTE are probably the most preferred and are super strong...probably over-kill (have them on mine and there are 16 bolts that hold on each side.......fun install....) Tactical rovers does quality work but most sets are going to be $600+...I believe there are some diagrams floating around that you could give to a fab shop. PM discoMike, i think he has a set.
As for the rear tire carrier you can flip it around to fit up to a 33" tire.
Pull the rear door trim...remove the 6 bolts....flip...and re-install bolts (only 4 will line up correctly with the holes, you can drill out the other two or just go with the 4....there are plenty of people that only have 4 and i haven't heard any horror stories...)
Regarding the lights, we got one of them working today. It only works once the light in the switch is on, but once the light in the switch is out the light goes out. It only stays on for a few seconds. Bad ground? Help, please?!

Rock Crawling
Joined: Aug 2011
Posts: 295
Likes: 1
From: Denver, CO
Remove wiper nut (under plastic trim piece)
Set wiper aside (careful the water line is still connected to it)
Remove interior panel...there are push pins all the way around the edge...(use a couple of screw drivers and try to pop them out applying equal pressure to each side) Some are going to break...you should end up with enough good ones to put it back on though...lost 3 or 4 when i did mine...no biggie
Unscrew the 6 nuts and bolts on the carrier
Flip Carrier
Re-install the 4 bolts that will line up (top and bottom) drill out the middle two if you feel so inclined
put the interior panel back on
the wiper will now need to be angled slightly so that it doesnt hit the carrier. You can notch out the metal on the carrier or just angle it up...doesnt effect the performance...just have it swing a few times so you have it where you want it.
30 min job
Take a look at the wiring on the lights...odd only one lit up but might be a bulb...not sure why it would be intermittent...