Farmtec chicken coop roof rack flooring Installed tonight - PICS


Thread Starter
|
Winching
Joined: Feb 2009
Posts: 513
Likes: 3
From: Pine Barrens, NJ
So I got my flooring and lights mounted on my Safety Devices rack tonight. I was hoping that my stock switches I ordered from John @ EE would be here today but they were not so the lights will have to wait a few days before they get wired.
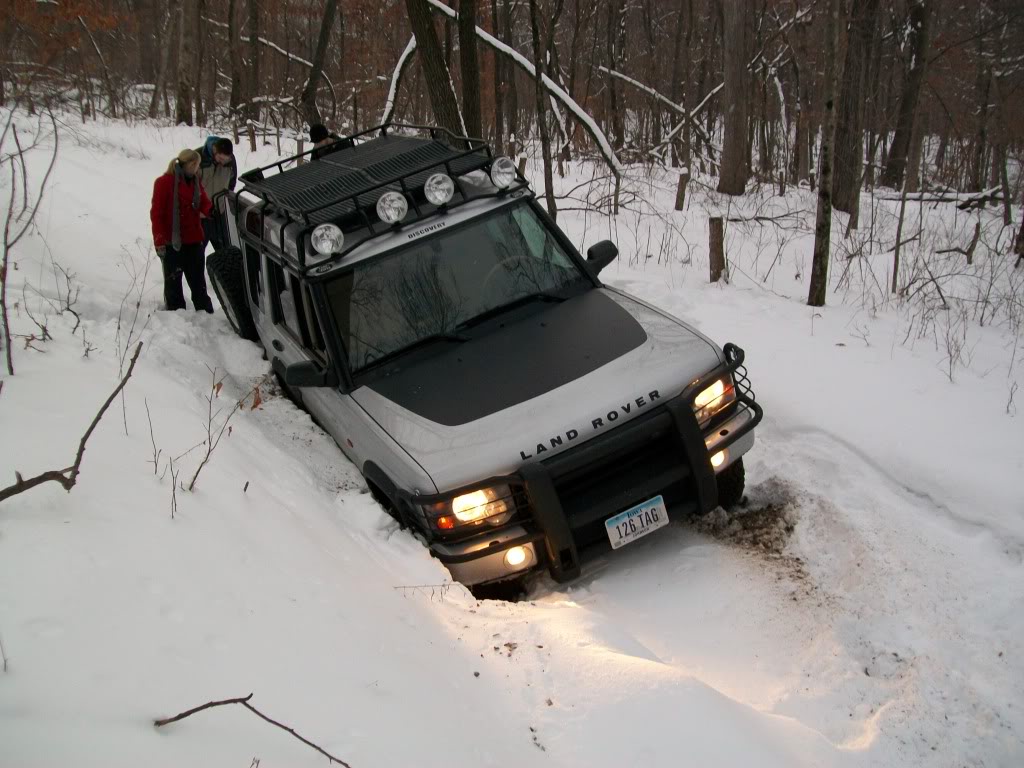
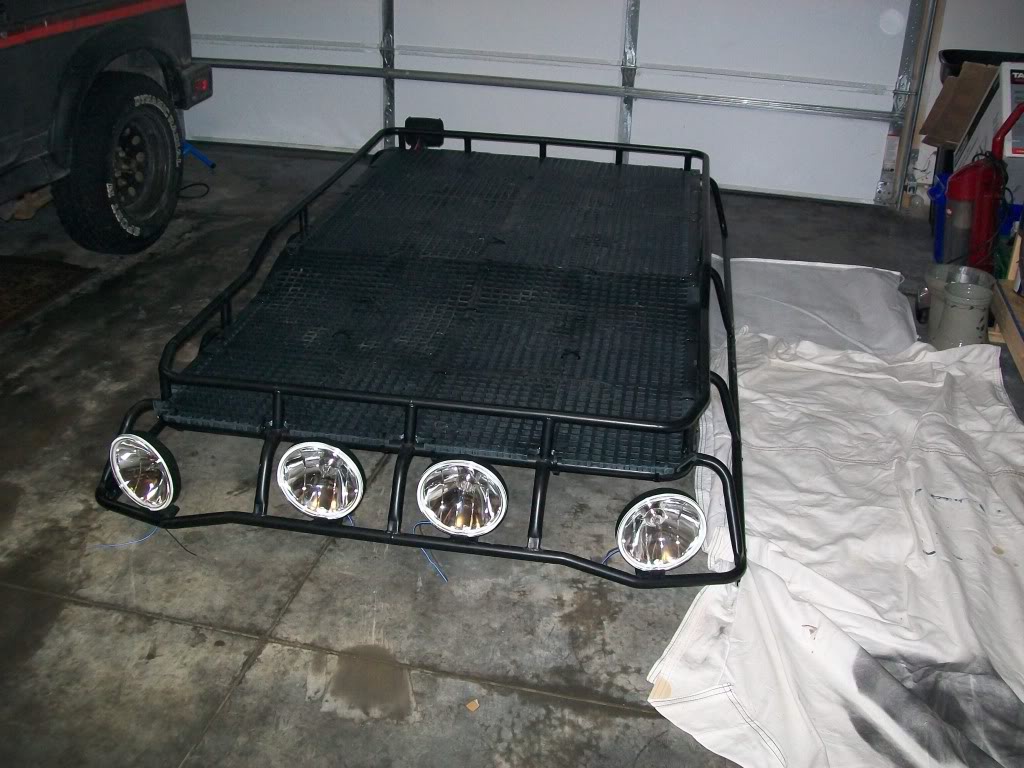
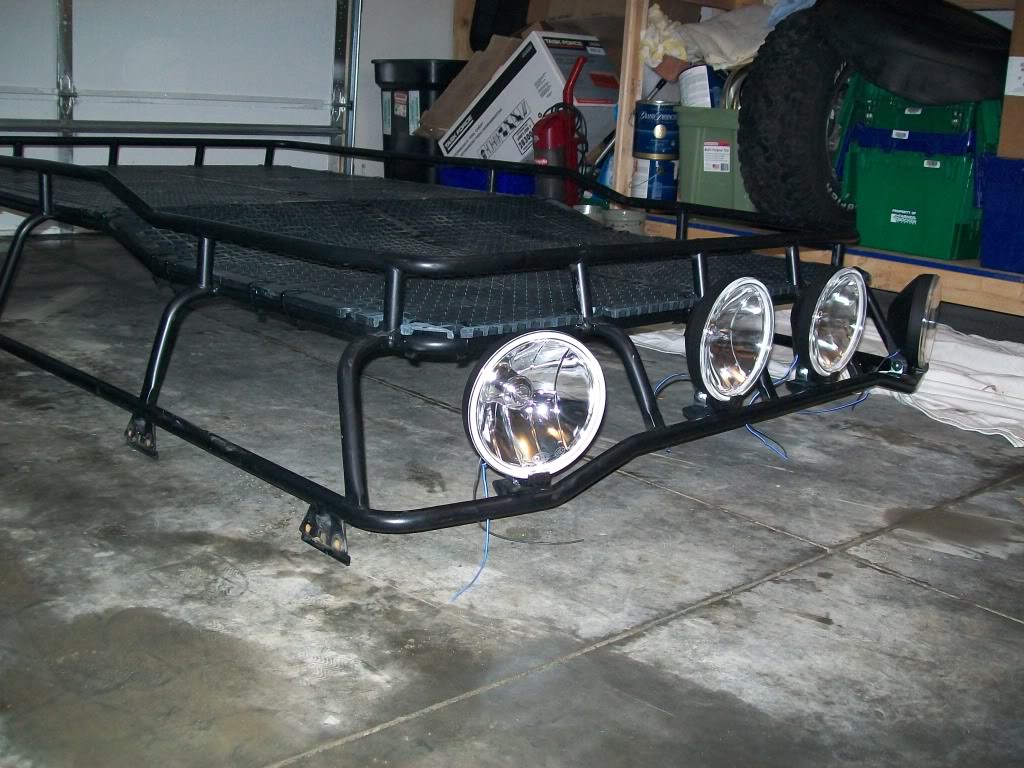
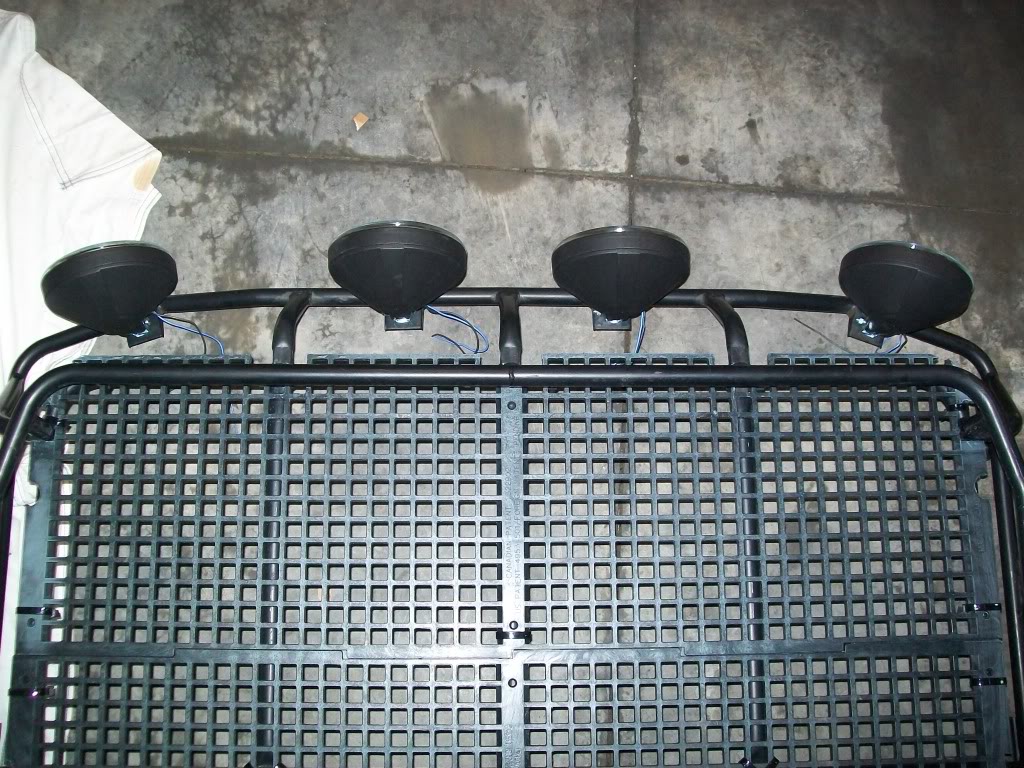
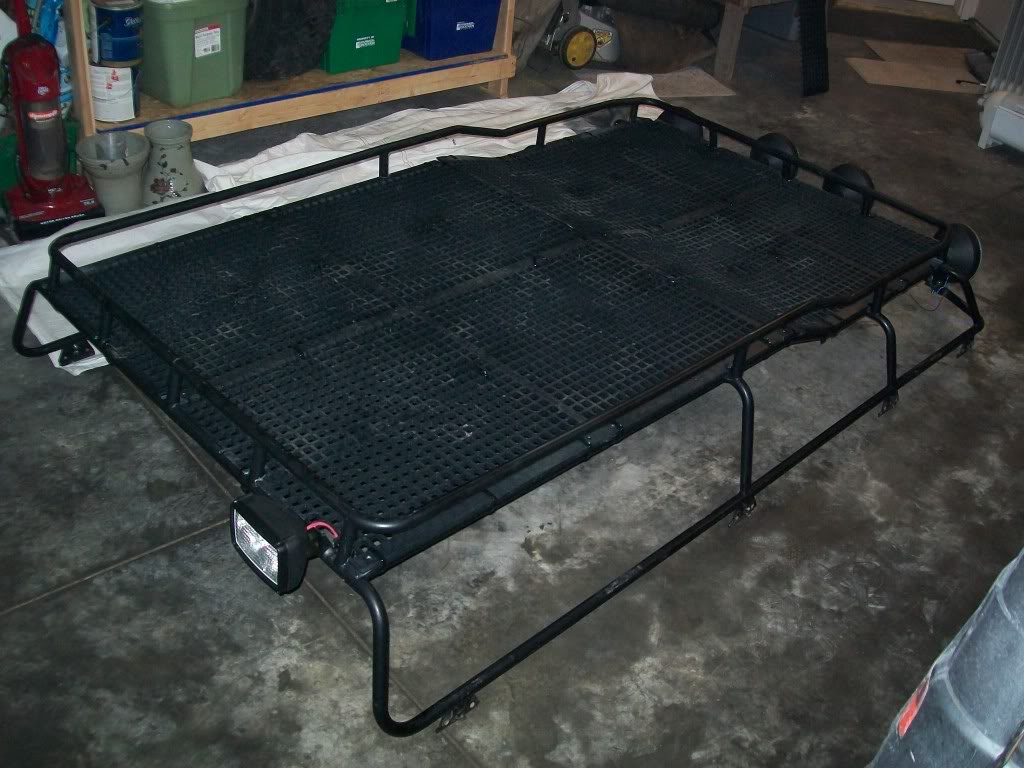
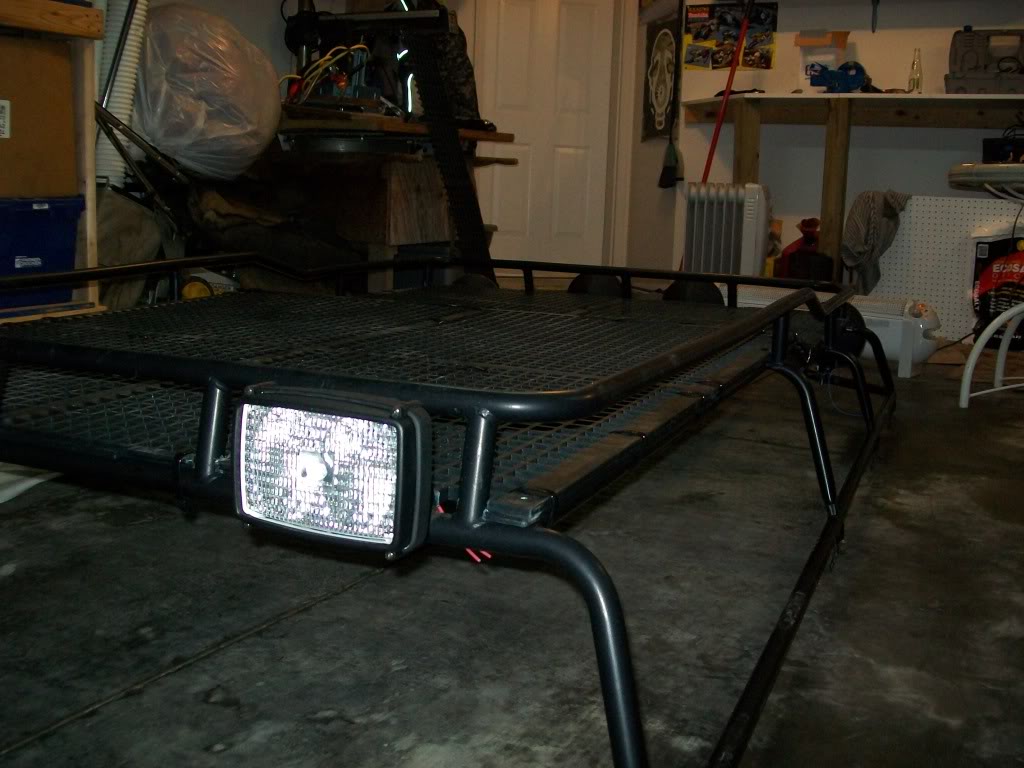
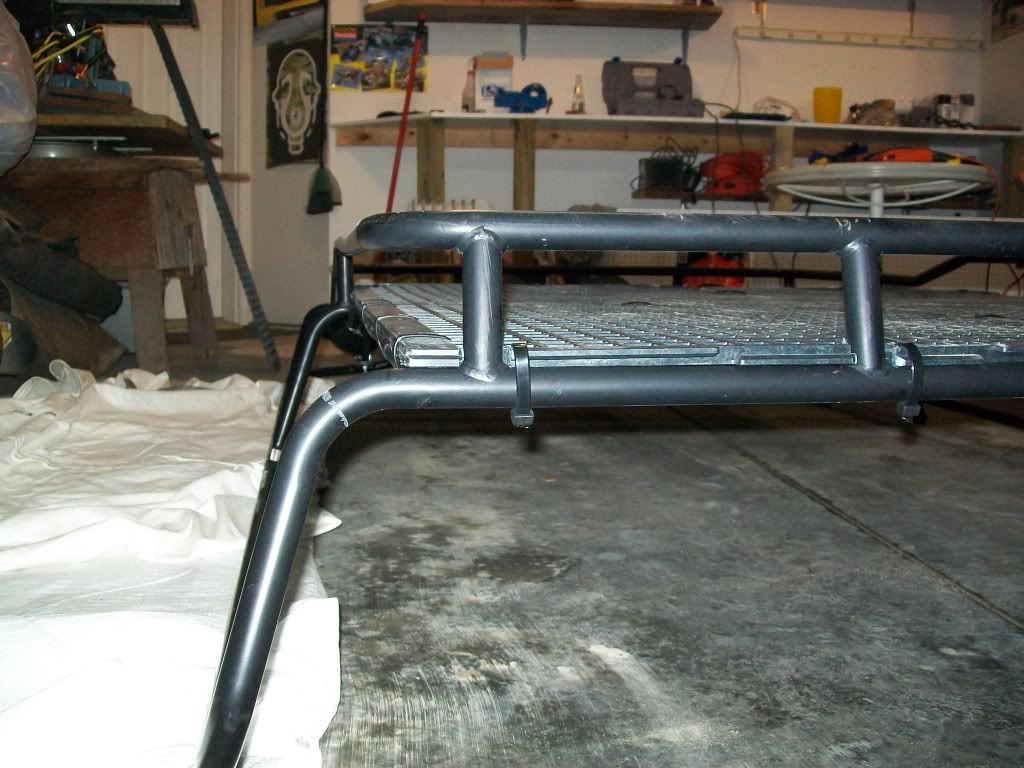
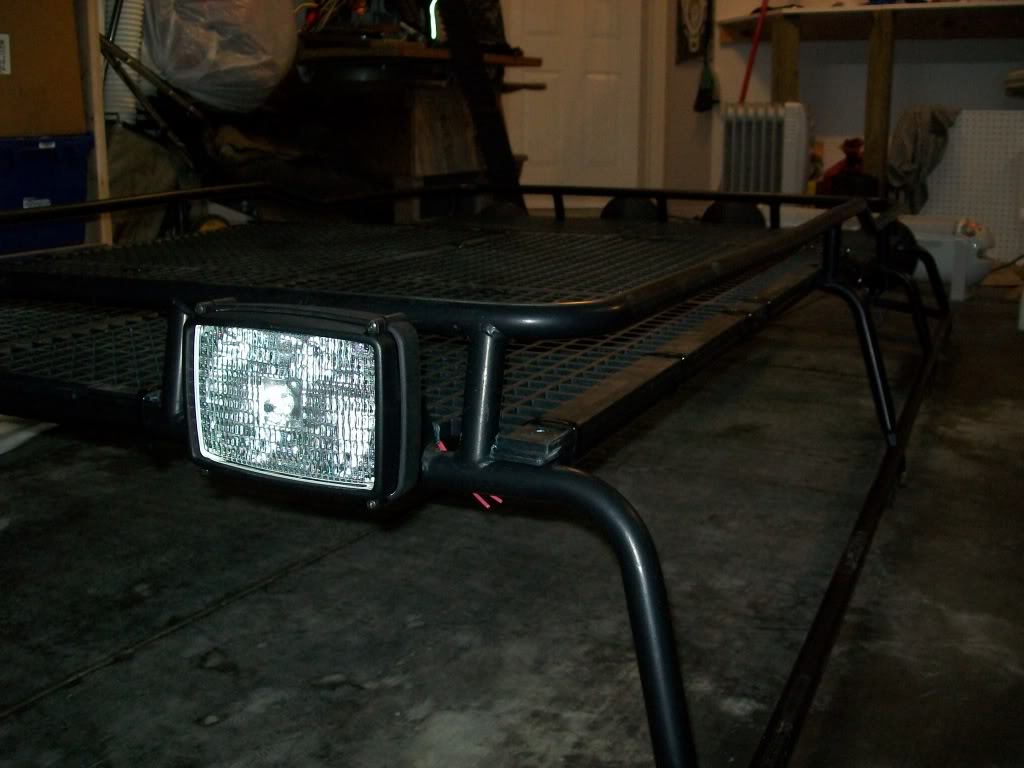
I used 4 sheets of the NON-overlapping flooring from Farmtec. I used 60 250lb 18in black zip ties. And I have 4 Hella 700FF lights on the front and a new Dual bulb Hella work lamp with 2 100W bulbs on the back.
Here are some pics and let me know if anyone has any questions on how i did it. I forgot to even get the camera out until I was already done.
The only hints I can think of now are:
1. Start from the back and cut the groves out with a 1in hole saw. But you are really only cutting it out like a half moon for the braces on the back.
2. Make sure to cut a tab out so you can mount your rear light if you have one.
3. You barely have to trim the next two pieces.
4. With the front piece, leave extra and keep taking little bits off so when you make the 3rd one take the slant your front one isn't too short.
5. I had my lady stand on it while i zipped it down, especially the one that goes over the slant. Having weight on it makes it way easier to follow/force the slant.
If you think you used enough zip ties, use a few more. In fact after putting 60 on I think I am going to go get another 10-20 and put them on too. Or at least have extras in the truck as I am sure they will break when I slide stuff on them enough times and sit up there in my lawn chair, Etc.
If anyone has any questions let me know. Or I can take more/different pictures before I put it back on.


Thread Starter
|
Winching
Joined: Feb 2009
Posts: 513
Likes: 3
From: Pine Barrens, NJ
Thanks Guys.
I got my hood blackout from Vigg on yesterday and I still have a few things to do yet. If all goes as planned I will take some pictures and post them next weekend.
Also, I have decided to run one of the bulbs in the work lamp to the reverse lights and one to the separate LR Aux2 switch i got from EE. This way I can still use it independent of the other lights and the ignition but it will also give me more backup light too. And when I am backing up on the trail I will still be able to have both on at the same time.
Up next is the CDL and then the bumper/winch. Also, I am still trying to see if I can find a used snorkel before I throw that kind of money down. Hint Hint Hint - LOL.


Three Wheeling
Joined: Apr 2007
Posts: 98
Likes: 0
From:
Looks great, I can`t wait to do mine like that. I`ll need to do some repairs on the rack first then either paint or repowder coat. How much did they charge for the shipping? I guess you didn`t get a chance to see how you like those lights. I`ll be looking for some soon.
Again, Looks great!!
Again, Looks great!!
Thread Starter
|
Winching
Joined: Feb 2009
Posts: 513
Likes: 3
From: Pine Barrens, NJ
Looks great, I can`t wait to do mine like that. I`ll need to do some repairs on the rack first then either paint or repowder coat. How much did they charge for the shipping? I guess you didn`t get a chance to see how you like those lights. I`ll be looking for some soon.
Again, Looks great!!
Again, Looks great!!

Thread Starter
|
Winching
Joined: Feb 2009
Posts: 513
Likes: 3
From: Pine Barrens, NJ
Sorry - forgot to update the pics here, but if you go to the gallery you will find several pictures of my truck since the rack was put back on. I also did a write-up on wiring the lights and the homemade limb risers.