When you click on links to various merchants on this site and make a purchase, this can result in this site earning a commission. Affiliate programs and affiliations include, but are not limited to, the eBay Partner Network.
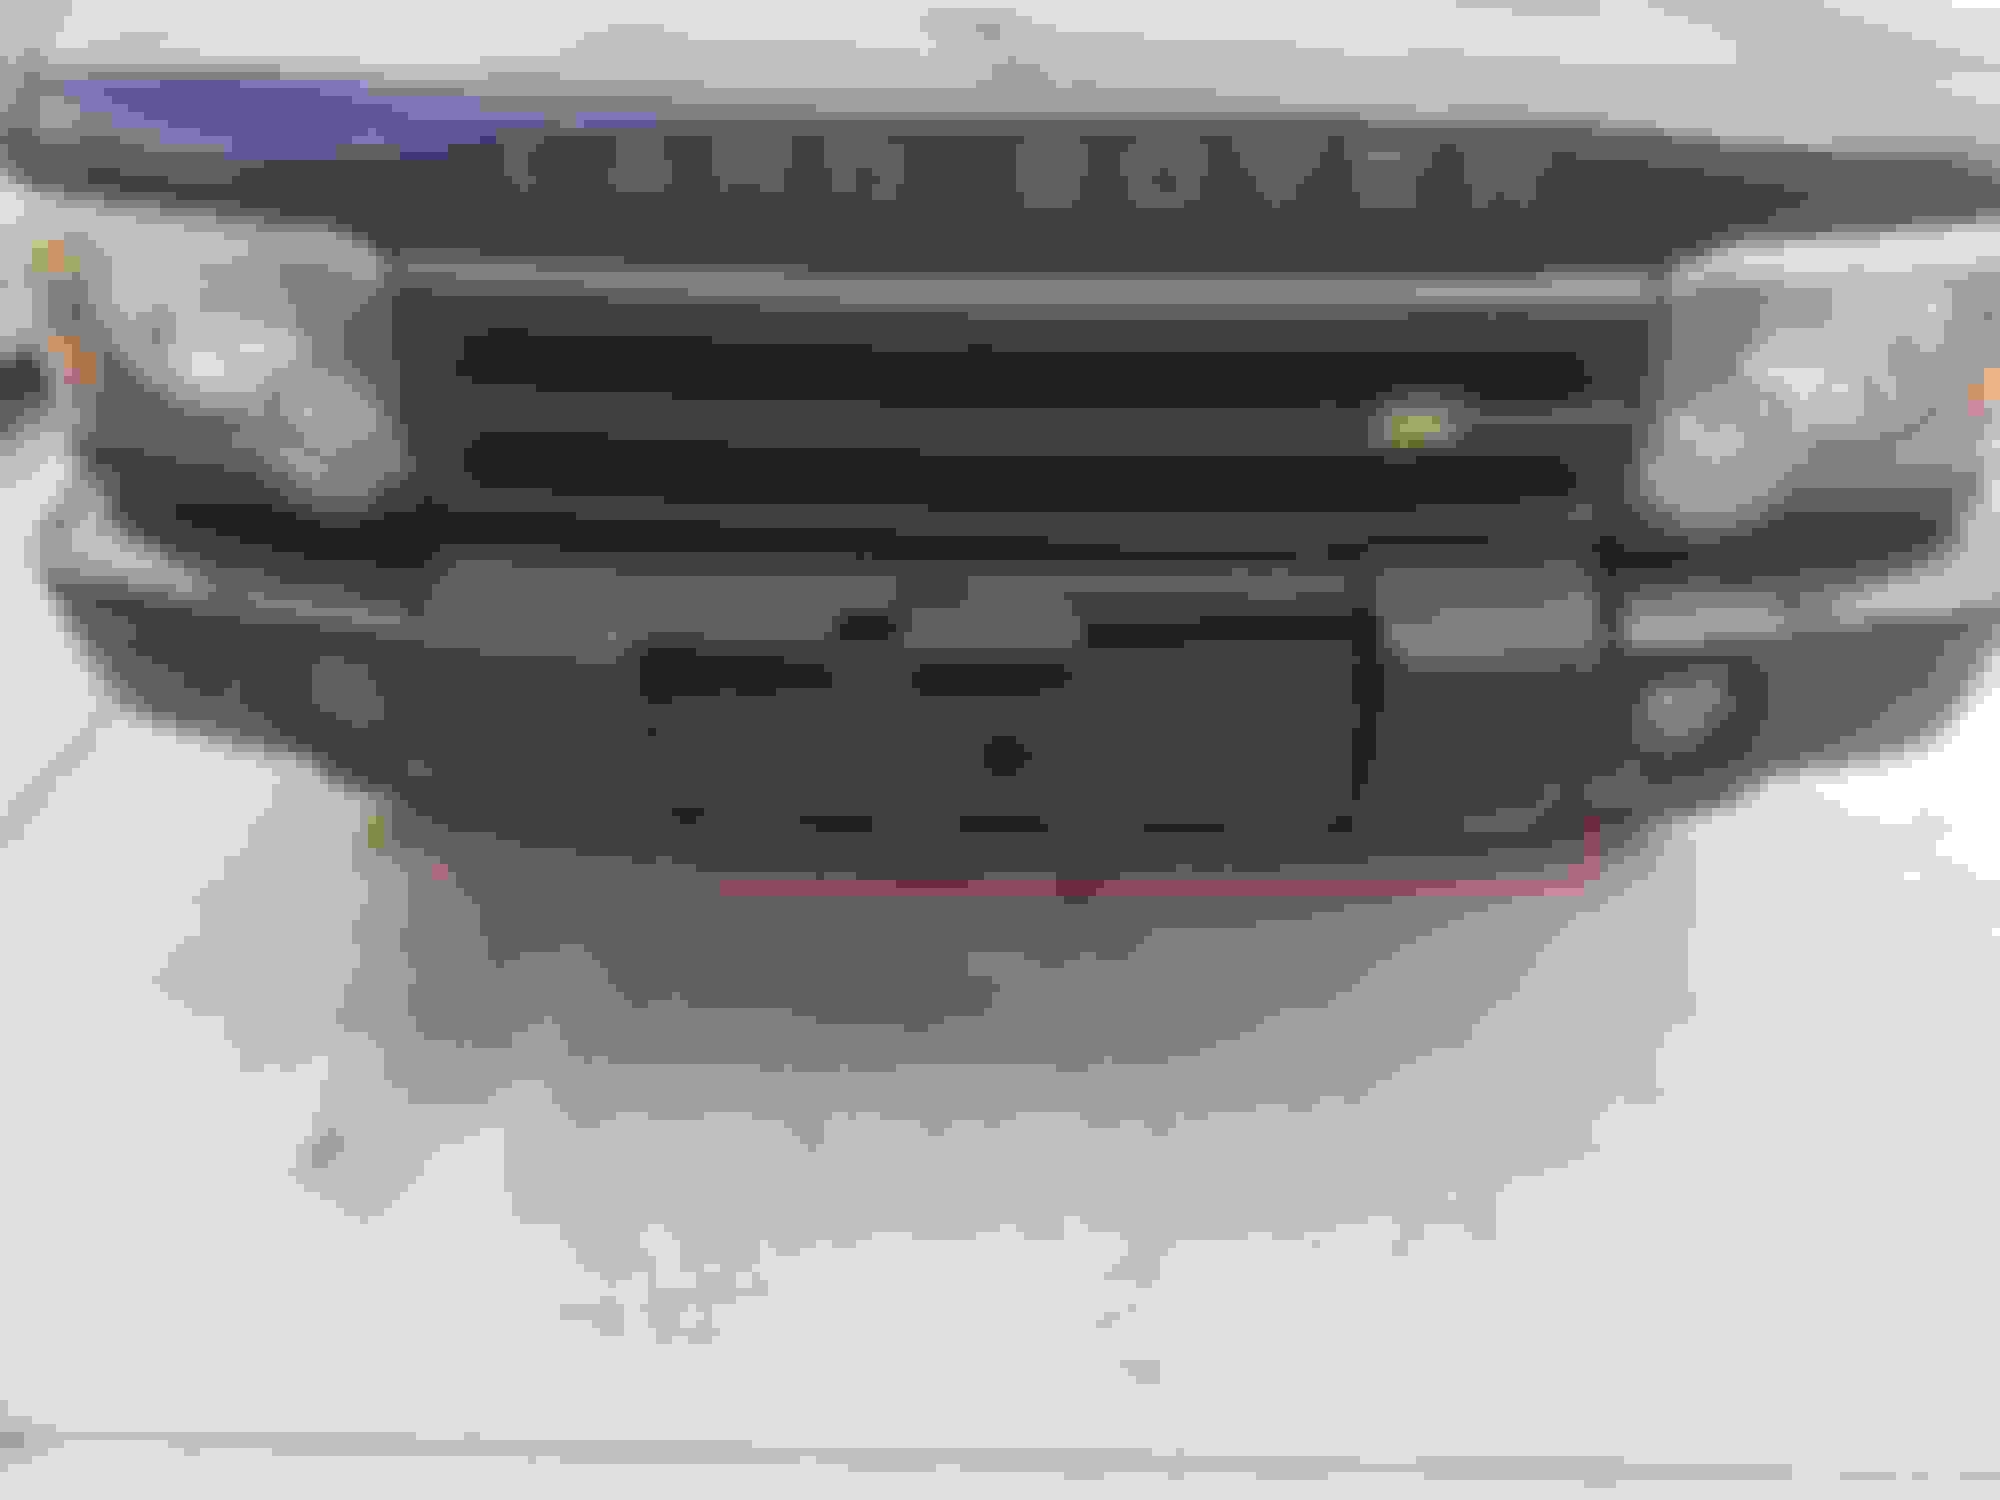
So I got a mostly intact OEM Disco Brush Guard(the foamy one) and Im at a loss for how this thing gets installed. I looks like I need to drill the bumper cover. Also does anyone know if I have to keep the headlight guards on this thing. Will it look weird with just the center part?
So I got a mostly intact OEM Disco Brush Guard(the foamy one) and Im at a loss for how this thing gets installed. I looks like I need to drill the bumper cover. Also does anyone know if I have to keep the headlight guards on this thing. Will it look weird with just the center part?
2004 Disco
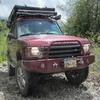
Had it on mine, took it off, liked the cleaner look.
Two main bolts through the bumper to the back, I have two 1 1/4 inch holes. There was two spongy rectangular inserts on the bar that you can pry out and see the holes for mounting. It also had two thin narrow sheets that attached to the grill mounting to hold the top.
There was also a color coded cover on the lower part that clipped at the top and was screwed underneath in about 6 places.
Not totally clear but hopes this helps a little.
I stole the spotlights and shabbily mounted then to my bumper.
Thanks. I think mine only has the two bolts. Perhaps things are missing. I wonder if I can find them somewhere. Sadly someone hit the front of my truck the first week I had it and cracked the center plastic so this will cover it up. Do you have a pic of the underside points you mentioned the 6 or so spots?
So it looks like I have to cut out all the plastic in picture one to install this thing. Also, its all attached as a single piece to the area in picture two. I'm not sure I want the lower part naked. Almost certain i am missing key parts now. like trim and finishers. 60 bucks is looking like less of a deal right now. And it looks like there are finishers if you dont want the headlight surrounds in(this is where the minor damage is so I was going to leave them off and just do the center) which is a bummer because I wanted to just use the center. This kind of sucks.
You have to drill a hole through the bump on the bumper and bolt it on the back. If you have the guard thats all foamy all the way to the head lights, once you remove those, you will end up having a large rectangular cavity on both sides of brush guard. Not sure if you patch that large cavity. To secure it, you have to pry open the rubber pieces on the guard to see the hole. That part get really rusted. I removed mine as well and use the fog lamps for the roof rack.
 10-23-2017, 02:36 PM