
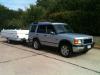
Our First Time to Replace Coil and Plugs
#1
 03-14-2016, 07:29 PM


Its been raining the entire day here and we decided to change the plugs due to misfires and the disco not climbing an over pass. Its been a great experience so far together with my son doing this project. He took the driver side and me on the other side. The challenge was getting into the coil. We tried watching the AB video but the sample was a different D2 truck. So we decided to continue on. The difficult part was buying tools and parts that we dont have like the coil and plug remover. Pending order is the gasket.
The following users liked this post:
JUKE179r (12-18-2016)
#2
03-14-2016, 09:25 PM
The difficult part was buying tools and parts that we dont have like the coil and plug remover. Pending order is the gasket.
#3
03-14-2016, 10:18 PM

Mudding
get some new 8mm wires too. I use the Kingsborne IGN 790 8mm wire set. I went with the 8mm blue.
Spark Plug Wires for Discovery and Range Rover
Spark Plug Wires for Discovery and Range Rover
#4
03-14-2016, 10:22 PM
Hahaha! 1st time we got the spark plug remover except for the lawn mower. LOL. It was fun doing it with my son. Actually, Im supposed to go to the mechanic tomorrow for the same job but the disco started to run rough and the SES light kept blinking and throwing multiple misfires. We did it instead.
#5
03-14-2016, 10:29 PM

Good job to get your feet wet, as long as you are very careful not to break or crack any of the plastic lines and fittings. If you do, there will be misfires again LOL. Clean the old material from mating surfaces of upper and lower intake. Use copper anti-sieze on plug threads. Get all 4 bolts back into the coil pack mounting brackets--hardest chore and most important because once again, multiple cylinder misfires if not properly secured!
#6
03-14-2016, 10:34 PM
Don't put it back together until you have ruled-out faulty coil packs. And definitely install new wires too. Most do valve cover gaskets while all this **** is off. Not a job you want to do twice. Not so much the difficulty but the multitude of pieces needed to be removed (tedious), time consuming, and possibility of breaking things that will start the misfires all over again. My 2 cents. Good luck!
#7
03-15-2016, 05:58 AM
Thanks chubbs878, youre right, I broke one plastic which I thought was a wiring harness cover (looks similar). I was wondering why it was empty, then saw its coming from a canister down below the firewall. I'll epoxy it together.
#8
03-15-2016, 02:38 PM
Don't put it back together until you have ruled-out faulty coil packs. And definitely install new wires too. Most do valve cover gaskets while all this **** is off. Not a job you want to do twice. Not so much the difficulty but the multitude of pieces needed to be removed (tedious), time consuming, and possibility of breaking things that will start the misfires all over again. My 2 cents. Good luck!
#9
03-15-2016, 03:28 PM
+1 on the Valve Cover Gaskets. Easy when you already have the upper intake removed. One thing I recommend is making sure the harness for the idle air control or purge solenoid does'nt fall behind the motor. Forget which one of these I had to fish out after the manifold was back together.
Moral of the story, you are crazy if you don't replace/update as much as possible when 80 percent of your top-end is already removed.
#10
03-15-2016, 09:01 PM
+1 on the Valve Cover Gaskets. Easy when you already have the upper intake removed. One thing I recommend is making sure the harness for the idle air control or purge solenoid does'nt fall behind the motor. Forget which one of these I had to fish out after the manifold was back together.
Lots of prayer before we started the disco. Hi 5 when it started! Test drove and was a bit rough and thought that could probably the cleaner got mixed up in the chamber some where. Then started throwing codes P0413, P1551 and P1510. Checked RAVE and found where the fault was. SAI vacuum hose not connected and also one connector to the IACV (not sure what this thing is but saw the picture in RAVE) was not connected too. It was stuck hanging between the silver tube and the firewall near the coil pack. Not to hard to fish, thank god. After connecting those, everything run smooth. Well, except the annoying TICK and some tools that was left within the wiper cowl. Cheers!