My first attempt at metal fab for rover Old school style
#1
 08-26-2010, 06:54 AM


Join Date: Aug 2010
Location: Texas
Posts: 10
Likes: 0
Received 0 Likes
on
0 Posts
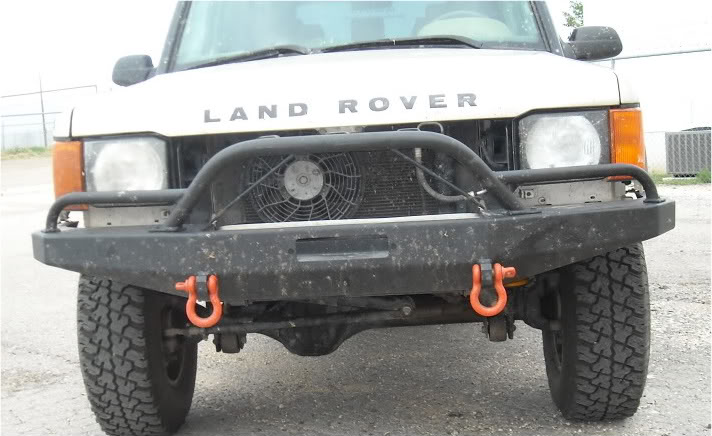
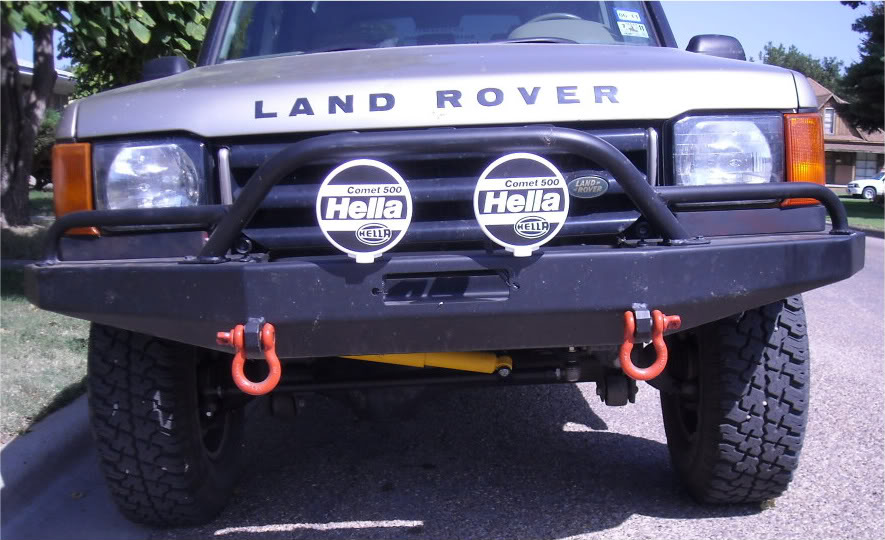
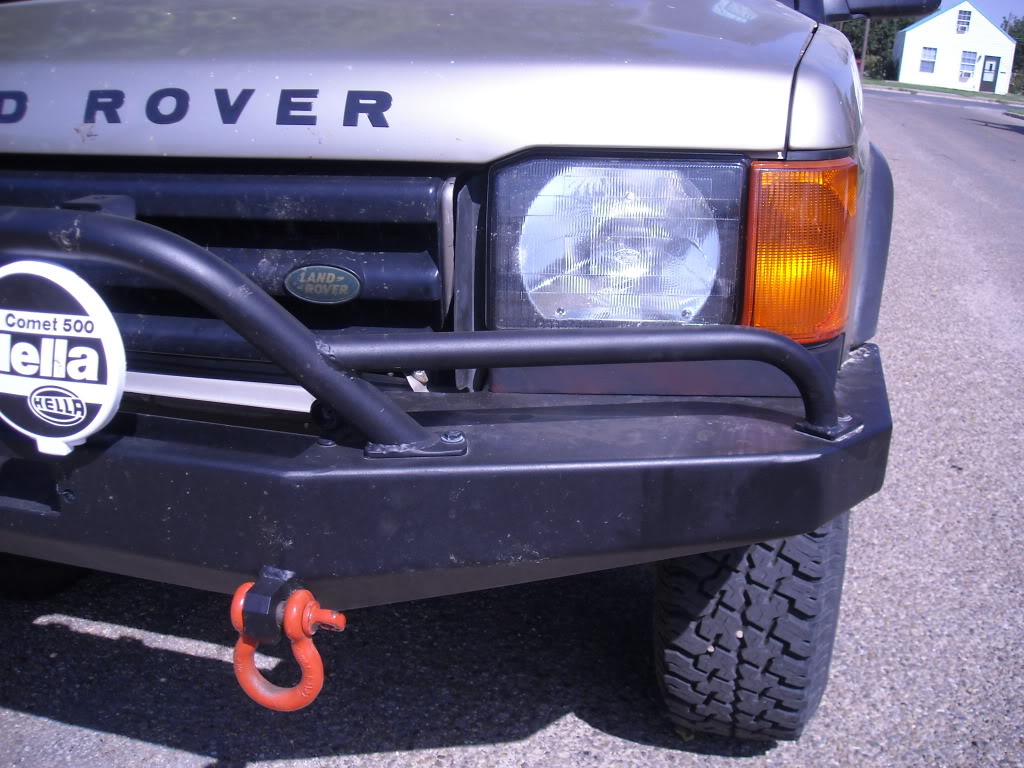
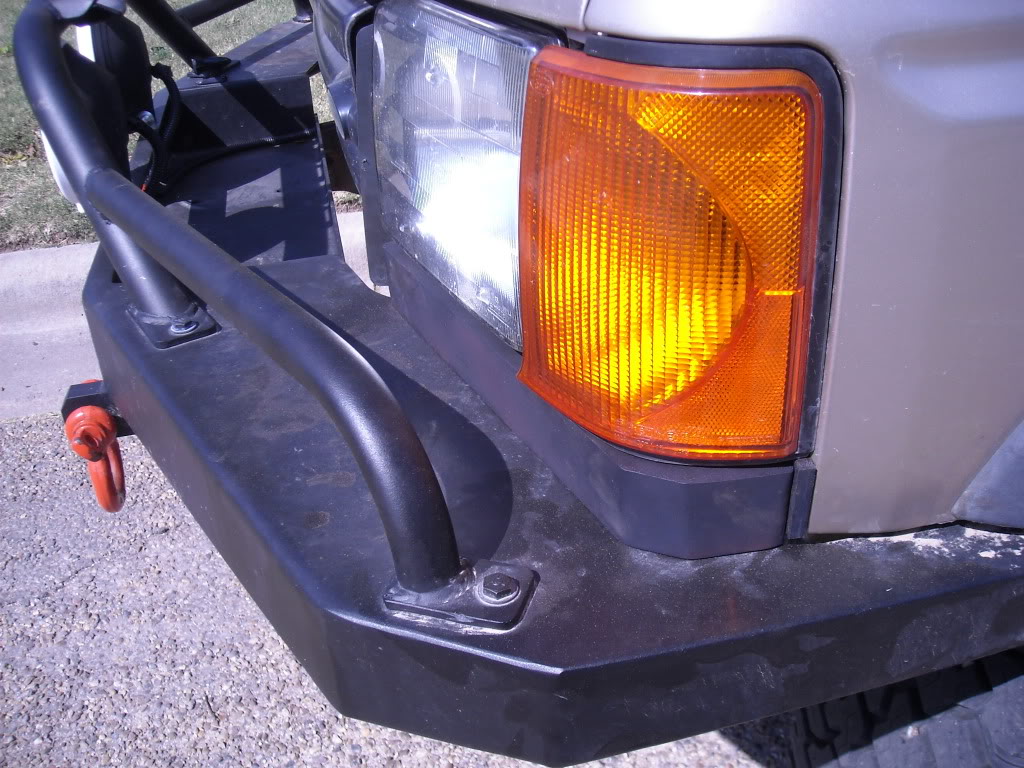
Ok, well a few years ago my Rover decided to meet a deer jumping across the road going 90mph. While my bumper managed to absorb 95% of the blow, the rear end of the dear busted out my passenger headlight and the plastic piece just under headlight. It also cracked grill along passenger side and around bottom. 95% of grille unaffected (which I will get to in a few). Accessing the damage and what to do I started thinking. Why go buy a new grill and these other pieces for $100's of dollars when you know the second something touches them they will just crack again (give it a deer at 90 is more than a touch, my entire right side of bumper did litteraly shatter tapping another car going less than a 1mph (was at stop sign and talking and vehicle was creeping and didnt realize it till a small tap, got out and looked and looked like someone had shot it buck shot from a 12 guage 3 or 4 times.) As you can tell, I am not a fan of Land Rover's cheap *** plastic front ends. So i decide I will not replace another piece with plastic ever. So I get an idea for the grill. Since 90+% of the grille (none in center of grill) was damaged, I will just have my metal fab guy bend me some pipe and cut the grill to fit inside of it. So when I had my new bumper made I told him idea and he made me one real fast. So I knew what I was doing with that section but still had no idea what I would do with sections under headlights. Reason grill is not done yet is pipe was about 1 or 2" long so needing to cut out some of the center and weld it back up (will be finished with it by weekend as well I hope).
Well a few months ago I go out to my fathers shop one day and realize I forgot the key to gate so I had to drive around and come in through the back. When I get out and start walking up to shop I notice something and immediately get an idea. Sticking out of the dirt was some old angle iron. It was pretty bent up but there was some sections that were still straight. There was about 10-15ft sticking out of dirt so I walk over and pick it up to take into shop. Yea not a chance lol there has to be at least another 10-15ft barried who knows how deep so I go in and get hack saw and start cutting out straight pieces. I take a piece that I cut and place it under headlight and it FITS LIKE A GLOVE. It goes under the lights and once mounted will sit about 1/4" above bumper if that. Now I know what I want to do but have no clue about metal work. I work concrete not metal lol.
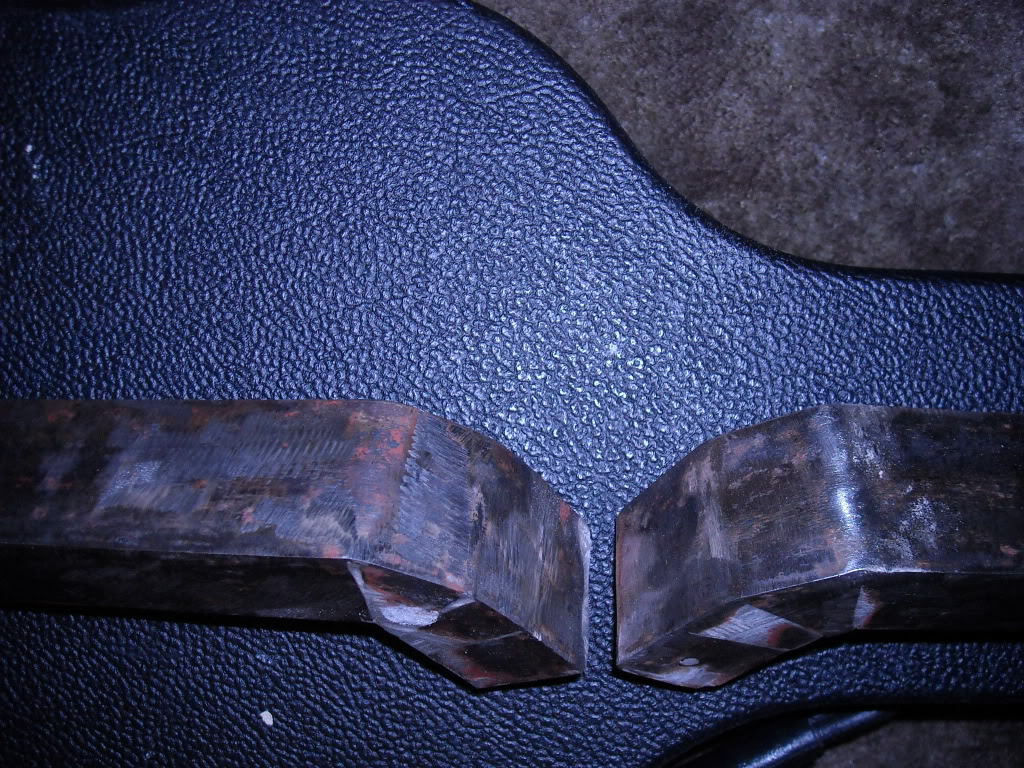
Few weeks later I see that angle iron at the shop and it hits me. I go grab one my plastic pieces that I saved and start measuring angles. So, this is how I did this lol no laughing. I measured from the end of piece (the part thats up around the turn signal) and measured the distance from the end to where it started to curve. Then I looked at how much it curved at that point. If you look at a factory piece it will go somewhat straight for a few inches then has a slight curve then straights back out a few inches before the big curve. So once I found my first curve, I mark the center where I want the bend to occur. From there I draw a line at a 90 d angle straight across. Then I decide I need to cut so much and angle the cut back down to the center line where I want the bend to happen. Virtually a V will be cut out of the top piece. I used a hack saw for all these cuts. Next I would move the angle iron in the vice grips so that the bend point was just sticking out of vice. I would heat it up a little using a torch then grapped rubber mallet and started hitting it until the V closed up as much as possible. By the time I finished the first one, I actually knew in my head at time how man degrees ever inch at the top of the V would give me. As you can tell from pic, second one bottom one, had much cleaner cuts. You can tell this by the inside edge of iron, not the bent side. Though the bend marks are at exact same points and angles you can see difference on inside edge (this part is under headlight so really doesnt matter From there I needed to fill the cracks from all the cutting. I didnt want to break out the welder so I decided to keep it easy. I got some magnum weld (tube cold weld stuff) Simply put I just pushed down into the cracks and gave it a few days to cure then grinded down the hold thing to get rid of the dust. I also used a wirewheel on a drill to get down in the deep spots of rust then smoothed it back out with grinder
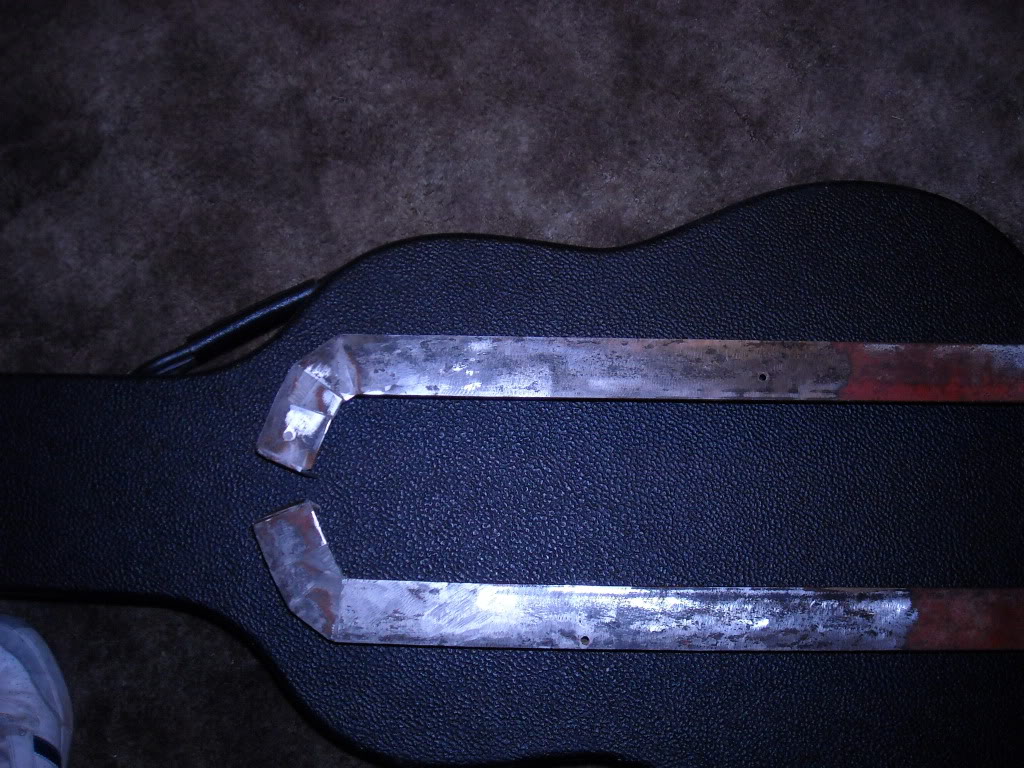
Should be done and have them mounted by friday.
Well a few months ago I go out to my fathers shop one day and realize I forgot the key to gate so I had to drive around and come in through the back. When I get out and start walking up to shop I notice something and immediately get an idea. Sticking out of the dirt was some old angle iron. It was pretty bent up but there was some sections that were still straight. There was about 10-15ft sticking out of dirt so I walk over and pick it up to take into shop. Yea not a chance lol there has to be at least another 10-15ft barried who knows how deep so I go in and get hack saw and start cutting out straight pieces. I take a piece that I cut and place it under headlight and it FITS LIKE A GLOVE. It goes under the lights and once mounted will sit about 1/4" above bumper if that. Now I know what I want to do but have no clue about metal work. I work concrete not metal lol.
Few weeks later I see that angle iron at the shop and it hits me. I go grab one my plastic pieces that I saved and start measuring angles. So, this is how I did this lol no laughing. I measured from the end of piece (the part thats up around the turn signal) and measured the distance from the end to where it started to curve. Then I looked at how much it curved at that point. If you look at a factory piece it will go somewhat straight for a few inches then has a slight curve then straights back out a few inches before the big curve. So once I found my first curve, I mark the center where I want the bend to occur. From there I draw a line at a 90 d angle straight across. Then I decide I need to cut so much and angle the cut back down to the center line where I want the bend to happen. Virtually a V will be cut out of the top piece. I used a hack saw for all these cuts. Next I would move the angle iron in the vice grips so that the bend point was just sticking out of vice. I would heat it up a little using a torch then grapped rubber mallet and started hitting it until the V closed up as much as possible. By the time I finished the first one, I actually knew in my head at time how man degrees ever inch at the top of the V would give me. As you can tell from pic, second one bottom one, had much cleaner cuts. You can tell this by the inside edge of iron, not the bent side. Though the bend marks are at exact same points and angles you can see difference on inside edge (this part is under headlight so really doesnt matter
From there I needed to fill the cracks from all the cutting. I didnt want to break out the welder so I decided to keep it easy. I got some magnum weld (tube cold weld stuff) Simply put I just pushed down into the cracks and gave it a few days to cure then grinded down the hold thing to get rid of the dust. I also used a wirewheel on a drill to get down in the deep spots of rust then smoothed it back out with grinderShould be done and have them mounted by friday.
#2
09-03-2010, 02:47 AM
Join Date: Aug 2010
Location: Texas
Posts: 10
Likes: 0
Received 0 Likes
on
0 Posts

Thread
Thread Starter
Forum
Replies
Last Post
Street Wolf
Discovery II
8
09-27-2008 08:58 AM