04 DII Build Thread
#71
 12-21-2016, 10:41 AM


With the crappy lighting due to crappy weather I haven't been able to get any good pictures of the progress made over the last week. I pulled the platform out along with all paneling in the rear last weekend. With the panel removed I was able to run all of my wiring for the backup light, cooking light, 2 USB ports, and CB coax. I still need to wire the Bluesea fuse block, power inverter, and lay the wire going to the engine bay.
I'm also making a couple fold down cooler holders that are mounted to the body, and run through the panels. I'm "hoping" these hold with a loaded down cooler, but I'm skeptical about them. These are made from t-slot extrusion, have locking hinges, and adjustable caribiners fixed to eye bolts.
With the giving season upon us I've decided to give us some goodies. Step one was ordering a 9,500lb winch, and ****** block. With the deal 4WD was having I couldn't pass it up. I'm also going to be order a backup light pod, 13" single row bar, and a 30" single row bar. In addition to that I may pick up some Tred 4x4 boards, and ARB compressor.
#72
01-12-2017, 08:35 AM
I've been absent from my thread for a bit, but here's a quick update on where things are.
Our platform is completely finished as of now! I removed the platform for about a week to run the wires for our backup light, cooking light, and CB coax. While the platform was out I also installed our Bluesea Fuse Panel to the side of the platform, and wired everything up. I ran the short section of wires to the power inverter, and connected them to the fused distribution block. The only wiring that needs to be done is getting power from the engine bay. At this point I only have the new stereo to finish on the interior, and that's going to be a project.
The stereo is going to consist of a new Alpine head unit. In addition to the head unit I'm also installing a Alpine mini 4 channel amp, two sets of Alpine 6-1/2" components, steering wheel control, and sound deadening the doors.
The next set of items on the list of things to do are lights. I need to install the LED backup light on either the bumper, or just above the driver side tail light. I also have two LED pod's that I'm going to add to the bumper, and we'll also have a 30" single row LED light bar on the roof rack. I picked up a DI three switch pod, and about 20 OEM switches from eBay to use to control the lighting. Came with 3 cruise control switches, and several light switches. Now I need to figure out how to swap the covers on them.
I still need to install the winch we pitched up over Christmas, and purchase a dual battery kit. Both of these items will most likely be installed after our engine swap.
Now, onto the engine swap. The new motor has been something that we've been talking about for a long time now, and we're just about ready to choose our fate. We're currently deciding between a rebuilt Rover engine, and an LS swap. We'll have some more details in the near future on this.
I'll post some pictures once I have time, and good weather. Stay turned for more information on the motor swap.
Last edited by Mstudt; 01-12-2017 at 03:00 PM.
#74
01-16-2017, 02:52 PM
#75
01-19-2017, 07:17 AM
Finally I have some pictures to post, and some new progress.
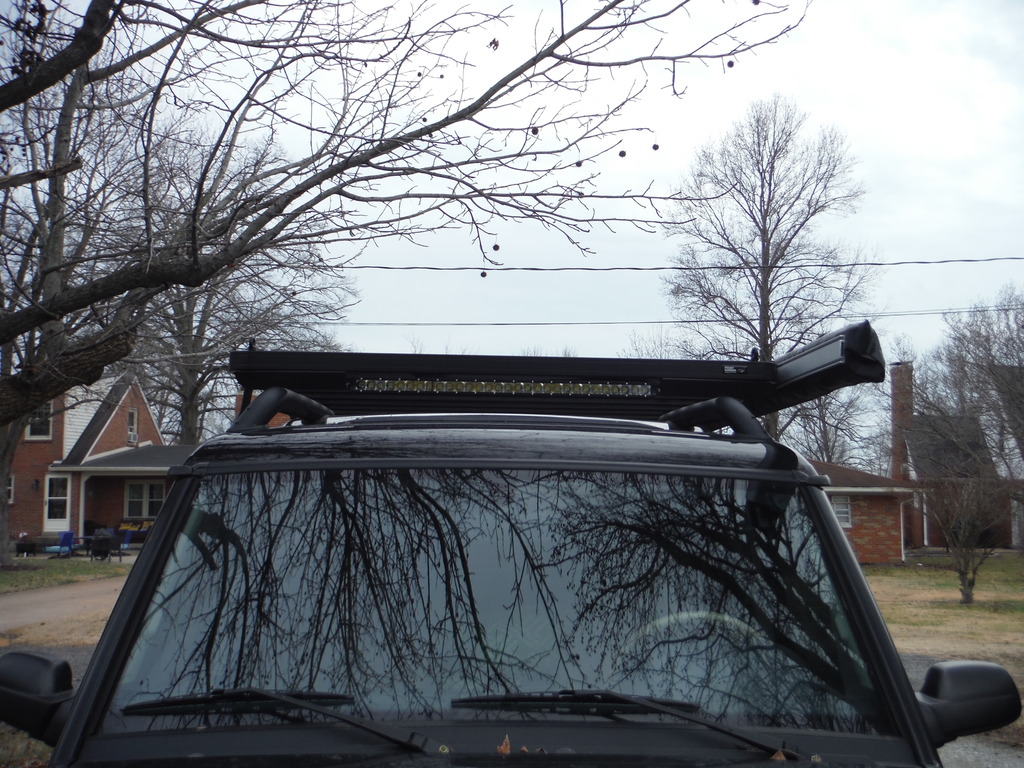
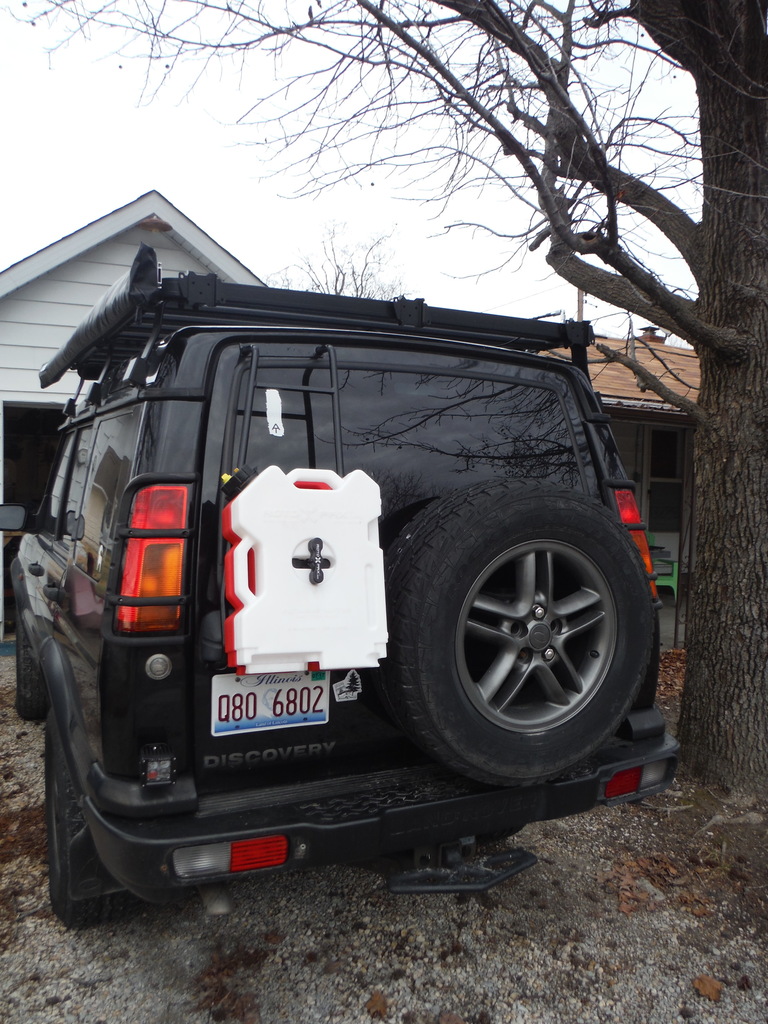
We added some more lighting up front with the addition of a 30" single row light bar. We were originally going to get a 40" single row, but found out it wouldn't clear the factor rails. We picked up a few lights from CaliRaised LED for the front, and back. We also added a 2x2 pod to the rear to be used as a backup light (bottom left corner of picture).

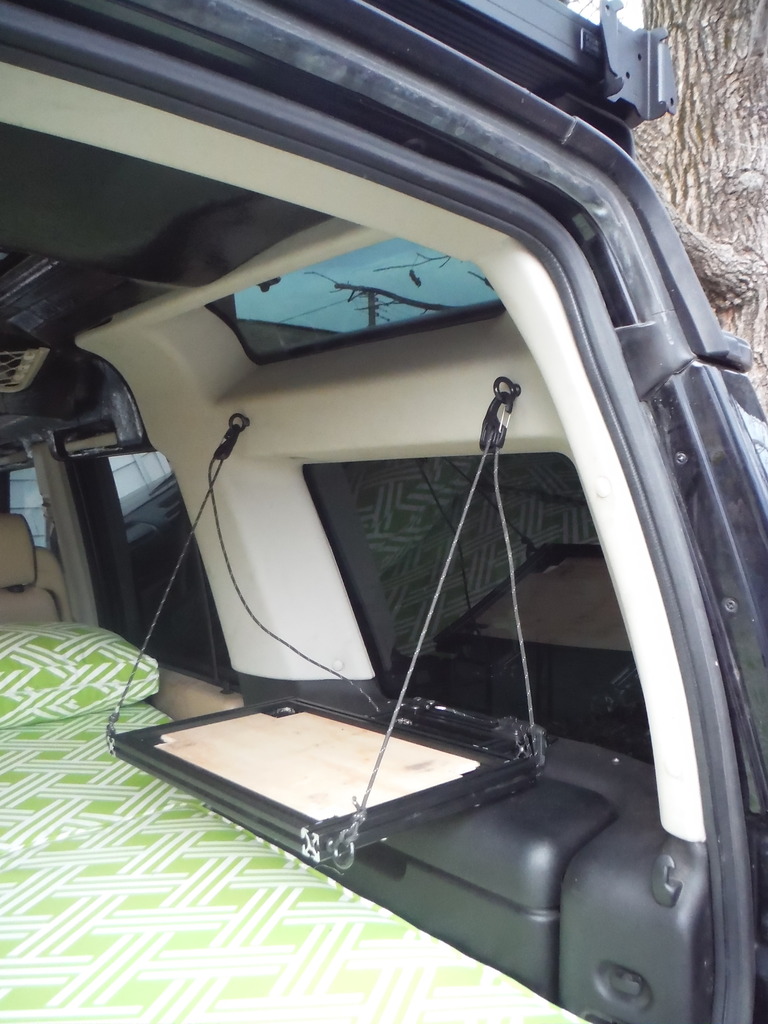
The cooler mount is also finished, and seems like it's going to work. The upper eye bolts are tied into the metal body near the curved upper window. The lower hing mount is also tied into the metal body just under the window. Both mounts are pretty stout, and should hold plenty of weight. The lower mount also has locking hinge to allow it to fold up out of the way.
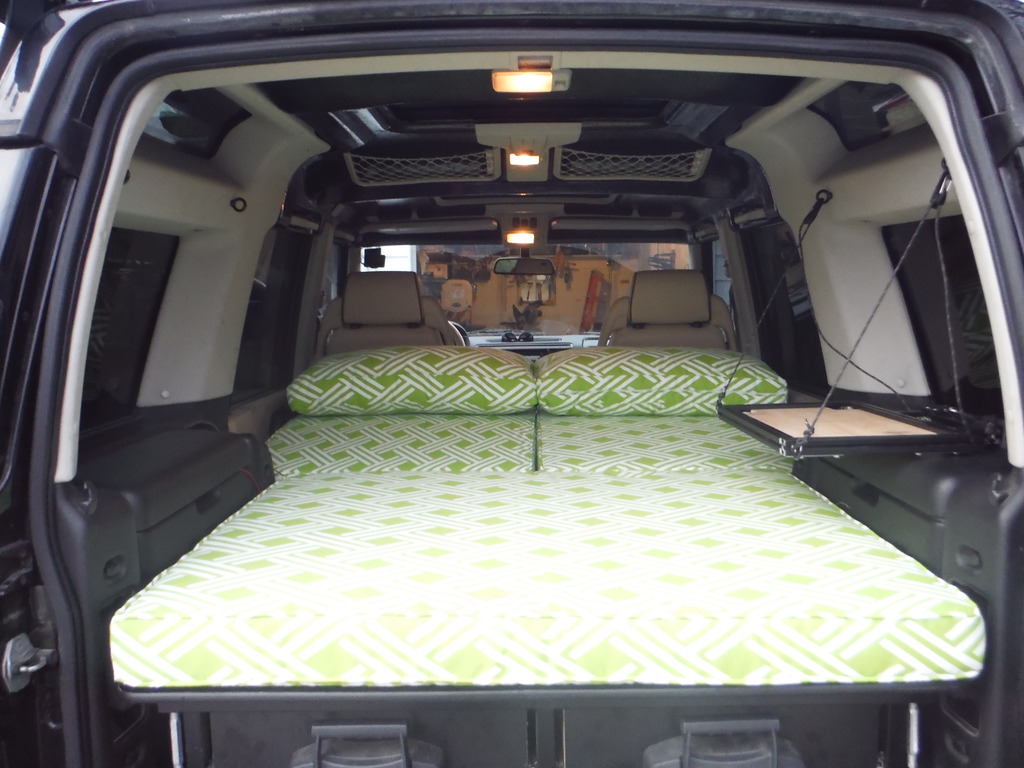
Next up is the bed. The rear section, and two large front sections are made from 3" high density foam. With the two small cushions being made from polyester.
We'll have a test run this weekend when we go camping Saturday night. Just a short one night trip to see how things are coming together. We need to try to bed to see if anything else needs to be done. We also need to try our cooking arrangement to how know how it works. Also want to see how to dual awning setup is going to work for us.
I placed an order for a new engine this morning, and that should be in around the beginning of March. I have a little over a month to get all the extra parts that I need for the engine swap. Lots of parts to order, and lots more work to be done.
We added some more lighting up front with the addition of a 30" single row light bar. We were originally going to get a 40" single row, but found out it wouldn't clear the factor rails. We picked up a few lights from CaliRaised LED for the front, and back. We also added a 2x2 pod to the rear to be used as a backup light (bottom left corner of picture).
The cooler mount is also finished, and seems like it's going to work. The upper eye bolts are tied into the metal body near the curved upper window. The lower hing mount is also tied into the metal body just under the window. Both mounts are pretty stout, and should hold plenty of weight. The lower mount also has locking hinge to allow it to fold up out of the way.
Next up is the bed. The rear section, and two large front sections are made from 3" high density foam. With the two small cushions being made from polyester.
We'll have a test run this weekend when we go camping Saturday night. Just a short one night trip to see how things are coming together. We need to try to bed to see if anything else needs to be done. We also need to try our cooking arrangement to how know how it works. Also want to see how to dual awning setup is going to work for us.
I placed an order for a new engine this morning, and that should be in around the beginning of March. I have a little over a month to get all the extra parts that I need for the engine swap. Lots of parts to order, and lots more work to be done.

#77
01-19-2017, 11:18 AM

Camel Trophy
Join Date: Oct 2016
Location: St. Clair County, Michigan
Posts: 4,550
Received 1,160 Likes
on
836 Posts
The following users liked this post:
Mstudt (01-19-2017)
#78
01-19-2017, 11:30 AM
Mike
#79
01-20-2017, 07:29 PM

Super Moderator
I have a silly question. I recently installed just a nice flat metal plate on the back door of my 99 D2 (has the Harmon Kardon Audio). I removed the old stuff, disconnected the sub, and just tucked the wiring out of the way. Got it all put back together and called it a day.
Next day I decided to drive my it into town real quick. When I turned on the key the radio came on immediately, and it will not respond to any input from me. I can't change the volume, steering wheel controls don't even work. So it has to be because I disconnected the rear subs......
Am I missing something?? People are installing diamond plate, aluminum plates on their back D2 cargo doors and I've never once heard anyone mention your radio going nuts if the sub is disconnected....
It was working flawlessly until I installed that rear door panel.... Not meaning to hijack this thread just curious if I'm the only one with a 99 D2 that apparently doesn't want to part with it's sub lol.
#80
01-20-2017, 08:43 PM
I have a silly question. I recently installed just a nice flat metal plate on the back door of my 99 D2 (has the Harmon Kardon Audio). I removed the old stuff, disconnected the sub, and just tucked the wiring out of the way. Got it all put back together and called it a day.
Next day I decided to drive my it into town real quick. When I turned on the key the radio came on immediately, and it will not respond to any input from me. I can't change the volume, steering wheel controls don't even work. So it has to be because I disconnected the rear subs......
Am I missing something?? People are installing diamond plate, aluminum plates on their back D2 cargo doors and I've never once heard anyone mention your radio going nuts if the sub is disconnected....
It was working flawlessly until I installed that rear door panel.... Not meaning to hijack this thread just curious if I'm the only one with a 99 D2 that apparently doesn't want to part with it's sub lol.
Next day I decided to drive my it into town real quick. When I turned on the key the radio came on immediately, and it will not respond to any input from me. I can't change the volume, steering wheel controls don't even work. So it has to be because I disconnected the rear subs......
Am I missing something?? People are installing diamond plate, aluminum plates on their back D2 cargo doors and I've never once heard anyone mention your radio going nuts if the sub is disconnected....
It was working flawlessly until I installed that rear door panel.... Not meaning to hijack this thread just curious if I'm the only one with a 99 D2 that apparently doesn't want to part with it's sub lol.