
Lucky 8’s Project P38


Thread Starter
|
Winching
Joined: Jan 2009
Posts: 628
Likes: 18
Project Update : A biff, A bash, but never a crash
Last weeks adventures during Rovers on the Rocks tested all of the armor and gave the Ashcroft ATB a full on work out.
A Biff
Before we get to the rock challenge lets have a look at the brand new front steering guard from Terrfirma.
I was planing on taking some action shots with the guard during Rovers on the Rocks but with in the first few minutes the guard was put to the test.
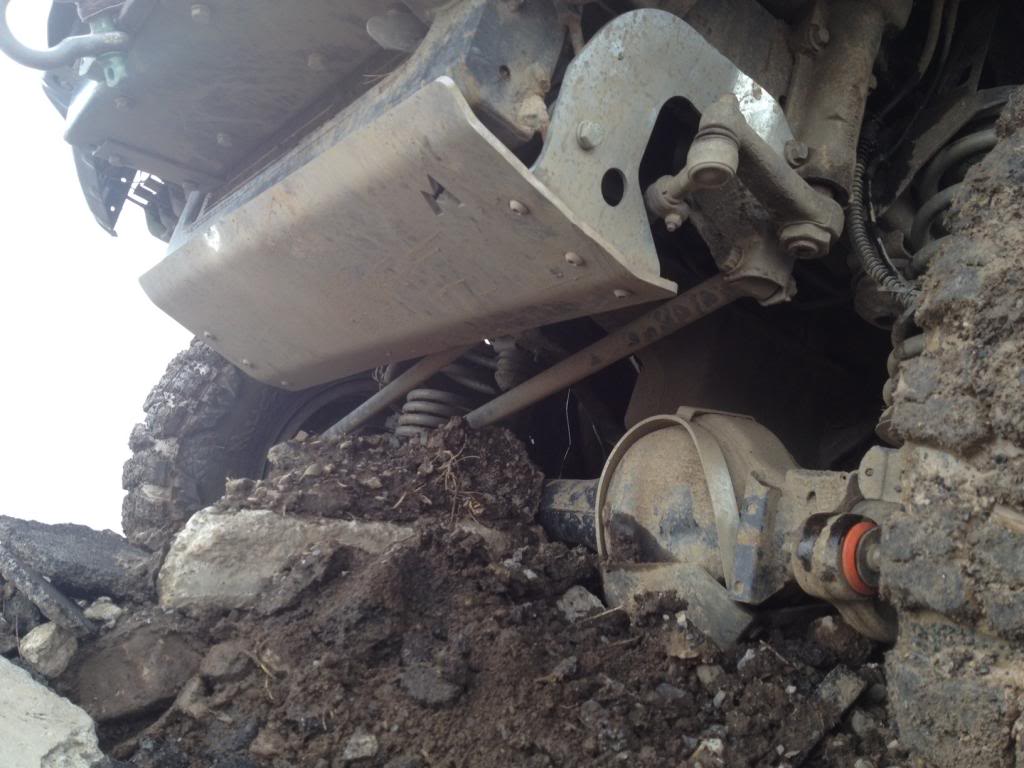
The new guard fit with ease and was able to take the abuse.
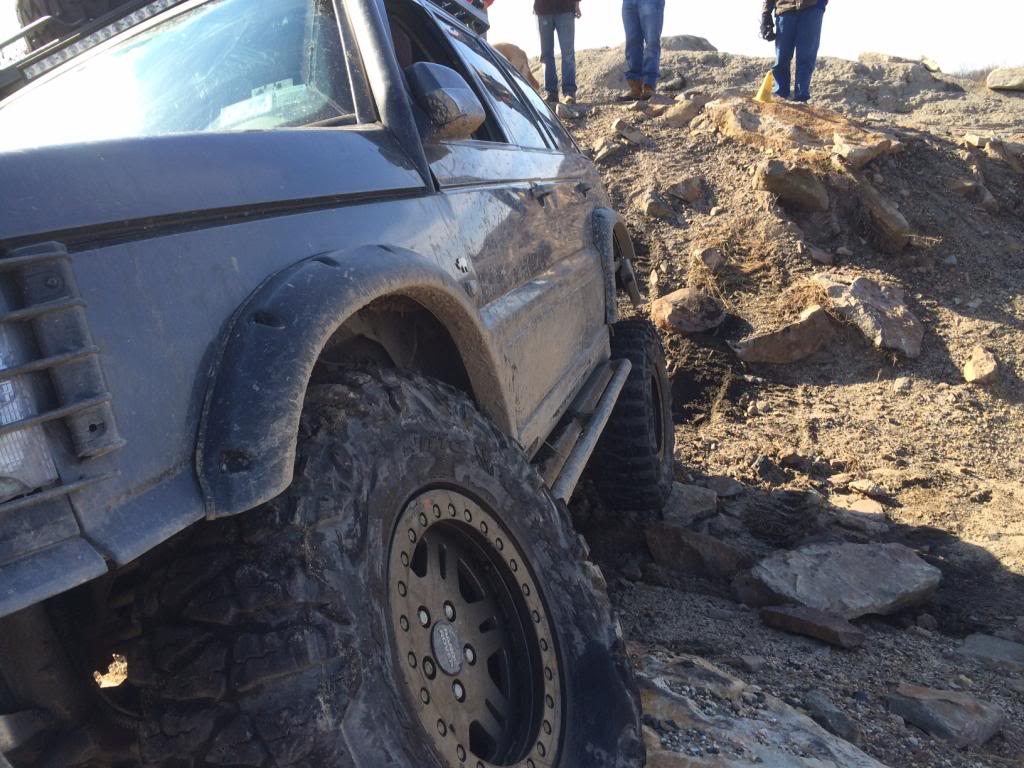
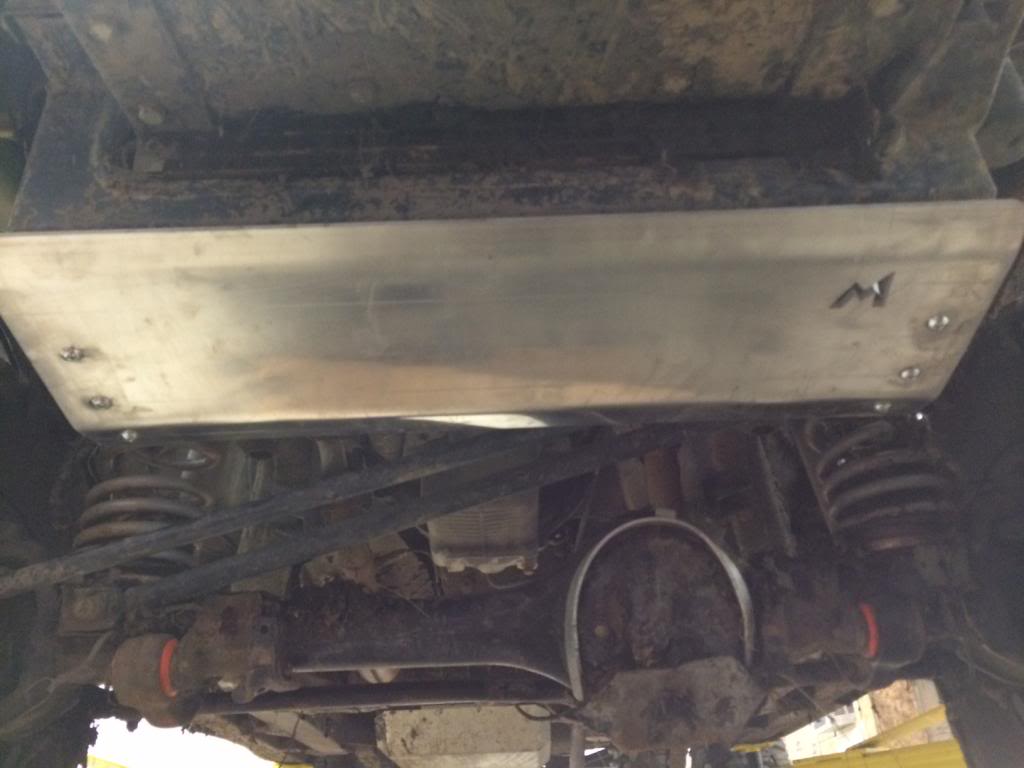
A Bash
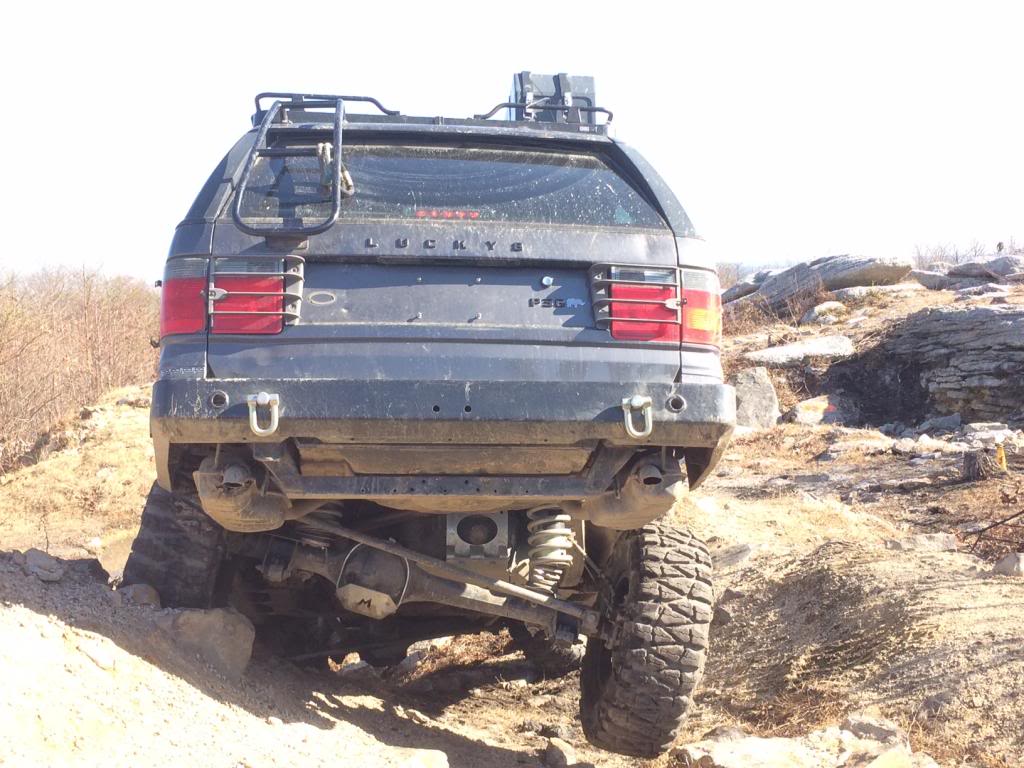
The steering guard was not the only new piece of armor earning its salt. The tank guard took a beating.
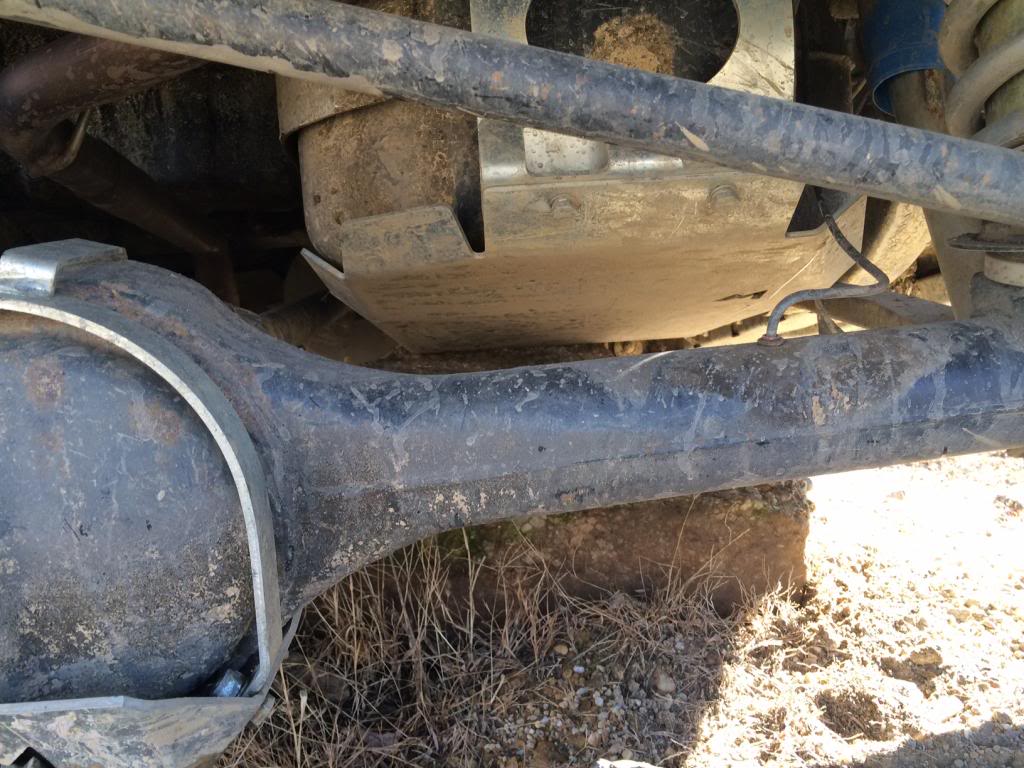

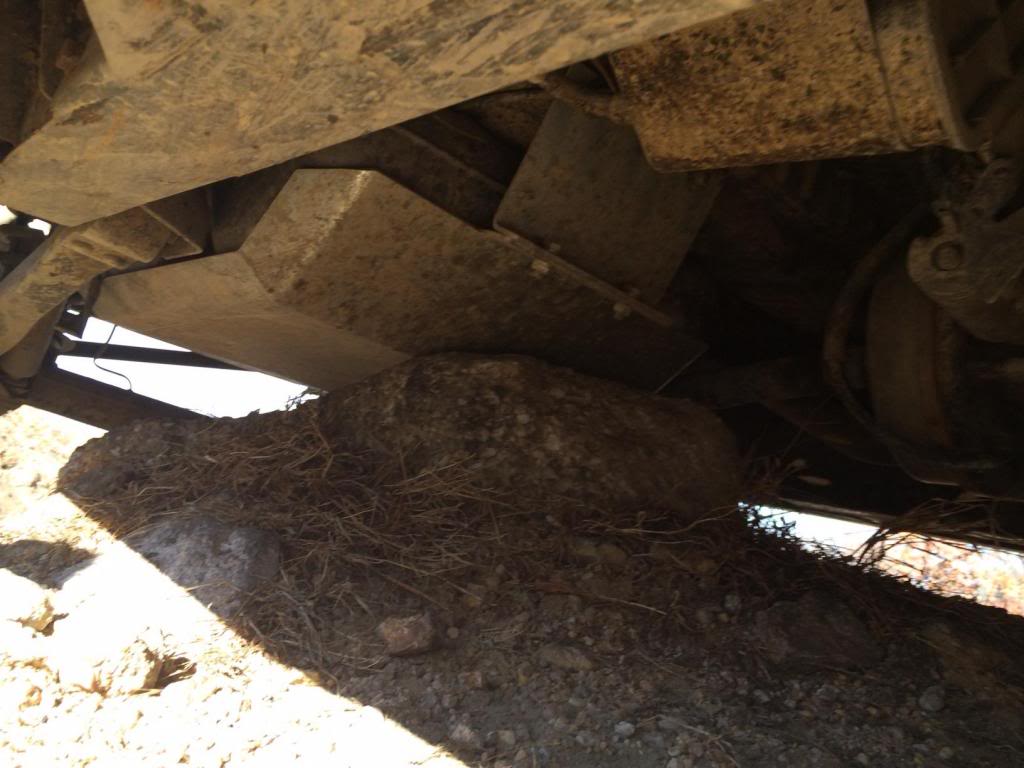
With out the guard the gas tank would not have survived this.
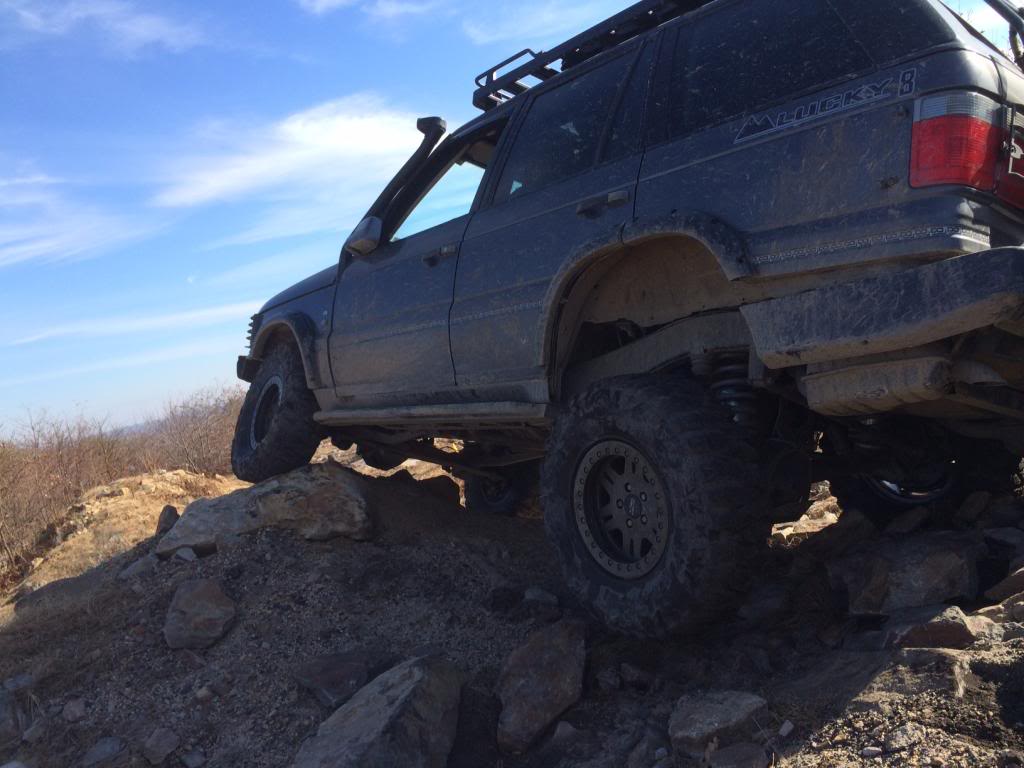
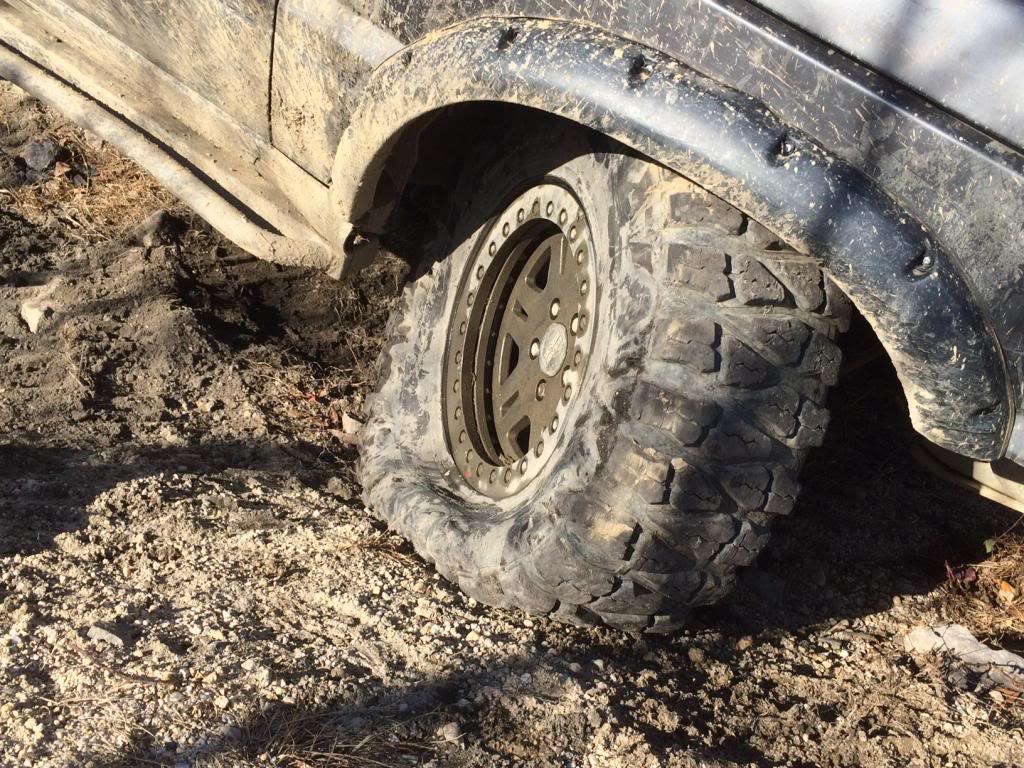
Never a crash
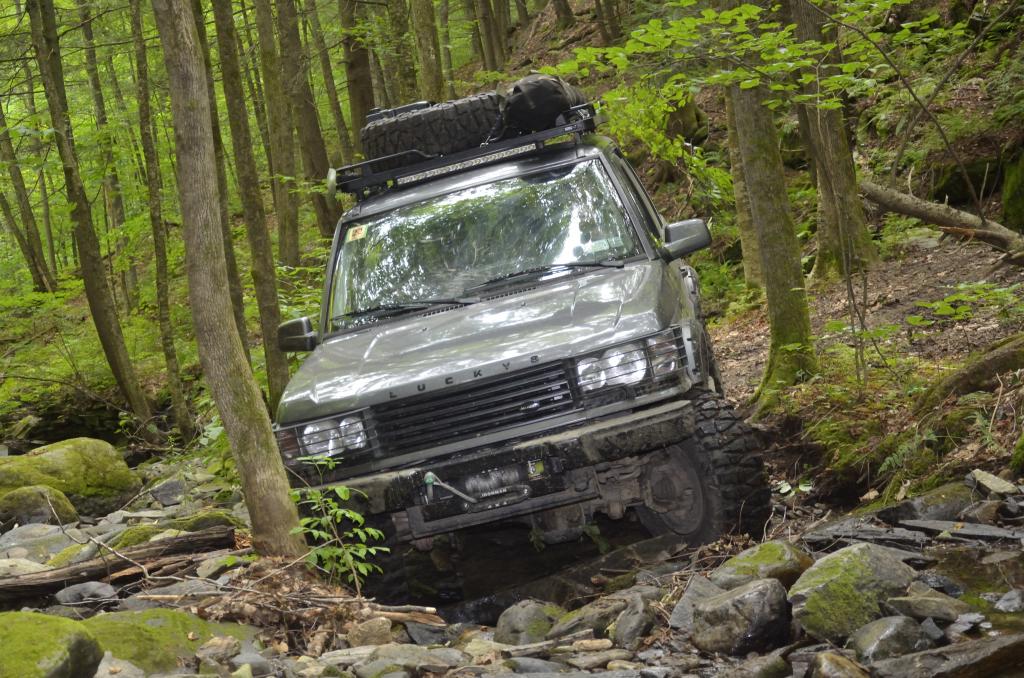
The P38 performed amazingly and this was partly due to the Terrafirma beed locks. I aired them down to 8psi and they gave us all the grip we could possibly ask for.
Traction can be a double edged sword. If the tire has more grip then the drivetrain has strength to spin it two things can happen.
1 the motor bogs down and wants to die
2 the weakest link in the system does its best rice crispy impression “Snap Crackle Pop"
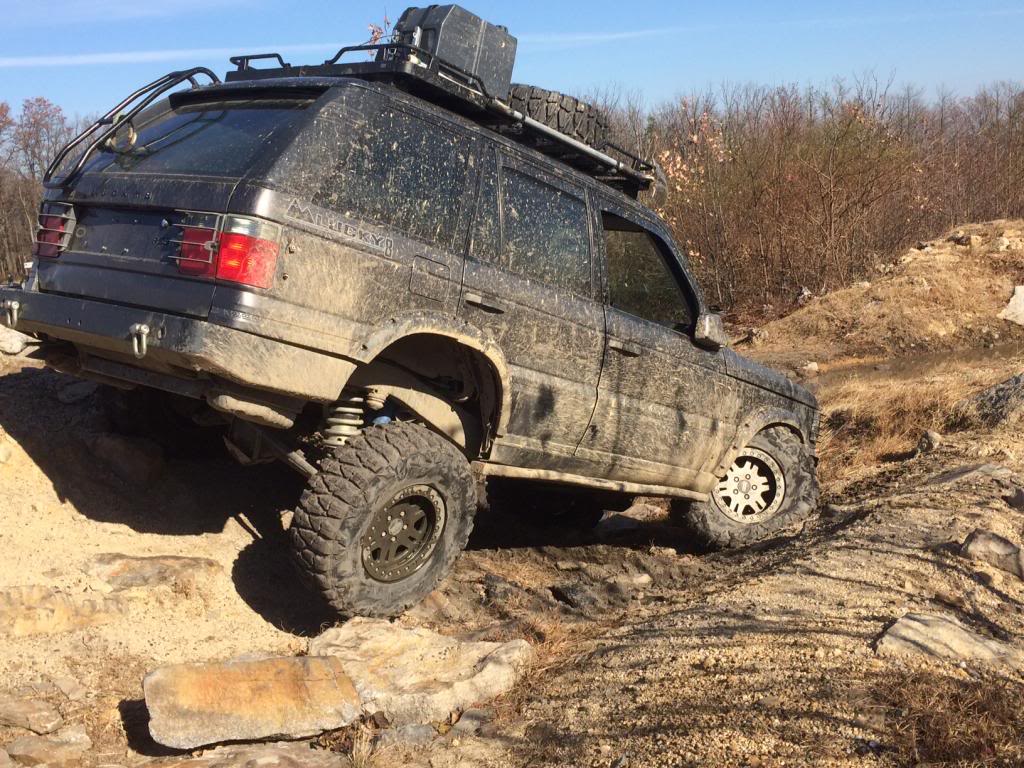
Yep you guest it we went with choice number two. The 4 dot 6 combined with the sticky icky Nitto’s ended in Snap Crackle Pop. We are betting it is the front viscous 1/2 shaft in the transfer case. Unfortunately this neutered the front drivetrain leaving us in rear wheel drive only. The silver lining in this failure is we were able to see just how good the Ashcroft ATB is.
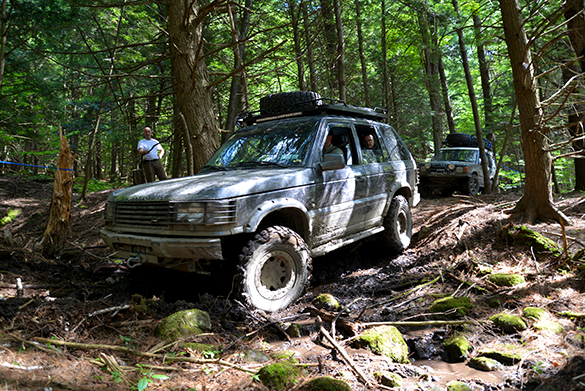
This situation gave us a unique oppertunity to see the ATB in action. With the traction control disabled and no power going to the front wheels this was a perfect challenge. Could the Ashcroft unit provide enough torque transfer to the one rear wheel on the ground to push the front two wheels over the rock and dirt mound?
My hats off to the ATB. If the traction control was working, I’m betting it would have walked right out with very little effort.
Before we get to the poser picture I have two other pictures I would like to share. The first one is of the Mud pod. I am really liking this on the dash.
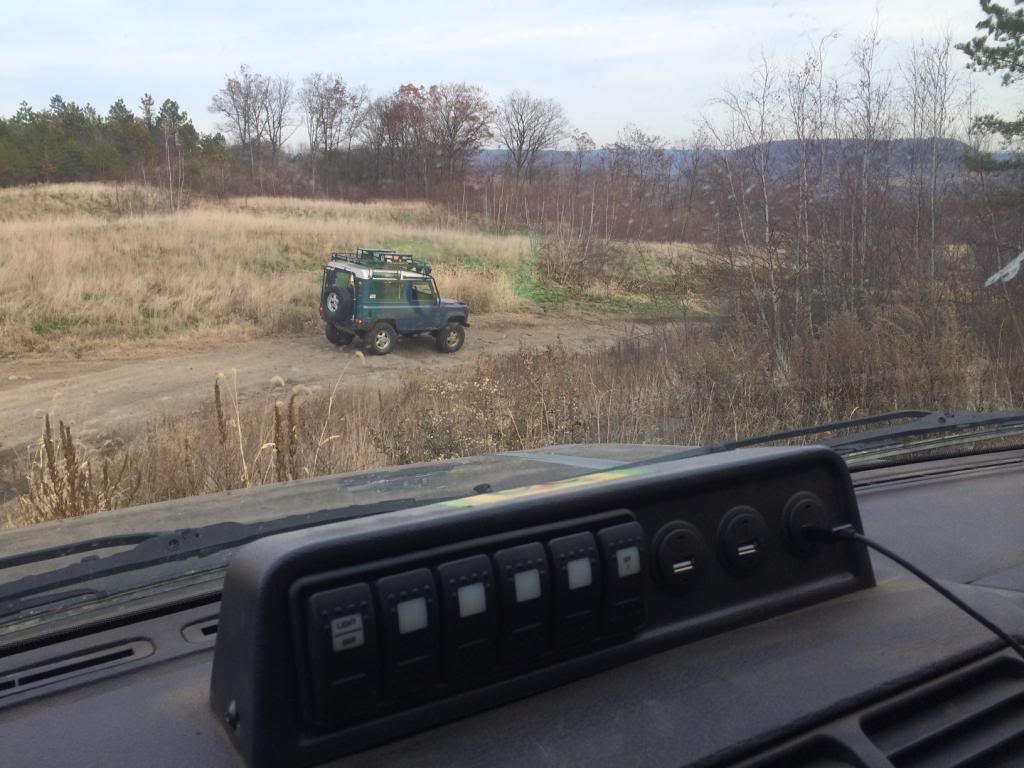
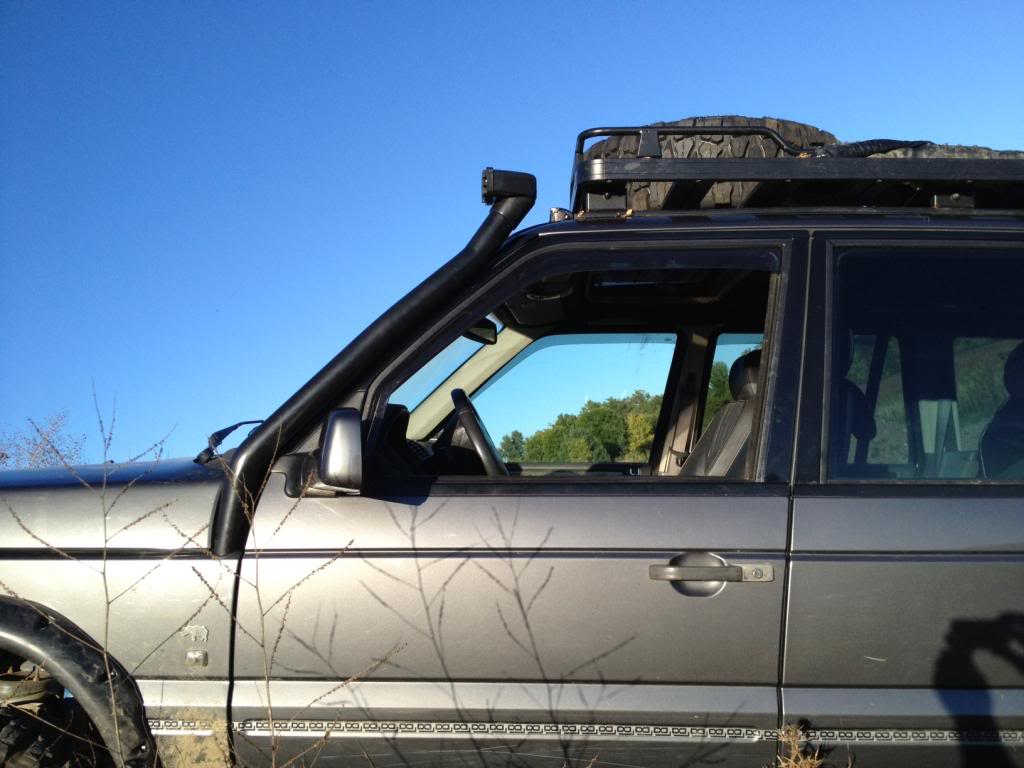
And the other picture is of the snorkel. We had a few water crossings and for the first time in a long time I took the P38 back with a dry air filter.
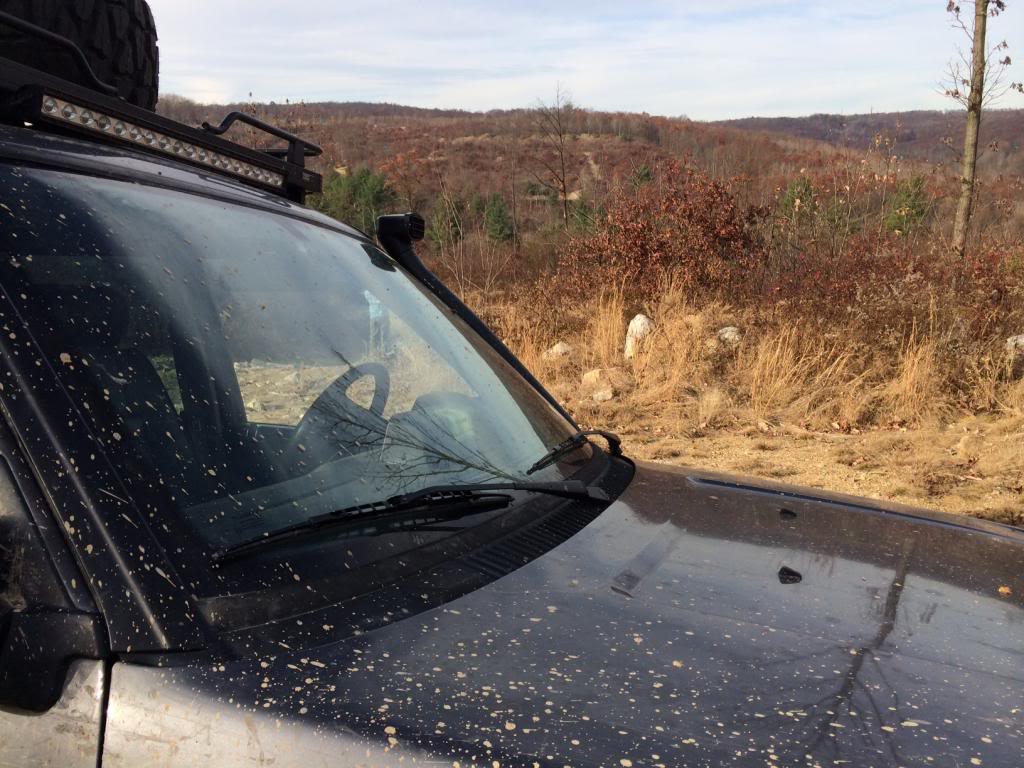
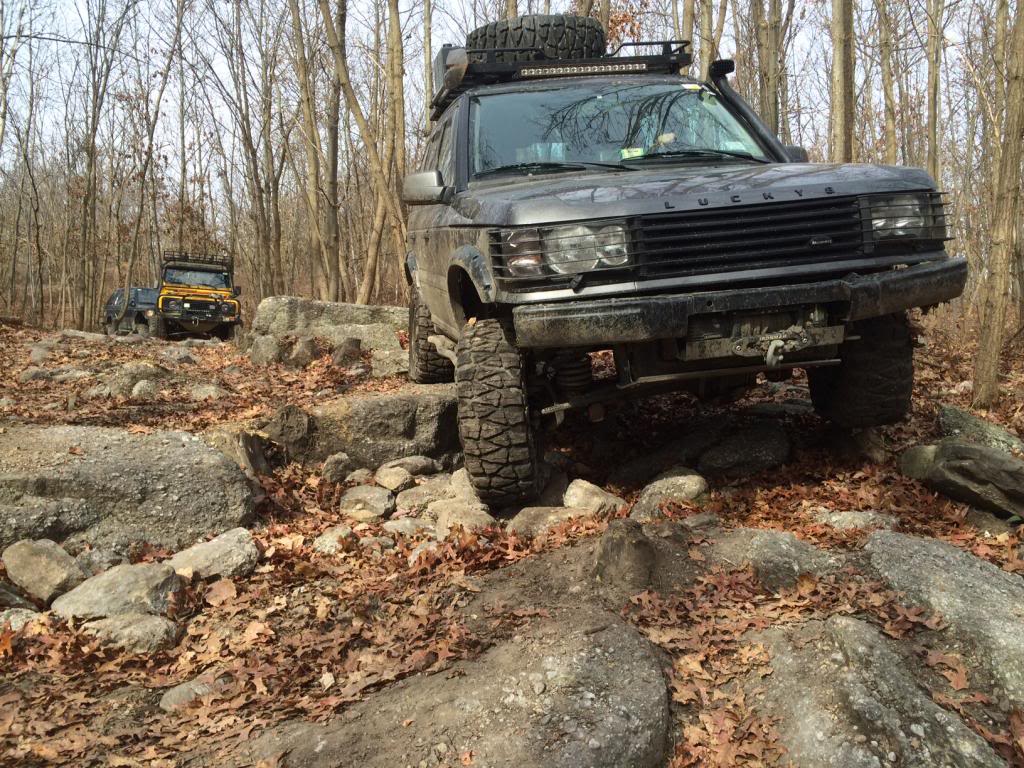
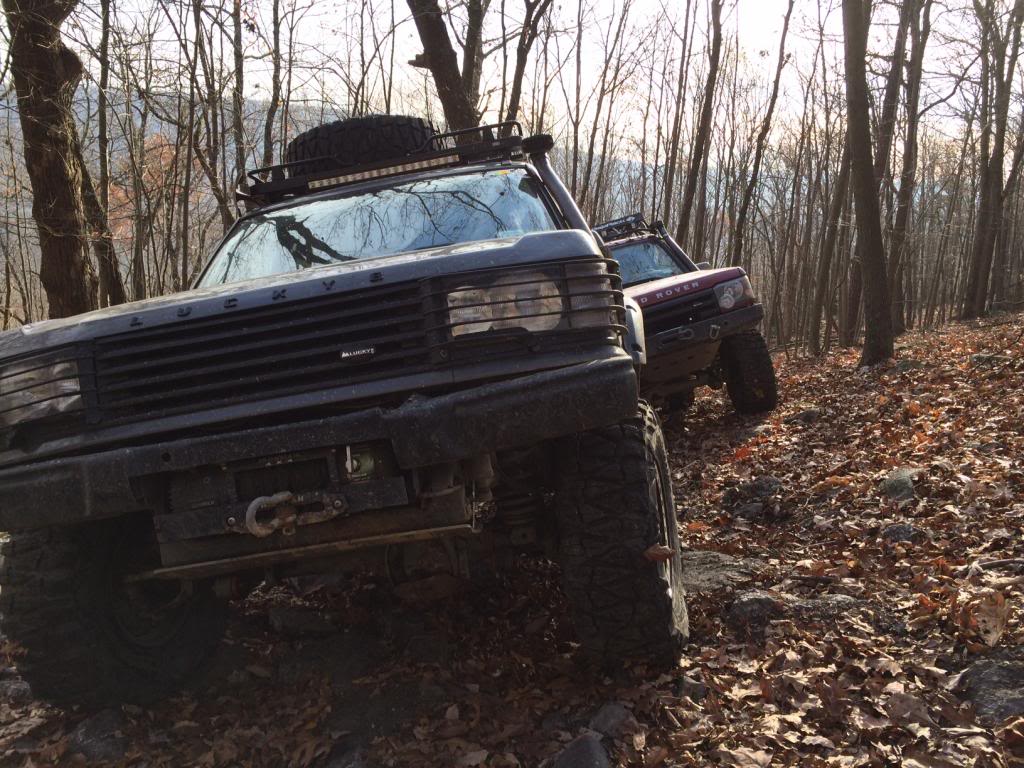
Finally the poser pic.
Last weeks adventures during Rovers on the Rocks tested all of the armor and gave the Ashcroft ATB a full on work out.


A Biff
Before we get to the rock challenge lets have a look at the brand new front steering guard from Terrfirma.

I was planing on taking some action shots with the guard during Rovers on the Rocks but with in the first few minutes the guard was put to the test.

The new guard fit with ease and was able to take the abuse.

A Bash
The steering guard was not the only new piece of armor earning its salt. The tank guard took a beating.


With out the guard the gas tank would not have survived this.
Never a crash
The P38 performed amazingly and this was partly due to the Terrafirma beed locks. I aired them down to 8psi and they gave us all the grip we could possibly ask for.

Traction can be a double edged sword. If the tire has more grip then the drivetrain has strength to spin it two things can happen.
1 the motor bogs down and wants to die
2 the weakest link in the system does its best rice crispy impression “Snap Crackle Pop"

Yep you guest it we went with choice number two. The 4 dot 6 combined with the sticky icky Nitto’s ended in Snap Crackle Pop. We are betting it is the front viscous 1/2 shaft in the transfer case. Unfortunately this neutered the front drivetrain leaving us in rear wheel drive only. The silver lining in this failure is we were able to see just how good the Ashcroft ATB is.

This situation gave us a unique oppertunity to see the ATB in action. With the traction control disabled and no power going to the front wheels this was a perfect challenge. Could the Ashcroft unit provide enough torque transfer to the one rear wheel on the ground to push the front two wheels over the rock and dirt mound?
My hats off to the ATB. If the traction control was working, I’m betting it would have walked right out with very little effort.
Before we get to the poser picture I have two other pictures I would like to share. The first one is of the Mud pod. I am really liking this on the dash.

And the other picture is of the snorkel. We had a few water crossings and for the first time in a long time I took the P38 back with a dry air filter.

Finally the poser pic.

Thread Starter
|
Winching
Joined: Jan 2009
Posts: 628
Likes: 18
Mini Project Update : Flash back
There was only 125 Rhino edition P38s made for the US market in 2000 and then a final batch of 150 for 2002. Needless to say these are rare trucks.
So whats the point of this history lesson ?
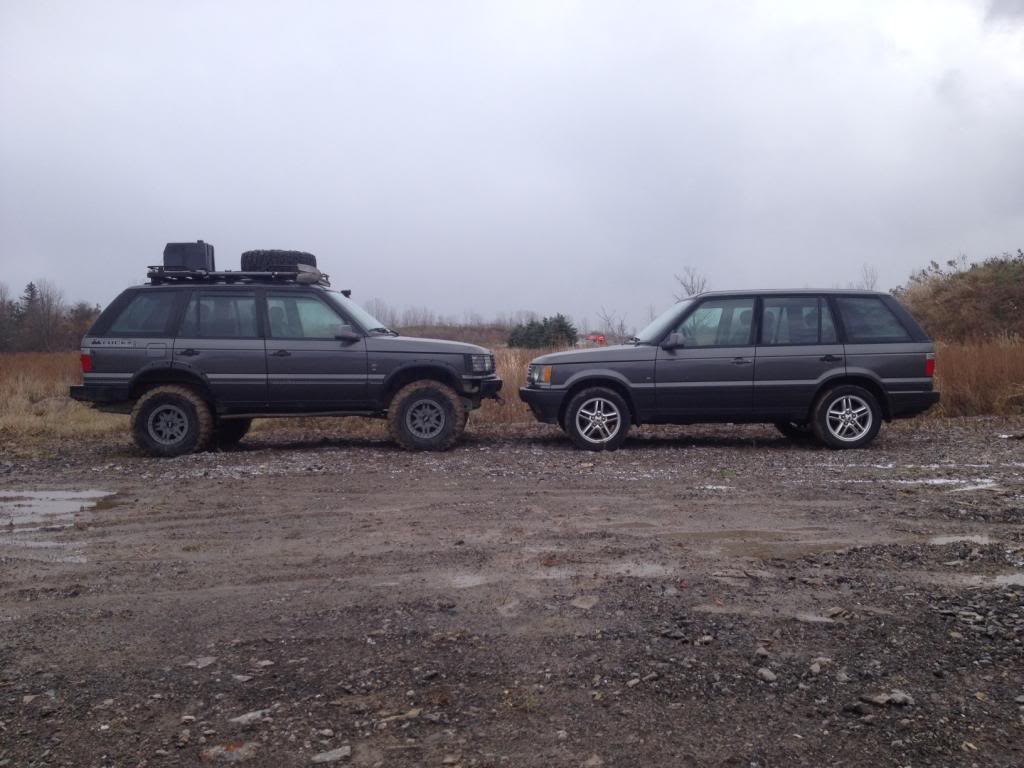
Against all odds we had another Rhino edition P38 show up at Lucky8’s front door. This poor animal was in desperate need of some BECM work. Once it had a clean bill of health we took the little guy out for some pictures with it’s big brother. Enjoy


From the inside of the stock Rhino
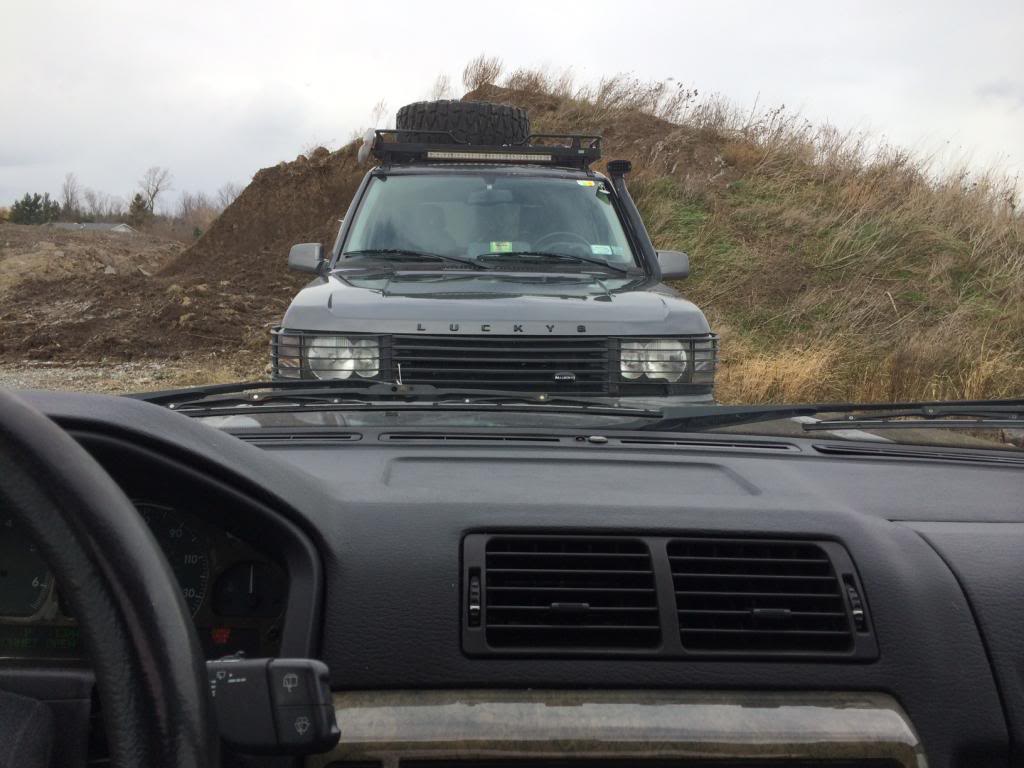
Playing with the angles
And the Poser shot

There was only 125 Rhino edition P38s made for the US market in 2000 and then a final batch of 150 for 2002. Needless to say these are rare trucks.
So whats the point of this history lesson ?
Against all odds we had another Rhino edition P38 show up at Lucky8’s front door. This poor animal was in desperate need of some BECM work. Once it had a clean bill of health we took the little guy out for some pictures with it’s big brother. Enjoy


From the inside of the stock Rhino

Playing with the angles

And the Poser shot


Thread Starter
|
Winching
Joined: Jan 2009
Posts: 628
Likes: 18
Thank you but it is not mine. The little guy went home right after the pictures.

Thread Starter
|
Winching
Joined: Jan 2009
Posts: 628
Likes: 18
Project Update : Pop goes the ?
Have you ever heard a drive line noise that you instantly knew was catastrophic? I did at VOT last year and the Rhino appeared to be lacking FWD.
Once the truck was free from the obstacle everything worked fine. I just scratched my head and went on for the next 2 days of the trip.
Pic nicked from Bryon Dorr
I heard this gut wrenching noise again at Rovers on the Rocks. I was positive there was no FWD. We jacked up the truck to test it and … Nothing. Everything worked as it should. Again I found myself scratching my head.

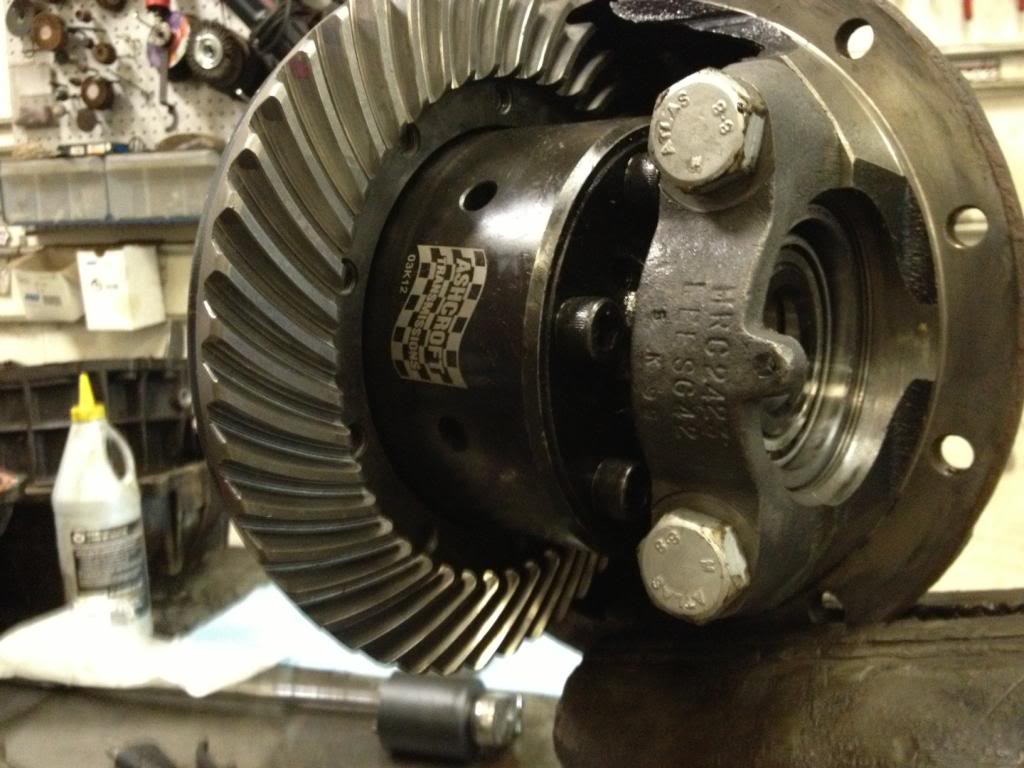
Back at the shop we pull the CVs, Diff and 1/2 shafts. Yep you guessed it

Unfortunately the next thing was the T-case and out it came. There was a ton of metal shavings in the fluid.
One of the bearings was completely shot but this would not account for the lack of FWD.
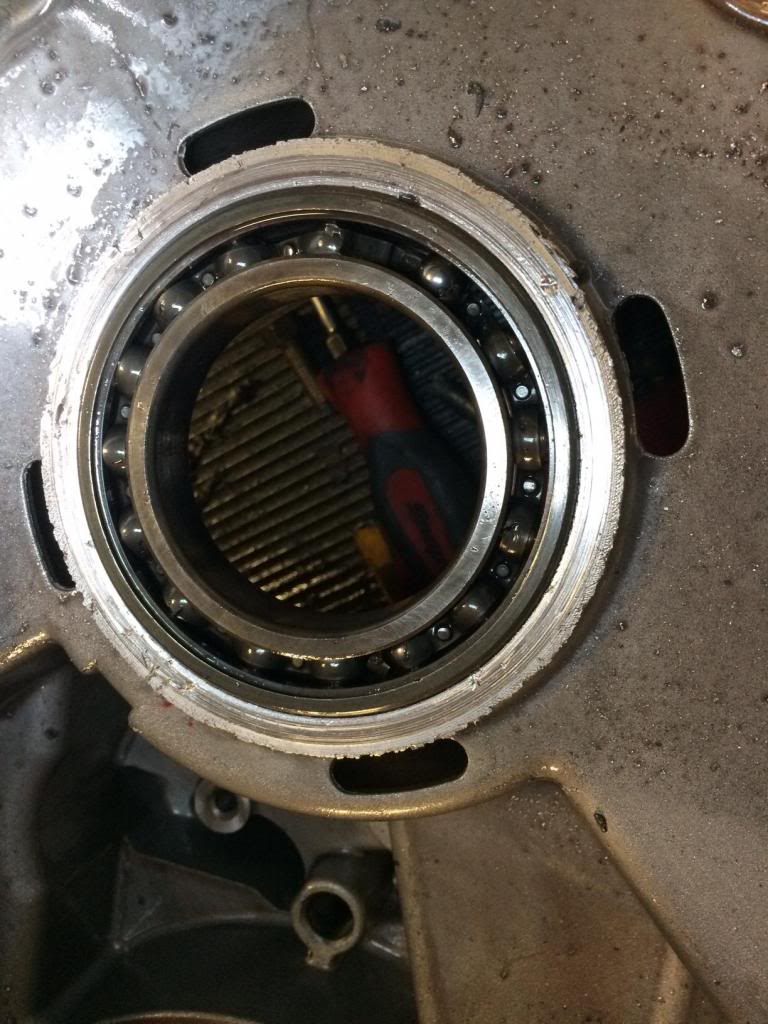
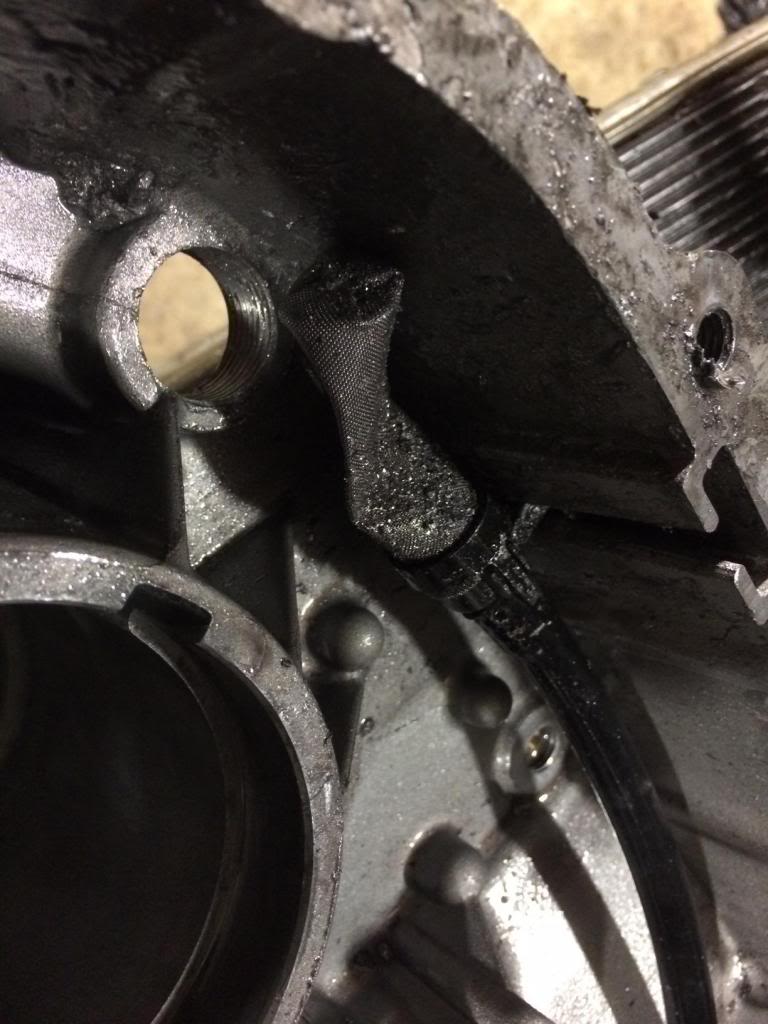
Hoping against all odds that the welded center viscous was still good, I popped it open and found
.
.
.
.
.
this.
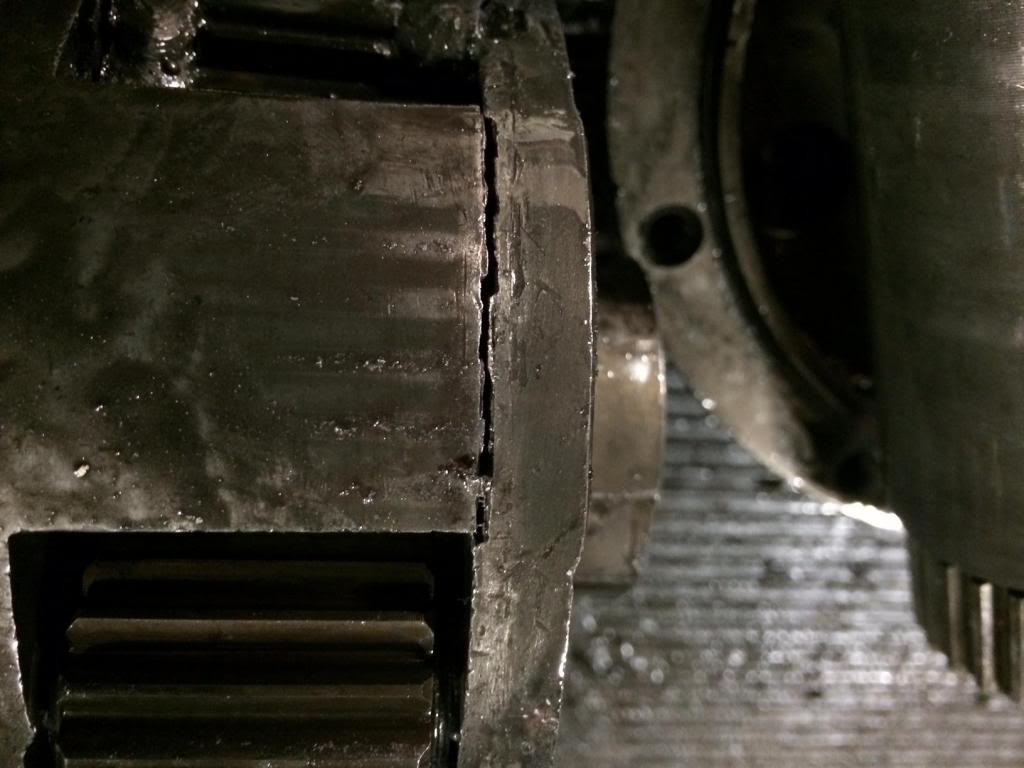
The end result was some of the teeth on the spider gears snapped off.
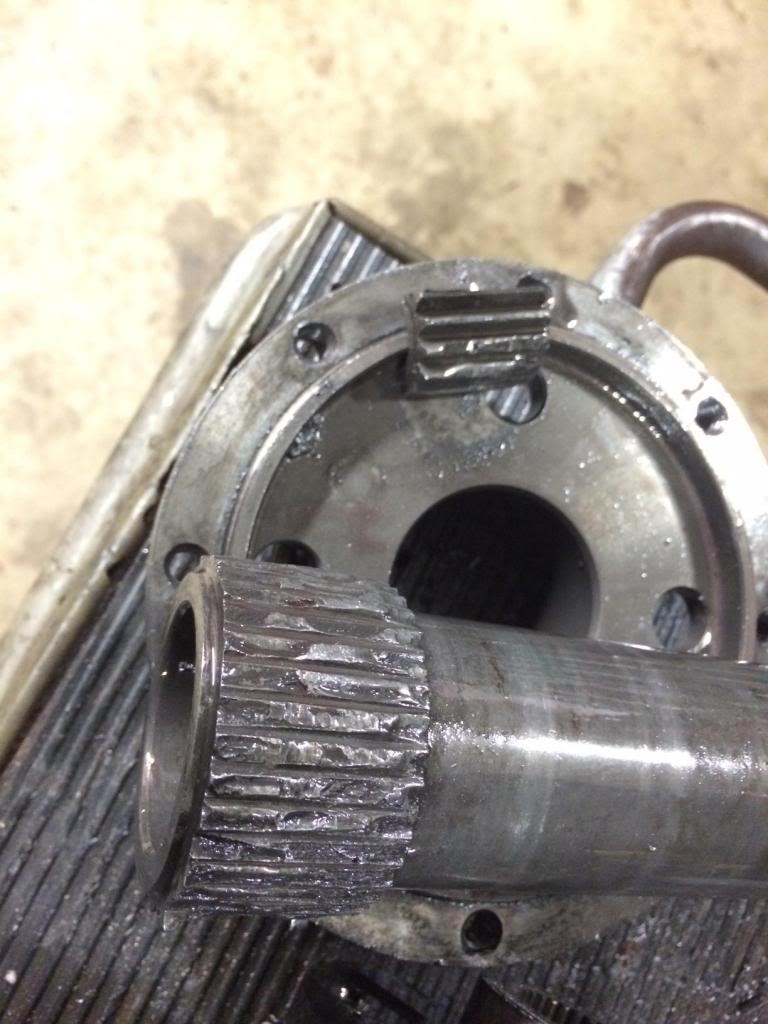
As the broken teeth bounced around the viscous unit it would spontaneously lose FWD. We maybe asking to much from the T-case but I’m going to give it another college try with a welded center.
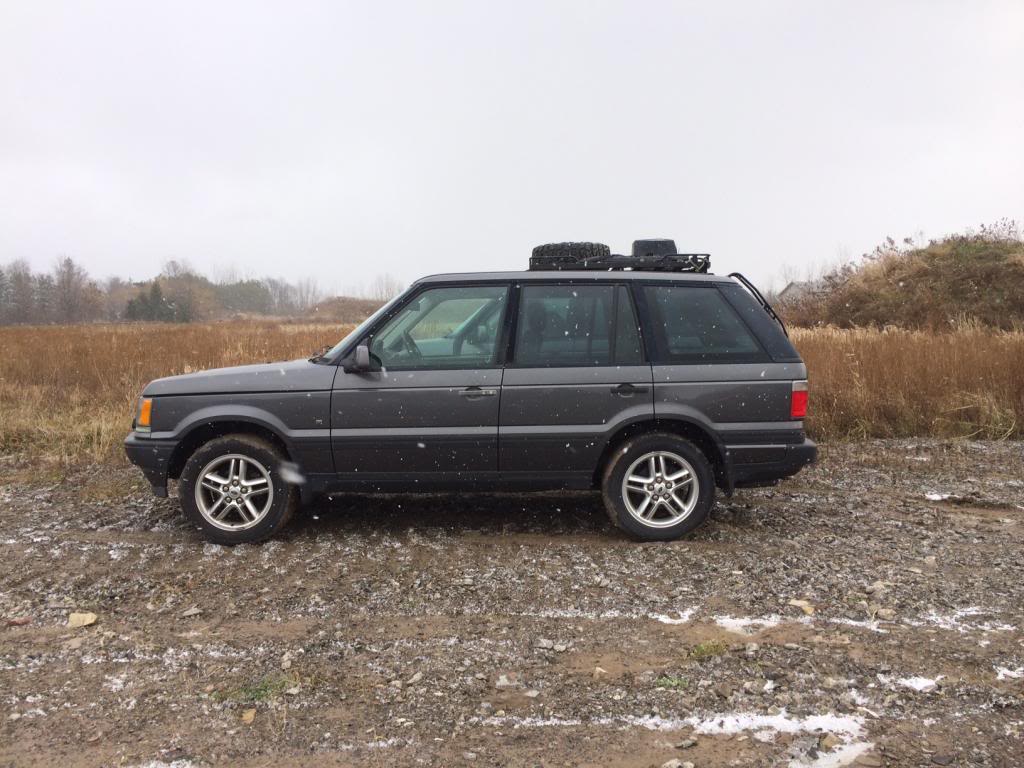
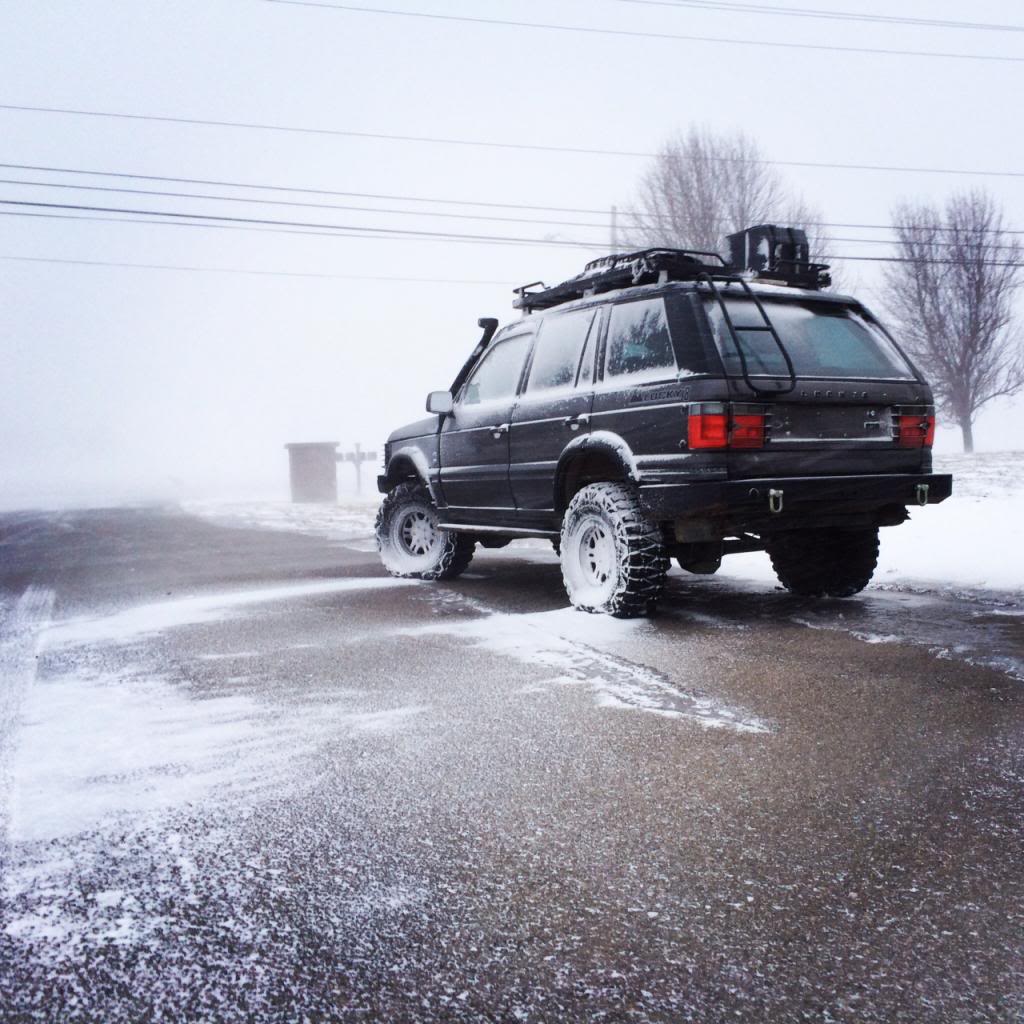
Thats all for now, enjoy the frosty poser pic.
Have you ever heard a drive line noise that you instantly knew was catastrophic? I did at VOT last year and the Rhino appeared to be lacking FWD.

Once the truck was free from the obstacle everything worked fine. I just scratched my head and went on for the next 2 days of the trip.

Pic nicked from Bryon Dorr
I heard this gut wrenching noise again at Rovers on the Rocks. I was positive there was no FWD. We jacked up the truck to test it and … Nothing. Everything worked as it should. Again I found myself scratching my head.
Back at the shop we pull the CVs, Diff and 1/2 shafts. Yep you guessed it

Unfortunately the next thing was the T-case and out it came. There was a ton of metal shavings in the fluid.

One of the bearings was completely shot but this would not account for the lack of FWD.

Hoping against all odds that the welded center viscous was still good, I popped it open and found
.
.
.
.
.
this.

The end result was some of the teeth on the spider gears snapped off.

As the broken teeth bounced around the viscous unit it would spontaneously lose FWD. We maybe asking to much from the T-case but I’m going to give it another college try with a welded center.
Thats all for now, enjoy the frosty poser pic.

Thread Starter
|
Winching
Joined: Jan 2009
Posts: 628
Likes: 18
Lucky8’s Project P38 Update : Been gone too long
First off, sorry for the lack in updates but I think this post will make a few people happy.
Snorkel
Say it with me S N O R K E L
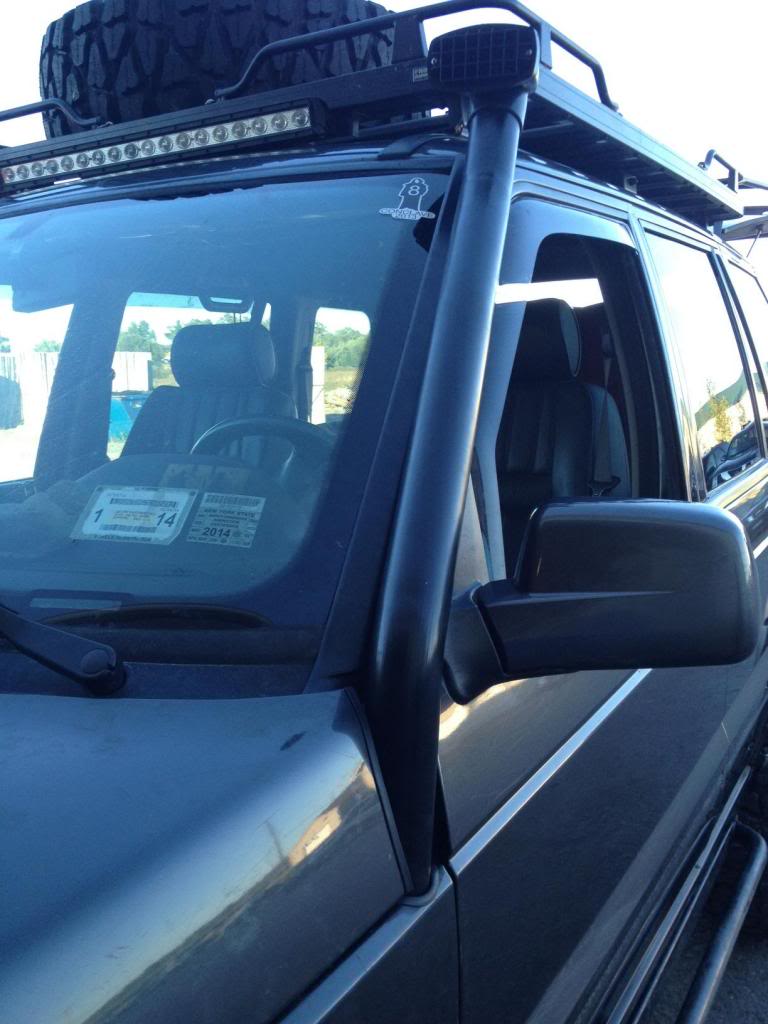
Finally all the pieces are done and ready to go. So without further adieu, here is what it takes to do the install.
Put the template on the hood.
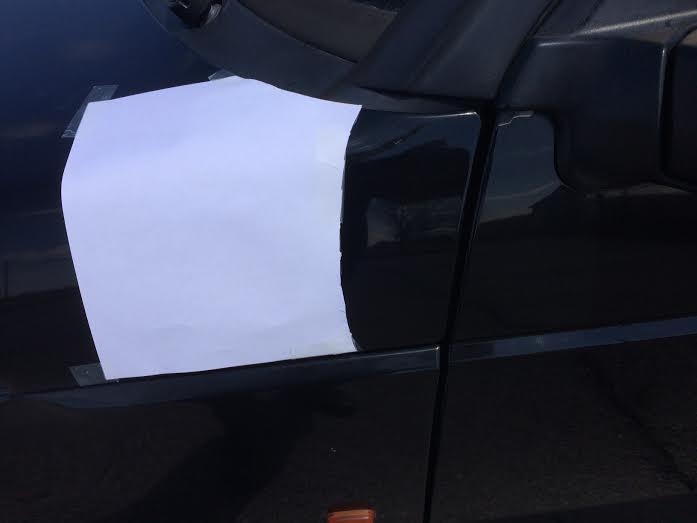
Mark the cut out portion with a scribe.

Remove the hood and cut the unwanted section out.
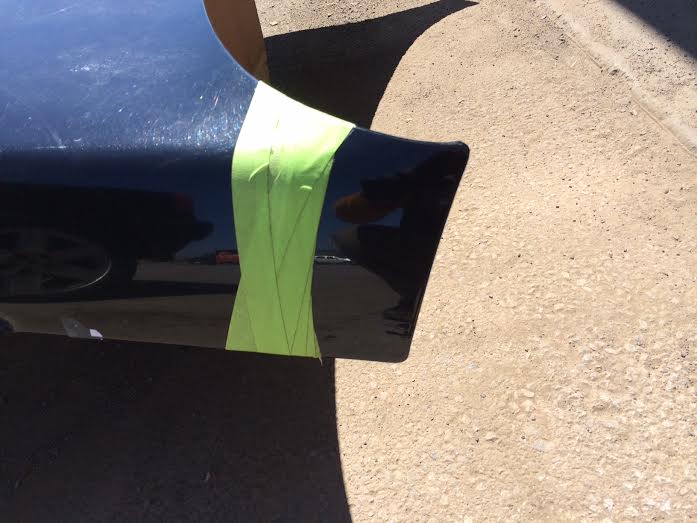
Remove the fender and inner fender plastic mud guard.
Put the template on and cut the unwanted section out.
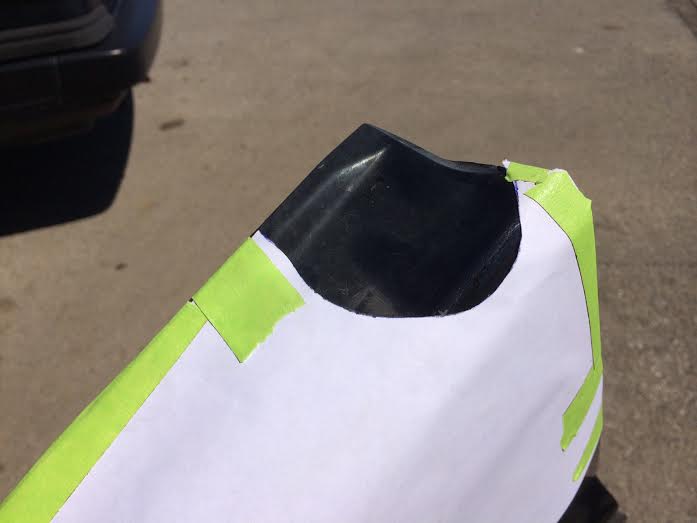
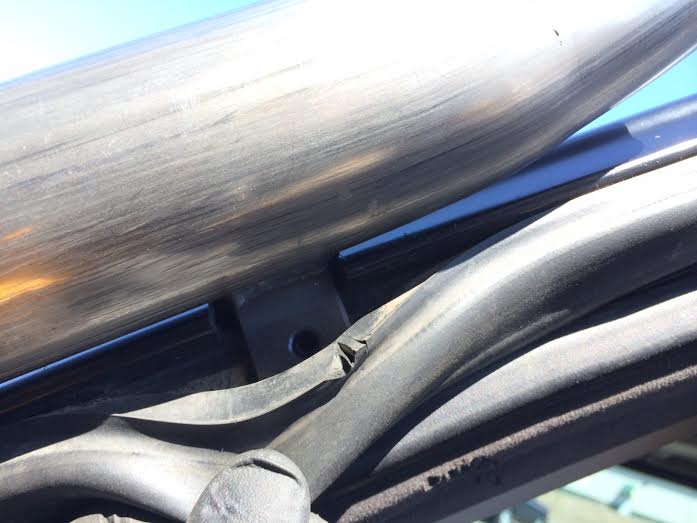
Notch out the pillar trim piece to make room for the snorkel tube mounting tabs.
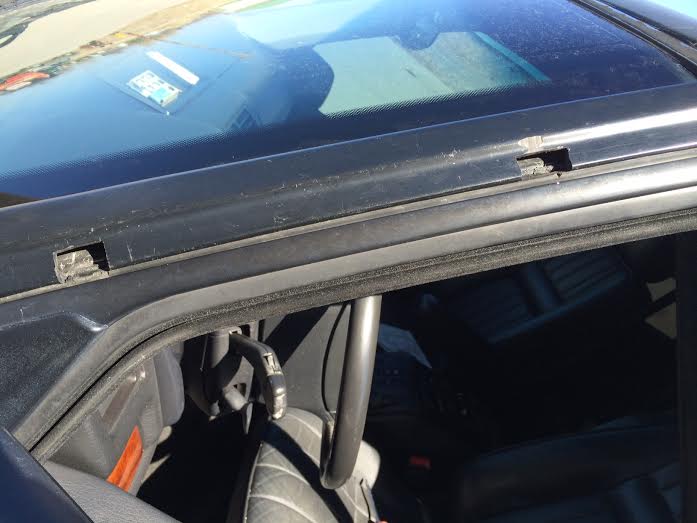
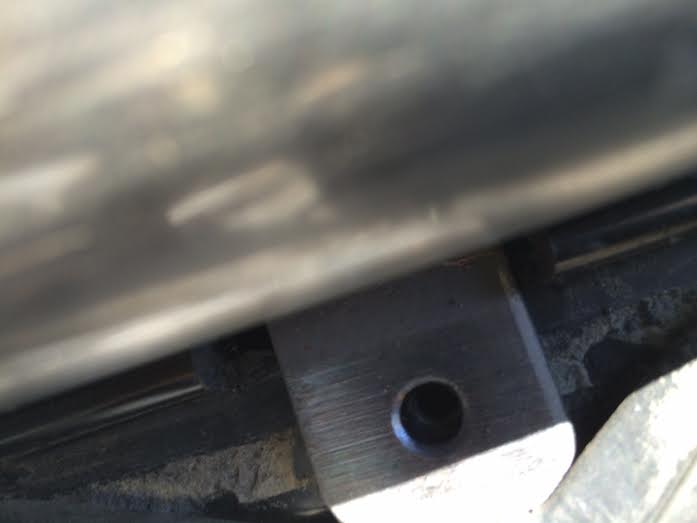
Align the notches with the upper existing screw hole. Use a self tapping screw to mount the bottom tab.
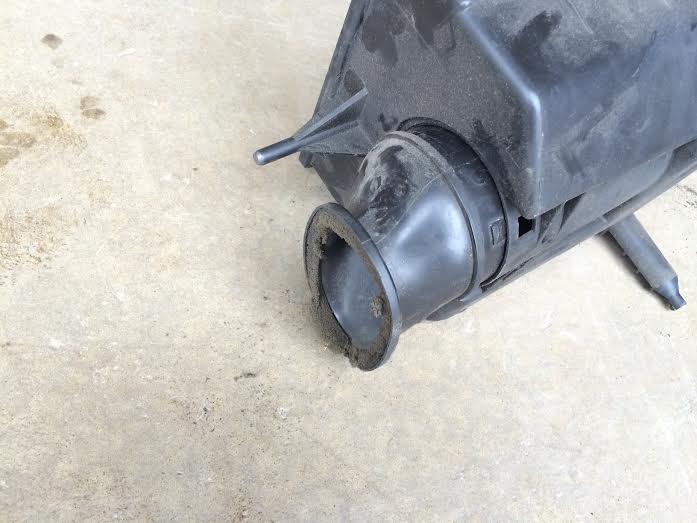
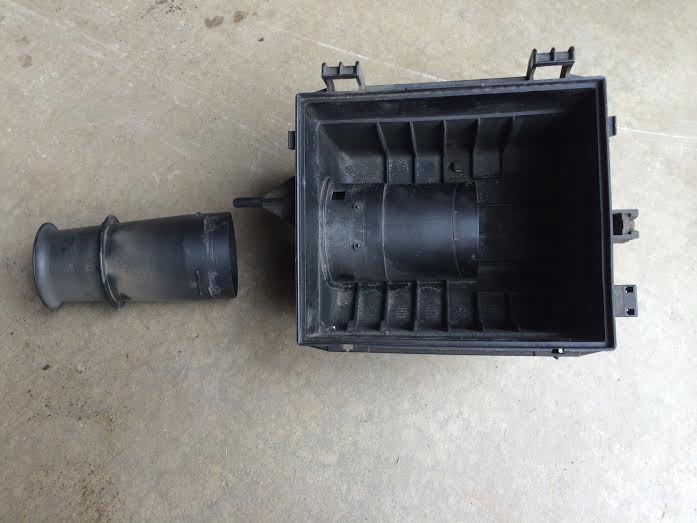
Remove the air box from the engine bay
First off, sorry for the lack in updates but I think this post will make a few people happy.
Snorkel
Say it with me S N O R K E L

Finally all the pieces are done and ready to go. So without further adieu, here is what it takes to do the install.
Put the template on the hood.

Mark the cut out portion with a scribe.

Remove the hood and cut the unwanted section out.

Remove the fender and inner fender plastic mud guard.
Put the template on and cut the unwanted section out.

Notch out the pillar trim piece to make room for the snorkel tube mounting tabs.

Align the notches with the upper existing screw hole. Use a self tapping screw to mount the bottom tab.


Remove the air box from the engine bay

Thread Starter
|
Winching
Joined: Jan 2009
Posts: 628
Likes: 18
Remove the trumpet nose section
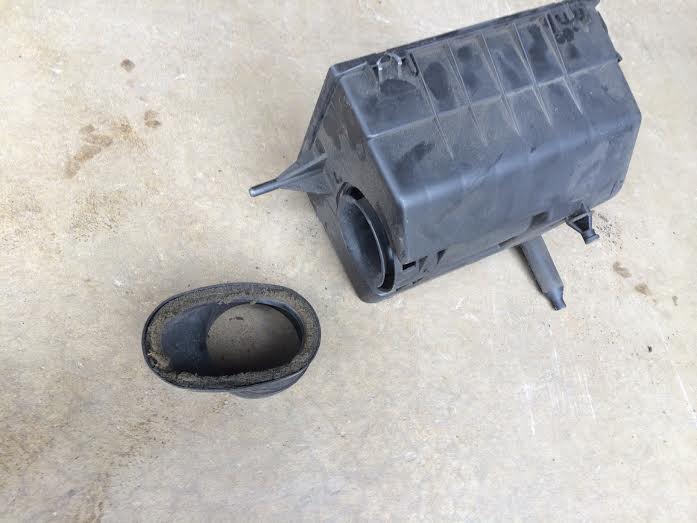
File down the tabs on the inner trumpet section for removal.
Remove inner trumpet section
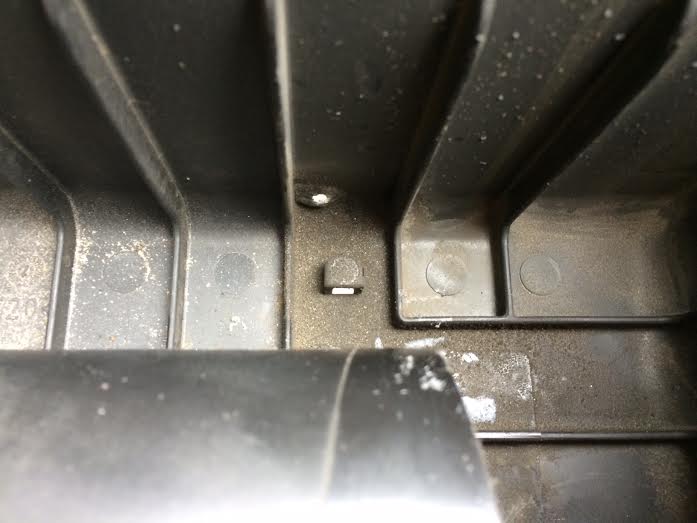
Clean out the air box and seal all the factory drain holes with RTV
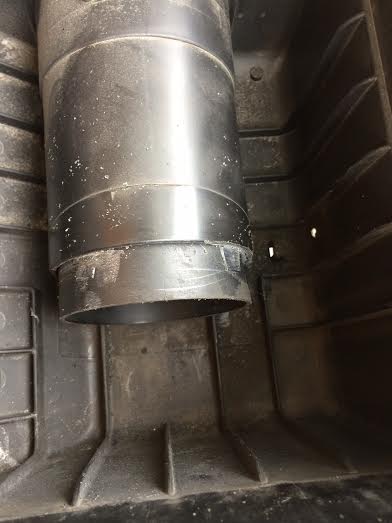
Cut the outer ring off of the internal trumpet section
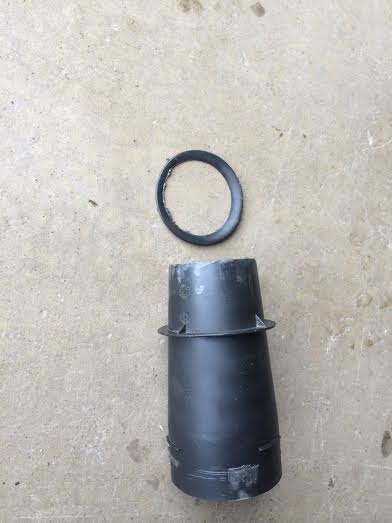
Generously apply RTV to the end of the internal trumpet piece and slide on the PVC hose.
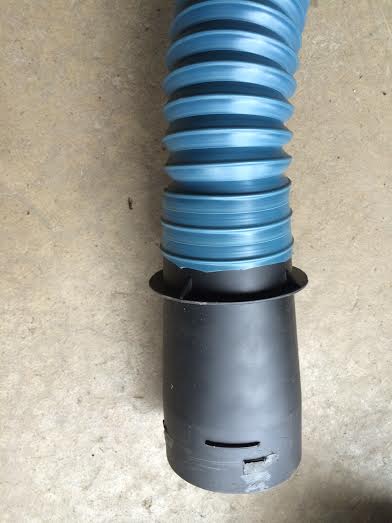
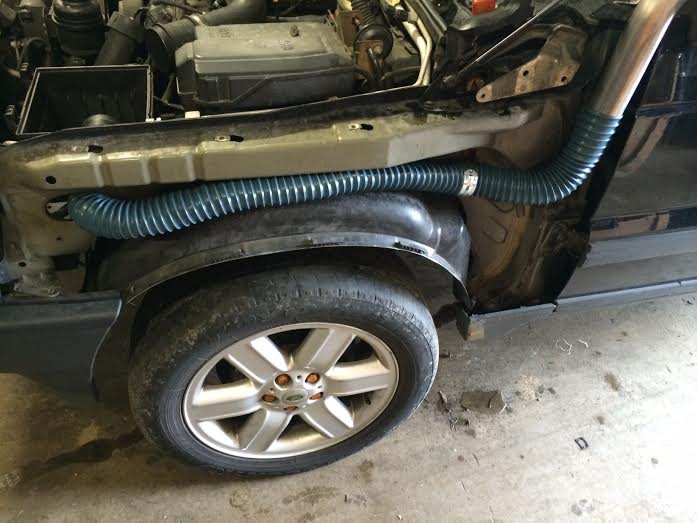
Slide the PVC hose through the old air intake opening. Take care not to cut the PVC hose on the inner fender.
Generously apply RTV to the end of the internal trumpet piece and slide it back into the air box. Seal the remaining holes with RTV.
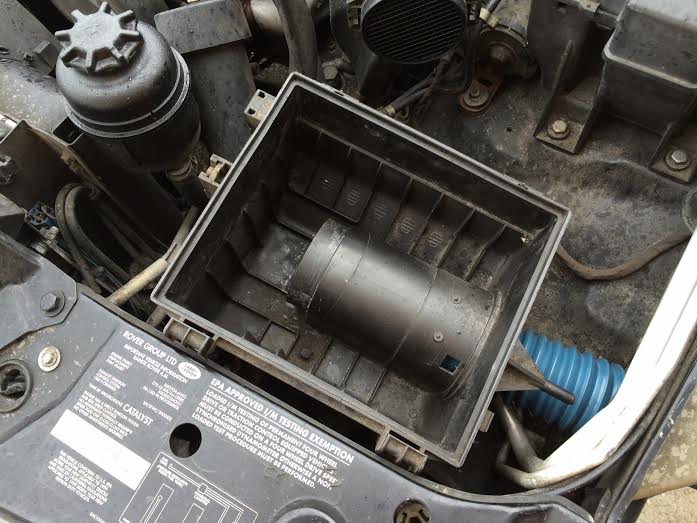
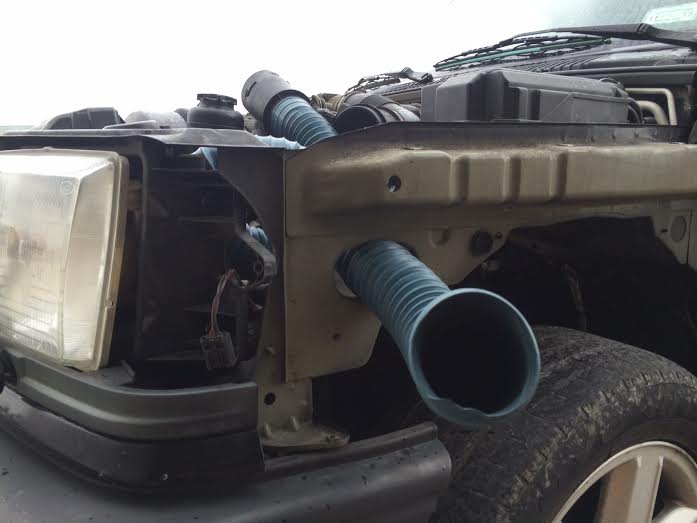
Generously apply RTV to the end of the snorkel in the fender well and slide on the PVC hose. Drill a 1/4 hole and attach the PVC hose clamp to the inside of the fender. Tuck the PVC hose above the inner fender plastic mud guard
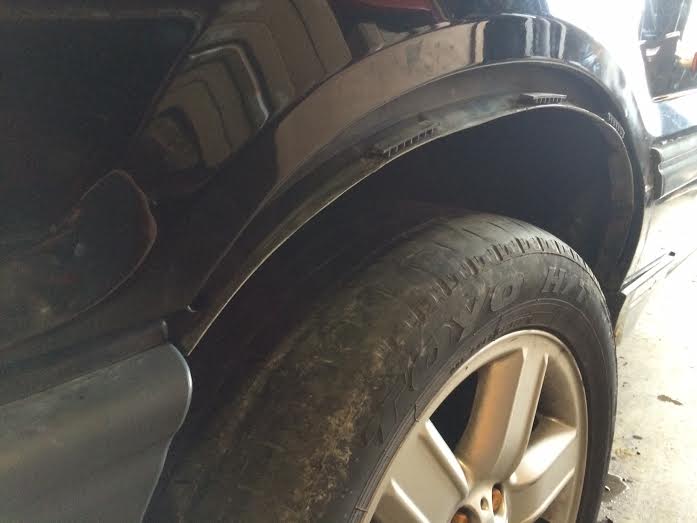
The inner fender plastic mud guard will have to be reworked to make room for the PVC hose.
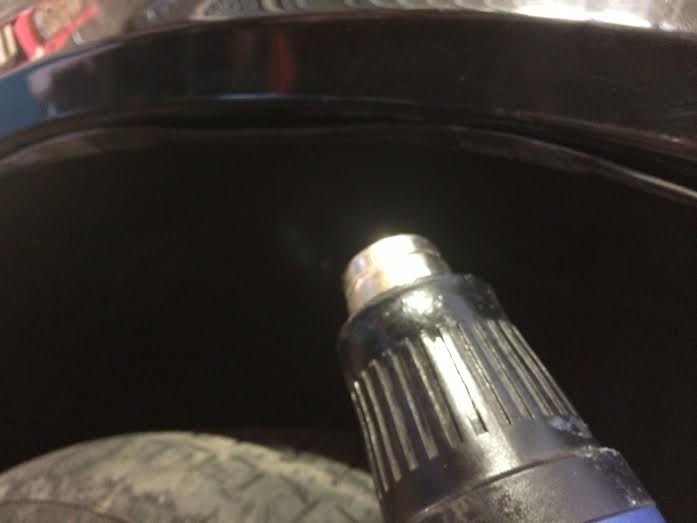
Use a heat gun on the inner fender plastic mud guard to bend it back into place.
Install the rubber trim pieces on the hood and fender cut off sections.
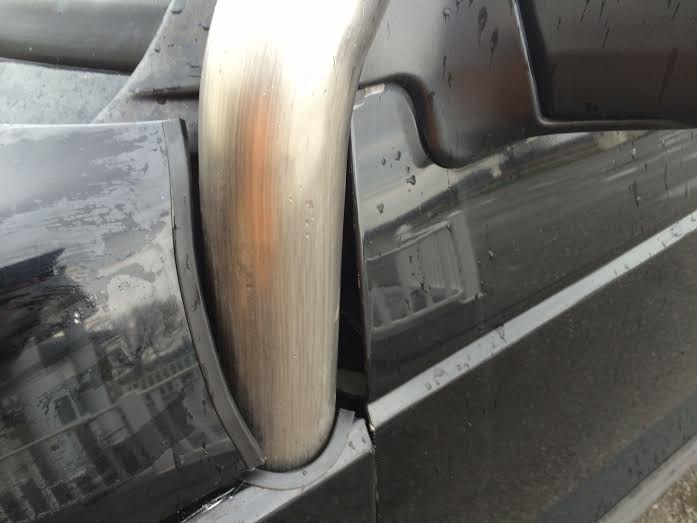
Lastly, generously apply RTV to the snorkel top and install.
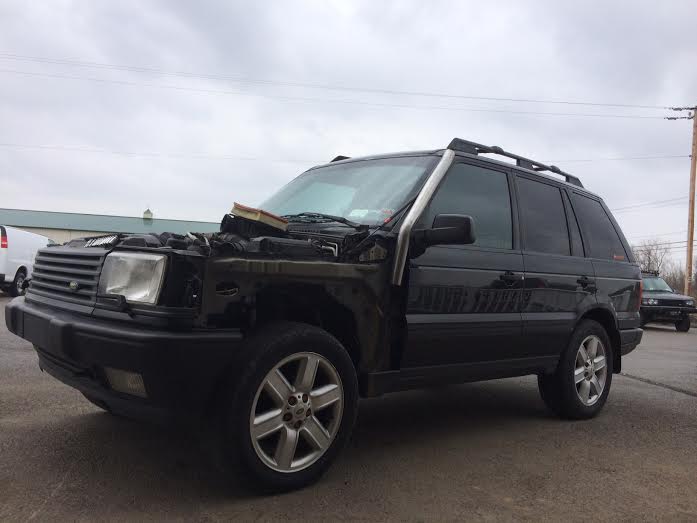
Let me know what you guys think. The poser pic here is the stock truck that gave up a hood and fender for testing purposes.

File down the tabs on the inner trumpet section for removal.

Remove inner trumpet section

Clean out the air box and seal all the factory drain holes with RTV

Cut the outer ring off of the internal trumpet section

Generously apply RTV to the end of the internal trumpet piece and slide on the PVC hose.

Slide the PVC hose through the old air intake opening. Take care not to cut the PVC hose on the inner fender.

Generously apply RTV to the end of the internal trumpet piece and slide it back into the air box. Seal the remaining holes with RTV.

Generously apply RTV to the end of the snorkel in the fender well and slide on the PVC hose. Drill a 1/4 hole and attach the PVC hose clamp to the inside of the fender. Tuck the PVC hose above the inner fender plastic mud guard

The inner fender plastic mud guard will have to be reworked to make room for the PVC hose.

Use a heat gun on the inner fender plastic mud guard to bend it back into place.

Install the rubber trim pieces on the hood and fender cut off sections.

Lastly, generously apply RTV to the snorkel top and install.

Let me know what you guys think. The poser pic here is the stock truck that gave up a hood and fender for testing purposes.
