When you click on links to various merchants on this site and make a purchase, this can result in this site earning a commission. Affiliate programs and affiliations include, but are not limited to, the eBay Partner Network.
Some photos of a Midland MXT275 15W 2-way GMRS radio I installed in my 2020 Defender 110.
The stubby 3 db gain "Ghost" antenna is screwed on a standard NMO lip mount over the hood (the mount stays there permanently, the antenna can be unscrewed and stored in the car when not in use) , the antenna wire goes through the firewall and into the cabin through the steering column's rubber boot. Thanks to another poster on this forum for the idea - there are no other easily accessible grommets to pass through the firewall that I could see otherwise.
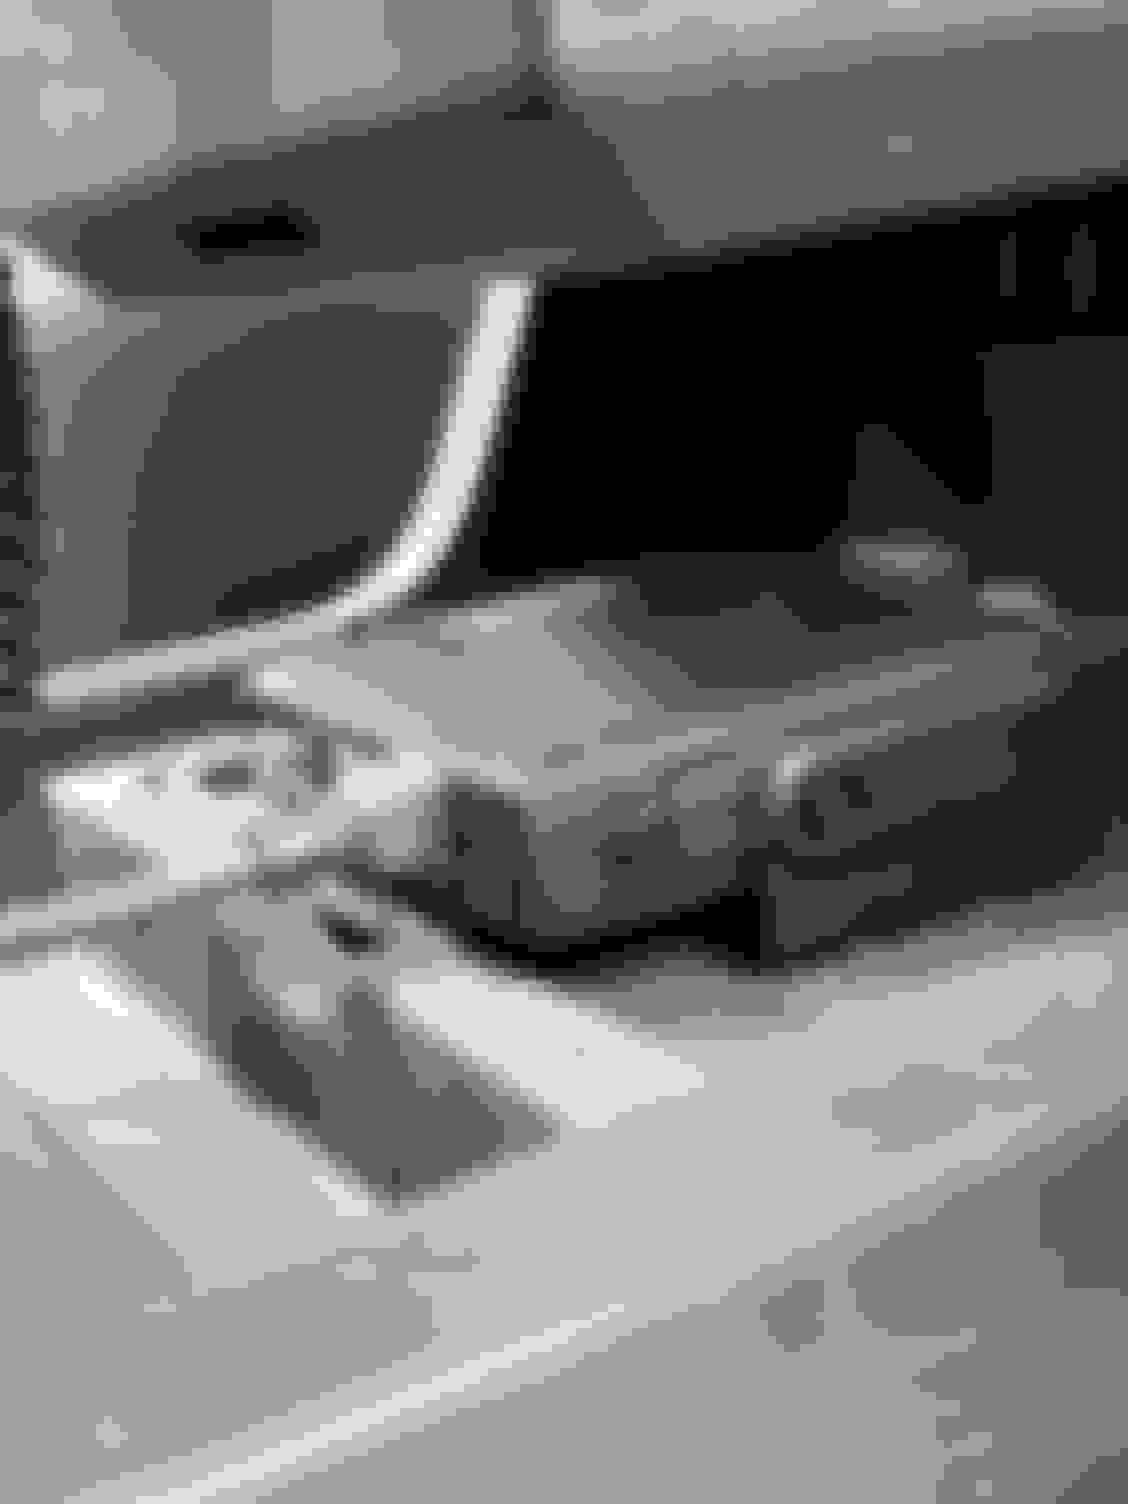
The head unit is mounted in the empty "storage" space under the cup holder. I attached the supplied bracket to the sturdy rubber tray that sits down there, so no permanent installation holes are required - other than on the tray itself - and the head unit can easily be removed and used on a different car by just sliding it off the bracket if necessary.
The microphone with all the controls (one of the reasons why I like this Midland model - no controls or displays on the head unit, so you can hide that away from sight) hangs from a custom A-Tach mount and attached microphone holder (the holder comes with the radio) to the right of the touchscreen - my cell phone is on the same mount to the left. Since the microphone with coiled cord can be detached from the head unit, it makes for a clutter free console when the radio is not needed.
Power cable with inline fuse and antenna wire from the engine bay are tucked away along the driver side panel of the center console, and pop out on the side of the driver seat to connect to the back of the head unit, so they are not visible.
Hope this helps.
Last edited by umbertob; May 29, 2021 at 07:27 PM.
@umbertob - Can you provide more info/link re: the handheld mount? Looks great and would like to find one. I see a "high" and "low" mount from A-tach. Is that the low mount or something else? Thanks.
Low phone mount from a-tach: https://www.atachmounts.com/Land-Rov...unt_p_332.html (pretty sure there are other similar or better choices on the market since last year.) Whichever mount you pick, I recommend you superglue / Gorilla glue the handheld mount - supplied with the radio - onto that a-tach or equivalent plate - the double-sided tape the Midland mount came with lasted about month or so in the hot SoCal summer last year before it failed. Three drops of superglue seem to have done the trick, permanently.
And one more question! (I hope) Did you create your own wiring harness from the cigarette lighter charger or did were you able to buy one / come with the set? Also, why did you run the power thru the grommet? Is it because you already ran the antennae wire through or was it just easier to go direct power to the battery? I'm thinking of taping into the fuse panel in the passenger side and wondering if you had any issues or were just trying to avoid the PITA. Ok, that was technically more than one question...
Thanks, @Bjs1234 ! That wiring harness is what I'm looking for. I can create one from the cigarette lighter, but would prefer one already made if they still have them. Their product site only shows it for a different model. While I love the way @umbertob mounted his, I saw that they have an Mic extender that other folks have used to completely bury the main unit. I may just put the plug down there and bury the "head unit" as well. I was just trying to minimize the number of splices I was going to do. I plan on running it to a fuse piggy back and the only thing I want to run thru the firewall is the antennae. I've been very successful avoiding it for lights by going with the Trigger Controller 6-shooter. Now I have to finally punch thru for the antennae. I've seen the Lucky8 wiring instructions that lead me to switch to the 6-shooter rather than go thru it.
Some photos of a Midland MXT275 15W 2-way GMRS radio I installed in my 2020 Defender 110.
The stubby 3 db gain "Ghost" antenna is screwed on a standard NMO lip mount over the hood (the mount stays there permanently, the antenna can be unscrewed and stored in the car when not in use) , the antenna wire goes through the firewall and into the cabin through the steering column's rubber boot. Thanks to another poster on this forum for the idea - there are no other easily accessible grommets to pass through the firewall that I could see otherwise.
The head unit is mounted in the empty "storage" space under the cup holder. I attached the supplied bracket to the sturdy rubber tray that sits down there, so no permanent installation holes are required - other than on the tray itself - and the head unit can easily be removed and used on a different car by just sliding it off the bracket if necessary.
The microphone with all the controls (one of the reasons why I like this Midland model - no controls or displays on the head unit, so you can hide that away from sight) hangs from a custom A-Tach mount and attached microphone holder (the holder comes with the radio) to the right of the touchscreen - my cell phone is on the same mount to the left. Since the microphone with coiled cord can be detached from the head unit, it makes for a clutter free console when the radio is not needed.
Power cable with inline fuse and antenna wire from the engine bay are tucked away along the driver side panel of the center console, and pop out on the side of the driver seat to connect to the back of the head unit, so they are not visible.
Hope this helps.
That�s very seamless and tasteful as well. Really nice job and outstanding product!!


 The tray is a good expandable place to drill without crying over 🙃


