When you click on links to various merchants on this site and make a purchase, this can result in this site earning a commission. Affiliate programs and affiliations include, but are not limited to, the eBay Partner Network.
Another day spent on the rock slider install -- this time on the rivnut-supported, metal trim piece. A few, interesting surprises -- many thanks to Tartar for answering my concern with the directions from Lucky8 (which I confirmed are incorrect, as I note in the parallel post).
Following are some pictures of the metal trim piece install, with some accompanying comments. A few heads-up:
1. I am not a fan of the noise of metal touching metal, so I installed thin rubber strips (the kind used in weather sealing new install windows) at the points where the trim touches the aluminum body and the stainless steel rock sliders. I also used medium loc-tite on the hex tool button-head bolts.
2. I had never installed rivnuts before, but it worked out ok. Plenty of videos on youtube on how to make a home-made install rig. I drilled 3/8" holes for the 6 MM bolt rivnuts -- worked out fine.
3. I (and others) were surprised by the difficultly of getting the trim piece up under, behind the open doors. I show a few pictures of the piece going in very high, with the vehicle in off-road height. Doing so without scratching the paint of the vehicle, down near the sill is difficult. Plus, with my rubber in place a bit of that was spread around -- but GOO GONE took it right off.
-------------------------------
The other surprise to note is that two 2.5 inch bolts are resident from the factory with no purpose in the Uchannel described, earlier. They should be removed before the rock sliders are installed.
-------------------------------
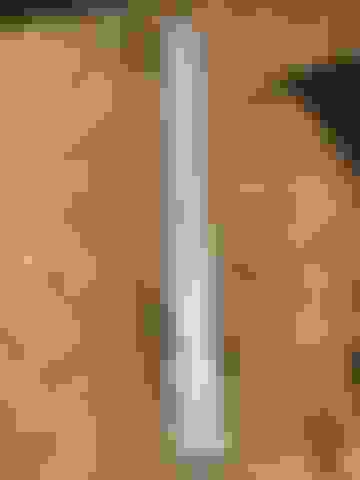
Rubber installed, trim piece ready to install This shows the height at the back at which the trim piece must be pushed from back to front Here is the height at the front where the trim piece must be pushed unitl the rear tire is cleared. See the extend of the black trim piece in front, as installed The rear actually goes past about 1/4 inch of the rock slider in the back This is the trim piece as finally installed. Note that the bolt spacing is not uniform --- and makes the individual trim pieces Left and Right handed.
Last edited by TrioLRowner; 05-27-2021 at 07:34 PM.
Curious what you guys are doing with all the spare parts and boards that we removed from the bottom. I�ve got them sitting in the garage because I can�t bring myself to throw them out, but the wife wants them gone. Feel like there may be some day where I�d regret getting rid of them, but that�s probably stupid because these sliders once on, are never coming off, at least not with me doing the work.
I finished up putting the trim pieces back on -- no issue. I had to buy plastic clips which I broke from an auto parts store -- it turns out an orange Mazda clip looks and services almost like the gray JLR clips which held on the trim -- all good.
I set the tire pressures at 47 rear and 45 front psi to put a little more wear on the center of the tires and to accomodate the winch and the rock sliders. I drove the vehicle up to 75 mph on road and a bit off. Truck performed beautifully. No extra noise and no flapping around of the aero covers -- very happy with the mods I made. The truck feels the road much more at these pressures, rides tighter, against the buttocks with cracks in the concrete. I did not notice any reduction in acceleration or the vehicle working too hard. I even think the rock sliders made the vehicle handle more like it did before the winch was installed -- moved the CG back and down a bit.
The P300 and transmission continues to impress -- so unexpectedly smooth.
Congrats and thanks for sharing the pics. You�ve motivated me to cut the aero covers and put them back on. With my luck, the guys will come out with new plates the day I reinstall the boards, so I�m going to wait a bit first and see.
Here�s something else you need to consider now that you�ve covered up the jack points. The standard scissor Jack will now have nothing to grab onto, so first I got a couple of jacking rated rubber pads that I can put between the scissor Jack and the metal plate. I figure that should be safe enough for a side of the road tire change. Kind of wish they had just cut a few holes at the Jack points to allow it to grab the V shaped part, but oh well. Second, for off-road and a more substantial jacking capability, I asked the guys at Licky8 and they said they really like using their arb Jack, so I sprung for one of those. I�m a little concerned with it sliding on the bar, so I have a heavy duty lashing strap I�ll wrap around one of the slider bars and the jacking arm to keep it in place on a lift. Would be interested in hearing how you guys will approach simple tire jacking as well as off road lifting situations. And no, I�m just never going to go the hi-lift route.
I glued rubber onto the points of the rock slider where the jacking point used to be and have on order a Powerbuilt 620470 4000 Lb Unijack to replace the scissor jack which came with the vehicle. I think it will work fine.
I glued rubber onto the points of the rock slider where the jacking point used to be and have on order a Powerbuilt 620470 4000 Lb Unijack to replace the scissor jack which came with the vehicle. I think it will work fine.
With a flat tire I could not fit that Powerbuilt "jack *** jackstand" unijack thingie under the rock sliders of my old LR4, even with the suspensions lifted to off-road height it just would not fit. I liked the idea, but ultimately had to get rid of it as I couldn't use it with any of my cars. Hopefully the Defender will have extra clearance to begin with, but that jack was really designed for lifted Jeeps and pickup trucks, not for cars or even most SUVs.
With a flat tire I could not fit that Powerbuilt "jack *** jackstand" unijack thingie under the rock sliders of my old LR4, even with the suspensions lifted to off-road height it just would not fit. I liked the idea, but ultimately had to get rid of it as I couldn't use it with any of my cars. Hopefully the Defender will have extra clearance to begin with, but that jack was really designed for lifted Jeeps and pickup trucks, not for cars or even most SUVs.
Umbertob:
Well, the 4000 lb bottle jack w /integrated jack stand fits under the rock sliders with the air all out of the nearest tire -- with less than half an inch to spare.
The problem is that the jack does not have enough travel to lift the tire enough to put on a fully inflated new tire ... ugghh. And the logic of the air suspension won't retract the wheel if I start the vehicle and change from off-road to access mode with the jack in place -- says it senses an obstacle and instead goes into ultra-extended mode.
So, I concluded the standard practice will be to carry a short 6x6 block / ramp in the vehicle, and drive my bad wheel up onto it, then extend the jack stand part of the lift up against the slider, then pump up the jack and kick out the wood to make room for the new wheel.
I will practice it a few times, then pull the scissor jack out of the vehicle.
This is why I followed Lucky8�s recommendation and got myself the arb Jack. It pretty much solves all these issues except it makes a nice dent in your wallet. At this point though, what�s another $800.


 05-22-2021, 04:58 PM