
How to: Window Regulator Bushing repair


Thread Starter
|
Mudding
Joined: Mar 2011
Posts: 102
Likes: 7
From: Oklahoma
All right, I've already installed my fixed regulators but I figured a couple pictures on what to do would help people with similar problems. Heres how to make your own bushings for $6.50. Might work on the front windows but works on the rears for sure.
First off head to your local Ace/Home Depot whatever and grab something like this ($4.75 at Lowes),
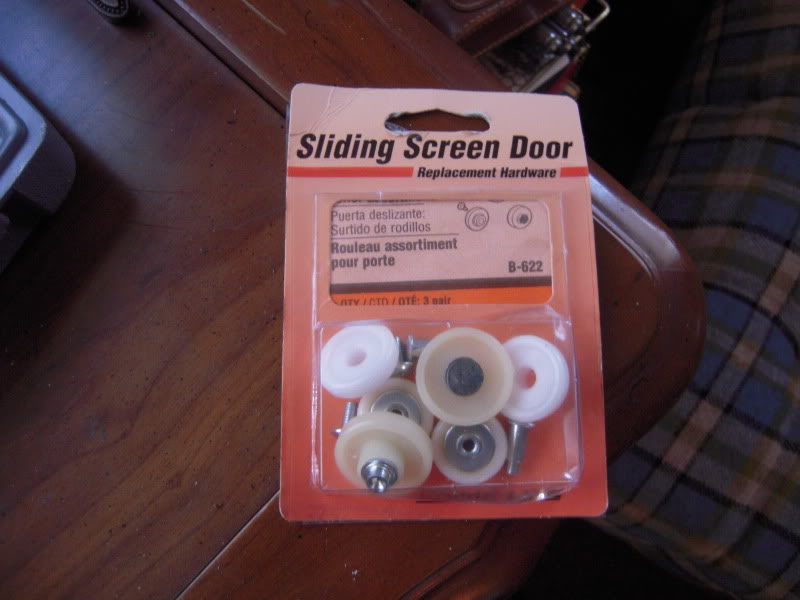
should be in the screen door hardware section, this is just a multipack of three sets of two. These are the ones you want;
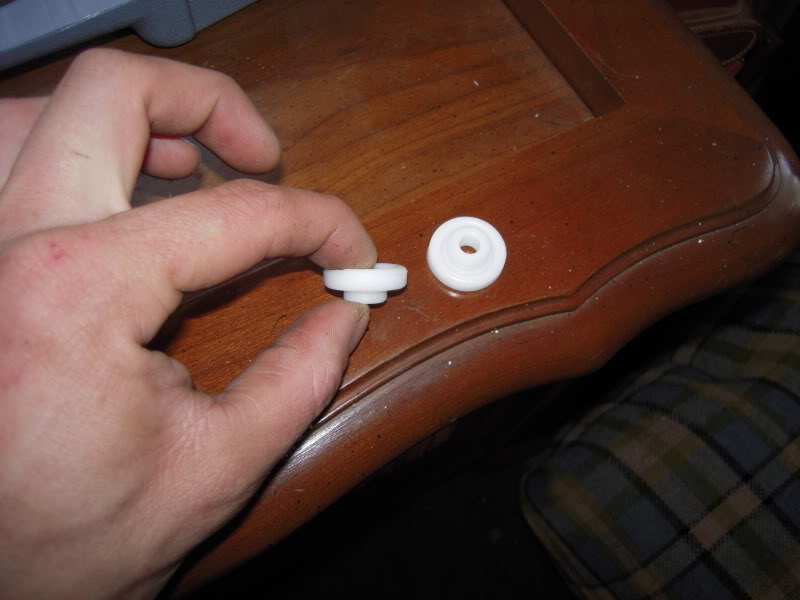
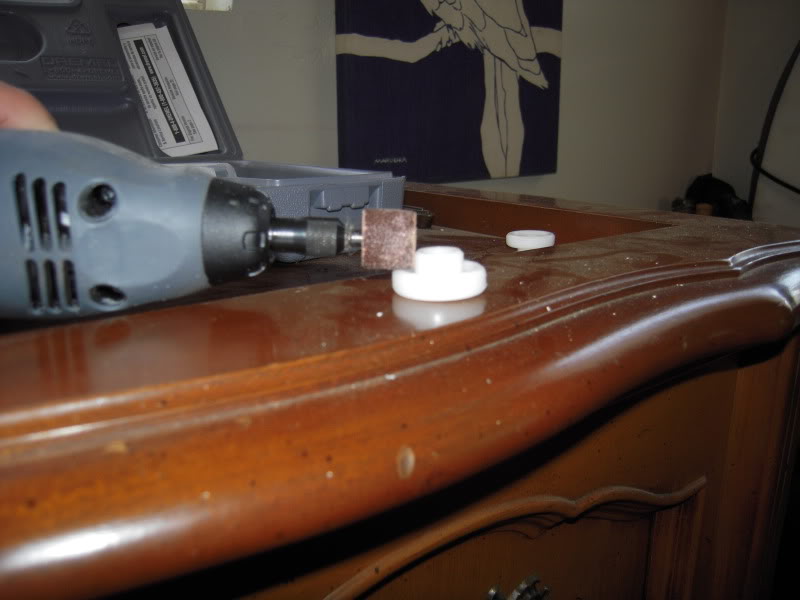
Take your dremel or sander or file and grind them here until they slide freely in your window track (the piece bolted with two 5/16ths screws to the bottom of your window) Grind here;
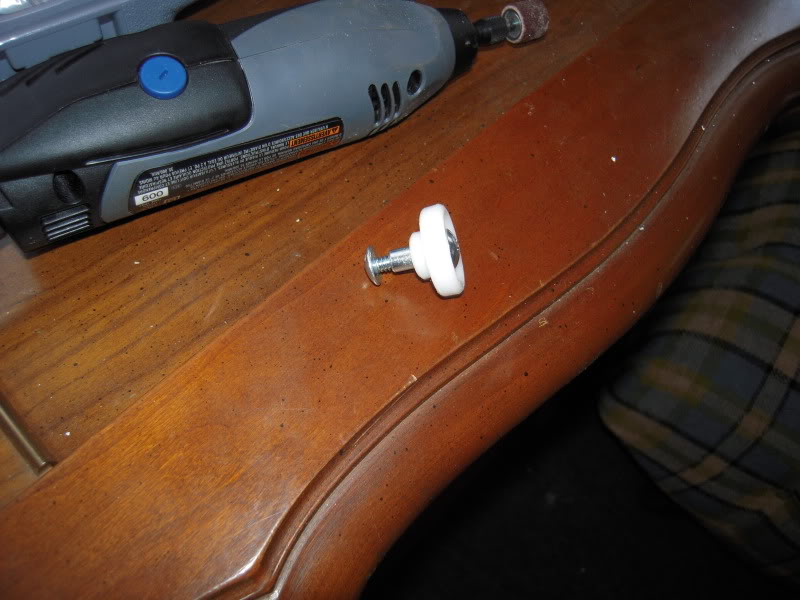
After this take the regulator you removed and cut the metal rivet on the end, just hacksaw the big end off and then hammer and punch the other side out. It should be just a hole on the end of the regulator, you might have to drill or file it out just a small amount to get the new bolt to go through, this is the bolt ($1.59 at Ace);
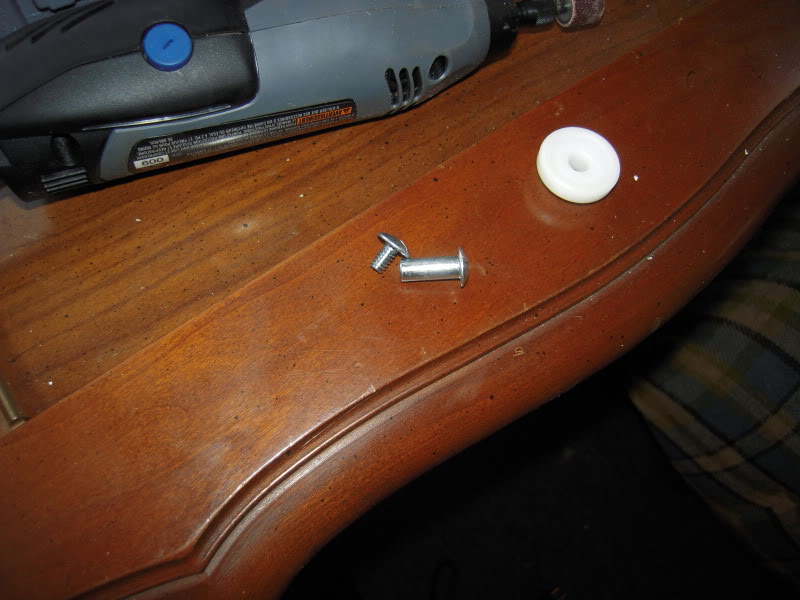
Its collared and should fit through the bushing and regulator arm, you might have to use a washer or two to get the screw to hold the bushing on solid. I ran up to three with no interference issues. This is the bolt in the bushing, just imagine a regulator on there.
Once your bushing is bolted onto the regulator take your dremel with the same attachment and barely grind the head of the screw facing the track until it slides freely and reinstall. Thats it your done! Hope this helps some people! Mine work great with no problems/noises or anything! Be sure to lube the tracks up as well!
First off head to your local Ace/Home Depot whatever and grab something like this ($4.75 at Lowes),
should be in the screen door hardware section, this is just a multipack of three sets of two. These are the ones you want;
Take your dremel or sander or file and grind them here until they slide freely in your window track (the piece bolted with two 5/16ths screws to the bottom of your window) Grind here;
After this take the regulator you removed and cut the metal rivet on the end, just hacksaw the big end off and then hammer and punch the other side out. It should be just a hole on the end of the regulator, you might have to drill or file it out just a small amount to get the new bolt to go through, this is the bolt ($1.59 at Ace);
Its collared and should fit through the bushing and regulator arm, you might have to use a washer or two to get the screw to hold the bushing on solid. I ran up to three with no interference issues. This is the bolt in the bushing, just imagine a regulator on there.
Once your bushing is bolted onto the regulator take your dremel with the same attachment and barely grind the head of the screw facing the track until it slides freely and reinstall. Thats it your done! Hope this helps some people! Mine work great with no problems/noises or anything! Be sure to lube the tracks up as well!


Three Wheeling
Joined: Mar 2011
Posts: 98
Likes: 0
From: AZ
I tried this over the weekend on the front passenger window. I found that the roller was to thick to fit in the metal guide. So I went to ACE and picked up some 1" nylon washers. I used one that was 1/8" thick and two at 1/16" thick. I used my Dremel to enlarge the center holes just a bit and they slid over the end on the arm. They fit perfectly. I will put up pics as soon as I get them on my pc.
Thread Starter
|
Mudding
Joined: Mar 2011
Posts: 102
Likes: 7
From: Oklahoma
I tried this over the weekend on the front passenger window. I found that the roller was to thick to fit in the metal guide. So I went to ACE and picked up some 1" nylon washers. I used one that was 1/8" thick and two at 1/16" thick. I used my Dremel to enlarge the center holes just a bit and they slid over the end on the arm. They fit perfectly. I will put up pics as soon as I get them on my pc.


Winching
Joined: Apr 2011
Posts: 553
Likes: 8
From: Oklahoma; where the winds come rolling down the plains.
I sell perfect fit Solid Replicas two for $5.00. Why go through the hassle of trying to fabricate? My replicas are cast from the OEM part. The plastic is stronger and allows for more flex where needed. Don't waste your time with fabrications. I have your solution, just contact me.
Last edited by LRD2&ME; Jun 8, 2011 at 06:10 PM.
Thread Starter
|
Mudding
Joined: Mar 2011
Posts: 102
Likes: 7
From: Oklahoma
I sell perfect fit Solid Replicas two for $5.00. Why go through the hassle of trying to fabricate? My replicas are cast from the OEM part. The plastic is stronger and allows for more flex where needed. Don't waste your time with fabrications. I have your solution, just contact me.
Because I couldn't find anywhere online that sold any repair kit.

