rear aframe ball joint replacement and suspension r&r
#1
 07-10-2013, 02:27 PM


I am starting this thread as a very basic helper/how to for this job, because I found a dearth of information on this topic and had I known what a nightmare this would turn into I would have planned better and approached it differently, that's for sure.
This is not intended to be an exhaustive treatise for the rover tech heads on the site, but more for a guy who might be contemplating diving into the job in his driveway and figuring it out as they go, like me. I'm no expert, certainly. If anybody seems to be interested, I will continue to update this as I go along. It could take some time, as my wreching hours are limited.
Let's take a look at the new ball joint, shall we?
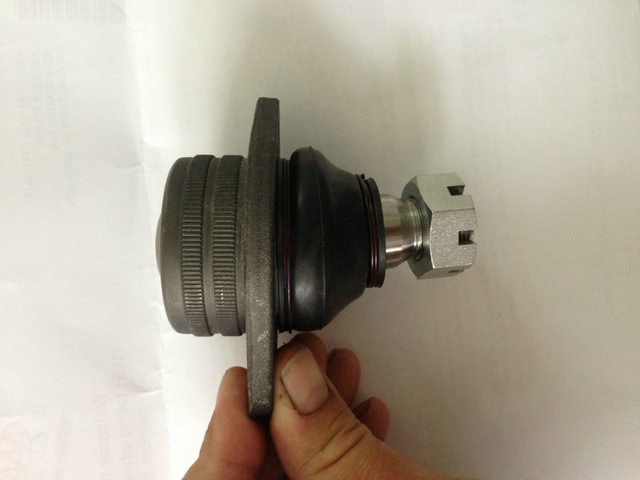
Notice the splining around the the back end. I didn't. I did kind of wonder how the two 10mm bolts could possibly stand the stress applied to the ball joint under load, but that was as far as I got. What it means is in order to replace this you need a press, and not a little tiny harbor freight 10 ton press but a big honkin one, if yours is in the condition mine is in. Press out of the socket and press in.
I don't have any pics of the very beginning, as I didn't decide to make this thread until I already had a full nightmarish day into the project. First, you need to get the rave or go to roversnorth and use the diagrams to familiarize yourself with the layout of the rear a frame (stolen pic, sorry):

There are two ways to get the ball joint bracket out. You can either attack the two 6" long bolts that attach the bracket to the A arms, or the two 4" x 3/4" bolts that hold the assembly to the frame. You also have to get the ball joint castellated nut off as well.
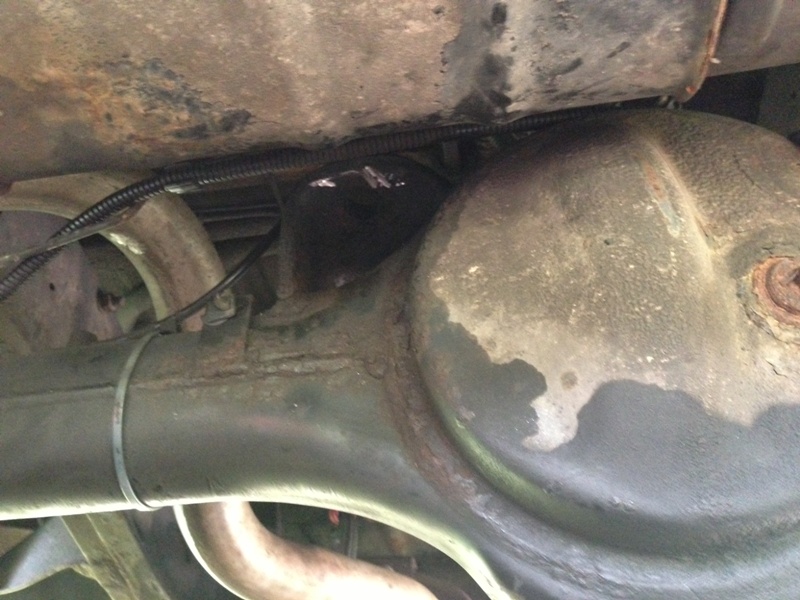
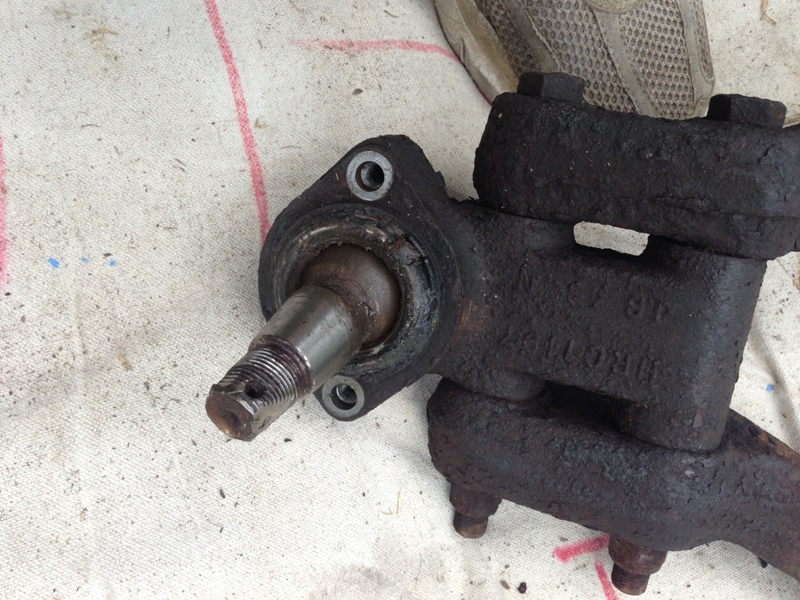
I started with the ball joint nut first. Again, I have no before pics on this part. It sits in a hood of sorts, welded to the top of the axle housing, and I tried every combination of ratchet I had and you just can't fit a socket in there. Here is what it looks like, minus the ball joint:
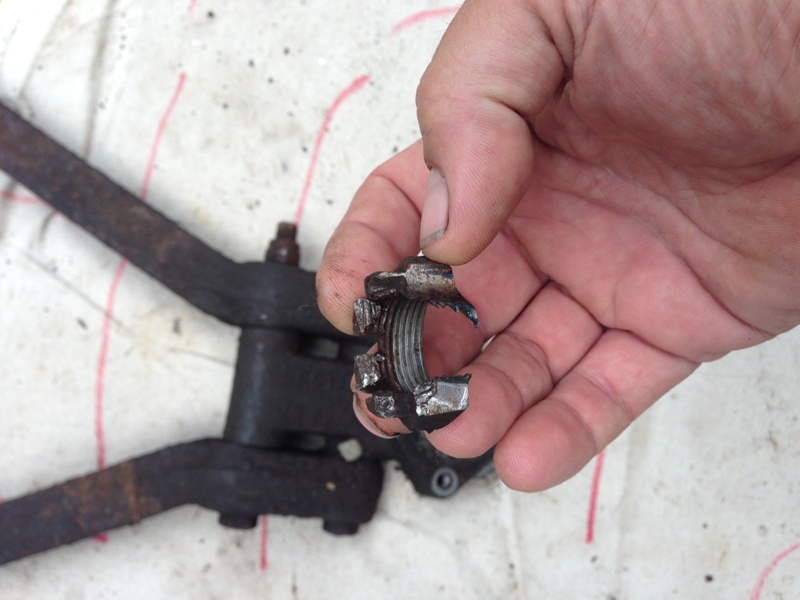
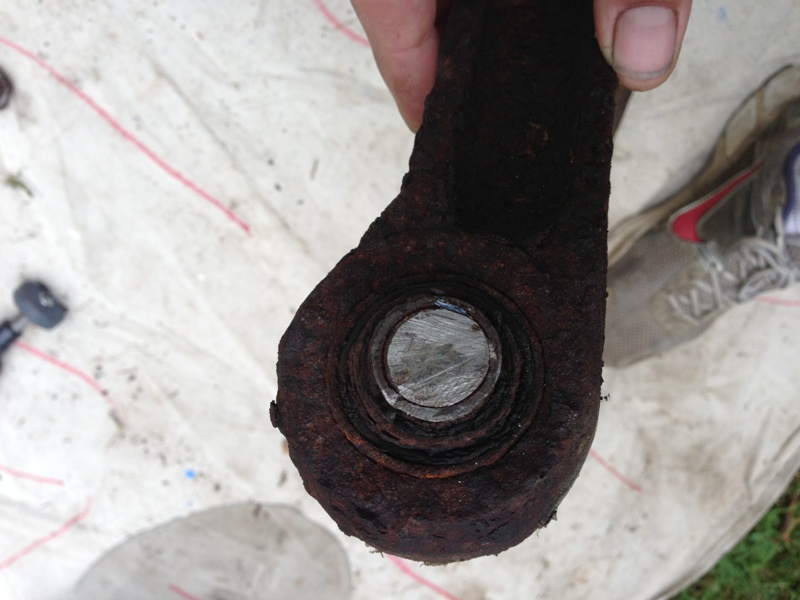
If you raised the truck and put jack stands under the frame and let the suspension hang, you might be able to get one of those goose neck wrenches in there, but turning room would be really limited. Mine was one big ball of rust, and I couldn't get the cotter pin out either. I decided to go with a 1/4" die grinder with a small grinding stone, it was all I could fit in there. Here is the post grind nut:
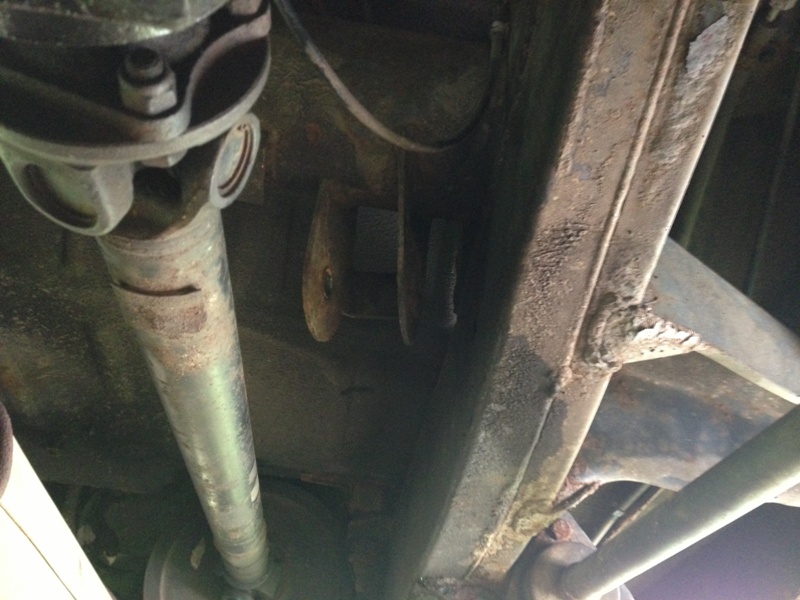
There was no was I could see to get at the long bolts holding the bracket to the a arms that would allow sufficient torque to get them off. They are held with nylocks, so that meant hard turning all the way off, and they were very rusty as well. I decided instead to go after the large bolts holding the assembly to the frame instead, and remove the entire thing intact. Here are the two empty frame brackets after the fact:
driver

passenger
After much sweating, cursing and tool throwing I got the nuts off with two large pipe wrenches, as they were rusted almost to the point of roundness. They are nylocks also, so hard turning all the way off. One bolt slipped right out, but the other had corroded itself into the bushing sleeve. I yanked and pulled and heated and p'blastered and all manner of other things but no dice. In the end, being that the bushings were toast anyway, I used a sawzall with a thick metal blade to cut the bolt on either side inside the mounting bracket (5" blade fits very nicely.) I thought the bolts were hardened, maybe grade 5 so I was reluctant to do this at first, but ten minutes of cutting and it was done. I imagine they are just mild steel, hardly even dulled the first blade I used. If your bolts are at all rusty, I would recommend getting two new ones and cutting the old ones out this way.
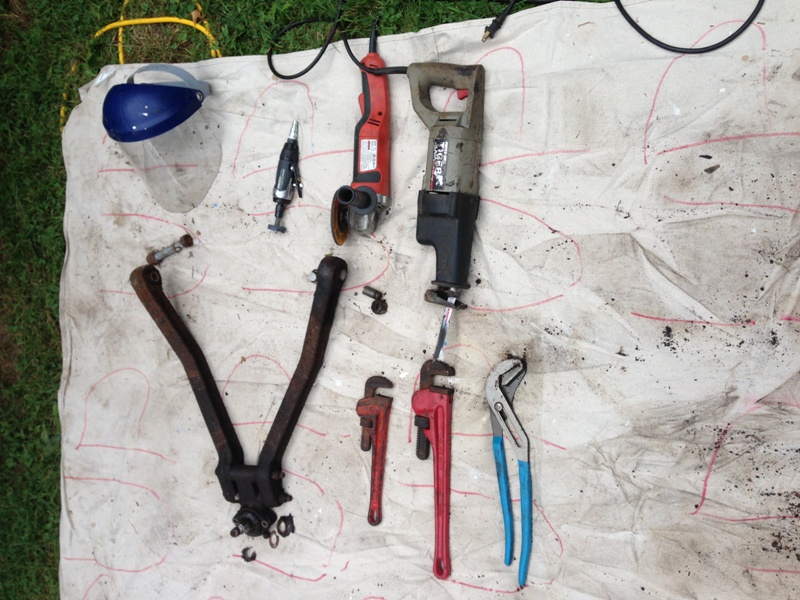
Here is the frame out of the truck, with the tools used to get it there:
Here is the bolt fused into the bushing:
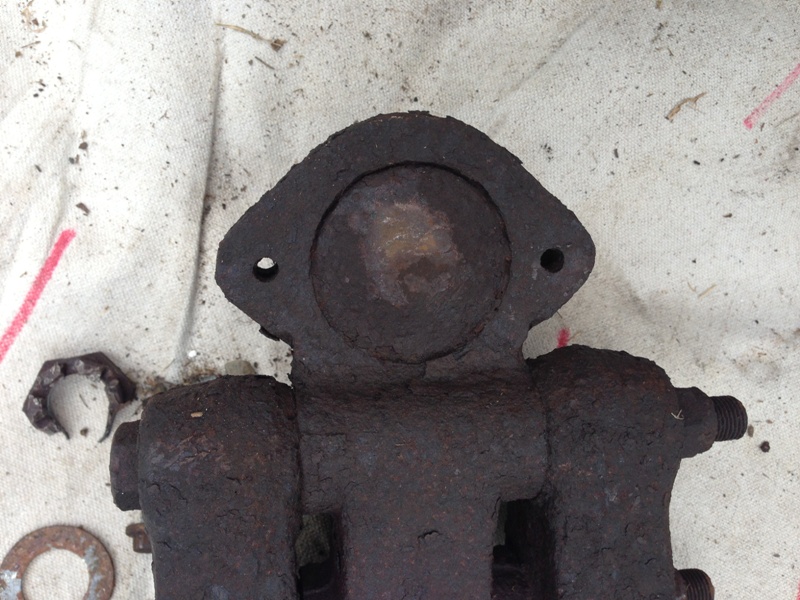
Here are the front and back of the dead ball joint:
Once it was out I wailed on it with a sledge a couple of times, partly to make myself feel better and partly to see if it might be possible to get it out that way. No dice.
At this point I need to examine my options for getting the bushings out, the ball joint out and in, and what other bits to replace while the rover is out of commission. I am leaning towards buying an all in one kit, shocks springs bushings etc. but am having a hard time deciding which to buy. Not being made of money, and given that I do very light 4 wheeling on infrequent occasions I am leaning towards this one from DAP:
Parts Kits - D.A.P. Enterprises
Shocks, springs and bushings all for $500.00. Any thoughts on this are welcome.
So thats where I am at the moment, like I said if anyone is interested in progress I will keep updating with pics as I go along.
This is not intended to be an exhaustive treatise for the rover tech heads on the site, but more for a guy who might be contemplating diving into the job in his driveway and figuring it out as they go, like me. I'm no expert, certainly. If anybody seems to be interested, I will continue to update this as I go along. It could take some time, as my wreching hours are limited.
Let's take a look at the new ball joint, shall we?
Notice the splining around the the back end. I didn't. I did kind of wonder how the two 10mm bolts could possibly stand the stress applied to the ball joint under load, but that was as far as I got. What it means is in order to replace this you need a press, and not a little tiny harbor freight 10 ton press but a big honkin one, if yours is in the condition mine is in. Press out of the socket and press in.
I don't have any pics of the very beginning, as I didn't decide to make this thread until I already had a full nightmarish day into the project. First, you need to get the rave or go to roversnorth and use the diagrams to familiarize yourself with the layout of the rear a frame (stolen pic, sorry):
There are two ways to get the ball joint bracket out. You can either attack the two 6" long bolts that attach the bracket to the A arms, or the two 4" x 3/4" bolts that hold the assembly to the frame. You also have to get the ball joint castellated nut off as well.
I started with the ball joint nut first. Again, I have no before pics on this part. It sits in a hood of sorts, welded to the top of the axle housing, and I tried every combination of ratchet I had and you just can't fit a socket in there. Here is what it looks like, minus the ball joint:
If you raised the truck and put jack stands under the frame and let the suspension hang, you might be able to get one of those goose neck wrenches in there, but turning room would be really limited. Mine was one big ball of rust, and I couldn't get the cotter pin out either. I decided to go with a 1/4" die grinder with a small grinding stone, it was all I could fit in there. Here is the post grind nut:
There was no was I could see to get at the long bolts holding the bracket to the a arms that would allow sufficient torque to get them off. They are held with nylocks, so that meant hard turning all the way off, and they were very rusty as well. I decided instead to go after the large bolts holding the assembly to the frame instead, and remove the entire thing intact. Here are the two empty frame brackets after the fact:
driver
passenger
After much sweating, cursing and tool throwing I got the nuts off with two large pipe wrenches, as they were rusted almost to the point of roundness. They are nylocks also, so hard turning all the way off. One bolt slipped right out, but the other had corroded itself into the bushing sleeve. I yanked and pulled and heated and p'blastered and all manner of other things but no dice. In the end, being that the bushings were toast anyway, I used a sawzall with a thick metal blade to cut the bolt on either side inside the mounting bracket (5" blade fits very nicely.) I thought the bolts were hardened, maybe grade 5 so I was reluctant to do this at first, but ten minutes of cutting and it was done. I imagine they are just mild steel, hardly even dulled the first blade I used. If your bolts are at all rusty, I would recommend getting two new ones and cutting the old ones out this way.
Here is the frame out of the truck, with the tools used to get it there:
Here is the bolt fused into the bushing:
Here are the front and back of the dead ball joint:
Once it was out I wailed on it with a sledge a couple of times, partly to make myself feel better and partly to see if it might be possible to get it out that way. No dice.
At this point I need to examine my options for getting the bushings out, the ball joint out and in, and what other bits to replace while the rover is out of commission. I am leaning towards buying an all in one kit, shocks springs bushings etc. but am having a hard time deciding which to buy. Not being made of money, and given that I do very light 4 wheeling on infrequent occasions I am leaning towards this one from DAP:
Parts Kits - D.A.P. Enterprises
Shocks, springs and bushings all for $500.00. Any thoughts on this are welcome.
So thats where I am at the moment, like I said if anyone is interested in progress I will keep updating with pics as I go along.
#2
07-10-2013, 02:54 PM

Drifting
Good thread, it will be nice especially for new people that want to tackle this themselves. I say keep going if it's not too much of a hassle and if you can keep the photos hosted. I know in my searches, so many old threads have dead links and photos, it sucks.
I also need to replace my rear ball, I started on the project and after spending 2 hours trying to get that castle nut off, and only managing to spin the nut and the ball center, I gave up and did some brake work instead.
I was fully planning on using my angle grinder to destroy the castle, in the exact way you did, so it's nice to see pictures of it done that way. I should get more time to work on mine within the next week or two.
For the ball, I think standard way to go is to carefully cut off the "wings" of the ball joint housing, then use the press to pop it out.
As for suspension, I haven't been around Land Rovers long enough to give a good suggestion, but I'm opting for the Terra Firma +2" shocks actually being delivered today, and the FJ coil budget lift. (essentialy two front springs from a Land Cruiser, mounted in the rear, and the rear springs now mounted to the front) So the total lift cost is under $350 if you don't include the u-joint drive shaft conversion I'm doing.
Anyway, nice work, keep us posted.
Last edited by Optimusglen; 07-10-2013 at 02:58 PM.
#3
07-10-2013, 03:16 PM

Pro Wrench
#5
07-10-2013, 04:35 PM


#6
07-10-2013, 04:58 PM
#7
07-10-2013, 05:09 PM
Pro Wrench

Thread
Thread Starter
Forum
Replies
Last Post