
Remind me

Thread Starter
|
Recovery Vehicle
Joined: Feb 2010
Posts: 1,057
Likes: 23
From: Boston
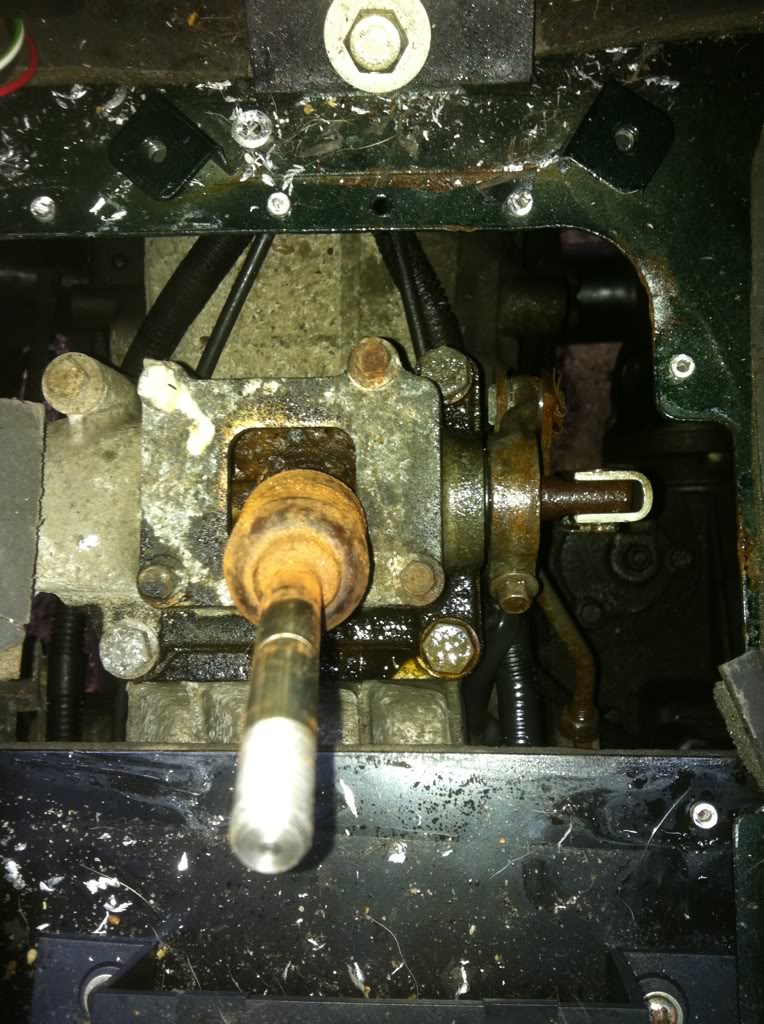
When I'm freeing my cdl, do I just pb blast the linkage to the right, or all up inside the shifter box that the selector drops into? All the photos I've seen of people who did this packed that box with grease but can I pb blast in there first?


Baja
Joined: Mar 2010
Posts: 5,584
Likes: 7
From: Pittsburgh PA suburbs.
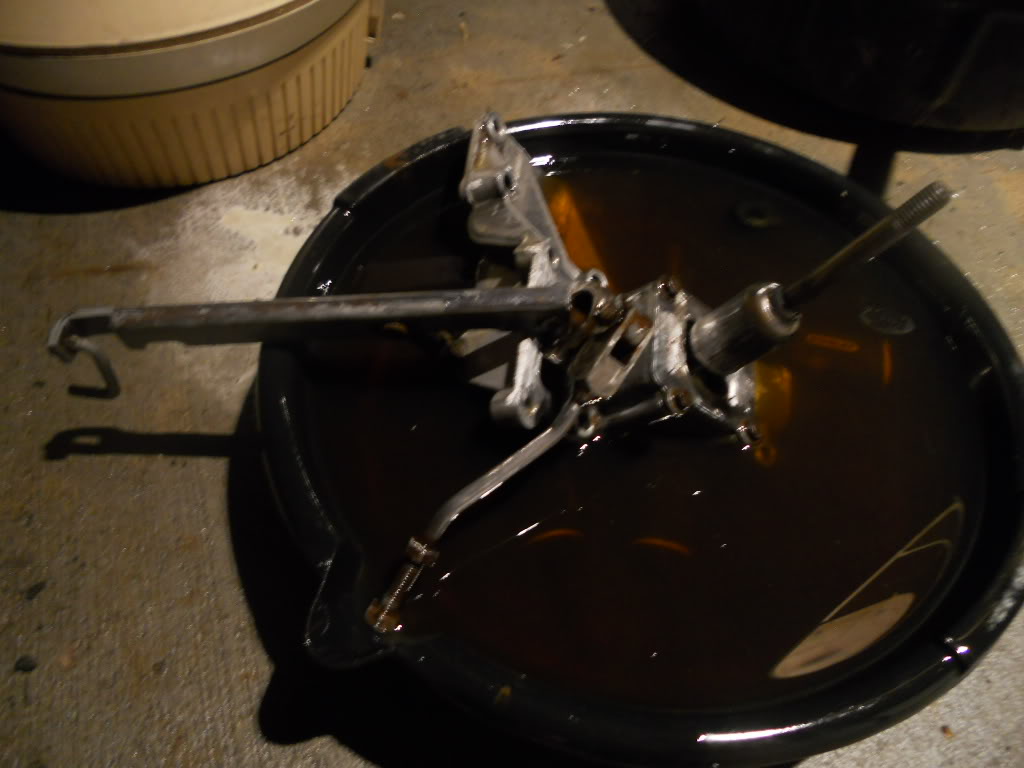
Yours looks terribly rusty. I would at least pull that cover off and clean it up as well.
Spraying with PB Blaster will help tremendously. Treat the mechanism with finesse, not force.
The piece at the bottom is the selector plate. Movement of the lever merely transmits that motion to rotate the selector plate CCW to engage and CW to disengage.
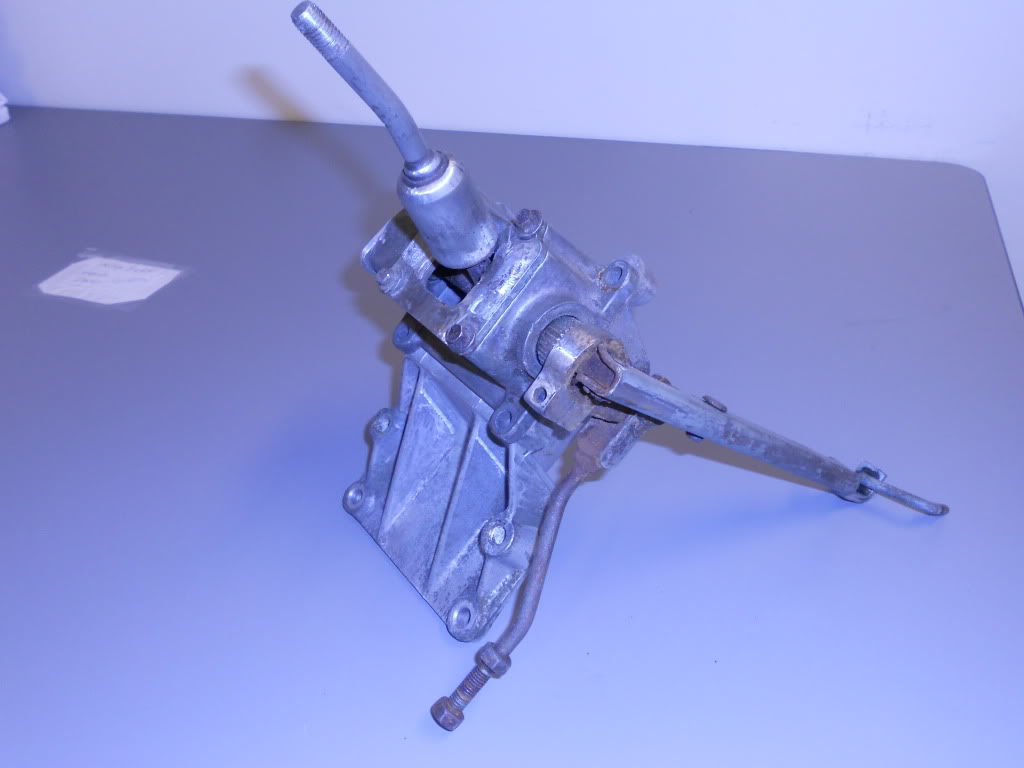
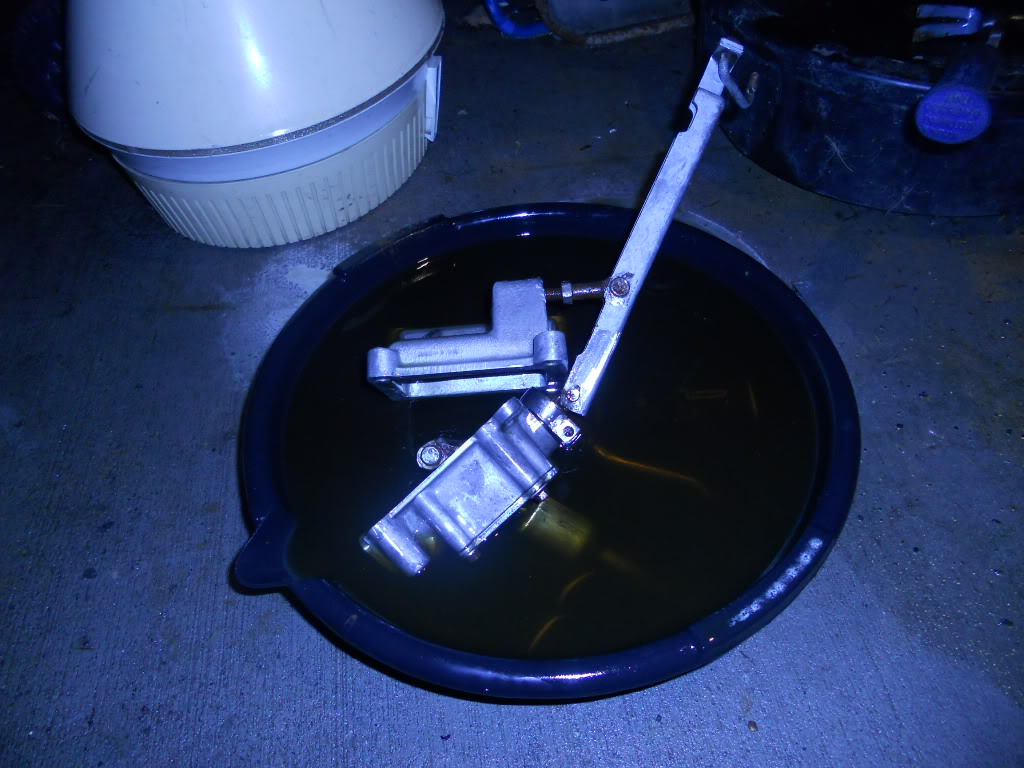
Click on the link in my signature and you will find lots of pics of mine as I totally disassembled it all. The most difficult was removing the clevis pins to get the unit out of the vehicle. I had plenty of time and knew absolutely nothing about it. It may not be necessary to totally disassemble it but I had seen a few horrific things that others had done to attempt to force theirs, so I went the other route.
Even after disassembly, parts replacement and greasing it all really good, the bottom selector plate was still immobile and would not move by the linkage itself. I used a speed handle with a couple of extension,placed a socket on the nut in the center of the plate and was attempting to loosen that nut. It took a lot of force but suddenly the shifter moved when I was attempting to loosen the nut.
That plate is what actually engages and disengages the diff lock. Even though it did engage, the dash light did not come on. Further review showed that the light is turned on by a plunger inside the T/C being depressed when the yoke engages. The CDL Switch on mine was also corroded and no longer worked.
Replacement of the CDL Switch was the final step in getting it all working correctly.
That was the first item I had to repair on my Discovery. It has been about 4 years now and it all still works very smoothly now.
When I reassembled mine, I packed the little box on the top with the Lucas Red tractor grease to keep it all working smoothly as it is exposed to all the crud coming from below. To add some extra protection, I used one of those rubber plumbing vent covers over the shaft to help keep water and other stuff away from the shifter mechanism. It fit right over the shaft underneath the factory boot.
Have fun with it. That Diff Lock working makes a world of difference when you do need it. Otherwise your 4 wheel drive is virtually a one wheel drive in slick conditions.
Spraying with PB Blaster will help tremendously. Treat the mechanism with finesse, not force.
The piece at the bottom is the selector plate. Movement of the lever merely transmits that motion to rotate the selector plate CCW to engage and CW to disengage.
Click on the link in my signature and you will find lots of pics of mine as I totally disassembled it all. The most difficult was removing the clevis pins to get the unit out of the vehicle. I had plenty of time and knew absolutely nothing about it. It may not be necessary to totally disassemble it but I had seen a few horrific things that others had done to attempt to force theirs, so I went the other route.
Even after disassembly, parts replacement and greasing it all really good, the bottom selector plate was still immobile and would not move by the linkage itself. I used a speed handle with a couple of extension,placed a socket on the nut in the center of the plate and was attempting to loosen that nut. It took a lot of force but suddenly the shifter moved when I was attempting to loosen the nut.
That plate is what actually engages and disengages the diff lock. Even though it did engage, the dash light did not come on. Further review showed that the light is turned on by a plunger inside the T/C being depressed when the yoke engages. The CDL Switch on mine was also corroded and no longer worked.
Replacement of the CDL Switch was the final step in getting it all working correctly.
That was the first item I had to repair on my Discovery. It has been about 4 years now and it all still works very smoothly now.
When I reassembled mine, I packed the little box on the top with the Lucas Red tractor grease to keep it all working smoothly as it is exposed to all the crud coming from below. To add some extra protection, I used one of those rubber plumbing vent covers over the shaft to help keep water and other stuff away from the shifter mechanism. It fit right over the shaft underneath the factory boot.
Have fun with it. That Diff Lock working makes a world of difference when you do need it. Otherwise your 4 wheel drive is virtually a one wheel drive in slick conditions.

Winching
Joined: Mar 2010
Posts: 749
Likes: 4
From: Briar, TX
I think given the appearance of that one I would just pull it and clean it up very well and repack with grease. It doesn't take that long to do. I would also replace all the little clevis pins for good measure as they are cheap, and then I would also do as DannyLee suggested and shift that selector plate a few times with a socket before putting the linkage back on. fairly cheap and quick disassembly and reassembly for peace of mind. Just my $0.02.
TReK
Joined: Aug 2011
Posts: 3,167
Likes: 87
I think given the appearance of that one I would just pull it and clean it up very well and repack with grease. It doesn't take that long to do. I would also replace all the little clevis pins for good measure as they are cheap, and then I would also do as DannyLee suggested and shift that selector plate a few times with a socket before putting the linkage back on. fairly cheap and quick disassembly and reassembly for peace of mind. Just my $0.02.

Here are the new parts I ordered.
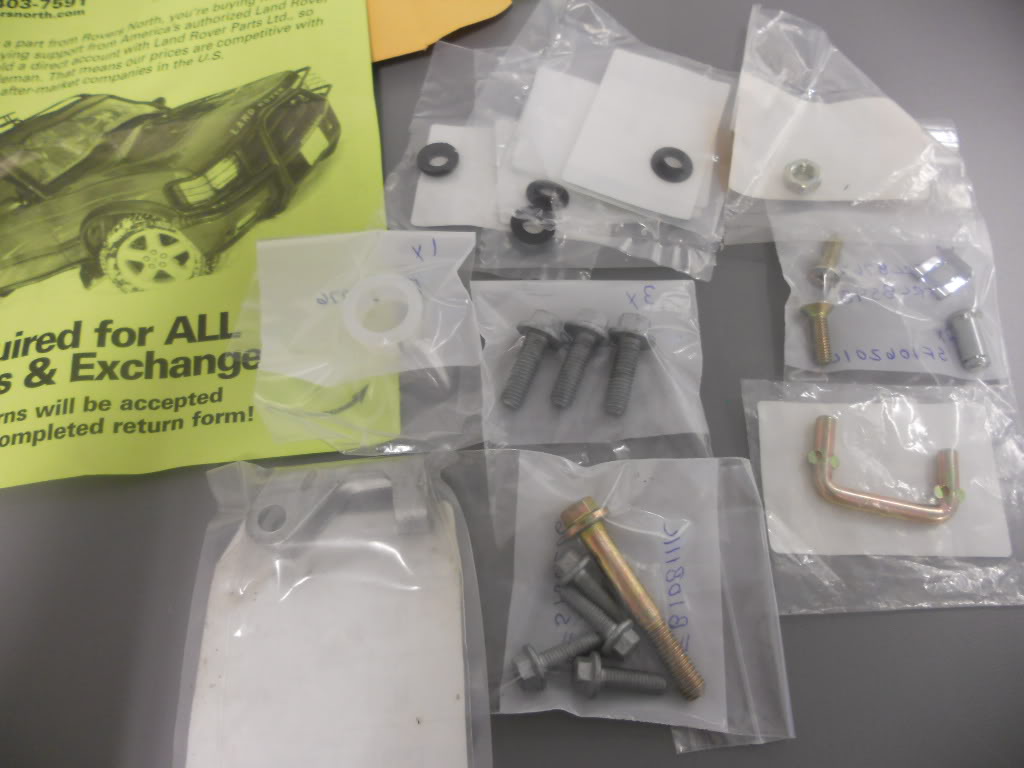
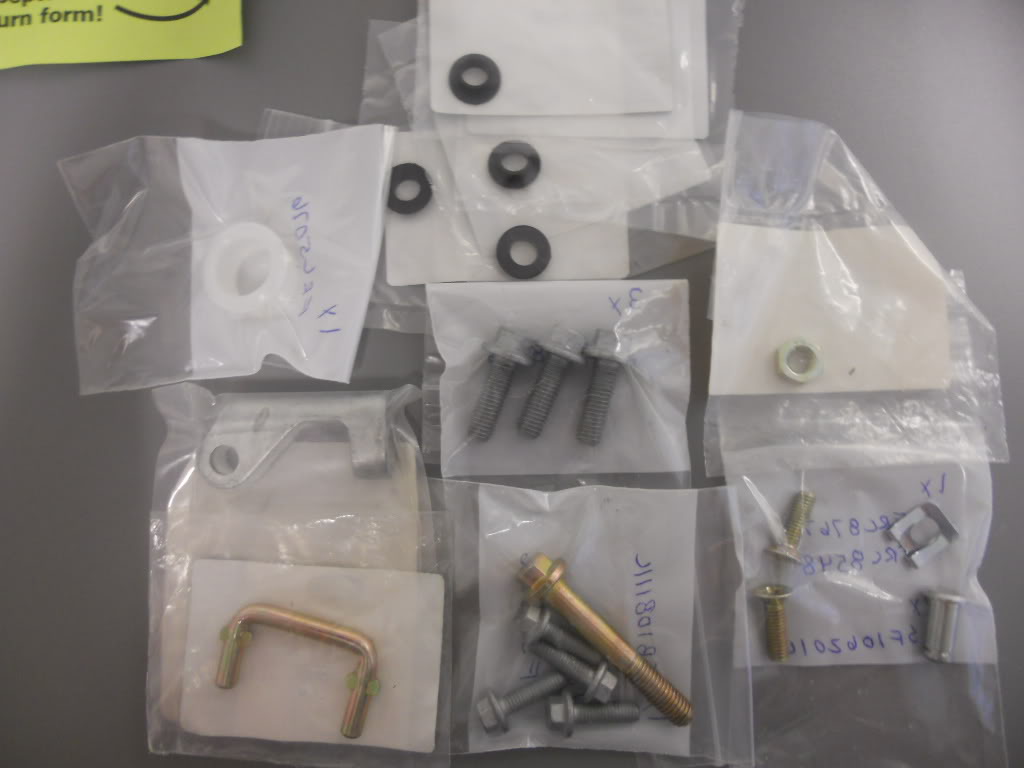
200 300 MK1 MK2 LAND ROVER DISCOVERY I II HI LOW BOOT | eBay
Good luck.
Last edited by TRIARII; Sep 25, 2011 at 01:32 AM.

