Stuck Diff Lock and High-Low Repair - Long but lots of Pics
#1
I recently did some extensive work on the transfer case shifter and linkages of my 98 Discovery 1. As with so many other Discovery's, my shifter was completely stuck for both the differential lock as well as the high-low linkage.
I am somewhat mechanically inclined but generally a novice, so I started by reading every post on this issue, watching the videos I could find, and looking at every possible picture to understand the problem and how to resolve it. I will not add much new to the many and excellent explanations that I found, but I will offer my tips and observations, as well as a few pictures of my process, as for several of the steps I had not found pictures.
My main sources I used to do the work were:
- The bahnstorm.com write-up: great overview, comments and some good pics. (most often shows up first in any search of "Discovery diff lock stuck" or similar).
- A Paul Grant post / write-up (google his post under "seized low gear lever").
- Pics and comments in a post called "my stuck diff lock story", by JPSpen
- The video in youtube titled "Land Rover Discovery 99 Solenoid"
- The RAVE workshop manual
Following the bahnstorm.com article/ writeup, my initial attempts to unfreeze the shifter without dissasembling the console and mechanism proved frustrating and fruitless. Several days going under the vehicle to spray PB Blaster, pushing, pulling, hammering and shaking only resulted in scuffed knuckles and a few pulled neck muscles.
Disassembling the console, e-brake, auto shifter, gaiter, cover plate, etc. was not hard at all, even as a novice, but a couple of the screws stripped, and drilling the rivets closest to the front was difficult because my drill would not fit under the dashboard to drill straight down. So I had to drill at an angle, resulting in elongated holes rather than the tight and round 3/16ths. I don't know how to resolve the drilling issue, but for the screws I would recommend making sure you have a good fitting screwdriver, that you start manually (with a drill the stripping happens too fast), and that you apply enough pressure until you feel the screw loosen. I ended up buying replacement stainless screws at my local ACE hardware, and later used short and thick stainless sheet metal screws instead of rivets for re-assembly of the plates.
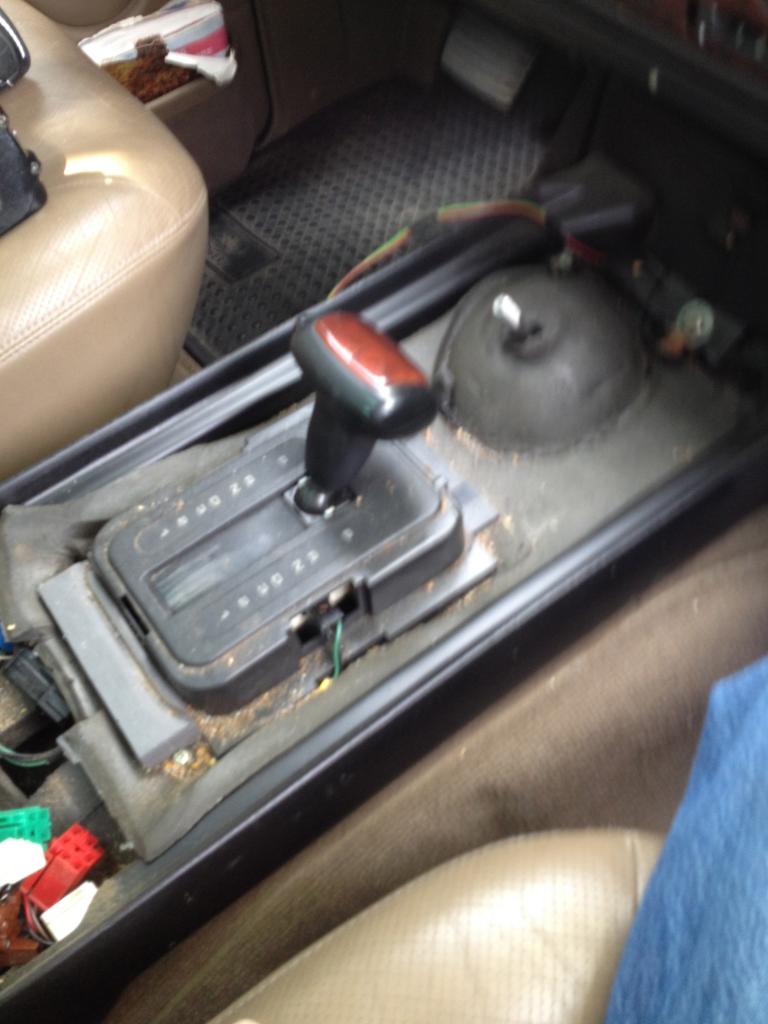
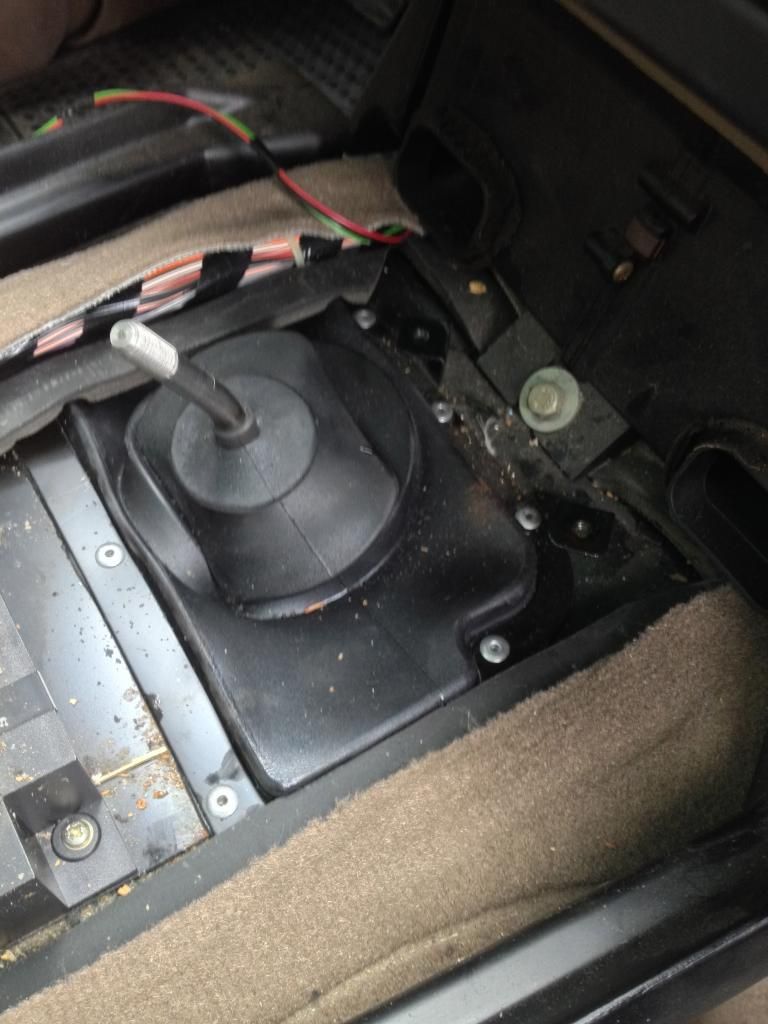
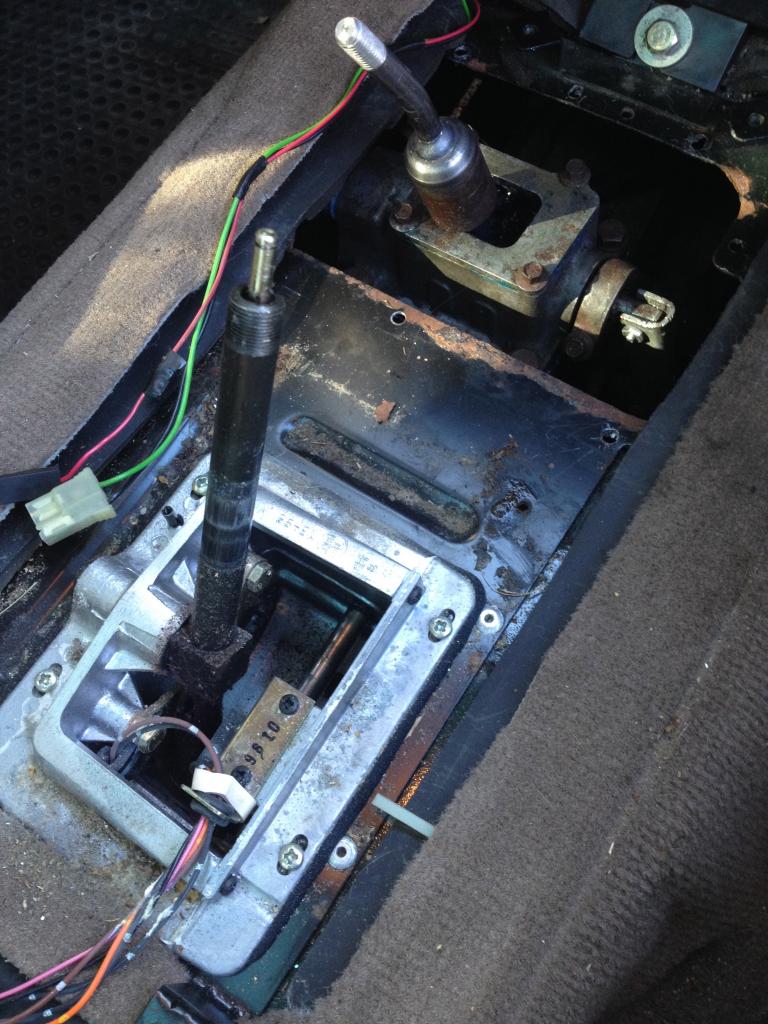
Once I had the console off and the front of the tunnel open, I started by working really hard to pull the pin and clevis holding the top of the linkage to the cross shaft (bottom of first pic below). I eventually pulled it, but in the process ruined the head of the pin and the clip was all rusted, so I had to order a replacement set (parts RND641 and RND643 at Rovers North).
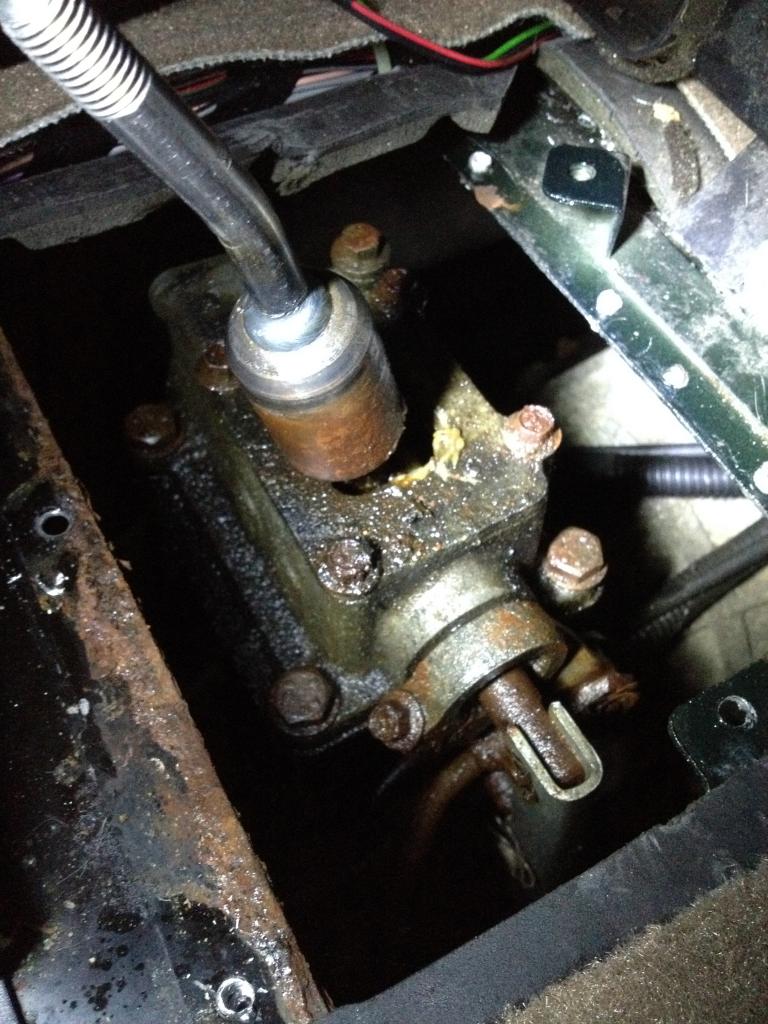
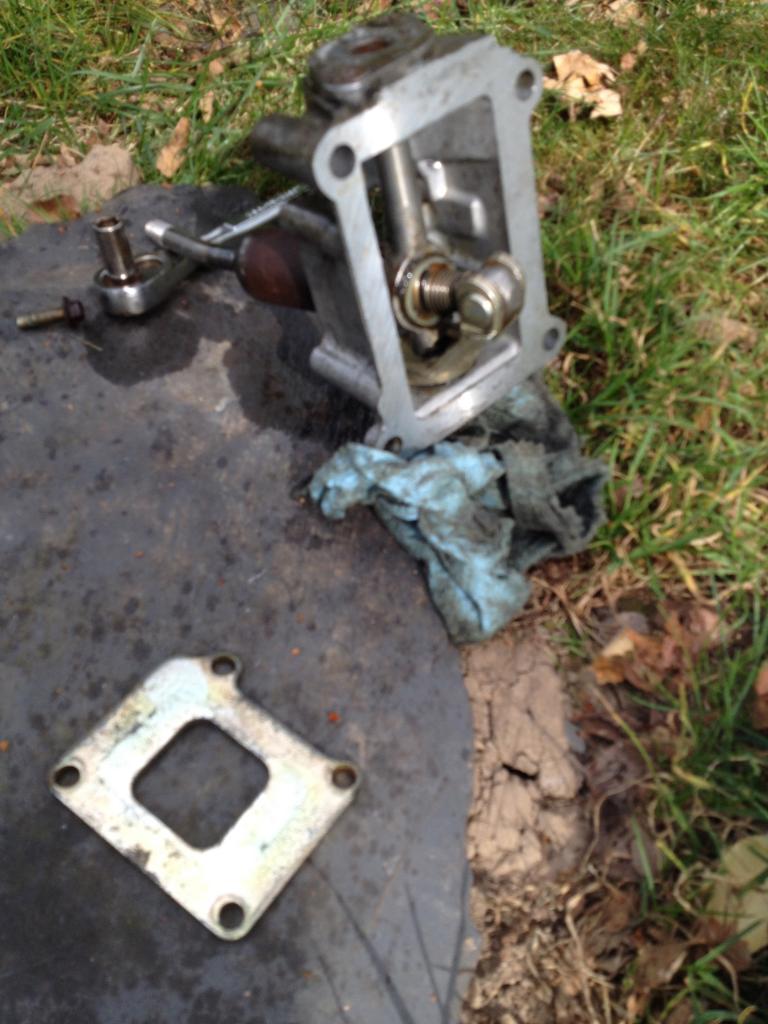
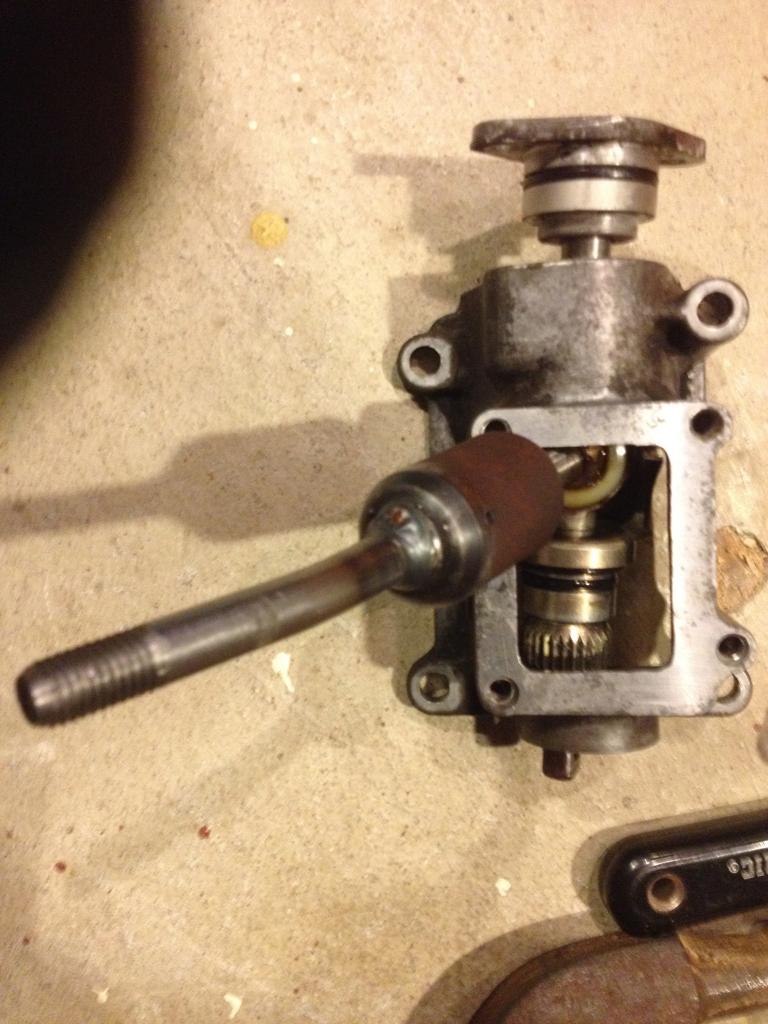
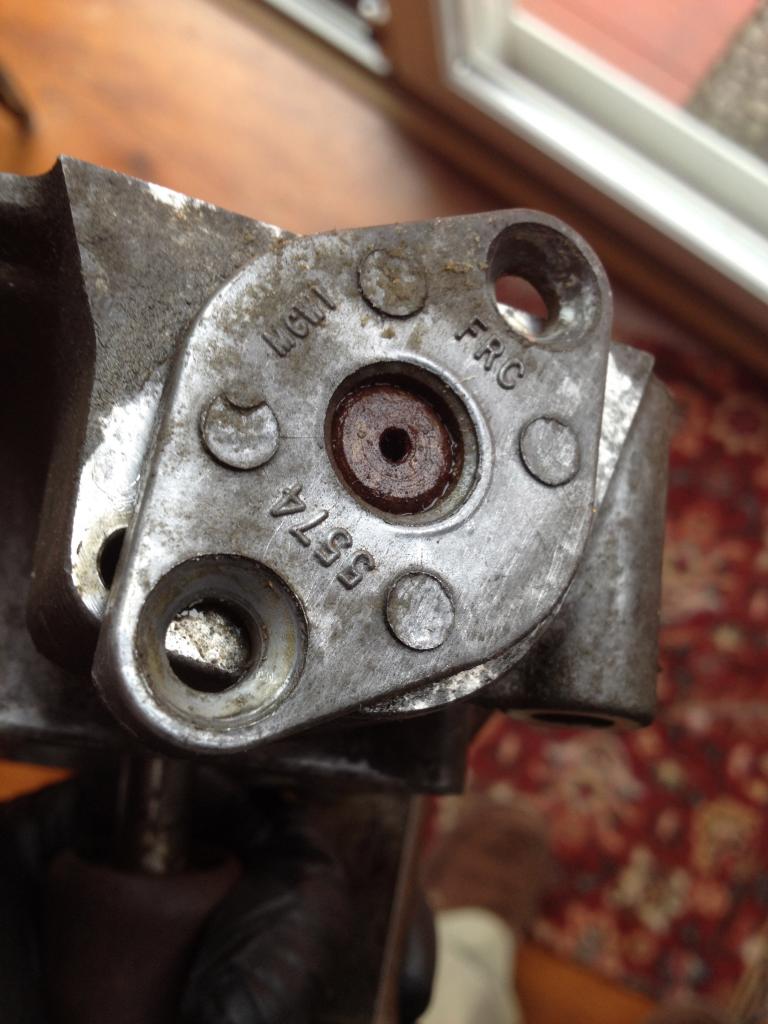
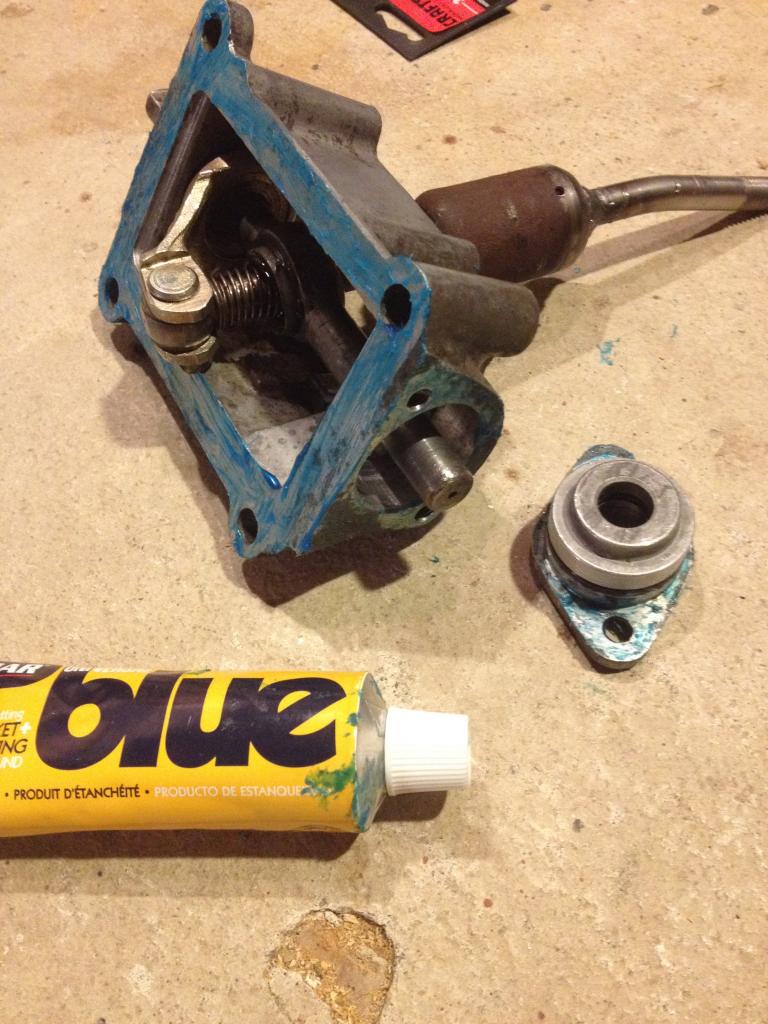
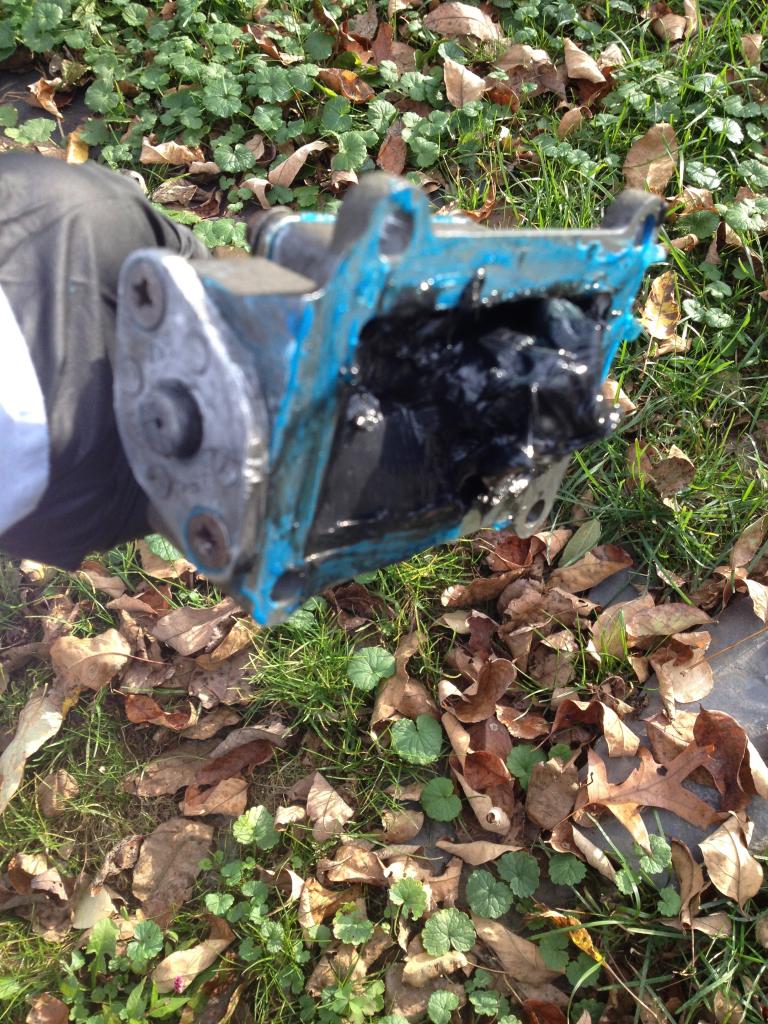
Once I had everything out of the vehicle, I worked on the whole shifter mechanism in the basement for a few days: alternating PB Blaster and WD40, and applying mallet taps, until it slowly began moving in every direction. I disassembled the end cover (which is where the shaft was mostly frozen), cleaned everything, lightly sanded away the rust, packed with lots of new grease, applied blue hylomar, and reassembled. The mechanism worked smoothly with all the cleaning and packed with new grease.
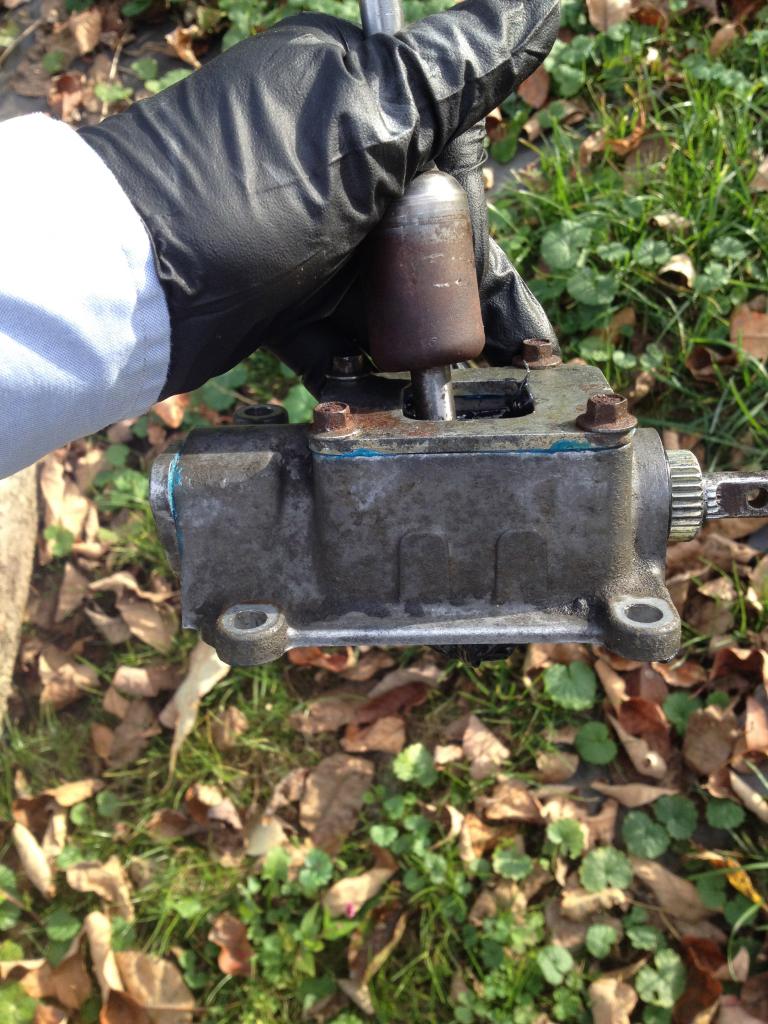
In trying to reinstall in the Discovery, I could not push the new pin and clevis in, no matter how many times I tried, so I used a small bolt and nut instead (seen in top right of pic).
 [/URL]
Now the diff lock seemed to work well, but the high-low would not budge. Based on most people's experience, I initially thought that the high-low problem was the solenoid. I spent a lot of time reading about it and finally removing it (only to find that the high-low still didn't work because the lower linkage-high-low arm connection seemed frozen).
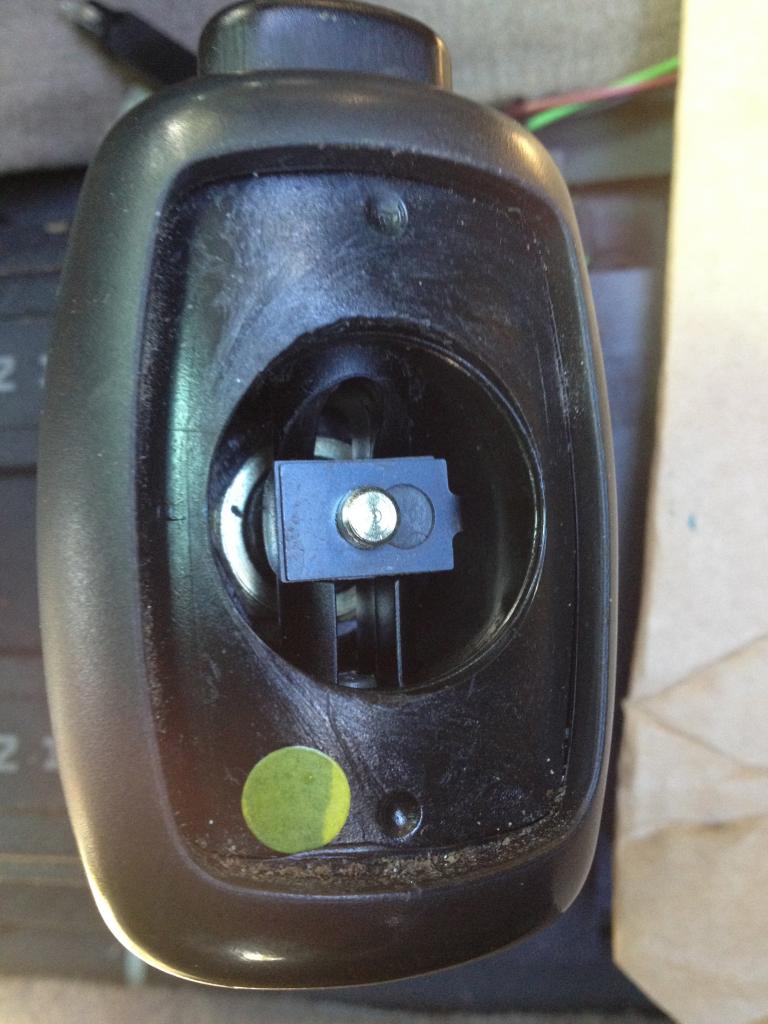
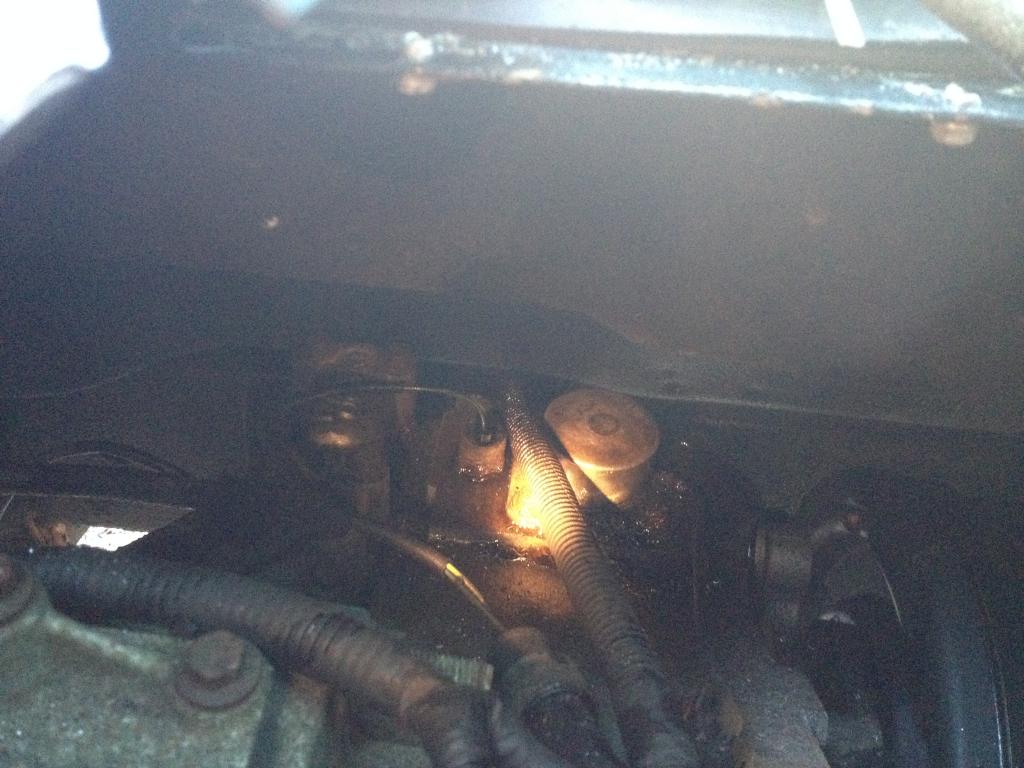
To access the solenoid I had to open the tunnel further, by removing the auto shifter and riveted plate. Here is where I ran into most screw stripping, so be careful. Paul Grant's write-up explained well the auto shifter **** removal, including the 19mm nut which as he says is pretty loose inside the ****, so I was able to turn it by pushing it with a screwdriver. Also watch for the spring in the button, which falls out when you remove the ****. The e-clip at the top that holds the spacer in place has an awkward shape and hard to remove and install, so be careful as I actually broke it by forcing it. I temporarily replaced it with a small hardware store circular e-clip, but now received the actual correct clip I ordered from Rovers North (part LRNA3727A) and will try to install. (Notice that this clip is what makes the shifter rise when you press the button on the ****, so without this clip you cannot shift out of Park. This minimal part can leave someone stranded if they don't know that they can simply pull off the **** and raise the metal shaft with their fingers to shift into drive). Notice the e-clip in the first pic and the solenoid on the top right of the last of the next few pics.
 [/URL]
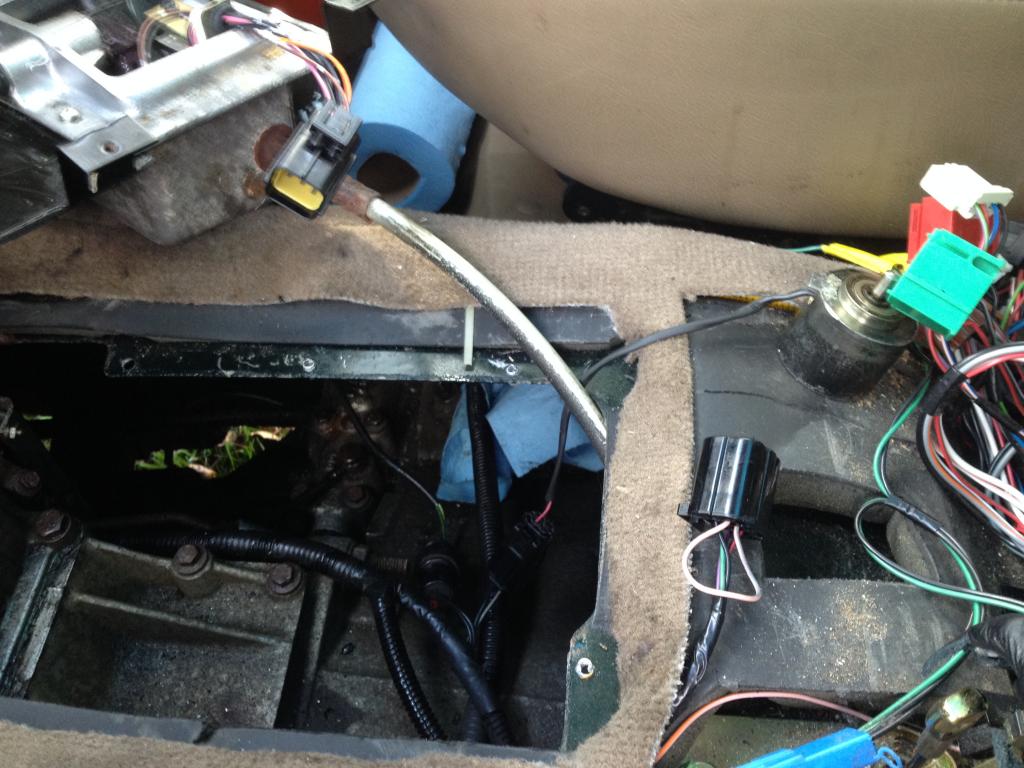
The solenoid was fine so I cleaned it, sprayed some PB in it, and I put it back in (because my teenage son drives the Disco, I didn't want to leave it out and risk one of his friends shifting to low at 60 miles/hour on a highway). The video in youtube titled "Land Rover Discovery 99 Solenoid" was great in understanding and testing the solenoid, but I could have avoided even removing it if I had tested the linkage first by removing the high-low cover entirely. I couldn't tell if it was the solenoid or the linkage while everything was connected and installed. Notice the high-low cover, breather tube, and frozen arm in the pics below.
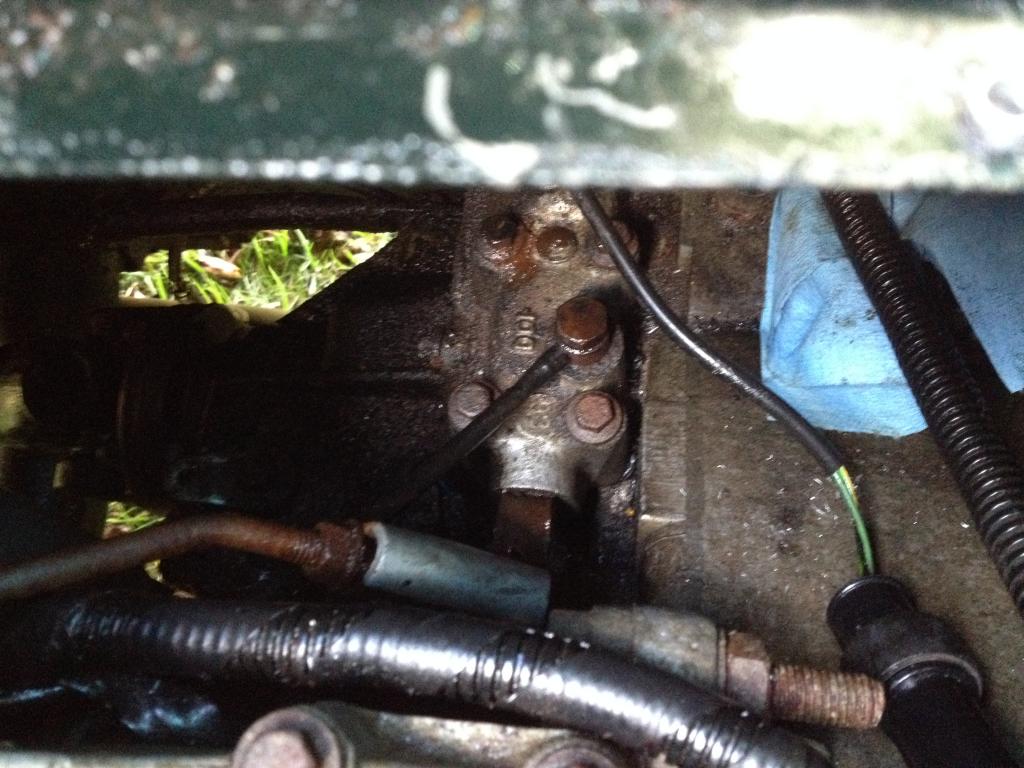
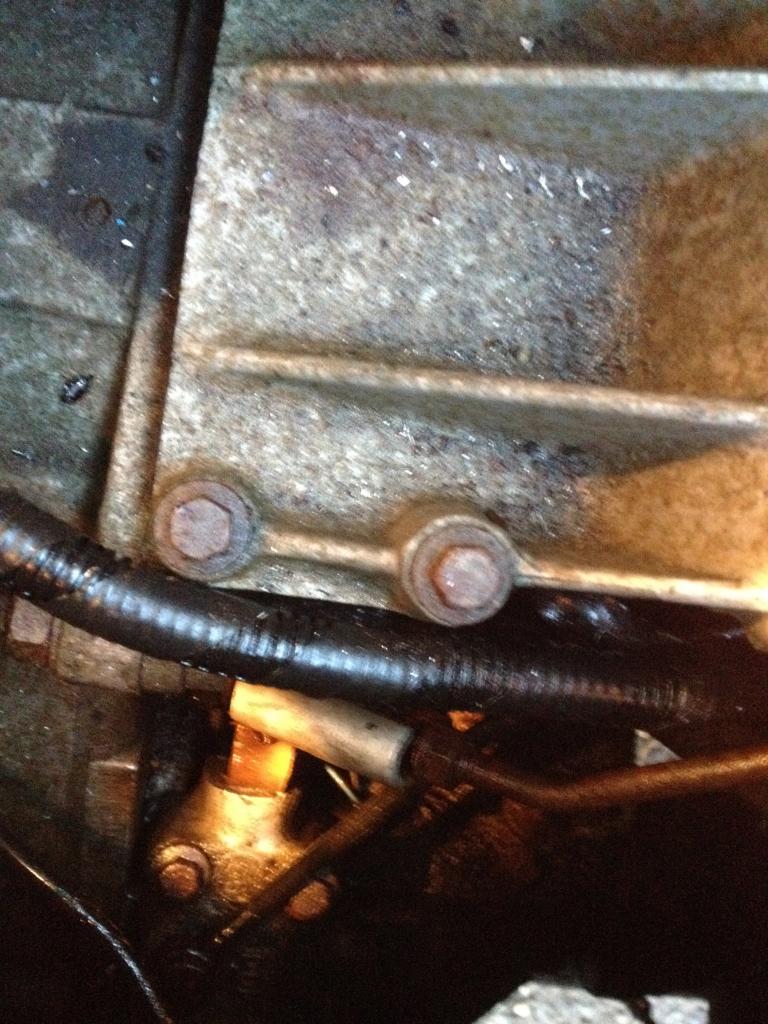
So I had to remove the entire shifter and linkage again, this time by unscrewing the high-low cover of the front output assembly (this is explained in Paul Grant's process and he considers it a safer way of removal).
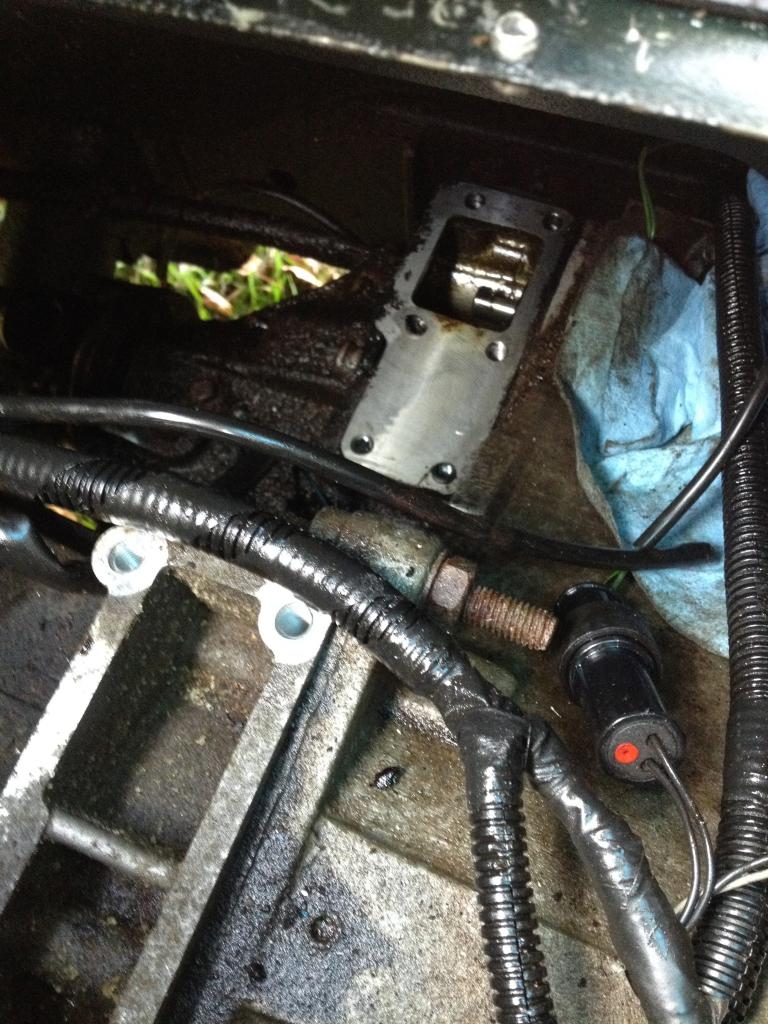
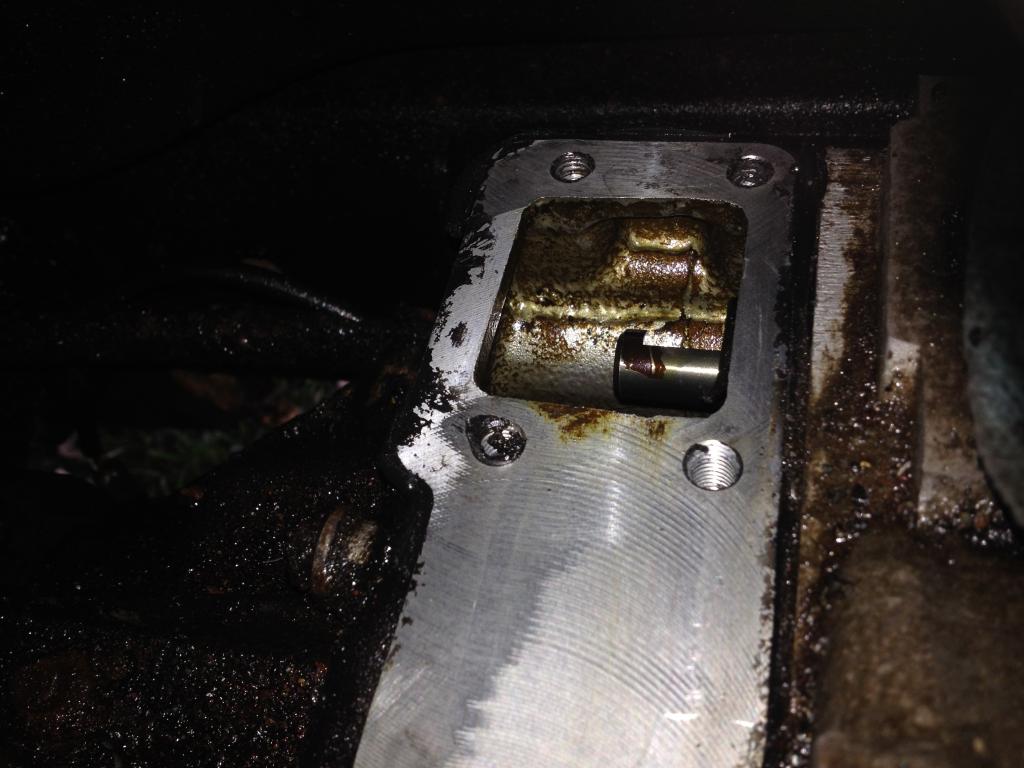
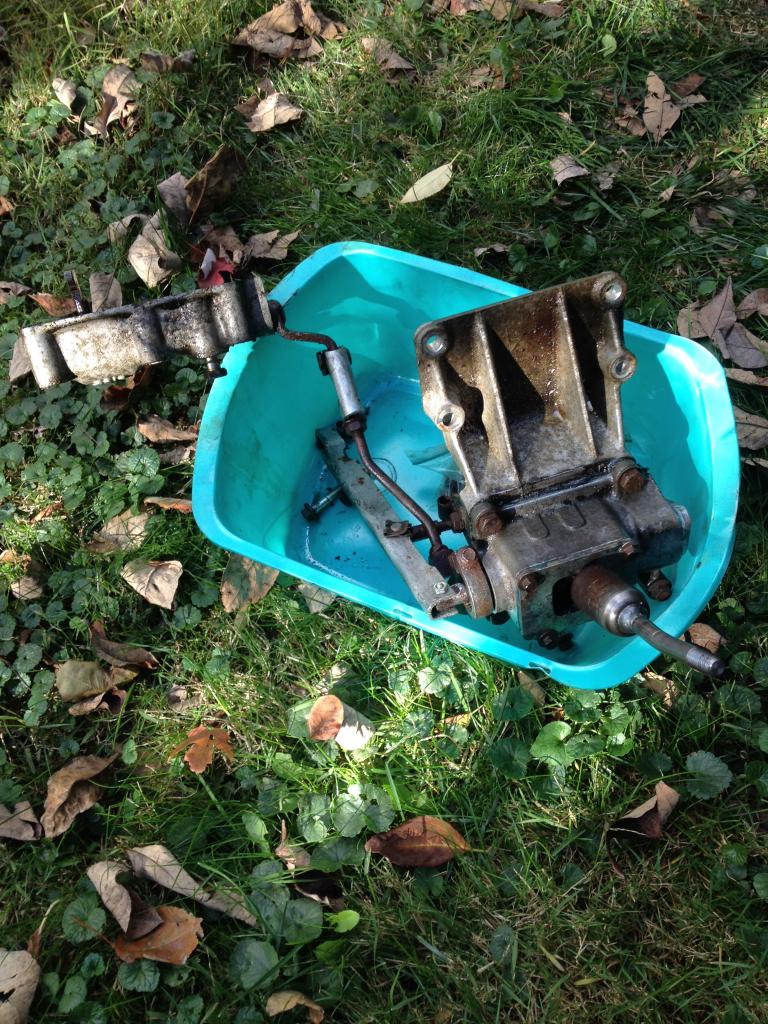
Now with everything out again, it was much easier working this on the workbench, even replacing my makeshift bolt and nut in the top linkage with the new pin and clevis I had not been able to fit before.
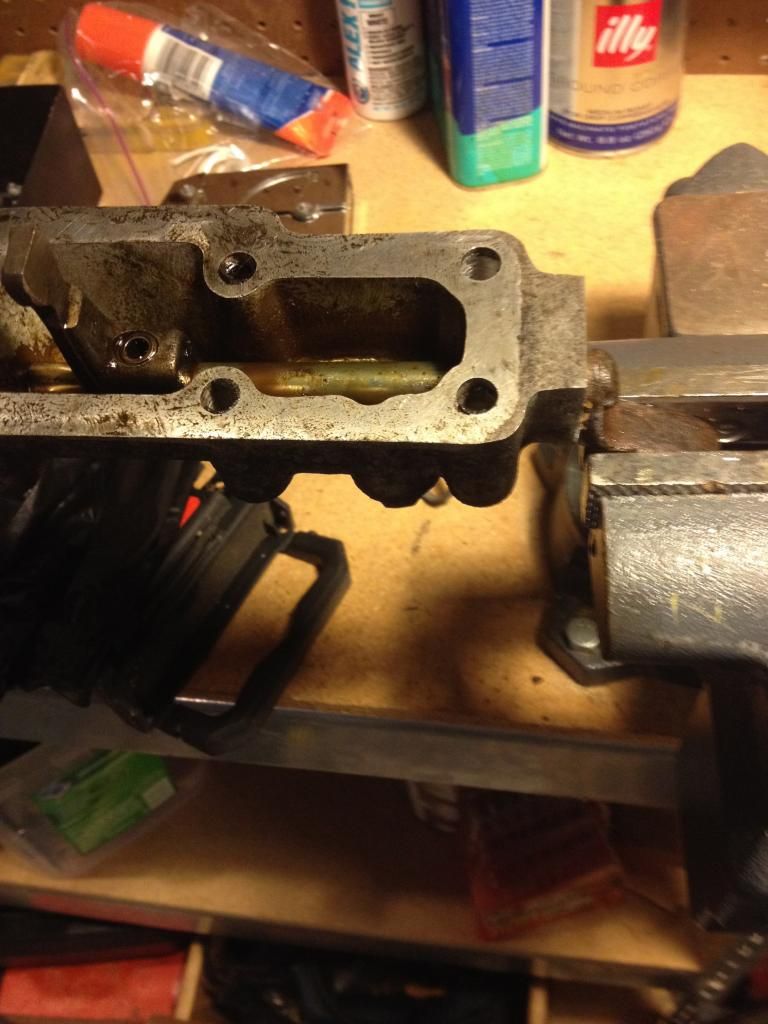
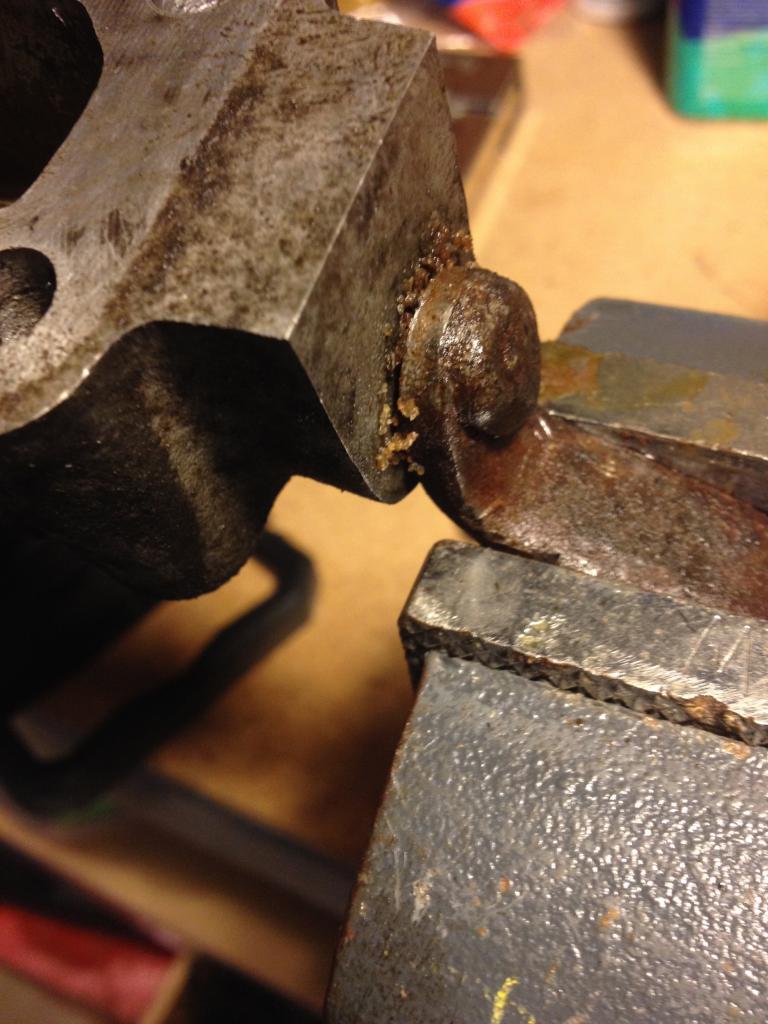
The high-low arm coming out of the cover was in fact completely frozen solid, but after attaching it to the vise, spraying some penetrating oil and a few taps with a mallet it came loose. After cleaning well and spraying some more lubricant on it, it worked perfectly.
I finally reassembled everything, and now both the diff lock and the high-low work great. In fact they seem to work even smoother than when I bought the Disco in 1998.
So my overall recommendation is to follow Paul Grant's instructions and unscrew both the four bolts that hold the linkage to the top of the transmission, and the six 10mm bolts holding the high-low cover, and remove the whole thing. This will also allow you to not only work on the stuck diff lock shaft more comfortably at the bench, but also clean and lube the high-low arm, even if not stuck (mine was frozen as mentioned so I had no choice).
A few more notes:
When removing the linkage with the high-low cover attached I had to remove the breather tube that attaches to the cover See pic where I show the high-low cover with the breather tube attached). Because this tube runs through a little clasp attached to the vertical linkage, and I could not separate the tube from the fitting, I cut it with an exacto knife right at the fitting, and slid it out. Even though the length of the tube allowed me to slide it back in and reconnect it to the fitting when I re-assembled, the tube is very stiff and narrow so I could not push it all the way over the fitting, so I left it as tight as possible hoping it won't slide off while driving. I really don't know the trick to get the tube on/off the fitting. Also watch for copper washer at top and bottom of the breather tube bolt, they are easy to miss or lose unless you are paying attention.
The few days while I had the shifter and solenoids out I covered the openings in the transfer case with shop towels to avoid anything falling in. This proved very useful as the lawn and landscape crew came by, and after they used leaf blowers through the driveway I found lots of debris had swirled around under the Disco and deposited on top of the rags.
In reassembling the solenoid cover and the high-low cover I used Permatex RTV Ultra Black which you find almost anywhere in the US (seems to be almost the same RTV than the Hylosil recommended in RAVE).
I bought and used a torque wrench as I was concerned about stripping the threads. The solenoid cover especially called for pretty low torque.
On re-assembly of the console, I read several warnings that reconnecting the e-brake cable was one of the hardest parts, but someone's advice about using a vise grip to pull and hold the cable, and working with someone's help to slide in the pin when I had the cable in position, made it fairly straightforward after a couple of failed attempts.
Throughout the process, I took many pics with my phone to remember how things were assembled. This proved invaluable as some things seem obvious until you want to re-assemble and don't remember which parts goes up-down, left-right, front-back, etc. I also kept several snack size ziplock bags and a sharpie to save the screws, pins and bolts, and label where they came from. After days of working this I had dozens of screws and clips and bolts of many sizes, and it was not always obvious to me where they belonged.
Hope this is not too long, at least for anybody approaching this project. It ended taking me a couple of weeks between evenings and weekend work, but as noted elsewhere you can generally drive during most of the process.
I am somewhat mechanically inclined but generally a novice, so I started by reading every post on this issue, watching the videos I could find, and looking at every possible picture to understand the problem and how to resolve it. I will not add much new to the many and excellent explanations that I found, but I will offer my tips and observations, as well as a few pictures of my process, as for several of the steps I had not found pictures.
My main sources I used to do the work were:
- The bahnstorm.com write-up: great overview, comments and some good pics. (most often shows up first in any search of "Discovery diff lock stuck" or similar).
- A Paul Grant post / write-up (google his post under "seized low gear lever").
- Pics and comments in a post called "my stuck diff lock story", by JPSpen
- The video in youtube titled "Land Rover Discovery 99 Solenoid"
- The RAVE workshop manual
Following the bahnstorm.com article/ writeup, my initial attempts to unfreeze the shifter without dissasembling the console and mechanism proved frustrating and fruitless. Several days going under the vehicle to spray PB Blaster, pushing, pulling, hammering and shaking only resulted in scuffed knuckles and a few pulled neck muscles.
Disassembling the console, e-brake, auto shifter, gaiter, cover plate, etc. was not hard at all, even as a novice, but a couple of the screws stripped, and drilling the rivets closest to the front was difficult because my drill would not fit under the dashboard to drill straight down. So I had to drill at an angle, resulting in elongated holes rather than the tight and round 3/16ths. I don't know how to resolve the drilling issue, but for the screws I would recommend making sure you have a good fitting screwdriver, that you start manually (with a drill the stripping happens too fast), and that you apply enough pressure until you feel the screw loosen. I ended up buying replacement stainless screws at my local ACE hardware, and later used short and thick stainless sheet metal screws instead of rivets for re-assembly of the plates.


Once I had the console off and the front of the tunnel open, I started by working really hard to pull the pin and clevis holding the top of the linkage to the cross shaft (bottom of first pic below). I eventually pulled it, but in the process ruined the head of the pin and the clip was all rusted, so I had to order a replacement set (parts RND641 and RND643 at Rovers North).


Once I had everything out of the vehicle, I worked on the whole shifter mechanism in the basement for a few days: alternating PB Blaster and WD40, and applying mallet taps, until it slowly began moving in every direction. I disassembled the end cover (which is where the shaft was mostly frozen), cleaned everything, lightly sanded away the rust, packed with lots of new grease, applied blue hylomar, and reassembled. The mechanism worked smoothly with all the cleaning and packed with new grease.


In trying to reinstall in the Discovery, I could not push the new pin and clevis in, no matter how many times I tried, so I used a small bolt and nut instead (seen in top right of pic).
 [/URL]
Now the diff lock seemed to work well, but the high-low would not budge. Based on most people's experience, I initially thought that the high-low problem was the solenoid. I spent a lot of time reading about it and finally removing it (only to find that the high-low still didn't work because the lower linkage-high-low arm connection seemed frozen).
To access the solenoid I had to open the tunnel further, by removing the auto shifter and riveted plate. Here is where I ran into most screw stripping, so be careful. Paul Grant's write-up explained well the auto shifter **** removal, including the 19mm nut which as he says is pretty loose inside the ****, so I was able to turn it by pushing it with a screwdriver. Also watch for the spring in the button, which falls out when you remove the ****. The e-clip at the top that holds the spacer in place has an awkward shape and hard to remove and install, so be careful as I actually broke it by forcing it. I temporarily replaced it with a small hardware store circular e-clip, but now received the actual correct clip I ordered from Rovers North (part LRNA3727A) and will try to install. (Notice that this clip is what makes the shifter rise when you press the button on the ****, so without this clip you cannot shift out of Park. This minimal part can leave someone stranded if they don't know that they can simply pull off the **** and raise the metal shaft with their fingers to shift into drive). Notice the e-clip in the first pic and the solenoid on the top right of the last of the next few pics.

 [/URL]
The solenoid was fine so I cleaned it, sprayed some PB in it, and I put it back in (because my teenage son drives the Disco, I didn't want to leave it out and risk one of his friends shifting to low at 60 miles/hour on a highway). The video in youtube titled "Land Rover Discovery 99 Solenoid" was great in understanding and testing the solenoid, but I could have avoided even removing it if I had tested the linkage first by removing the high-low cover entirely. I couldn't tell if it was the solenoid or the linkage while everything was connected and installed. Notice the high-low cover, breather tube, and frozen arm in the pics below.


So I had to remove the entire shifter and linkage again, this time by unscrewing the high-low cover of the front output assembly (this is explained in Paul Grant's process and he considers it a safer way of removal).


Now with everything out again, it was much easier working this on the workbench, even replacing my makeshift bolt and nut in the top linkage with the new pin and clevis I had not been able to fit before.

The high-low arm coming out of the cover was in fact completely frozen solid, but after attaching it to the vise, spraying some penetrating oil and a few taps with a mallet it came loose. After cleaning well and spraying some more lubricant on it, it worked perfectly.


I finally reassembled everything, and now both the diff lock and the high-low work great. In fact they seem to work even smoother than when I bought the Disco in 1998.
So my overall recommendation is to follow Paul Grant's instructions and unscrew both the four bolts that hold the linkage to the top of the transmission, and the six 10mm bolts holding the high-low cover, and remove the whole thing. This will also allow you to not only work on the stuck diff lock shaft more comfortably at the bench, but also clean and lube the high-low arm, even if not stuck (mine was frozen as mentioned so I had no choice).
A few more notes:
When removing the linkage with the high-low cover attached I had to remove the breather tube that attaches to the cover See pic where I show the high-low cover with the breather tube attached). Because this tube runs through a little clasp attached to the vertical linkage, and I could not separate the tube from the fitting, I cut it with an exacto knife right at the fitting, and slid it out. Even though the length of the tube allowed me to slide it back in and reconnect it to the fitting when I re-assembled, the tube is very stiff and narrow so I could not push it all the way over the fitting, so I left it as tight as possible hoping it won't slide off while driving. I really don't know the trick to get the tube on/off the fitting. Also watch for copper washer at top and bottom of the breather tube bolt, they are easy to miss or lose unless you are paying attention.
The few days while I had the shifter and solenoids out I covered the openings in the transfer case with shop towels to avoid anything falling in. This proved very useful as the lawn and landscape crew came by, and after they used leaf blowers through the driveway I found lots of debris had swirled around under the Disco and deposited on top of the rags.
In reassembling the solenoid cover and the high-low cover I used Permatex RTV Ultra Black which you find almost anywhere in the US (seems to be almost the same RTV than the Hylosil recommended in RAVE).
I bought and used a torque wrench as I was concerned about stripping the threads. The solenoid cover especially called for pretty low torque.
On re-assembly of the console, I read several warnings that reconnecting the e-brake cable was one of the hardest parts, but someone's advice about using a vise grip to pull and hold the cable, and working with someone's help to slide in the pin when I had the cable in position, made it fairly straightforward after a couple of failed attempts.
Throughout the process, I took many pics with my phone to remember how things were assembled. This proved invaluable as some things seem obvious until you want to re-assemble and don't remember which parts goes up-down, left-right, front-back, etc. I also kept several snack size ziplock bags and a sharpie to save the screws, pins and bolts, and label where they came from. After days of working this I had dozens of screws and clips and bolts of many sizes, and it was not always obvious to me where they belonged.
Hope this is not too long, at least for anybody approaching this project. It ended taking me a couple of weeks between evenings and weekend work, but as noted elsewhere you can generally drive during most of the process.
Thread
Thread Starter
Forum
Replies
Last Post


