
2000 Disco II Major Rebuild/Overhaul


Thread Starter
|
Mudding
Joined: Nov 2013
Posts: 116
Likes: 2
From: Utah
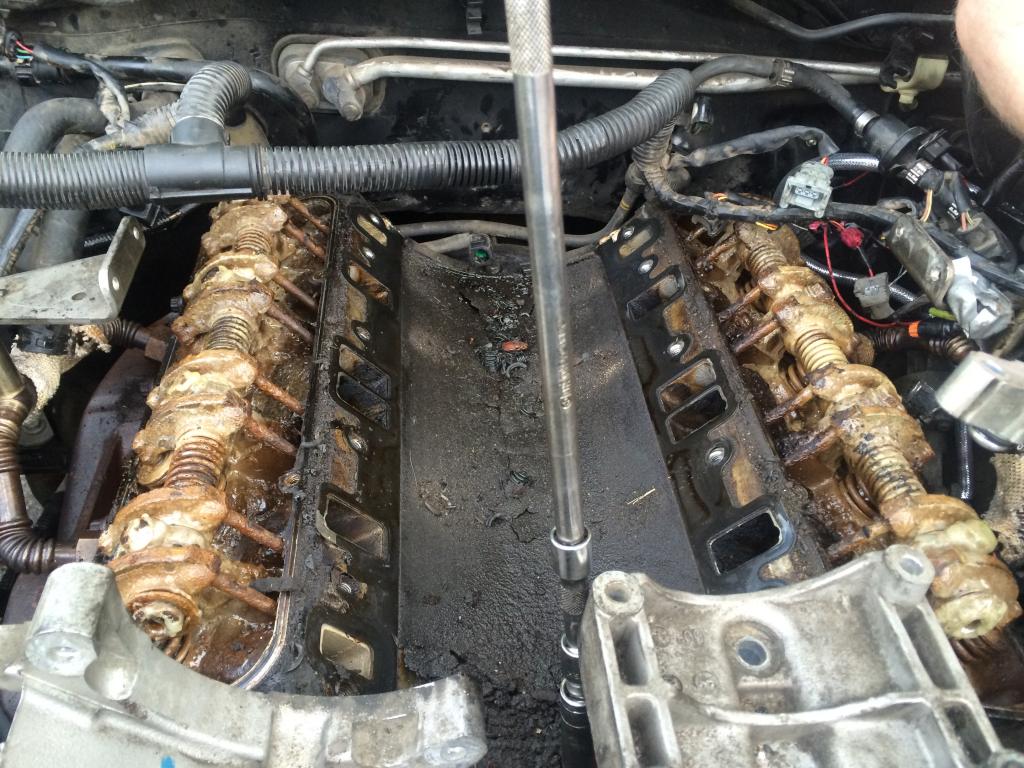
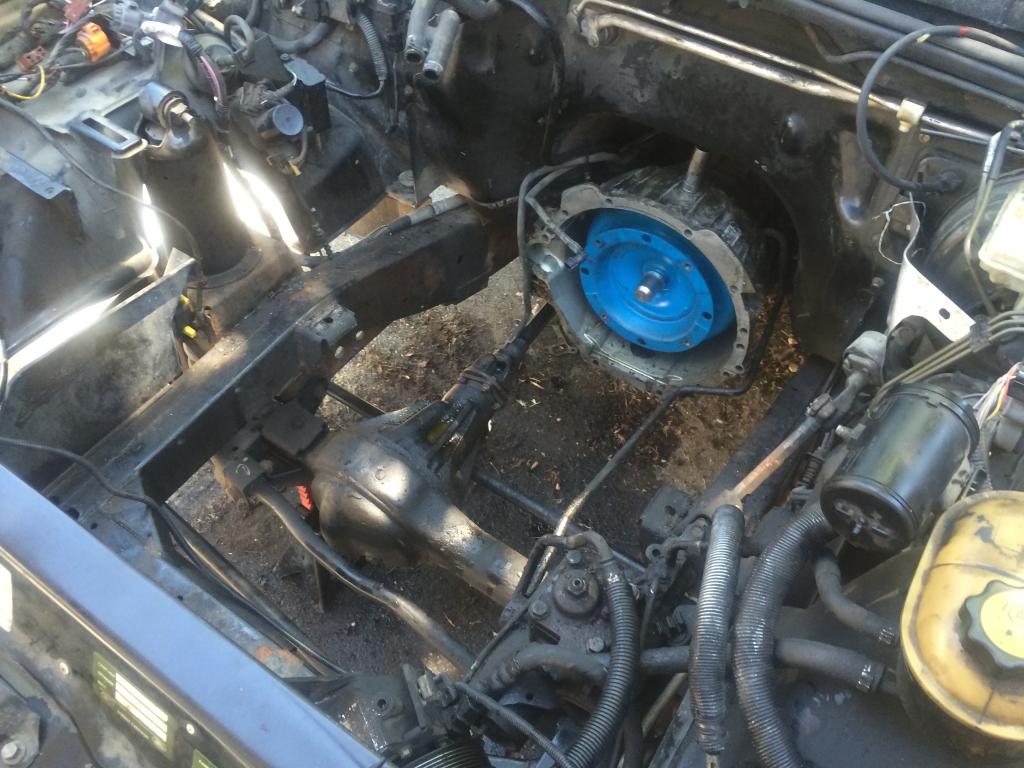
It's been abused and had a blown gasket as well as a number of other indicators that the engine was ready to be ripped apart. I love doing this stuff, so I am going all in. In the picture, go ahead, and ask me what this smelled like:
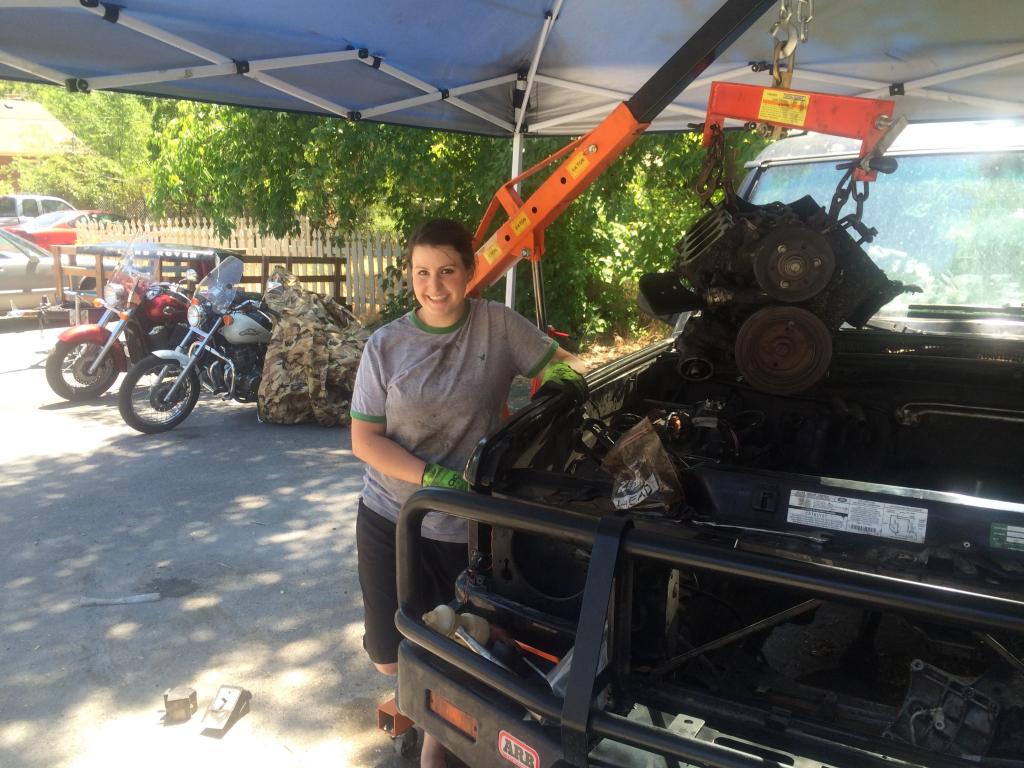
I also had a pretty bad shutter when shifting from park to drive, so I'm doing the prop shafts and ripping the Transmission/Transfer Case out, too and rebuilding those as well. After taking off the front passenger side tire to remove the engine with a Harbor Freight hoist, I see the shutter may be a result of there being no bushing at all on the shocks, so... New Lift Kit! Probably Terrafirma 2" with a half or one inch space up front to offset the difference in having a fatty ARB bumper, and yet to be bought HF winch. What suggestions are out there for making sure the vehicle doesn't lean forward with the bumper? Different springs or spacers?
I've already removed and disassembled the engine.

The heads needed 10 thou machined off of them. They're looking pretty good, now. And I was going to do the valve job all on my own, but after cleaning off the carbon with a brass brush, there was too much heavy pitting on the exhaust valves to do on my own. those are at the machine shop getting turned and polished, now. BTW, if anyone in the Utah Valley area needs machine work, Charley's is doing great work for me and has some pretty good pricing, too. 80 for the heads, 20 for the valves, and 60 to hot tank everything in my engine bay. My poor Prius is laden down right now with all of the parts I can find to be hot tanked. I'm dropping those off this morning.
Good deals and purchases so far:
-Magnaflow cats and Torque Converter from a rebuilt Disco II that was totaled 14k miles after the rebuild. Got the cats for $200 and the Torque Converter for $100.
-8.5mm Magnacor Wires for $107 on Amazon
-New Ingnition coil pack assembly from Rock Auto for $45
-Magnaflow muffler for $85, going to cut out the stock muffler and weld in the stainless new guy tomorrow. Also removing the resonator and putting a replacement pipe on so the fumes don't go up into the cabin.
-$800 in new gaskets, lifters, pushrods, rockers, rocker arms, piston rings, cam, springs, bearings, seals, bolts, u-joints, ball kit, and more from lrdirect on one of their 10% off days. The shipping was 150, but who cares, when it's so much cheaper as a whole? Took 3 business days to get to me.
-Transmission rebuild kit from Rock Auto for $170
-Oil and Transmission Fluid coolers (I may have became frustrated at the quick-release valves and accidentally ripped my spigots out...) $100
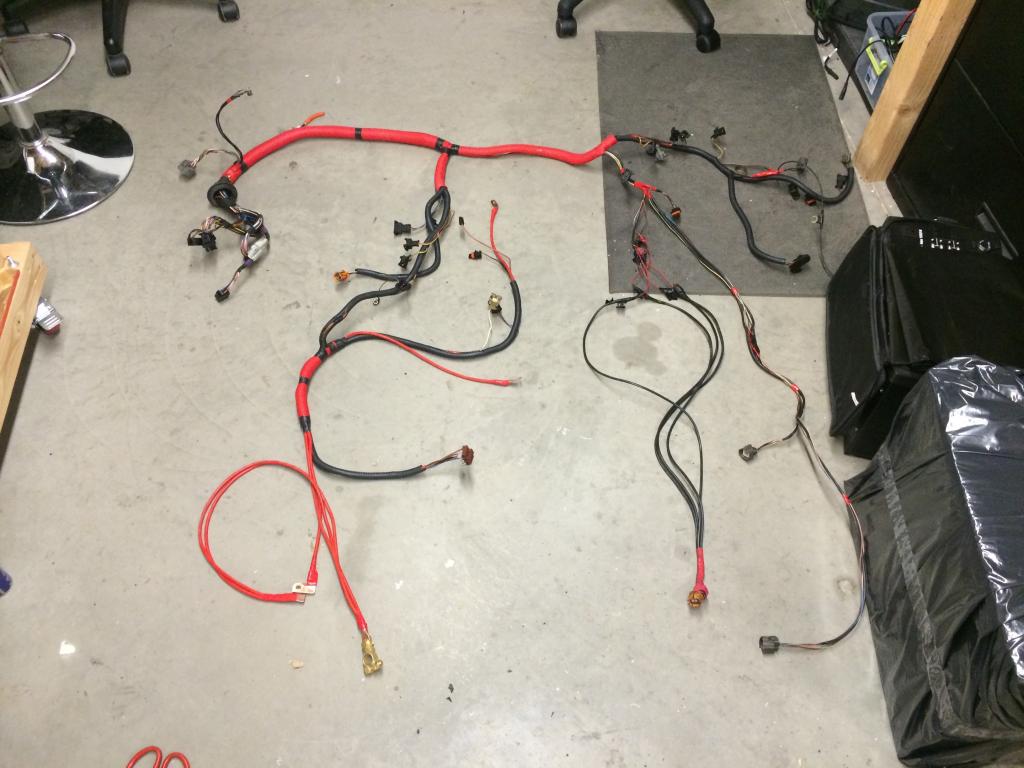
-Horsehair 8AWG 200 Amp 200 degree C Battery/Alt/Starter Cables. All silicone wrapped and so flexible, I can wrap it around my pinky! $40. I made these myself and while cleaning and rewrapping the engine wiring harness, I incorporated these cables. Anything of the large main cables under the hood were replaced by these. It's only a $1/ft, and I have used 15' red and 8' black. All of the terminals are copper (had to custom make the funny shaped ones to the main fuse box) except for the actual battery terminals(brass). But I made that modular so I can put a prototype Lithium Semi-Truck Battery in. I doubt I'll need the 3000 CCA, but If I can do it for free and it weighs half of what the original Rover battery does, and I can monitor it via Bluetooth and GPS, why not?! I use these cables at work for high discharges (3000Amps) of low voltage (12V) with large Lithium battery packs, so I figured, hey, if they can handle 200A constant and 200 degrees C, where normal battery cables are rated for 50A constant and 100 C, why not replace the old stiff stuff with this awesome super-flexible stuff!? So I did. Still not done cleaning up the harness, but here's what I have so far.
Before:

Half-way Done:
I'm debating a few purchases/work, input appreciated:
-Should I get the cylinders pinned? Do the 4.0's have issues with the sleeves slipping? Mine look fine.
-Do I need to have the block pressure tested? If so, to what pressure?
-I'm replacing the cam, lifters, rockers, rocker arms, push rods, springs, and rod springs, but keeping the valves if possible. Should I get new valve guides if mine are still in spec?
-I've already bought a new stock cam, but is there any huge advantage to getting a modified cam? I head D&D fab makes a good one. How much do they run?
-I heard the 4.0 and 4.6 blocks are identical and that the cranks are the only different part. Can I get a 4.6 crank and get a 0.6L bump in displacement? Anything I'd need to worry about/change if I did do that?
I'll post pictures of as much of it as I can as I go, but I have a few, so I'll put those up here, now. Disco Mike, all-seeing Forum Man, be proud of the array of fluids below:
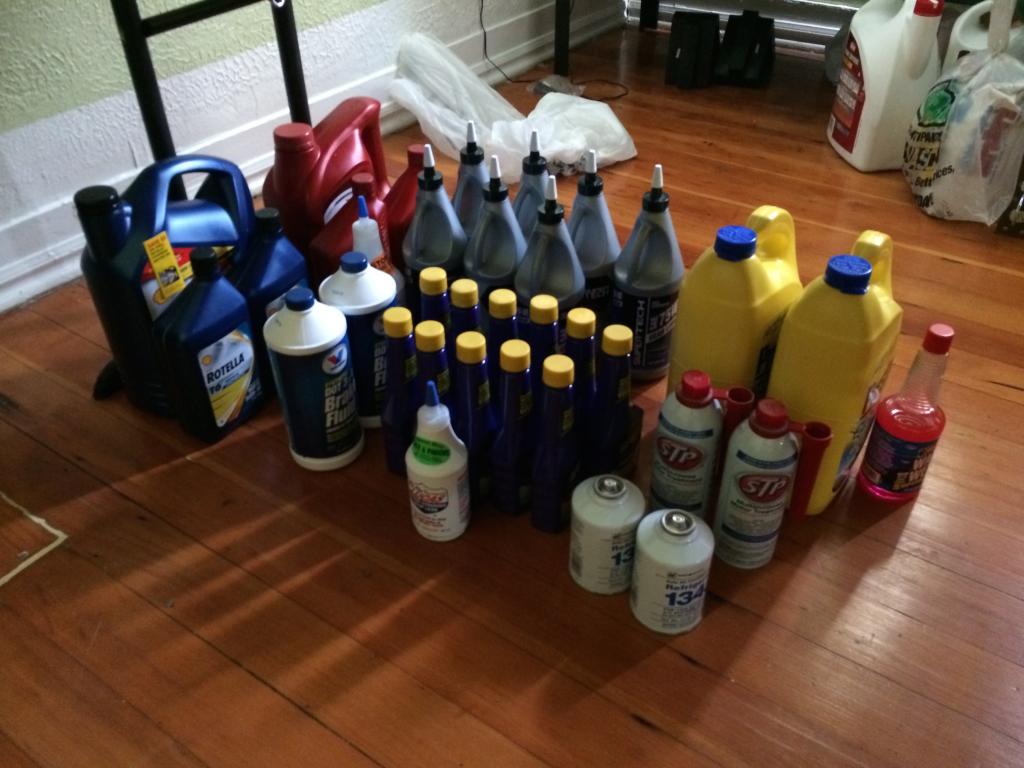
There are also all of the other parts for everything specified in your major service. Just out of the shot.
As of yesterday:
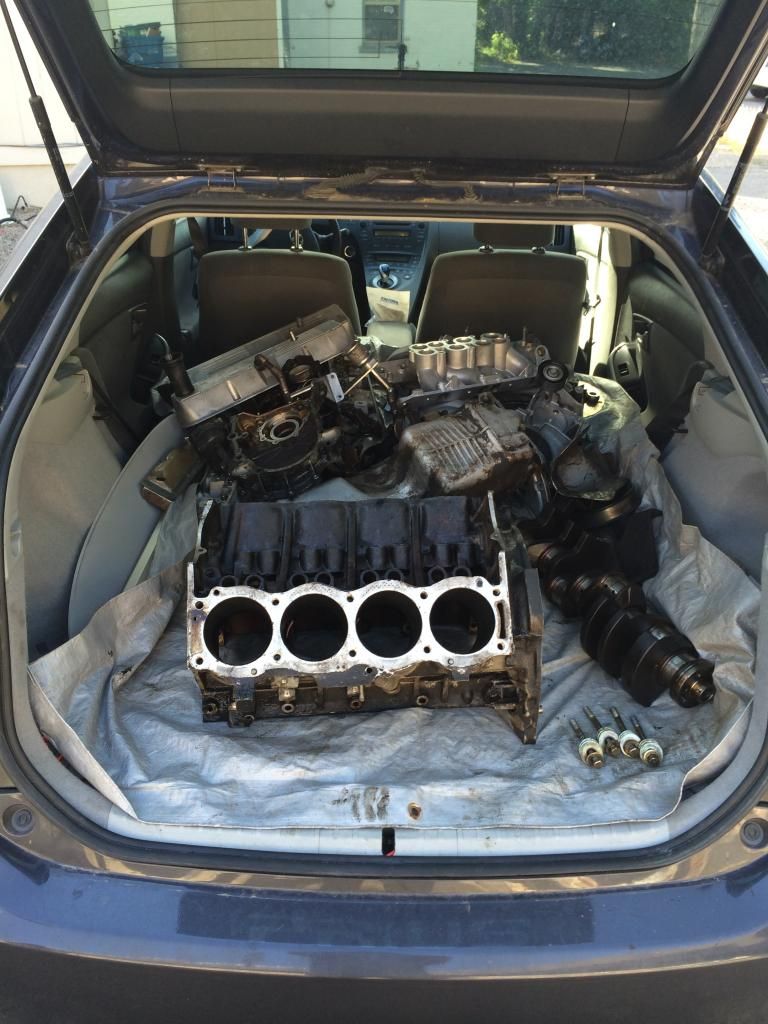
And in case it helps anyone, the block is really light after you strip it of all the moving parts! I was able to pick it up and load it into the trunk of my car without any trouble.

I also had a pretty bad shutter when shifting from park to drive, so I'm doing the prop shafts and ripping the Transmission/Transfer Case out, too and rebuilding those as well. After taking off the front passenger side tire to remove the engine with a Harbor Freight hoist, I see the shutter may be a result of there being no bushing at all on the shocks, so... New Lift Kit! Probably Terrafirma 2" with a half or one inch space up front to offset the difference in having a fatty ARB bumper, and yet to be bought HF winch. What suggestions are out there for making sure the vehicle doesn't lean forward with the bumper? Different springs or spacers?
I've already removed and disassembled the engine.


The heads needed 10 thou machined off of them. They're looking pretty good, now. And I was going to do the valve job all on my own, but after cleaning off the carbon with a brass brush, there was too much heavy pitting on the exhaust valves to do on my own. those are at the machine shop getting turned and polished, now. BTW, if anyone in the Utah Valley area needs machine work, Charley's is doing great work for me and has some pretty good pricing, too. 80 for the heads, 20 for the valves, and 60 to hot tank everything in my engine bay. My poor Prius is laden down right now with all of the parts I can find to be hot tanked. I'm dropping those off this morning.
Good deals and purchases so far:
-Magnaflow cats and Torque Converter from a rebuilt Disco II that was totaled 14k miles after the rebuild. Got the cats for $200 and the Torque Converter for $100.
-8.5mm Magnacor Wires for $107 on Amazon
-New Ingnition coil pack assembly from Rock Auto for $45
-Magnaflow muffler for $85, going to cut out the stock muffler and weld in the stainless new guy tomorrow. Also removing the resonator and putting a replacement pipe on so the fumes don't go up into the cabin.
-$800 in new gaskets, lifters, pushrods, rockers, rocker arms, piston rings, cam, springs, bearings, seals, bolts, u-joints, ball kit, and more from lrdirect on one of their 10% off days. The shipping was 150, but who cares, when it's so much cheaper as a whole? Took 3 business days to get to me.
-Transmission rebuild kit from Rock Auto for $170
-Oil and Transmission Fluid coolers (I may have became frustrated at the quick-release valves and accidentally ripped my spigots out...) $100
-Horsehair 8AWG 200 Amp 200 degree C Battery/Alt/Starter Cables. All silicone wrapped and so flexible, I can wrap it around my pinky! $40. I made these myself and while cleaning and rewrapping the engine wiring harness, I incorporated these cables. Anything of the large main cables under the hood were replaced by these. It's only a $1/ft, and I have used 15' red and 8' black. All of the terminals are copper (had to custom make the funny shaped ones to the main fuse box) except for the actual battery terminals(brass). But I made that modular so I can put a prototype Lithium Semi-Truck Battery in. I doubt I'll need the 3000 CCA, but If I can do it for free and it weighs half of what the original Rover battery does, and I can monitor it via Bluetooth and GPS, why not?! I use these cables at work for high discharges (3000Amps) of low voltage (12V) with large Lithium battery packs, so I figured, hey, if they can handle 200A constant and 200 degrees C, where normal battery cables are rated for 50A constant and 100 C, why not replace the old stiff stuff with this awesome super-flexible stuff!? So I did. Still not done cleaning up the harness, but here's what I have so far.
Before:

Half-way Done:

I'm debating a few purchases/work, input appreciated:
-Should I get the cylinders pinned? Do the 4.0's have issues with the sleeves slipping? Mine look fine.
-Do I need to have the block pressure tested? If so, to what pressure?
-I'm replacing the cam, lifters, rockers, rocker arms, push rods, springs, and rod springs, but keeping the valves if possible. Should I get new valve guides if mine are still in spec?
-I've already bought a new stock cam, but is there any huge advantage to getting a modified cam? I head D&D fab makes a good one. How much do they run?
-I heard the 4.0 and 4.6 blocks are identical and that the cranks are the only different part. Can I get a 4.6 crank and get a 0.6L bump in displacement? Anything I'd need to worry about/change if I did do that?
I'll post pictures of as much of it as I can as I go, but I have a few, so I'll put those up here, now. Disco Mike, all-seeing Forum Man, be proud of the array of fluids below:

There are also all of the other parts for everything specified in your major service. Just out of the shot.
As of yesterday:

And in case it helps anyone, the block is really light after you strip it of all the moving parts! I was able to pick it up and load it into the trunk of my car without any trouble.

Recovery Vehicle
Joined: Feb 2014
Posts: 1,125
Likes: 24
Good score on the Cats and torque converter. I think you can sell your old cats for scrap and get about what you paid for the new ones or more. I think there are posts on here that have the sites that pay the most.
I like the new battery cables and wiring also. Looks like you are going all out.
I wish I were brave enough to try an auto trans rebuild. How hard was that?
4.6 crank and rods to make the swap, not just the crank, if I'm not mistaken. Bore is the same, some say you can keep your 4.0 pistons for more compression ratio.
I would definitely carry the block in to have it all checked out. deck surfaces checked for square. I cold tested mine here to 60lbs, but a good machine shop can hot test it I think. Some say test to 30lbs and I have seen others say up to 100lbs. May blow the freeze plugs out at that psi?
With a new cam you should also go ahead a spring for new cam bearings if it is really high mileage.
Nice pics, I'll be following along!
Last edited by RicketyTick; Jul 15, 2014 at 09:42 AM.

Thread Starter
|
Mudding
Joined: Nov 2013
Posts: 116
Likes: 2
From: Utah
Thanks jamestfl!
My wife has named this truck Roger. Here is sad Roger, the gutted tripod, waiting for new parts and a lift...
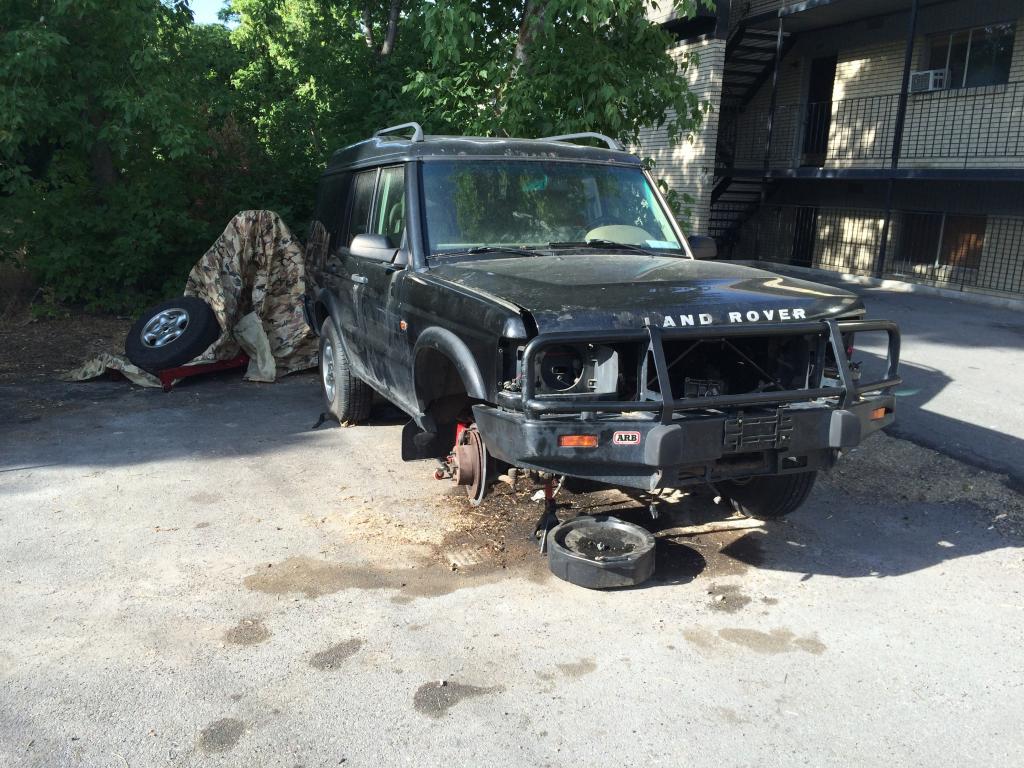
And here is the engine, in the back of my Prius. Feels kinda wrong...
My wife has named this truck Roger. Here is sad Roger, the gutted tripod, waiting for new parts and a lift...

And here is the engine, in the back of my Prius. Feels kinda wrong...

Thread Starter
|
Mudding
Joined: Nov 2013
Posts: 116
Likes: 2
From: Utah
Other Money savers:
And I have to brag about my water pump. It's the same one (brand and quality) that AB sells for 150, and they sell it for 120 on Amazon, but they had an open box unit, brand new, on their Warehouse Deals for $40. Looks great. Only downside is the gasket that came with it is broke... Darn, that'll be a whole two quarters more!
Another money saving tip I've found: Bolts, the stretch and stud and expensive sucker that if you do the math and materials analysis for (luckily that's my field), you can save a ton!
My exhaust manifold bolts are next to useless. Completely corroded. One of the bolt heads came off with minimal force when trying to loosen them. Getting new ones are expensive. I like not expensive. I found the correct bolt specs and then matched it to a product at Fastenal. For the kit of them, I think it was almost $100 from any of the good reputable places. I spent $4.50 total for all 16 using a corporate account at Fastenal, though. If you don't have corporate account, it's 8 bucks. Specs: 140ksi Yield, 3/8-16, 2.5" socket head, Part number 1123313. They work perfectly with the spacers and they have a slightly higher proof strength than the stock bolts (120ksi), so you'll definitely be able to reuse them. If you're worried about the socket head not having a flange, get a 3/8" Titanium washer for each of them, Part UW4440000TT0000. Or if you're just a pansy and don't want Titanium, you can get some stainless washers with 1" OD for a quarter or so, part number 0152661. If you want the truly Identical part, but with a 12 point flanged head, the part number is 22869. It's like $1.60/ea. But that's 6x what I spent. And I'm cheap. You can also get Grade 10 3" studs and then grade 8 flanged nuts, but the studs are spendy suckers! 8 bucks each, I think...
Now to go get the spec on the studs I broke on the exhaust manifolds!
Also on the docket, replacing the phillips head flush mount screws that secure the oil pump plate to the timing cover. I want Allen-key, not phillips! Those round off so easy and you can actually get a proper torque spec on allen-keyed fasteners.

Recovery Vehicle
Joined: Jan 2012
Posts: 1,064
Likes: 16
From: San Antonio,Tx
Great stuff. I and many other members on here have done rebuild threads and I always love seeing a Disco on the brink of the scrap yard being brought back to life. I've put 63K on my truck since my rebuild and it has been great. Take your time and do it right and it will threat you good for many miles in the future. There will always be something else to fix on a Rover, but you should be getting the big stuff out of the way.
You've got guts pulling an engine in flip flops. That's a great way to get rid of an extra toe . Who needs all 10 anyway
You've got guts pulling an engine in flip flops. That's a great way to get rid of an extra toe
. Who needs all 10 anyway
Last edited by Jared9220; Jul 15, 2014 at 03:50 PM.

Thread Starter
|
Mudding
Joined: Nov 2013
Posts: 116
Likes: 2
From: Utah
It was missing one of the bolts connecting the flex plate to the torque converter for heaven's sake! Who does that?! I bought a new torque converter, anyway, and I'm buying a ton of new fasteners, too, so It'll be a clean, proper rebuild.
Last edited by RSPTex; Jul 16, 2014 at 05:34 AM.
Thread Starter
|
Mudding
Joined: Nov 2013
Posts: 116
Likes: 2
From: Utah
Great stuff. I and many other members on here have done rebuild threads and I always love seeing a Disco on the brink of the scrap yard being brought back to life. I've put 63K on my truck since my rebuild and it has been great. Take your time and do it right and it will threat you good for many miles in the future. There will always be something else to fix on a Rover, but you should be getting the big stuff out of the way.
You've got guts pulling an engine in flip flops. That's a great way to get rid of an extra toe. Who needs all 10 anyway
You've got guts pulling an engine in flip flops. That's a great way to get rid of an extra toe
. Who needs all 10 anywayI hear people warn about putting connecting the engine to the torque converter the wrong way when finishing a rebuild and putting the engine back in. What is this wrong way? And how do you do it the right way?
And you see my smiling wife in the pic above? She stays that way if I don't get my other shoes dirty. Also, these are what I wear most of the time:

And hey, if I lose a toe, and drop some thing there again, it won't hurt that next time!

