
How to: Paint Worn Fender Flare Arches Properly


As these trucks get older, one of the first things to show age is the plastic fender flare arches. Its a common problem, but an easy fix. If your arches are getting rough and turning gray, don't pay nearly $400 to have them replaced! Just follow these steps and repaint them yourself, you'll really like the outcome, and you don't even have to take them off.
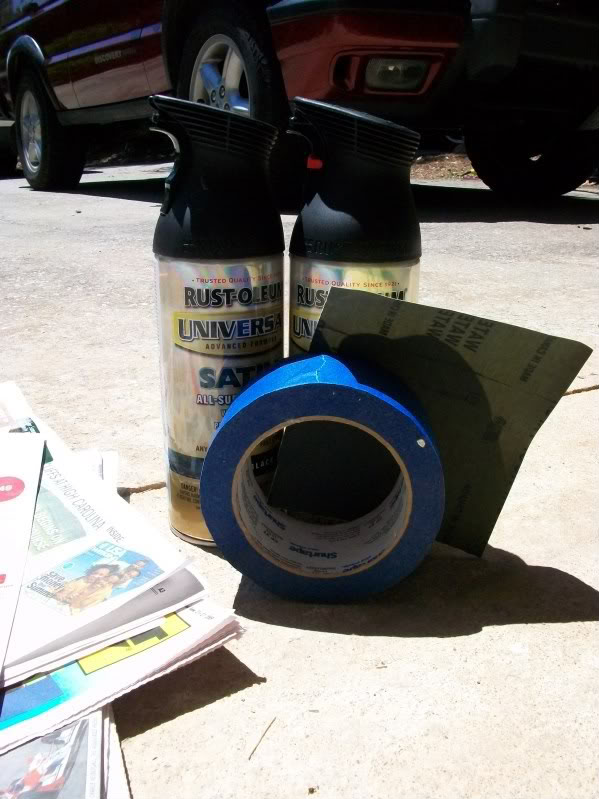
Here's what you'll need
-2 Cans of Black paint from the list below (Flat or Satin, your choice)
-Fine grit sandpaper (220-400 grit)
-Ammonia or rubbing alcohol to clean/prep arches
-Old newspaper and some painters tape
For the paint, you must use a good quality paint for plastic. I wouldn't go cheap here because you won't like how it holds up 2 years from now. A majority of the people who have done this used Krylon Fusion or Rustoleum Universal Plastic paint. Flat or Satin is up to you, I personally liked the Rustoleum satin because it was close to the original finish of the arches. Below is a list of paints that have been used successfully by other members:
-Krylon Fusion
-Rustoleum Universal Plastic Paint
-Dupli-Color Bumper Coating (Found at Autozone)
-Dupont Single stage paint (If you're really serious)
-Plastikote-Bumper Color Paint
-Bondo Easy Finish Bumper Black
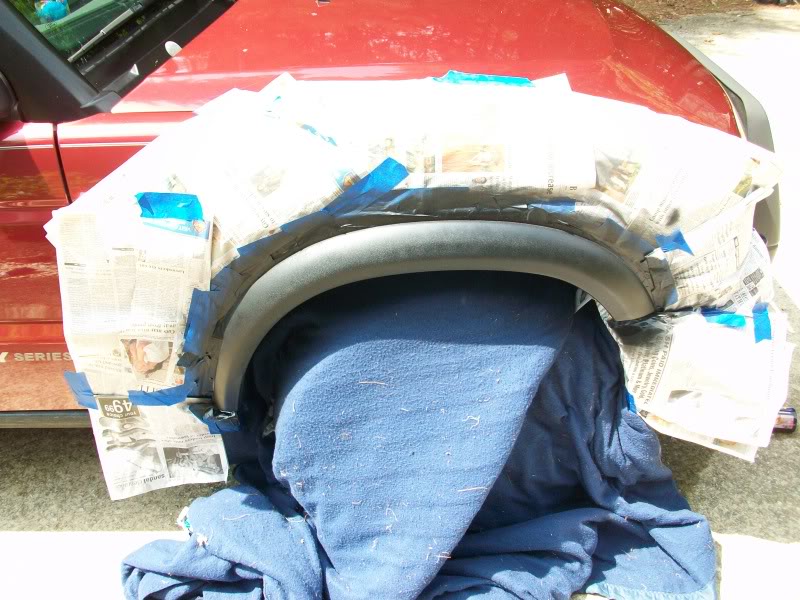
First, sand the arches and take your time doing this. The smoother the better. When you think they are smooth enough, do it one more time. It may help to finish it off with with a lighter grit sandpaper depending how rough they are. For example, Start with 220 grit and finish with 400. The picture below the taping step shows what they will look like after taping and sanding too.
Next, wipe down the arches with ammonia or rubbing alcohol. This will get off all the sanding residue, armorall, or that back to black stuff you tried before resorting to painting.
Next tape off the arches with painters tape and newspaper to give you more room to spray. Some people have taken the arches off to repaint them, but I've been told they'll never go on quite the same so I avoided doing that. When taping, take your time. You don't want black paint beyond the arches. Mine may look like overkill, but it was worth it:
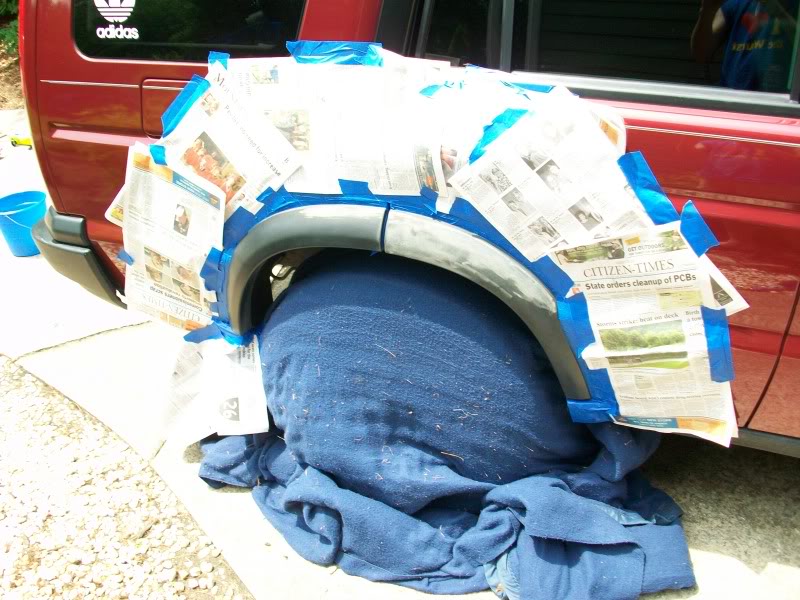
Now that your arches are perfectly clean and nicely taped off, you can begin to paint. Do a bunch of VERY LIGHT coats. I'm talking 7 or 8. Make sure you let it dry between coats. It takes more time, but the end result is worth it. You will also have better, even coverage that way.
Once the paint is dry, remove the tape and newspaper and enjoy your nice BLACK fender flares!
(Proceed with painting at your own risk)
Here's what you'll need
-2 Cans of Black paint from the list below (Flat or Satin, your choice)
-Fine grit sandpaper (220-400 grit)
-Ammonia or rubbing alcohol to clean/prep arches
-Old newspaper and some painters tape
For the paint, you must use a good quality paint for plastic. I wouldn't go cheap here because you won't like how it holds up 2 years from now. A majority of the people who have done this used Krylon Fusion or Rustoleum Universal Plastic paint. Flat or Satin is up to you, I personally liked the Rustoleum satin because it was close to the original finish of the arches. Below is a list of paints that have been used successfully by other members:
-Krylon Fusion
-Rustoleum Universal Plastic Paint
-Dupli-Color Bumper Coating (Found at Autozone)
-Dupont Single stage paint (If you're really serious)
-Plastikote-Bumper Color Paint
-Bondo Easy Finish Bumper Black
First, sand the arches and take your time doing this. The smoother the better. When you think they are smooth enough, do it one more time. It may help to finish it off with with a lighter grit sandpaper depending how rough they are. For example, Start with 220 grit and finish with 400. The picture below the taping step shows what they will look like after taping and sanding too.
Next, wipe down the arches with ammonia or rubbing alcohol. This will get off all the sanding residue, armorall, or that back to black stuff you tried before resorting to painting.
Next tape off the arches with painters tape and newspaper to give you more room to spray. Some people have taken the arches off to repaint them, but I've been told they'll never go on quite the same so I avoided doing that. When taping, take your time. You don't want black paint beyond the arches. Mine may look like overkill, but it was worth it:
Now that your arches are perfectly clean and nicely taped off, you can begin to paint. Do a bunch of VERY LIGHT coats. I'm talking 7 or 8. Make sure you let it dry between coats. It takes more time, but the end result is worth it. You will also have better, even coverage that way.
Once the paint is dry, remove the tape and newspaper and enjoy your nice BLACK fender flares!
(Proceed with painting at your own risk)
Last edited by Camdisco24; Aug 11, 2010 at 05:08 PM. Reason: Additions

Winching
Joined: Apr 2009
Posts: 561
Likes: 4
From: Port Huron, MI
i used hurculiner last week on my flares turned out great....off road finish....looks great,even used the uv top coat so they stay black....
i already painted them last year with a can of spray and they faded...so i used the hurc.....and it worked out good....i like your write up...prep is the key on anything with body work.
i already painted them last year with a can of spray and they faded...so i used the hurc.....and it worked out good....i like your write up...prep is the key on anything with body work.

03discoman, Hurculiner is another good option. Not quite as cheap as paint, but still better than buying new arches. I heard that hurculiner is a little harder to clean... Any truth to that?
Thanks Bamaboy, like I said in the OP, quality paint is key to avoiding fading. Mine have made it through 2 hot summers and still look just as good.
Thanks Bamaboy, like I said in the OP, quality paint is key to avoiding fading. Mine have made it through 2 hot summers and still look just as good.


Drifting
Joined: Jan 2010
Posts: 38
Likes: 0
From: around nashville
you did it...thanks for the write up!
how about some before/after photos? (or, at least the after ones)
back to black didn't even touch 'em. the roughened texture just seemed to shed it. back to black did work well on other various smooth rubber parts, but this is the way to go. wonder if i can fit this into a 3 hour window i have today?
I think you can easily do it in 3 hours. Honestly, taping and waiting between coats takes the longest.
Last edited by Camdisco24; Aug 11, 2010 at 04:58 PM.