
How to remove and paint a headliner from a D2


I joined the painted headliner club this week. I went a little different route after I saw Tweakrovers headliner in person. I color matched mine to the gray that was already there. I really like the outcome, minus one section where I kind of creased the board when putting it back in. But compared to the saggy junk that was there before, this is a great upgrade.
Here's the before and after:
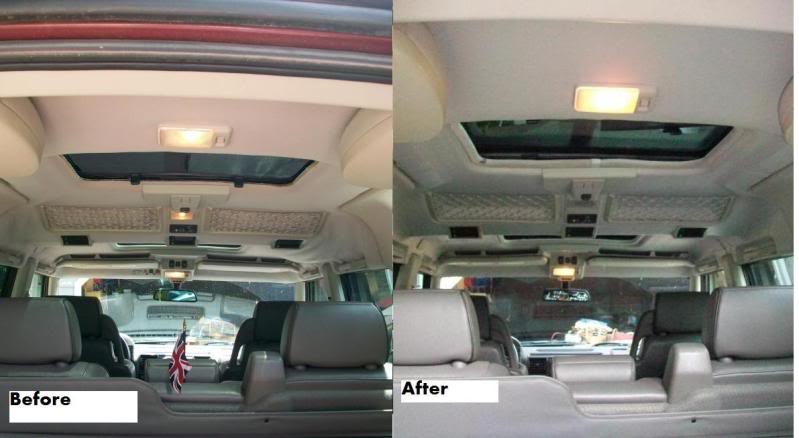
Very minor difference, can't really tell color-wise unless you knew what was there before.
I used Stix primer, and Ben Moore eggshell finish Regal paint and brushed it on.
If anyone has gray headliner and wants to do this method, PM me and ill send you the color formula, then you can take it to your local Ben Moore (or other paint store) and have it mixed!
This write up was a HUGE help getting that darn board out. THANKS
Here's the before and after:
Very minor difference, can't really tell color-wise unless you knew what was there before.
I used Stix primer, and Ben Moore eggshell finish Regal paint and brushed it on.
If anyone has gray headliner and wants to do this method, PM me and ill send you the color formula, then you can take it to your local Ben Moore (or other paint store) and have it mixed!
This write up was a HUGE help getting that darn board out. THANKS


Drifting
Joined: Jun 2009
Posts: 40
Likes: 1
I painted mine also this past weekend. Thanks for your help hilltoppersx!
I went to Lowe's and had them color match my "aw crap" handles. I used a satin acrylic enamel (exterior) applied using a small cell/foam roller (roller for finishing cabinets/woodwork). The results were fantastic!
I power washed the adhesive/foam from the headliner being careful not to use too high of a pressure to avoid the risk of destroying the fiberglass threads. I also spray the headliner at a 45 degree angle (not directly down). Took about 20 minutes and I had an adhesive free and clean headliner.
If you choose to use the power wash method be aware that the headliner isn't a solid/hard fiberglass shell. It is merely a thin layer of fiberglass over foam (both sides). You will have some water soaking into the foam and will need to allow the headliner to dry before painting.
Using water will also tend to take the rigidity out of the material allowing it to easily become malformed or creased. Take care when handling and get help. The one advantage to getting the material wet (besides saving a crap load of time) is you can "press out" any areas that became deformed over time by carefully weighting the deformed area to the proper contour during the drying period.
My Disco doesn't have sunroofs, but the headliner has depressions for where a sunroof would go. These areas had a slight bulge in the corners. After getting the material wet (by power washing) I was able to place my headliner on an 8' sheet of plywood and weighted the bulged areas during drying. This resulted in perfectly formed/flat areas.
A tip for removal - It is much easier to remove the headliner if you remove the molding on the posts (between the front and rear doors). This molding has two forms of clips that attach it. One set pushes directly into the frame, the other set are small spring steel clips that grasp EACH side of the pillar on the sides.
To remove the molding, simply pull the plastic molding near the top, towards the inside center of the vehicle to loosen the clips that secure the molding directly into the pillar. Then, pull the hard rubber weather stripping away from the door frame and pull the steel spring clips away that grasp around the sheet metal. You'll have to flex the molding slightly to perform this. Once you get the knack of it, it only takes a few minutes.
Before reinstalling the molding (upon completion), make sure you align the sliding seat belt adjuster with the 15mm nut on the seat belt slide inside the molding prior to attempting to push the molding back into place.
Another minor tip for removal - If your Disco is like mine, there are two plastic fastener buttons that attach the headliner to the roof (brackets) near the map holders. I removed the buttons fasteners (without damage) by taking a piece of 30 lb mono filament fishing line and sliding it under the "head" of the button and wrapping it 2x around the shank of the fastener. I did this in a way to allow equal ends of line to be hanging out on either side. I then grabbed each end and pulled them downward simultaneously to dislodge the fastener. Came out nice, clean and flat.
I highly recommend doing this rather inexpensive mod.
Last edited by Foe; Jul 29, 2010 at 04:30 PM.


Pro Wrench
Joined: May 2010
Posts: 1,918
Likes: 86
From: St Louis MO
Foe - I'm a little confused about what you're describing on the sunroof indentations, and the use of weights during drying, and "perfectly formed/flat areas". Are you saying that your headliner no longer has the obvious sunroof indentations? Eventually, I am going to get around to this and I currently have color matched pushpins holding the headliner in the sagging locations (mainly where the sunroofs would go, if I had sunroofs).
At least you and I are never going to have to worry about sunroof leaks!
At least you and I are never going to have to worry about sunroof leaks!
Last edited by lordmorpheus; Jul 30, 2010 at 07:06 PM.
