Swap ratty old handbrake gator for a nice leather one
#1
So, sat here waiting for lots of maintenance goodies to come through the post, I decided to fix the worn old plastic handbrake gator.
Time - about 2.5 hours.
Need - piece of thin leather. Mine was 8x11.5 and was 'just' big enough. Leather needle and thin thread. I got some thick waxed string, which was way too thick, found some strong cotton at home.
Contact adhesive.
Cost - $16 for everything I needed.
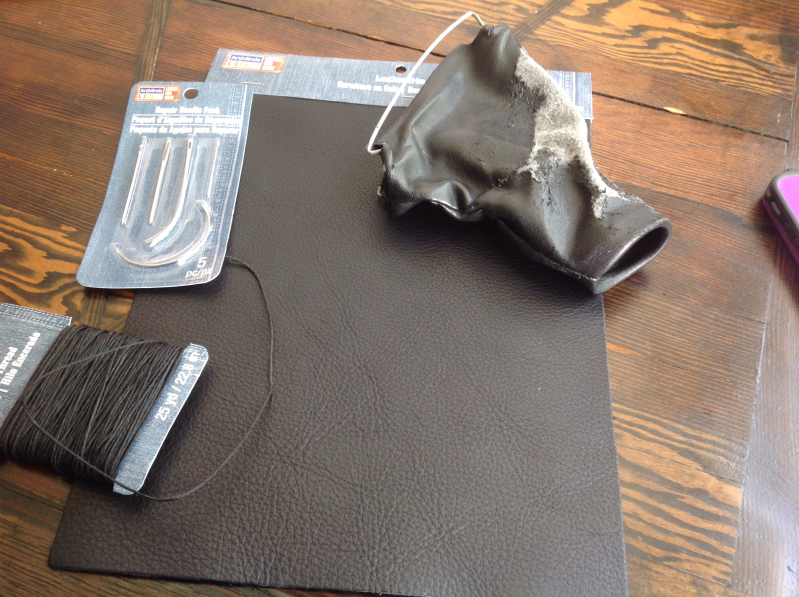
Forgot to get a pic of the old one in place, but you know the score?
Remove the electric window button cover plate. Remove 4 screws and pull switch assembly to one side.
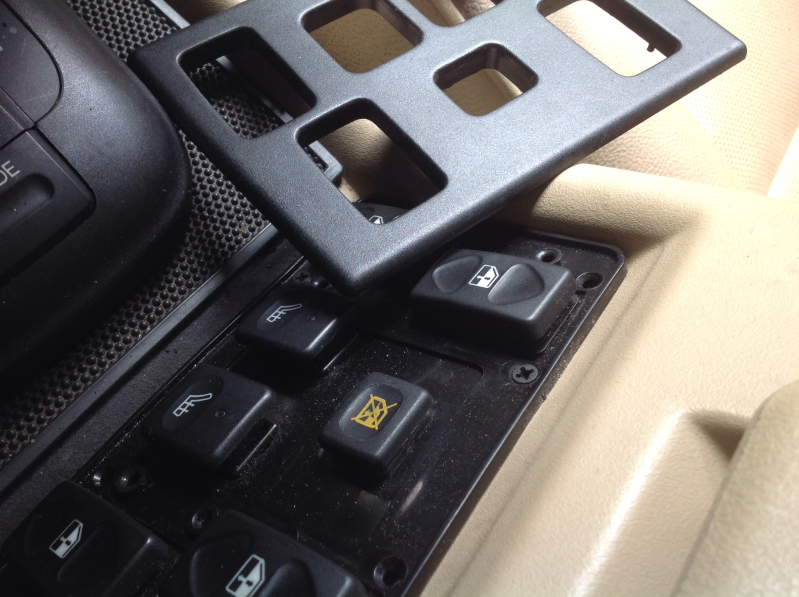
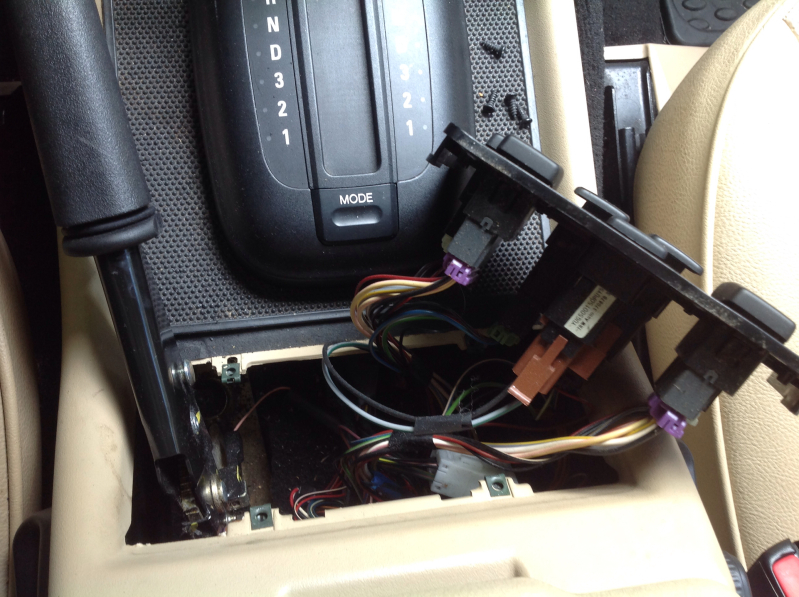
The gator is attached to a small wire basket thing, which slots behind the plastic centre console hole. Pulls out fairly easy. The top has a rubber ring, which neatly holds the material to the handle. Look after this bit. It will annoy you greatly in about 2 hours.
The wire bit is glued to the pleather. Unpeel it, and note which way round it goes, as it is bigger one end than the other.
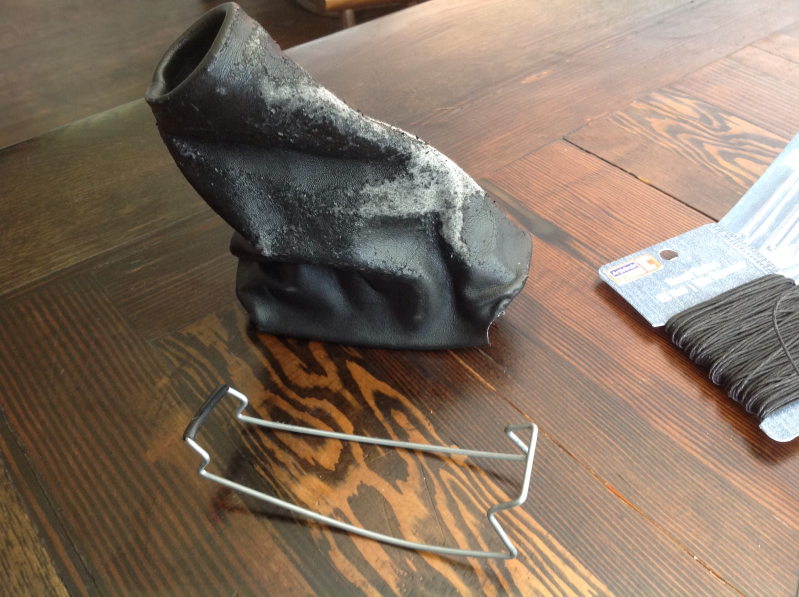
Pick the stitches apart and open the old thing flat. Use it as a template to mark the nice new bit of leather.
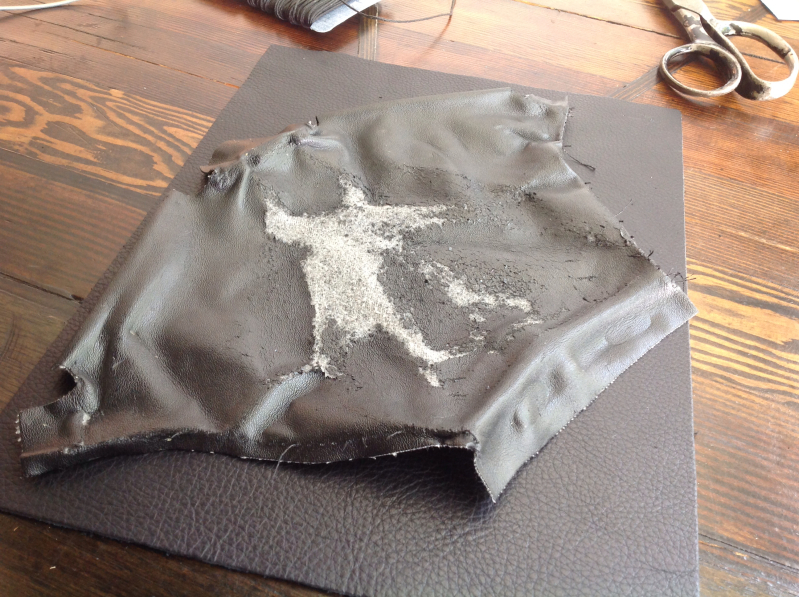
Cut out shape. In my shape below the very bottom right corner is where the leather was just not quite big enough. These bits just make overlap flaps, and makes no difference whatsoever.
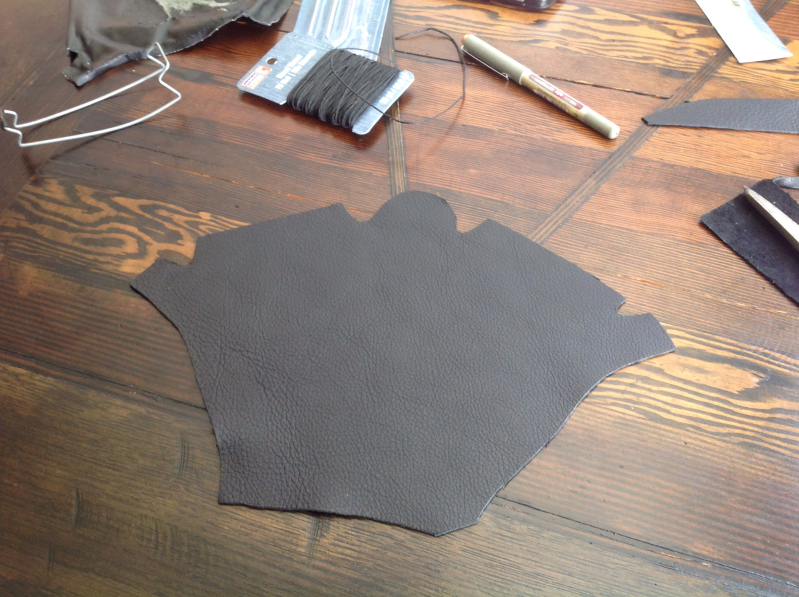
Stitch the shape together, inside out. Follow the dimensions of the original. Make particularly sure to have a heavy stitch at the top and bottom of the seam, this is where it will be under most pressure when you start folding it around.
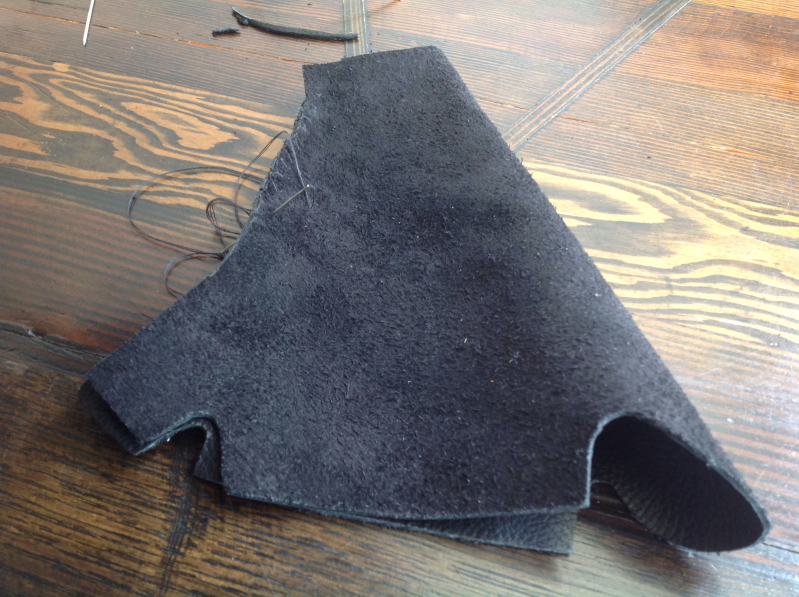
Turn it the right way out. Give the top and bottom of the seam a tug, check it doesn't come apart.
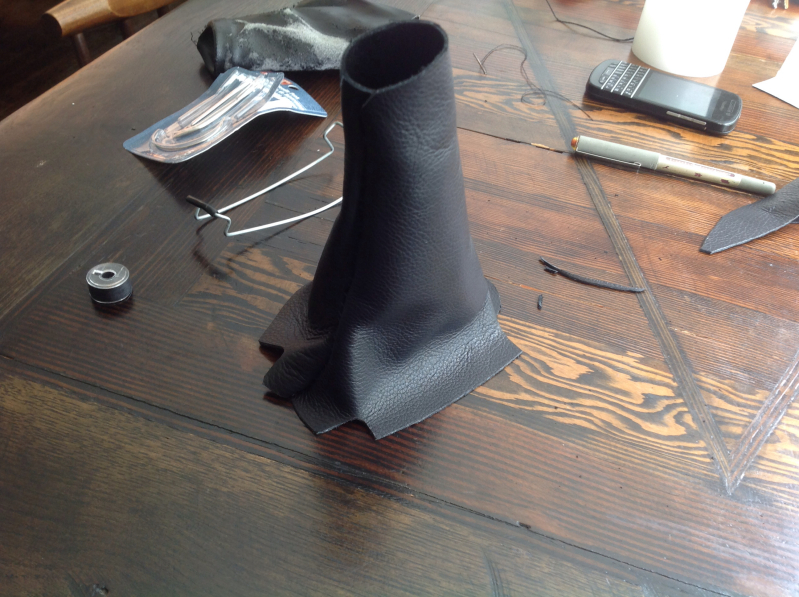
Spread contact adhesive about 1" up inside the bottom of the boot. It will dry pretty quick. Give it another coat and go do something else for 20 mins. It's got to be dry to then stick properly to itself.
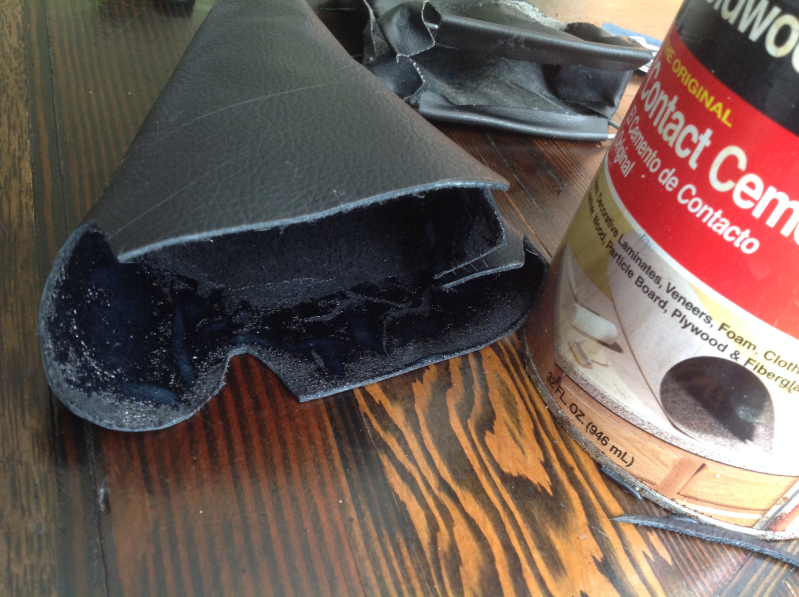
Take the wire cage, check it's the correct way round and fold the two bottom flaps about 3/8 over the long wire bits. The two end flaps should then fall into place and be happy where they lie.
My leather was much thicker than the original plastic stuff. Maybe 1/16". Doesn't sound much, but it can be a challenge to fold and crease. If the glue does its job well, it won't budge.
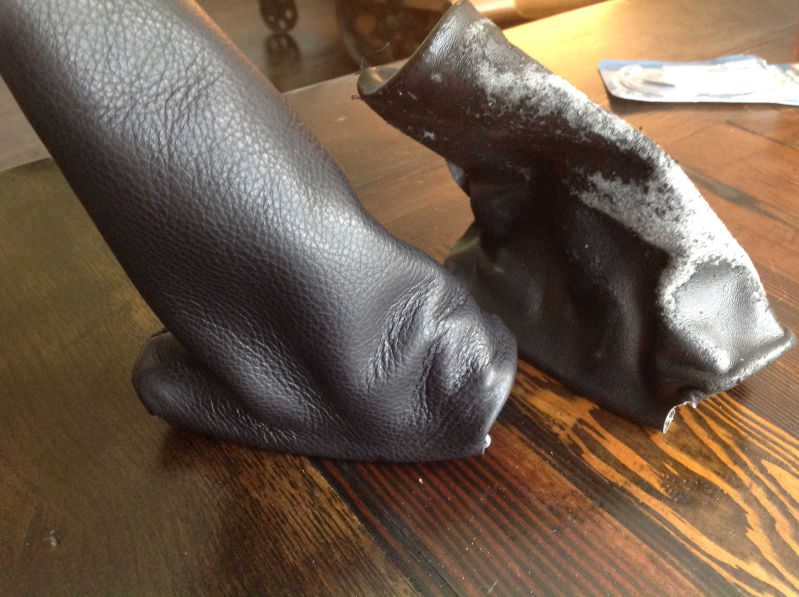
Find the rubber ring and prepare to get annoyed with it.
It needs gluing inside the top of the boot, with the top folded inside, over the ring. This is where following the original template size is important.
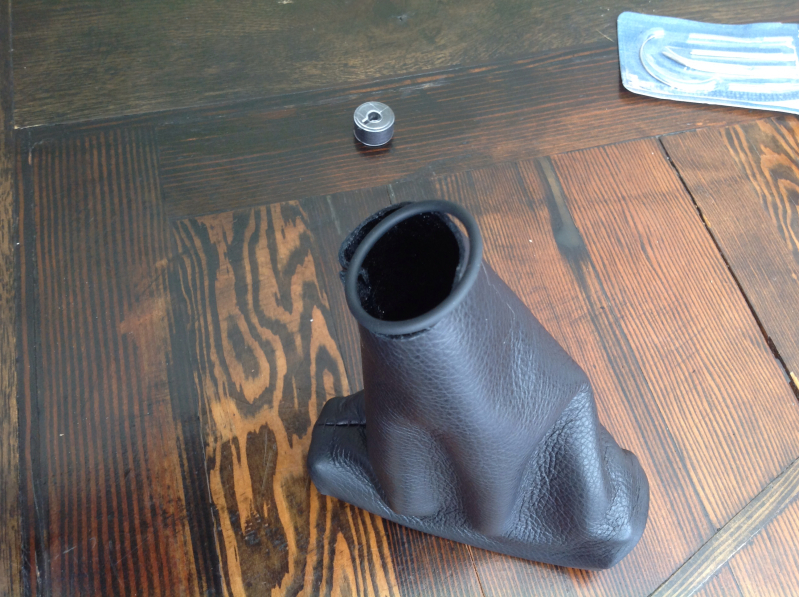
After a couple of goes I got it sitting pretty well glued, folded over. I could have tried a dab of superglue (krazyglue) but didn't want to risk marking the leather. The contact adhesive peeled off quite well. Superglue would not.
In my excitement I forgot to take a pic of the next bit. I decided to slightly grease the inside of the top bit, with the rubber ring in it. I could just tell it was going to Unpeel inside, when in tried to slip it over the handle.
Pull the wire cage over the handle and then just concentrate on the top bit. Tease it over the handle til the rubber ring and leather fold slots into the groove. I used a screwdriver to seat everything down properly.
Push the wire cage with its new leather cover back behind the plastic console bit.
Refit switches and plastic cover. Wipe grease of your handbrake handle.
Done and done.
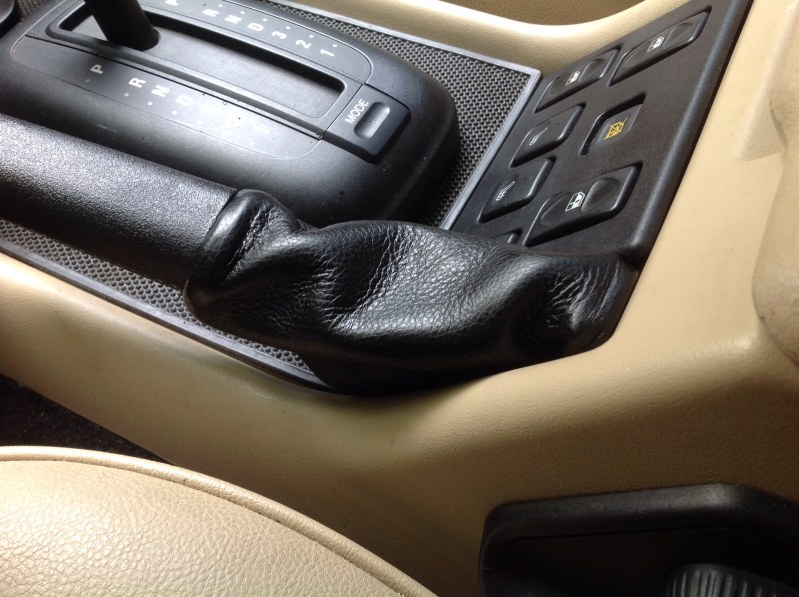
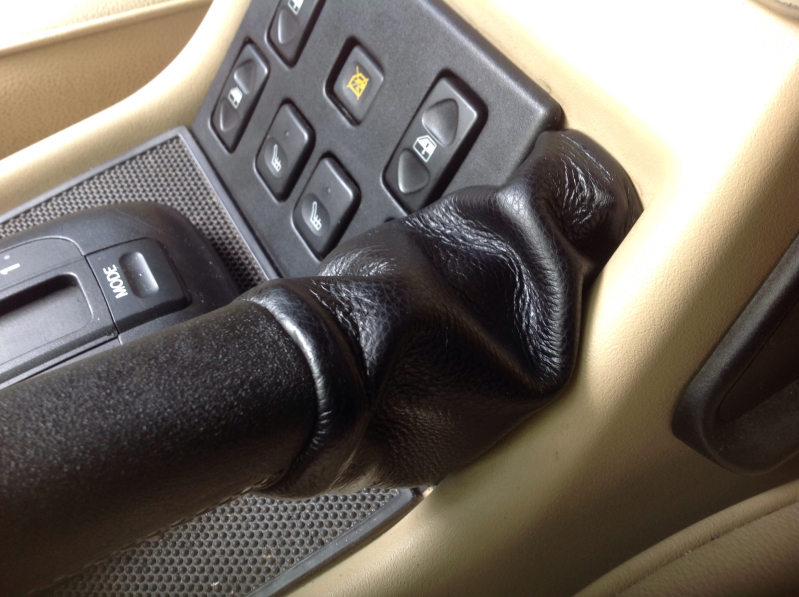
Going to do the CDL one next. Even though it hasn't worn at all, I think the thickness, and material look far better.
Time - about 2.5 hours.
Need - piece of thin leather. Mine was 8x11.5 and was 'just' big enough. Leather needle and thin thread. I got some thick waxed string, which was way too thick, found some strong cotton at home.
Contact adhesive.
Cost - $16 for everything I needed.

Forgot to get a pic of the old one in place, but you know the score?
Remove the electric window button cover plate. Remove 4 screws and pull switch assembly to one side.


The gator is attached to a small wire basket thing, which slots behind the plastic centre console hole. Pulls out fairly easy. The top has a rubber ring, which neatly holds the material to the handle. Look after this bit. It will annoy you greatly in about 2 hours.
The wire bit is glued to the pleather. Unpeel it, and note which way round it goes, as it is bigger one end than the other.

Pick the stitches apart and open the old thing flat. Use it as a template to mark the nice new bit of leather.

Cut out shape. In my shape below the very bottom right corner is where the leather was just not quite big enough. These bits just make overlap flaps, and makes no difference whatsoever.

Stitch the shape together, inside out. Follow the dimensions of the original. Make particularly sure to have a heavy stitch at the top and bottom of the seam, this is where it will be under most pressure when you start folding it around.

Turn it the right way out. Give the top and bottom of the seam a tug, check it doesn't come apart.

Spread contact adhesive about 1" up inside the bottom of the boot. It will dry pretty quick. Give it another coat and go do something else for 20 mins. It's got to be dry to then stick properly to itself.

Take the wire cage, check it's the correct way round and fold the two bottom flaps about 3/8 over the long wire bits. The two end flaps should then fall into place and be happy where they lie.
My leather was much thicker than the original plastic stuff. Maybe 1/16". Doesn't sound much, but it can be a challenge to fold and crease. If the glue does its job well, it won't budge.

Find the rubber ring and prepare to get annoyed with it.
It needs gluing inside the top of the boot, with the top folded inside, over the ring. This is where following the original template size is important.

After a couple of goes I got it sitting pretty well glued, folded over. I could have tried a dab of superglue (krazyglue) but didn't want to risk marking the leather. The contact adhesive peeled off quite well. Superglue would not.
In my excitement I forgot to take a pic of the next bit. I decided to slightly grease the inside of the top bit, with the rubber ring in it. I could just tell it was going to Unpeel inside, when in tried to slip it over the handle.
Pull the wire cage over the handle and then just concentrate on the top bit. Tease it over the handle til the rubber ring and leather fold slots into the groove. I used a screwdriver to seat everything down properly.
Push the wire cage with its new leather cover back behind the plastic console bit.
Refit switches and plastic cover. Wipe grease of your handbrake handle.
Done and done.


Going to do the CDL one next. Even though it hasn't worn at all, I think the thickness, and material look far better.
Last edited by cappedup; 09-22-2014 at 09:12 PM.
#3
I've pm'd Jafir my VIN. He was going to check out exactly what was delivered at first registration.
Heated seats. No heated screen. Pleather seats. Single CD player. Rear springs. CDL. Sunroofs. Running boards and rear guards.
Seems to be a mix, but aparantly normal, as ordering new is like ticking boxes.
#6
#8
Hence, the heated seats in an S.
#9
Nice work. I did the same on my "S" plus the 4 wheel drive boot was in about as poor condition as the brake boot. An easy fix to keep the interior looking nice. I think we have the same model of LR's. Pleather, single CD and the likes. I checked on adding controls for the heated seats as I read that some already have all the elements, you just needed to add the buttons, but no such luck. I miss the heated seats.
Thread
Thread Starter
Forum
Replies
Last Post
bcolins
Discovery II
7
06-12-2013 06:29 PM
brianex
Retired - Private For Sale/Trade Classifieds
5
03-23-2008 09:42 PM


