Tom Woods rear shaft installation
#1
 08-30-2015, 03:56 PM


Got my new Tom Woods Rear Shaft and it came with NO Instructions.
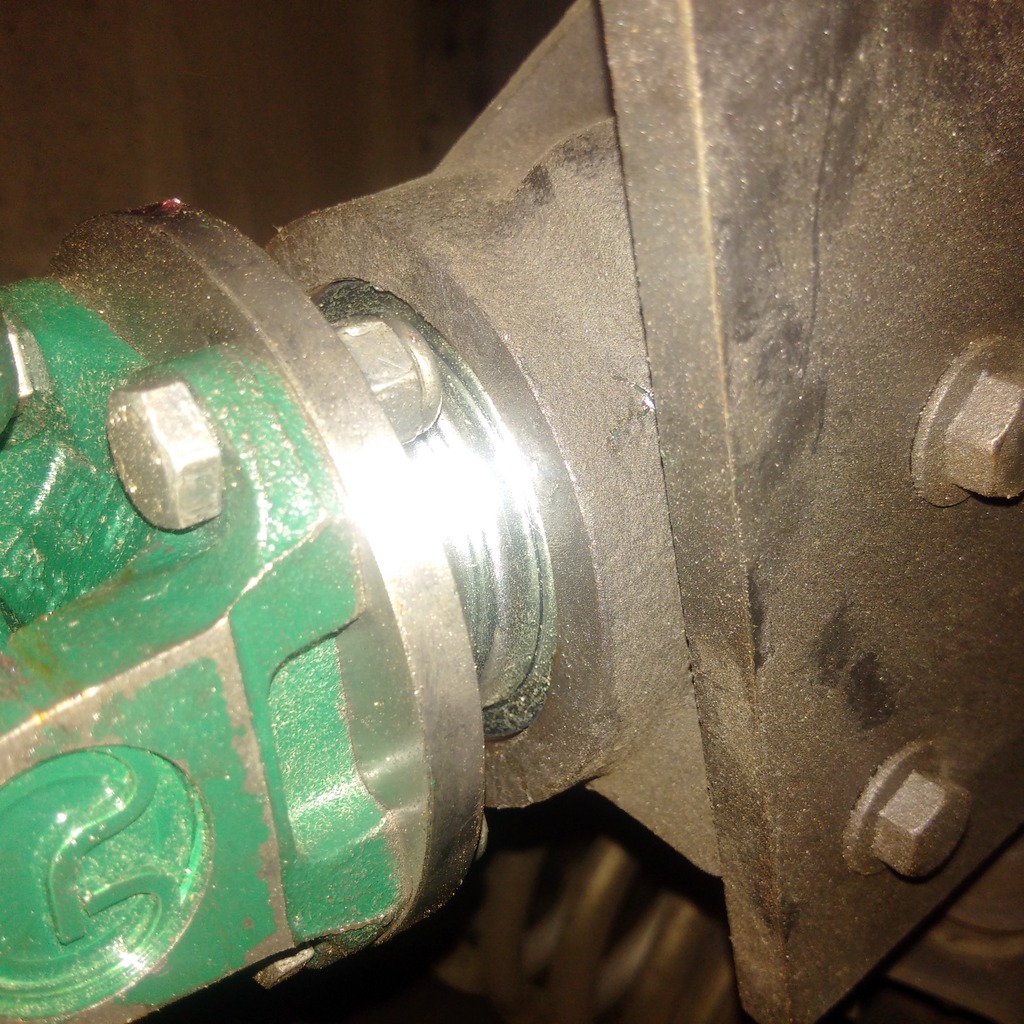
I noticed that the diff side connection has 4 bolt mounts and the stock has 3. But, it came with a new flange, what looks like a spring seal, a metal thingy, and new differential spacer.
 [/url]
First Problem, I "THINK" I need to remove the old mounting flange. HOW DO YOU GET IT OFF! I've tried smacking with a mallet, but it doesn't seem to want to budge!
 [/url]
Am I correct that this just "slides" off?
I noticed that the diff side connection has 4 bolt mounts and the stock has 3. But, it came with a new flange, what looks like a spring seal, a metal thingy, and new differential spacer.
[/url]First Problem, I "THINK" I need to remove the old mounting flange. HOW DO YOU GET IT OFF! I've tried smacking with a mallet, but it doesn't seem to want to budge!
[/url]Am I correct that this just "slides" off?

#3
08-30-2015, 07:26 PM

I just did this a couple of days ago.
The part you pictured is called the centering peg. It pulls out bu it is coated with green loctite so it is hard to pull. The thread inside is m8. So, you need an m8 bolt for the center of it, and something to pull it out.
I used a bolt puller from harbor freight and a large ring from a rented ball joint kit but basically you could use a large socket that fits over the metal part of the centering peg, then put the bolt through some washers and then through the socket, then tighten the bolt so it pulls the centering peg out straight. Or you could use a slide hammer.
Once that is out you will see a big bolt in the center. It is 17mm I think. Also, you will see a seal that has to be pried out (you have a new one in your picture. Get the seal off, the the bolt. The bolt has a big washer around it... save both. When the bolt is out, the center pulls out by hand. Then put the new seal in, your new metal part over the gear, the bolt and washer, and you are done. The bolt needs red Loctite and should be tightened to 100nm or 74 ft/lb for a normal gas Disco II. Put the driveshaft on and you are done. If you want the bolts to face forward, be sure to put those in your new four bolt flange before you slip it into place.
The following users liked this post:
JUKE179r (08-29-2017)
#4
08-30-2015, 07:30 PM
#5
08-30-2015, 08:13 PM
 [/url]
#6
08-30-2015, 08:19 PM
got the bolt on the inside out, mine was a 15mm. I see the thick washer on it.
Pulled the seal out, and replaced it.
Now hear are my problems.
The metal sleeve thingy doesn't want to fit right.
Is this how it goes
A=
 [/url]
or this way
B=

Looking at the metal sleeve on the old flange, it looks like it should go like in the first pic A, but when I put the new flange on, it bottoms out and the big bolt with the thick washer will is not long enough to grab the threads.
Do you have to press the sleeve onto the flange?
Pulled the seal out, and replaced it.
Now hear are my problems.
The metal sleeve thingy doesn't want to fit right.
Is this how it goes
A=
[/url]or this way
B=
Looking at the metal sleeve on the old flange, it looks like it should go like in the first pic A, but when I put the new flange on, it bottoms out and the big bolt with the thick washer will is not long enough to grab the threads.
Do you have to press the sleeve onto the flange?
#8
08-30-2015, 08:25 PM
got the bolt on the inside out, mine was a 15mm. I see the thick washer on it.
Pulled the seal out, and replaced it.
Now hear are my problems.
The metal sleeve thingy doesn't want to fit right.
Is this how it goes
A=
[/url]
or this way
B=
Looking at the metal sleeve on the old flange, it looks like it should go like in the first pic A, but when I put the new flange on, it bottoms out and the big bolt with the thick washer will is not long enough to grab the threads.
Do you have to press the sleeve onto the flange?
Pulled the seal out, and replaced it.
Now hear are my problems.
The metal sleeve thingy doesn't want to fit right.
Is this how it goes
A=
[/url]or this way
B=
Looking at the metal sleeve on the old flange, it looks like it should go like in the first pic A, but when I put the new flange on, it bottoms out and the big bolt with the thick washer will is not long enough to grab the threads.
Do you have to press the sleeve onto the flange?
#9
08-30-2015, 08:27 PM