Lucky 8’s Project P38
#91
 08-05-2013, 10:46 PM


Project update : Resurrection
We all have that special edition P38 we like. For me it is the Rhino. I just love the ostrich seats and the mystic green wood trim. As luck would have it there was one on craigslist that needed some TLC and more importantly it was in my price range. It doesn't take a rocket scientist to figure out what happened.

The downside to this choice was we needed to move every one of those accessories and modifications over to the Rhino. In retrospect putting in another motor would've been far easier and faster.
Without further ado here is the new L8 P38
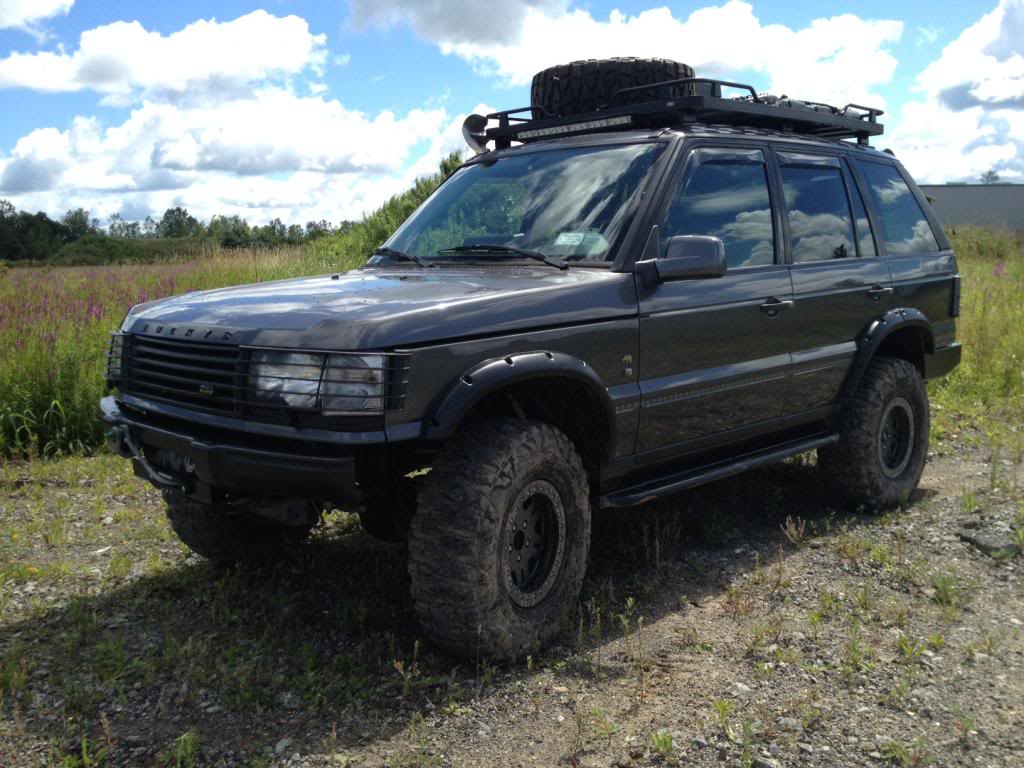
OK that pic sucks..
Hows this one ?
?
?
?
?
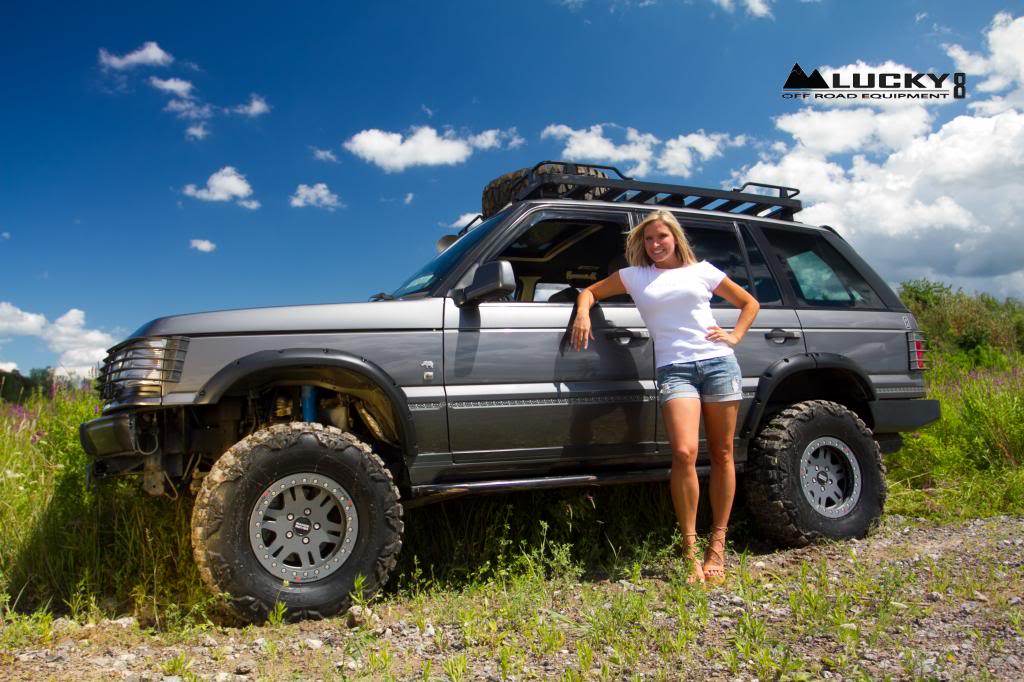
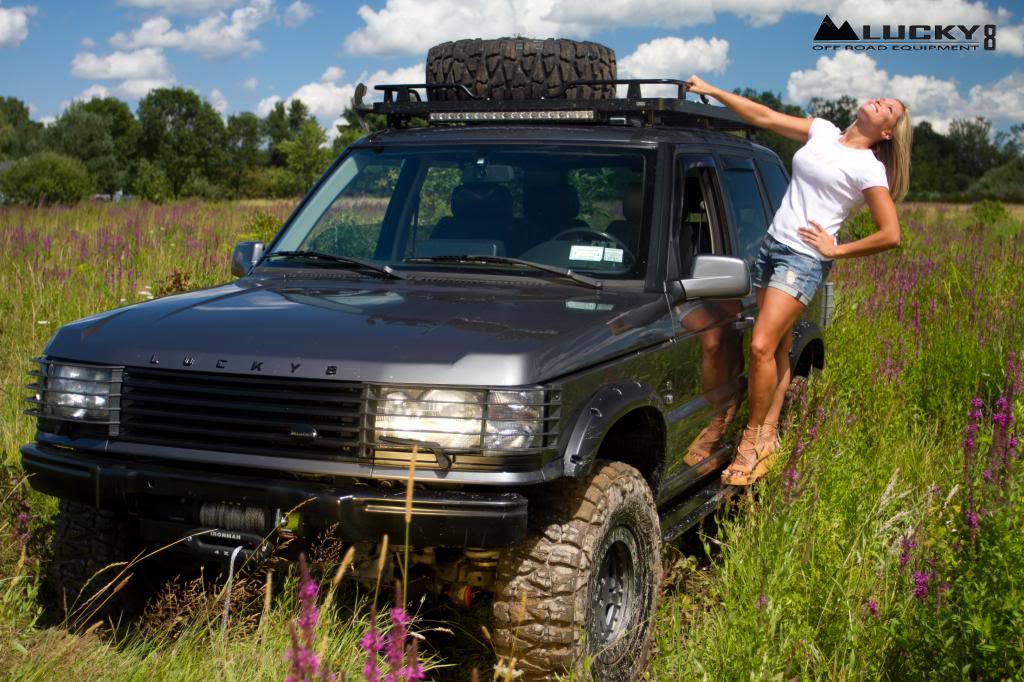
I'm sure a few of you with a keen eye have already noticed some differences beyond the color of the truck. The rest of you must still be looking at our new shop girl Amy
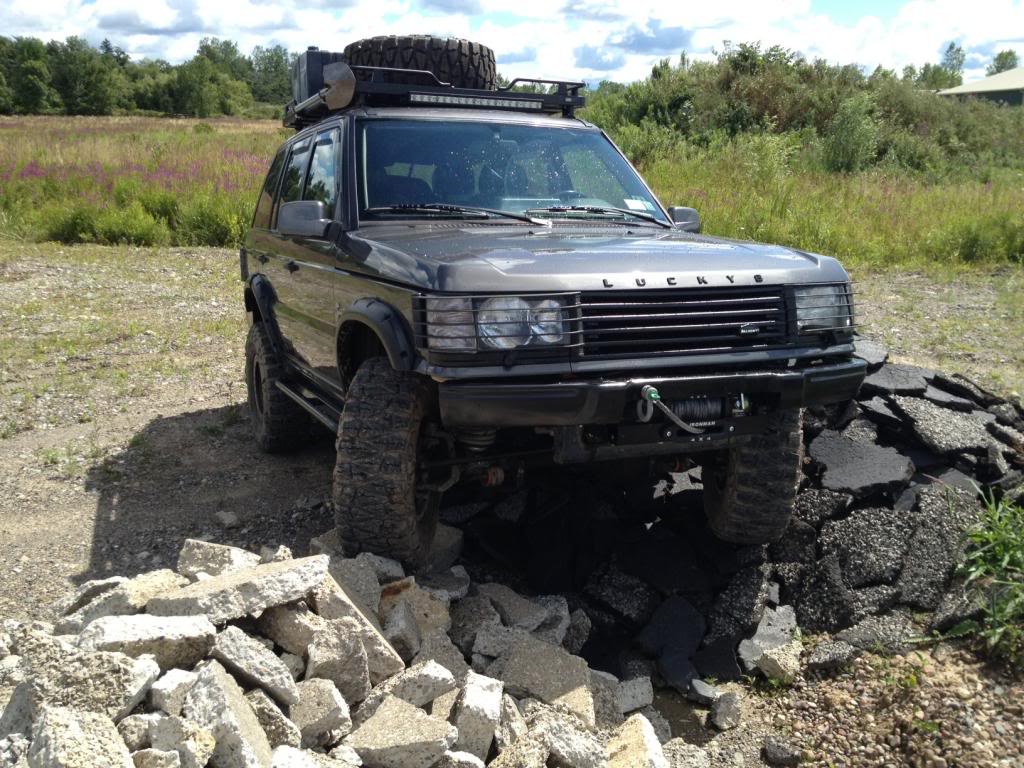
The first thing we wanted to do was lift the truck a bit more. Changing the springs was an option but we were very happy with the current ride quality. To keep everything the same but get more lift we added 1 inch spacers. On any other classic generation Land Rover adding springs spacers is a no-brainer, but the P 38 is not just any Land Rover. The issue is the air to coil conversion plates. The studs on the conversion plates are only long enough to accommodate the spring seat.
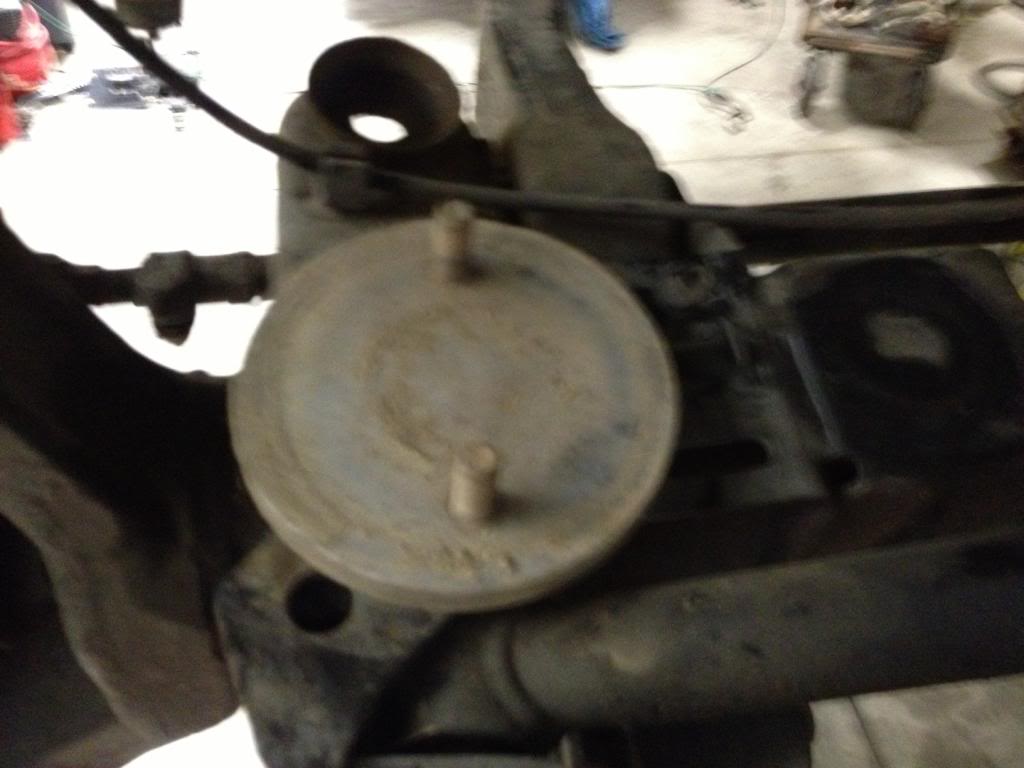
The first thought was to get longer studs but we decided that drilling two holes in the axle mounting bracket would be the best solution. The easiest way to accomplish this was to use the air to coil conversion plate with the studs knocked out of it as a template.
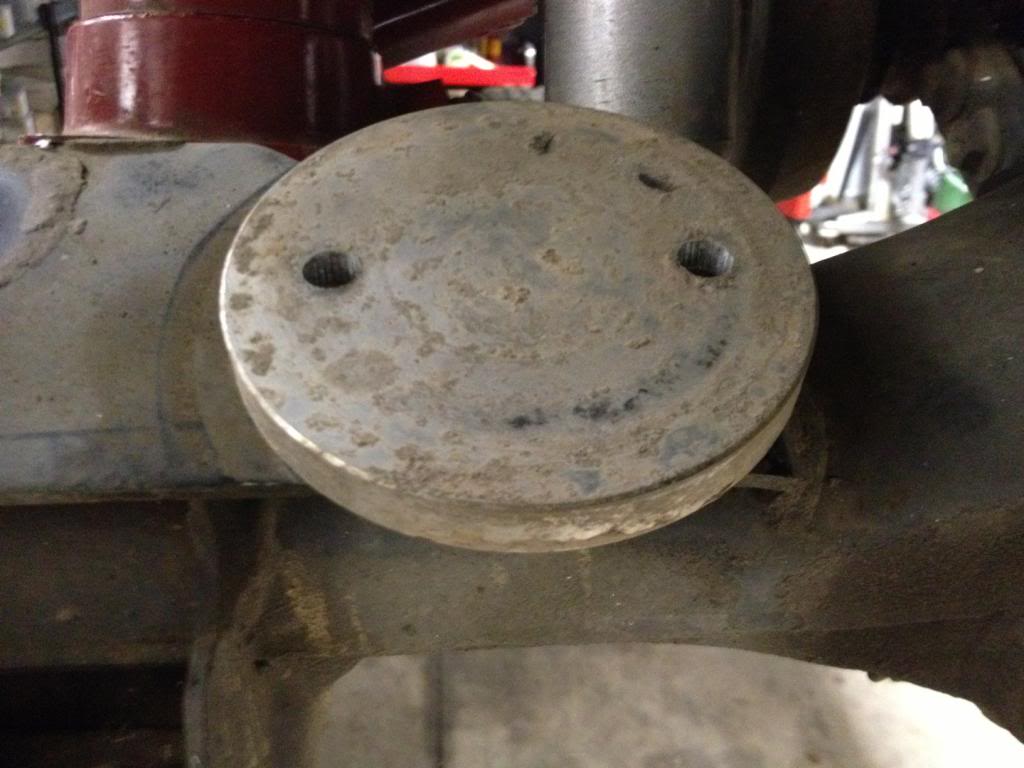
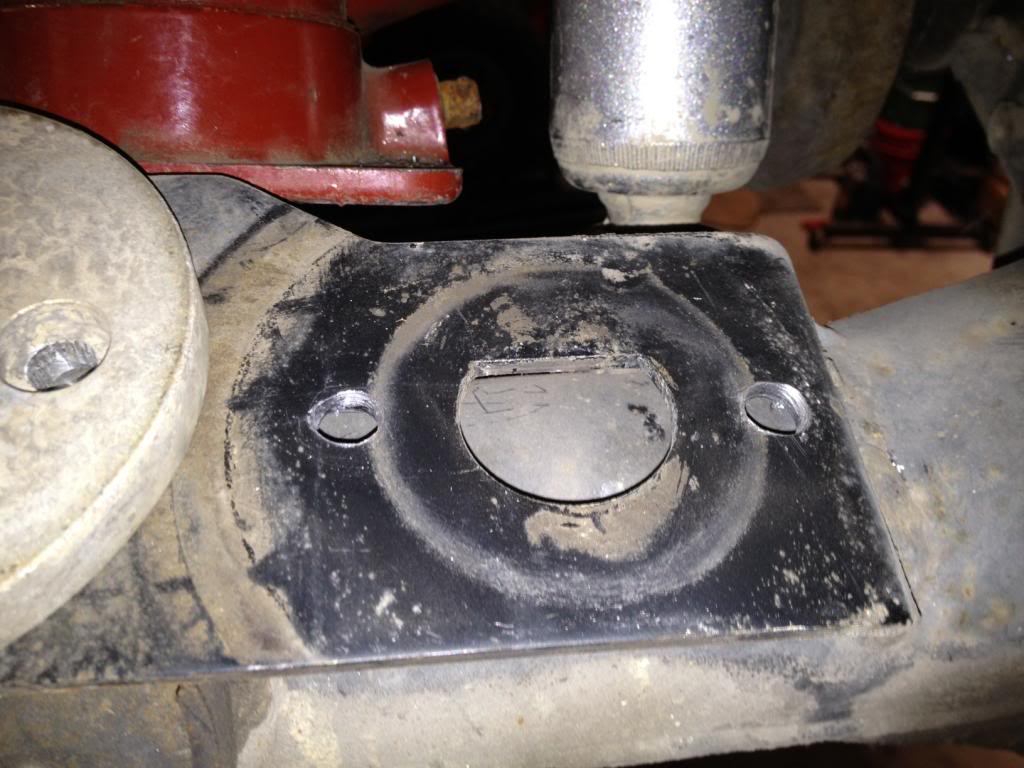
Another way to do it his use a 1 1/2 spacer and remove the air to coil conversion plate but in the interest of science we went with this.

The front was a completely different challenge. You cannot drill all the way through because the axle housing is in the way.
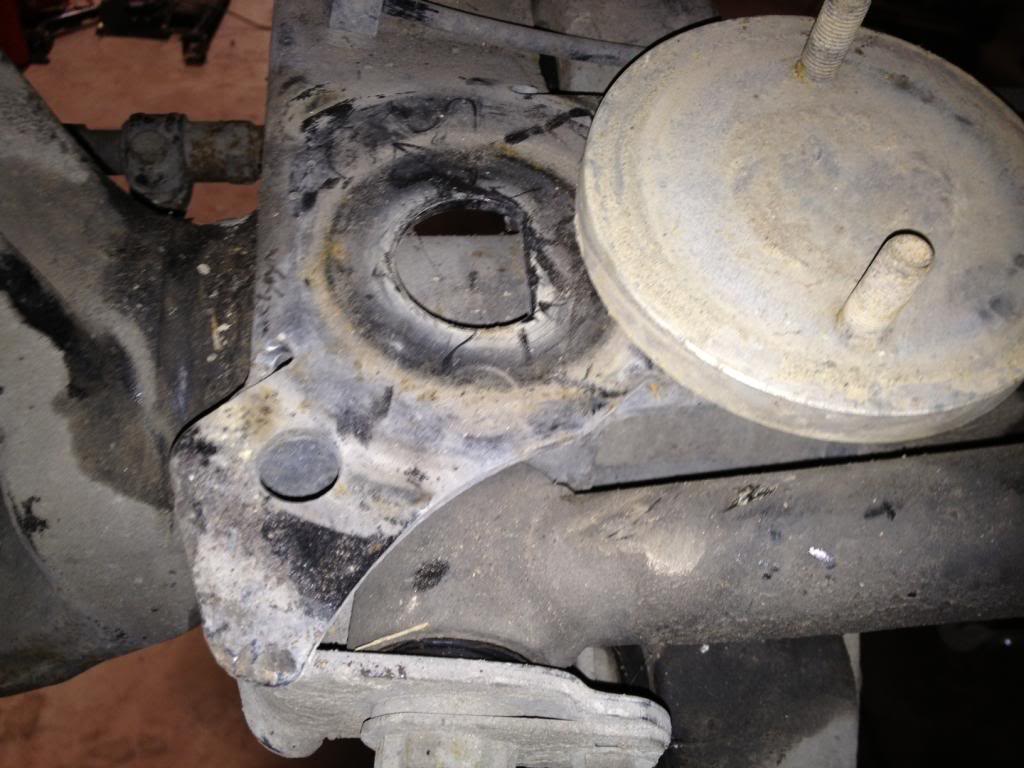
We needed to get a little bit creative with this one. The solution that came to mind was drilling and tapping the air to coil conversion plate
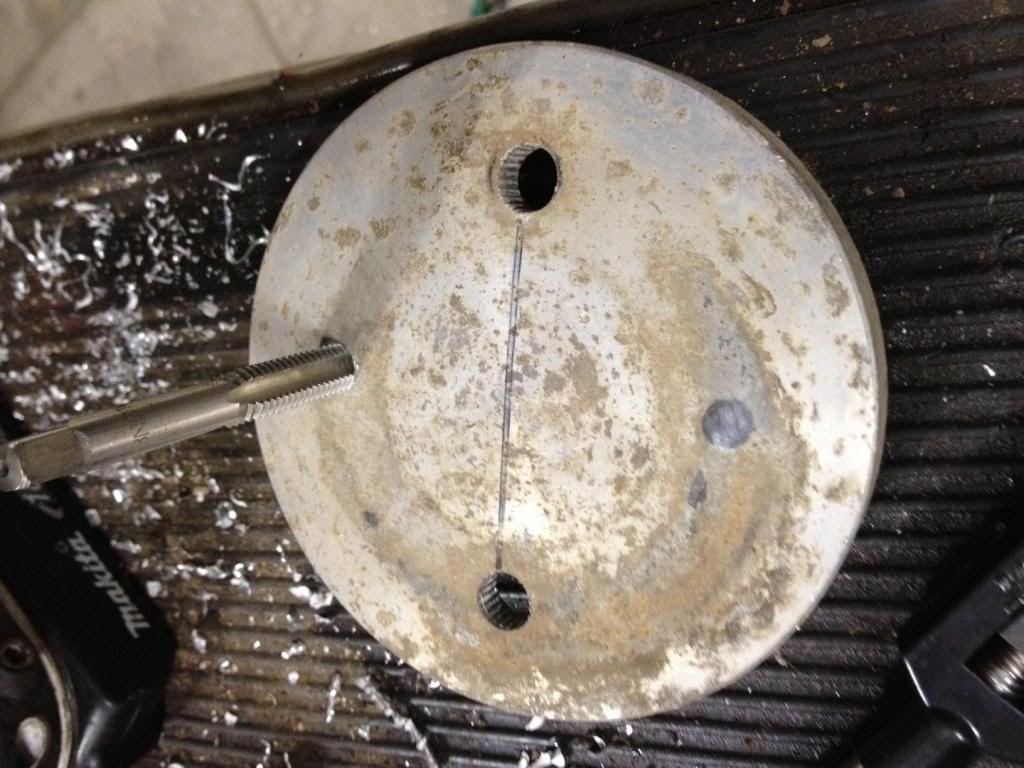
In the front we were not getting any dislocation and I was not afraid of the stress put on the air to coil conversion retaining pin.
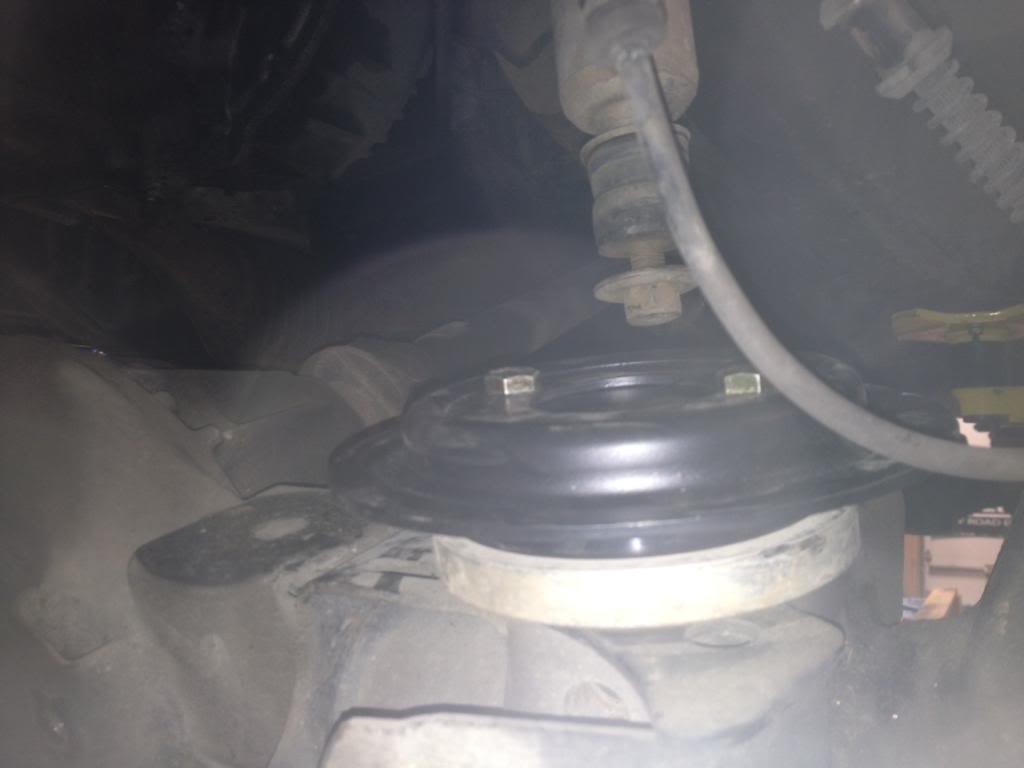
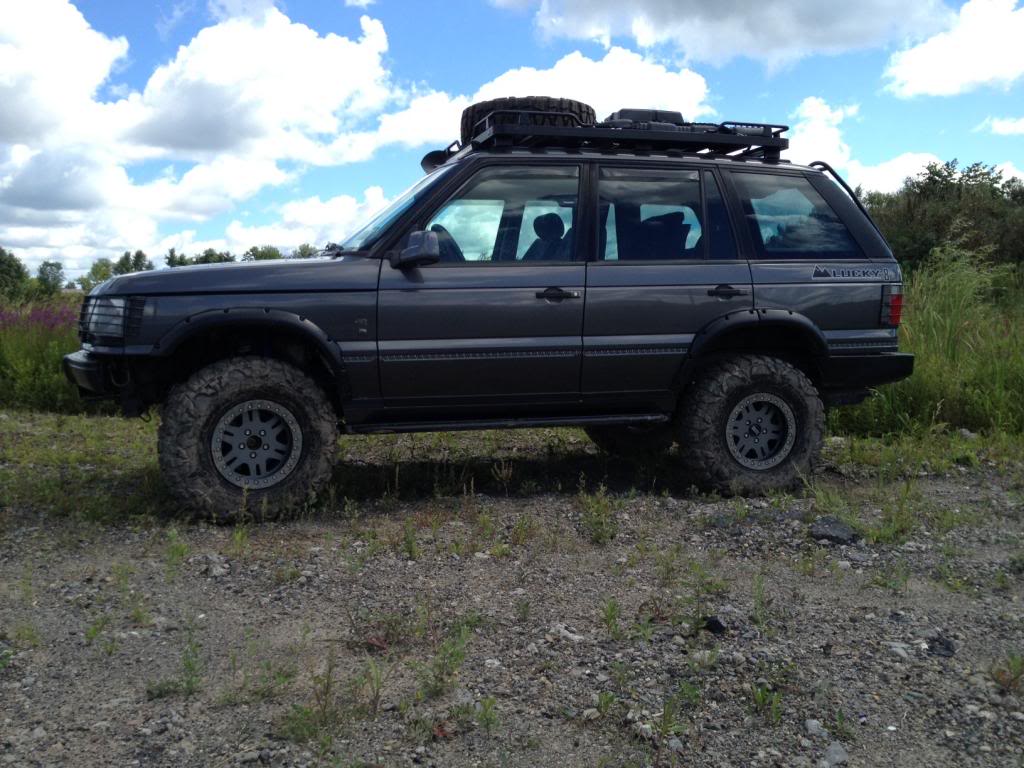
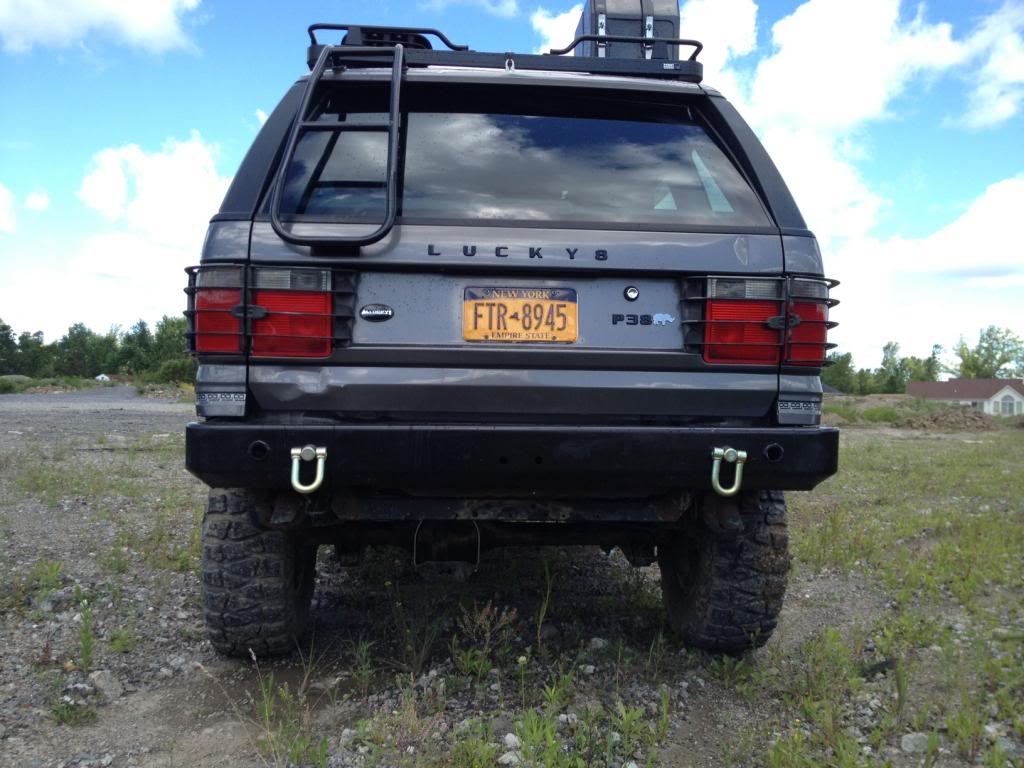
Here is a side view with the new lift.
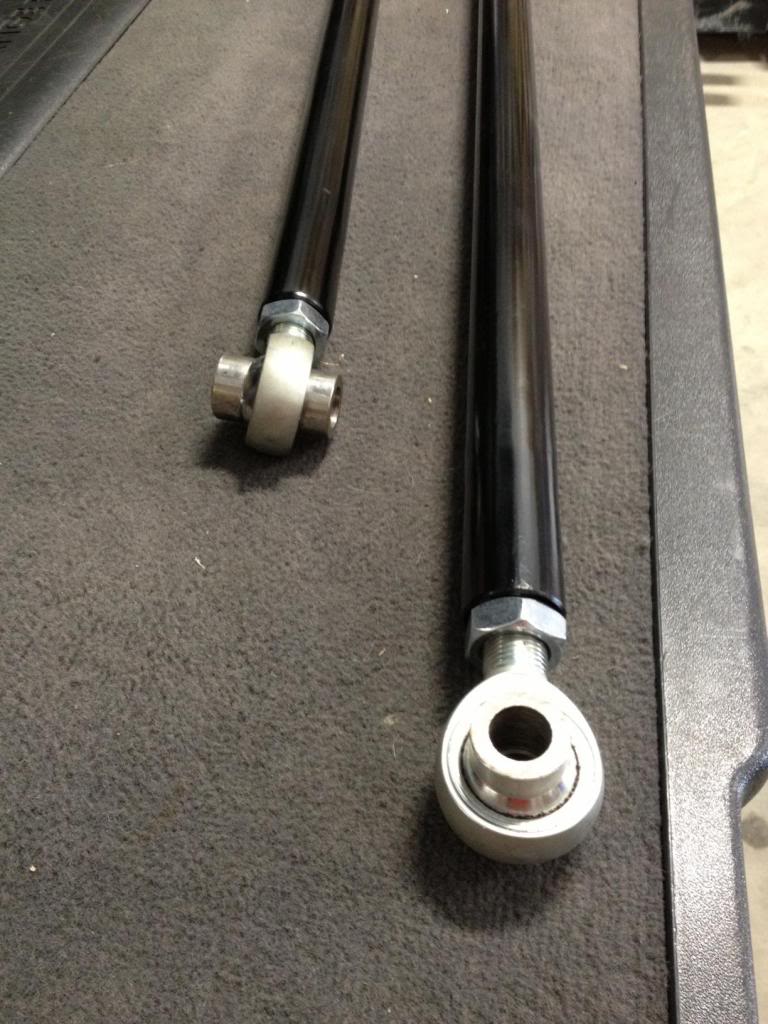
With the extra lift the axles were way off making new panhard bars a must. A quick phone call to Rovertym and we had 2 new ones on our tailgate.
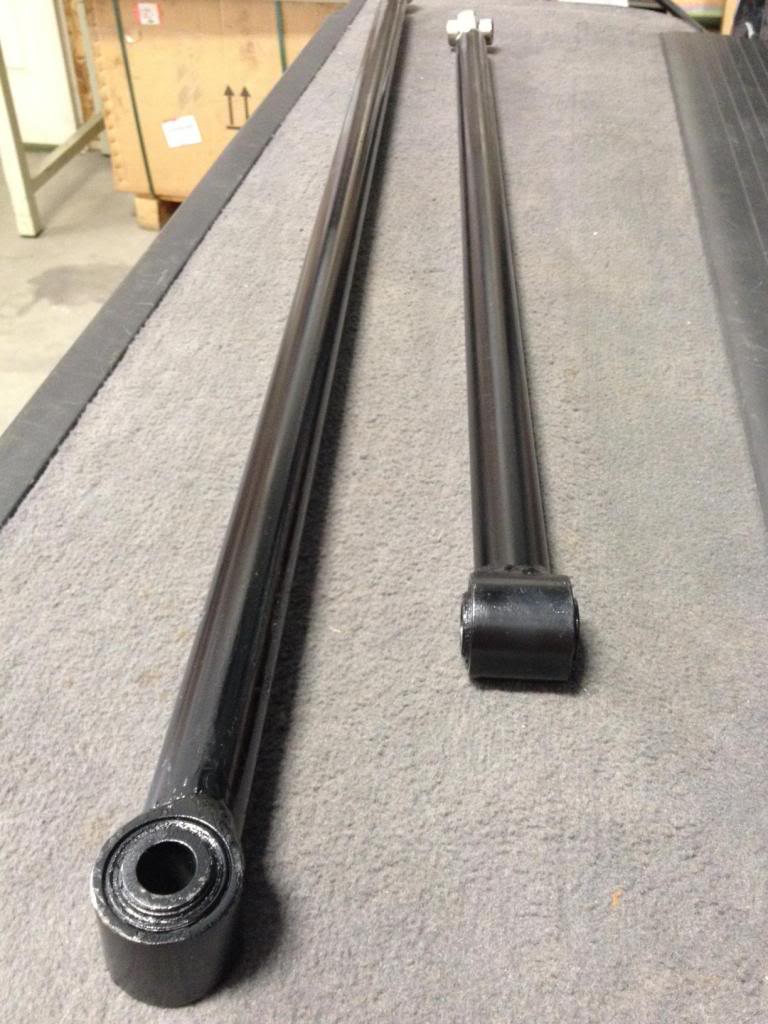
Did I mention they were fully adjustable ?
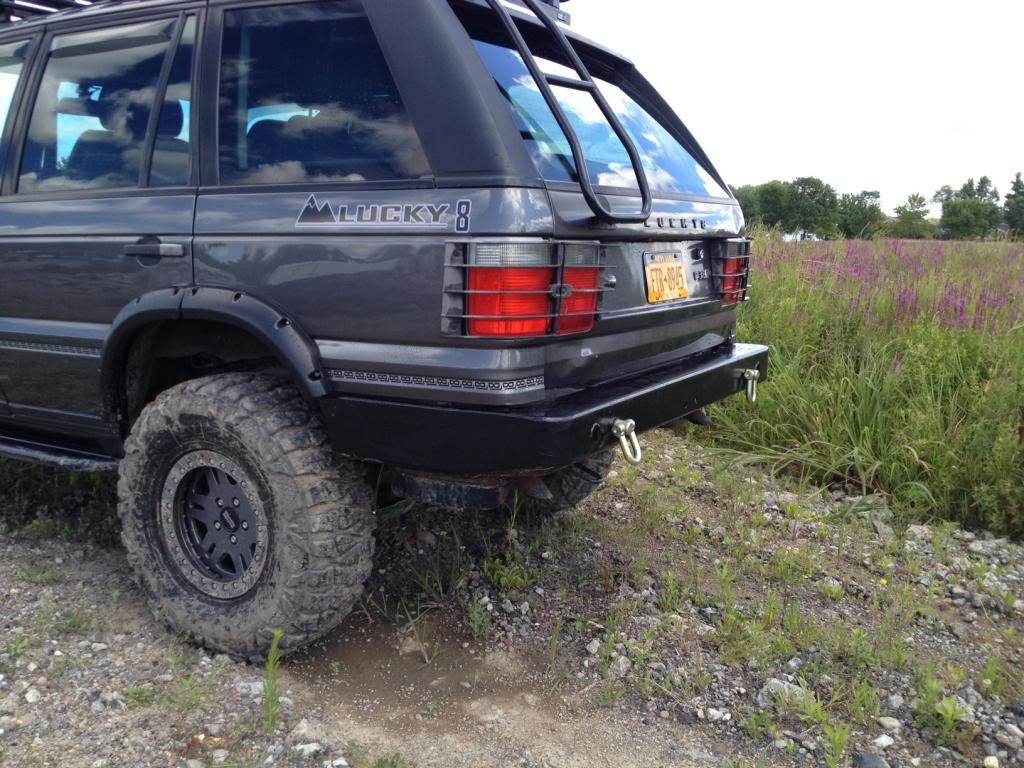
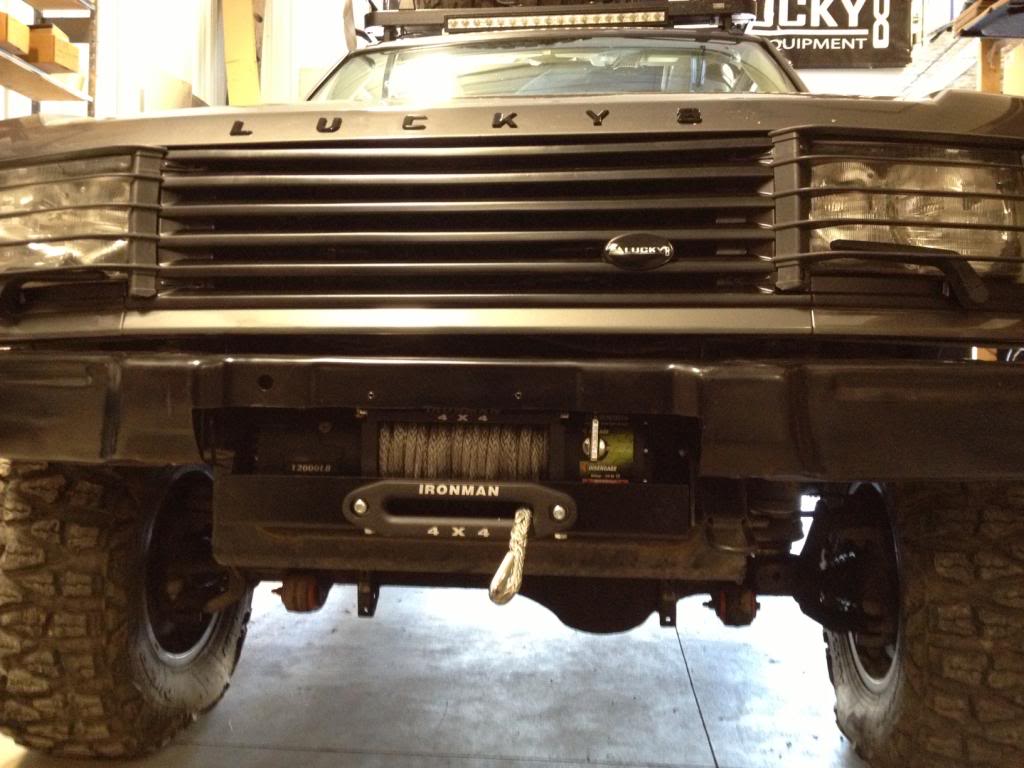
With the suspension squared away it was time to try out the new prototype bumper from Terrafirma. The initial test fitting went well, the only possible downside for some is you need to remove the trailer hitch . Personally I didn't want the trailer hitch on the truck so this is a non-issue. Do you guys care if you need to remove your trailer hitch in order to fit the bumper?
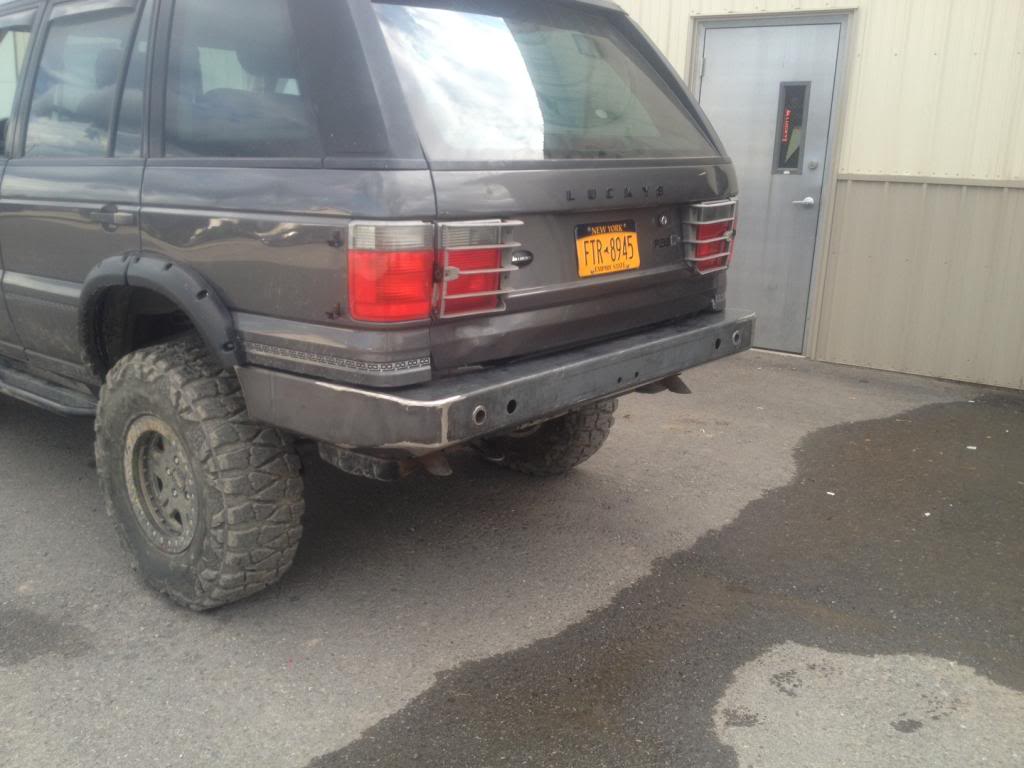
With VOT" Vermont expedition trophy " right around the corner there was no time to send the bumper out for powder coating. So we rattle canned it black and threw it on the truck.
We all have that special edition P38 we like. For me it is the Rhino. I just love the ostrich seats and the mystic green wood trim. As luck would have it there was one on craigslist that needed some TLC and more importantly it was in my price range. It doesn't take a rocket scientist to figure out what happened.

The downside to this choice was we needed to move every one of those accessories and modifications over to the Rhino. In retrospect putting in another motor would've been far easier and faster.
Without further ado here is the new L8 P38

OK that pic sucks..
Hows this one ?
?
?
?
?

I'm sure a few of you with a keen eye have already noticed some differences beyond the color of the truck. The rest of you must still be looking at our new shop girl Amy
The first thing we wanted to do was lift the truck a bit more. Changing the springs was an option but we were very happy with the current ride quality. To keep everything the same but get more lift we added 1 inch spacers. On any other classic generation Land Rover adding springs spacers is a no-brainer, but the P 38 is not just any Land Rover. The issue is the air to coil conversion plates. The studs on the conversion plates are only long enough to accommodate the spring seat.

The first thought was to get longer studs but we decided that drilling two holes in the axle mounting bracket would be the best solution. The easiest way to accomplish this was to use the air to coil conversion plate with the studs knocked out of it as a template.


Another way to do it his use a 1 1/2 spacer and remove the air to coil conversion plate but in the interest of science we went with this.

The front was a completely different challenge. You cannot drill all the way through because the axle housing is in the way.

We needed to get a little bit creative with this one. The solution that came to mind was drilling and tapping the air to coil conversion plate

In the front we were not getting any dislocation and I was not afraid of the stress put on the air to coil conversion retaining pin.

Here is a side view with the new lift.

With the extra lift the axles were way off making new panhard bars a must. A quick phone call to Rovertym and we had 2 new ones on our tailgate.

Did I mention they were fully adjustable ?

With the suspension squared away it was time to try out the new prototype bumper from Terrafirma. The initial test fitting went well, the only possible downside for some is you need to remove the trailer hitch . Personally I didn't want the trailer hitch on the truck so this is a non-issue. Do you guys care if you need to remove your trailer hitch in order to fit the bumper?

With VOT" Vermont expedition trophy " right around the corner there was no time to send the bumper out for powder coating. So we rattle canned it black and threw it on the truck.


#92
08-05-2013, 10:46 PM
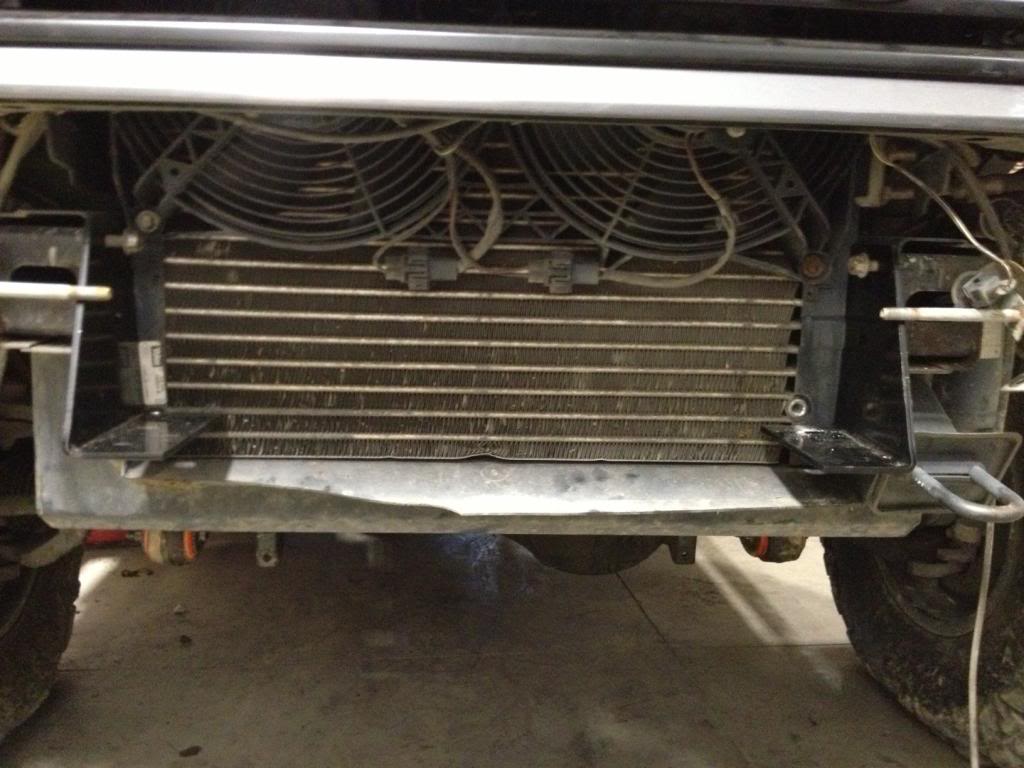
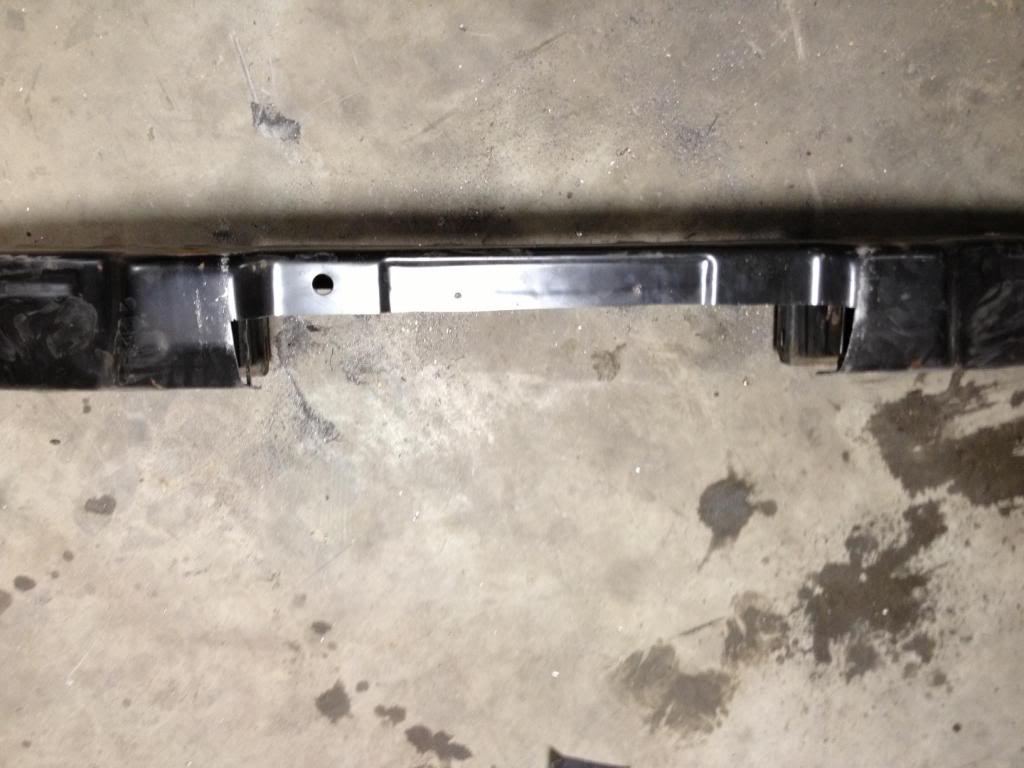
For VOT we needed a winch but the Terrafirma bumper was not ready yet. As the old saying goes necessity is the mother of all invention. A look around the shop for options landed us a Terrafirma discrete winch mount for a Disco 2. After a quick mockup of the side plates we knew we had our answer.
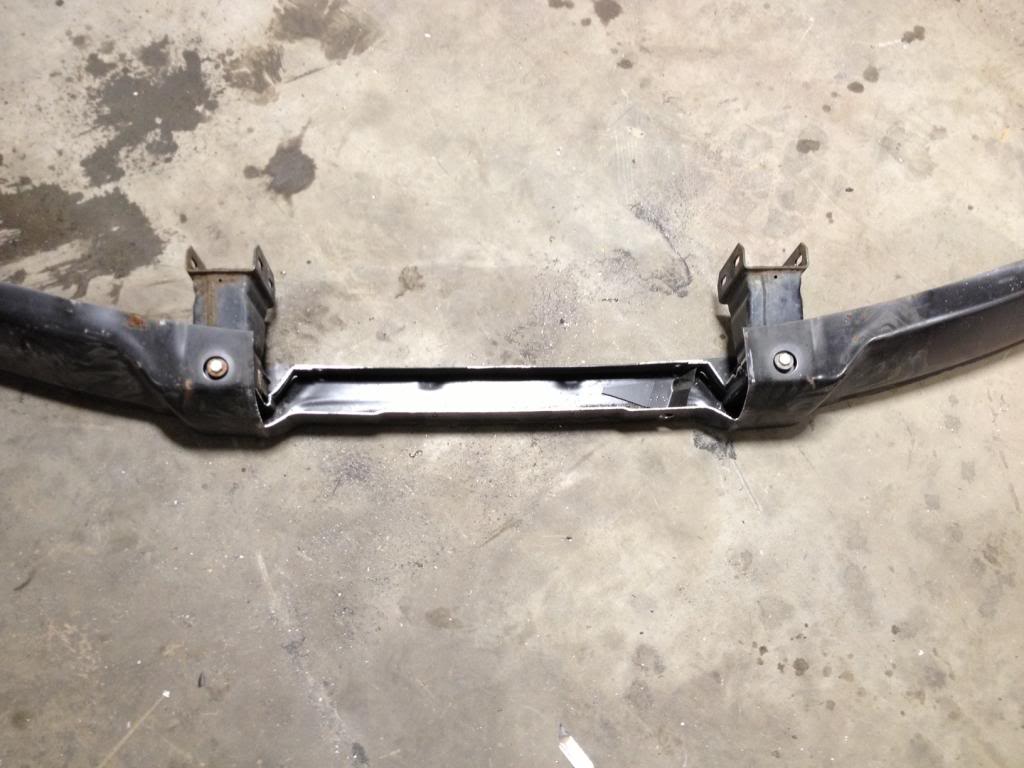
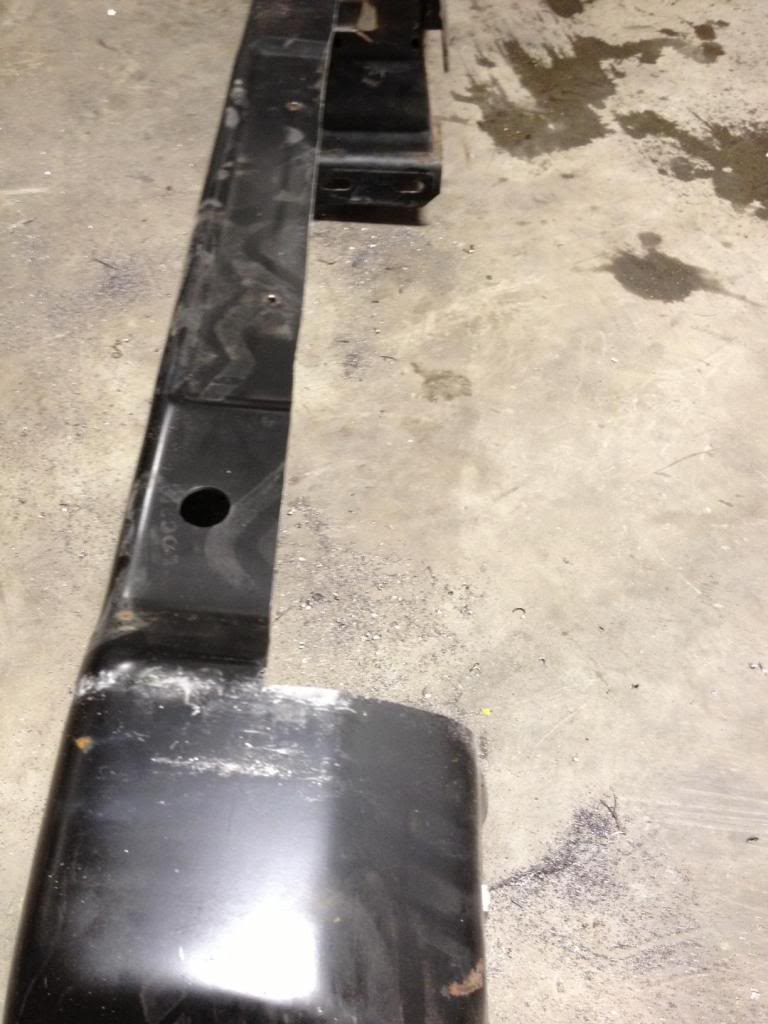
The side brackets almost fit, but one of the frame mounting holes needed to be slightly extended.

The next issue we ran into was the bumper was in the way of the winch. In order to make room we simply cut out the section giving us a problem.
All together we had this.
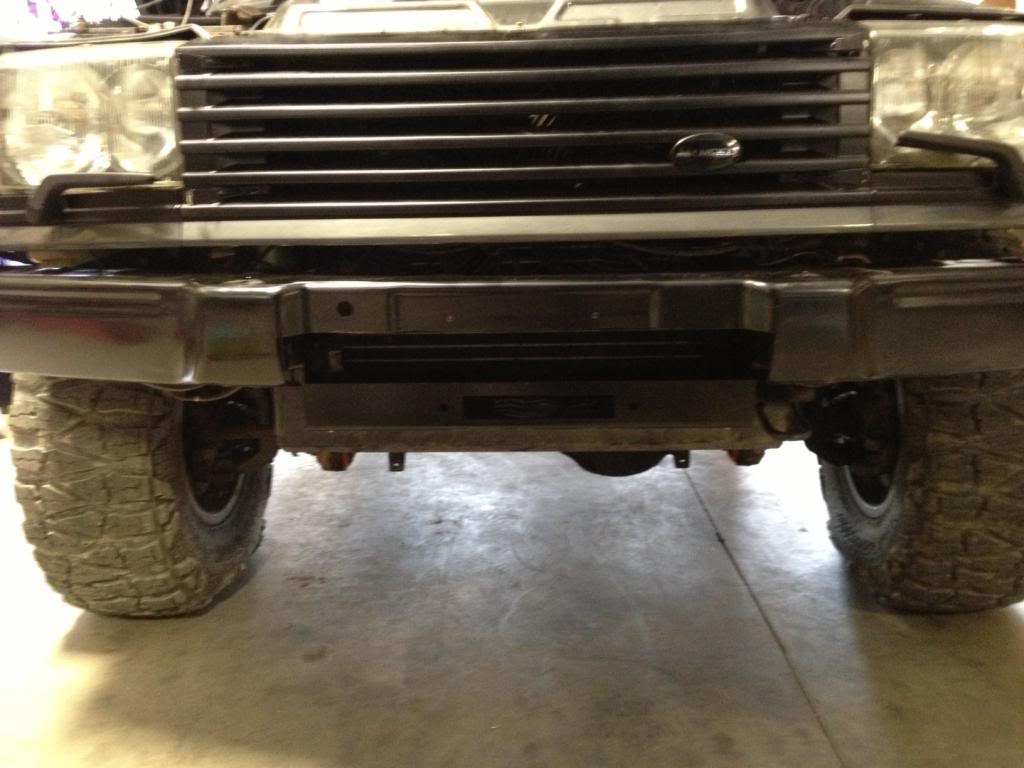
And with the winch installed
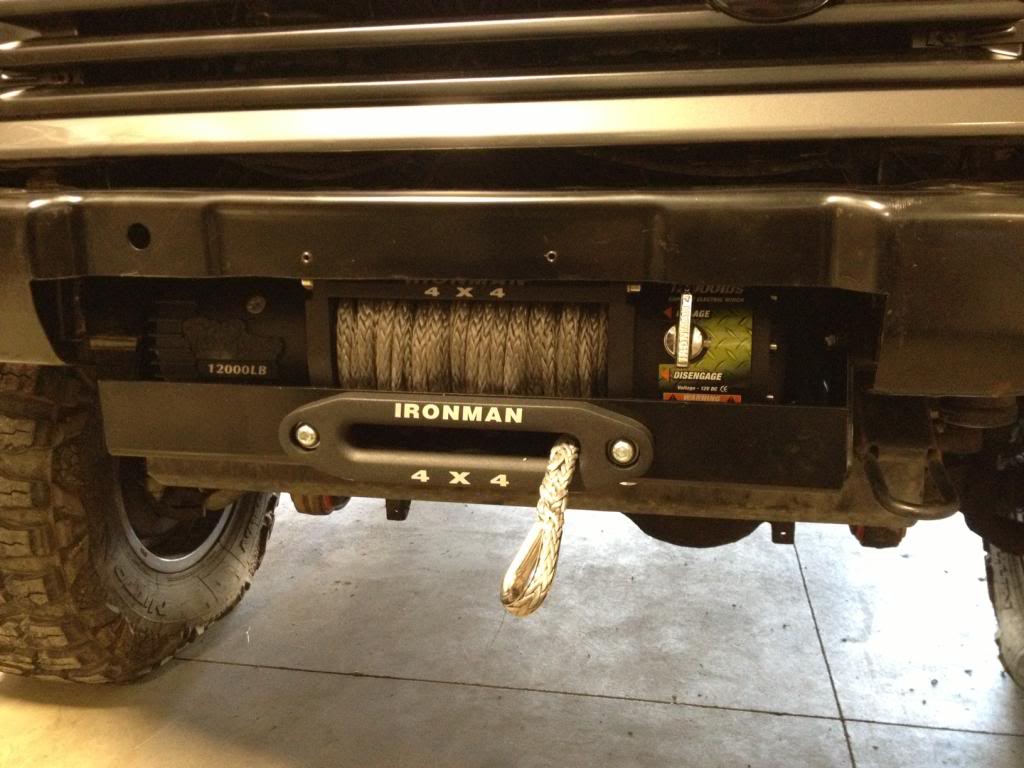
An unseen advantage to this installation was the winch tray acts as a lower radiator guard.
And the poser pic.

The side brackets almost fit, but one of the frame mounting holes needed to be slightly extended.

The next issue we ran into was the bumper was in the way of the winch. In order to make room we simply cut out the section giving us a problem.


All together we had this.

And with the winch installed

An unseen advantage to this installation was the winch tray acts as a lower radiator guard.

And the poser pic.

#93
08-26-2013, 09:42 PM
Project update : Super lock no more
I bet if we took a poll for the worst thing about the P38, super lock would be the uncontested winner. I have had my fair share of P38's and never had an issue with super lock until three days before the VOT.
Let me paint the picture for you. To prep for VOT I had the truck fully loaded with everything, roof rack, tent, jerrycans, sand ladders, the whole nine and I was driving it around town looking like a complete tool. All I needed was a Crocodile Dundee hat to complete the ultimate poser look
In my defense I was trying to work out any bugs with the new truck, suspension and extra weight.
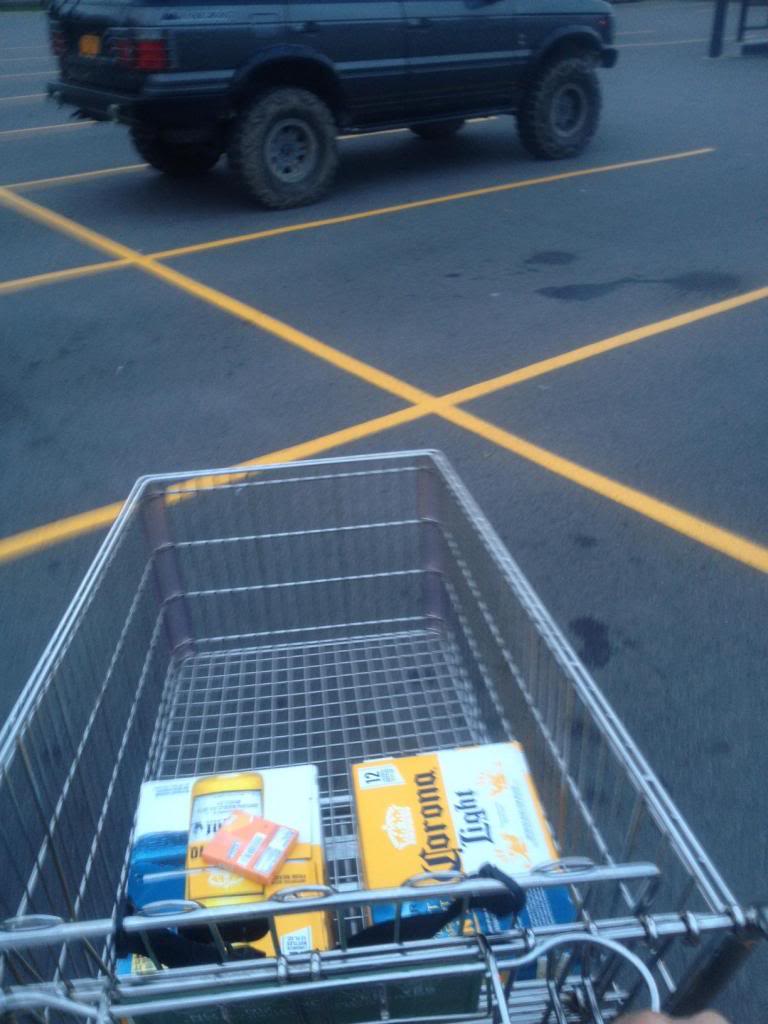
So Top Chef Dave calls me up and says he's making chicken fajitas for VOT and asked if I would pick up some Corona beer to go with the dinner. I said yes having no idea I was about to enter the…………………………….
SUPER ……………. LOCK…………………… ZONE! " cue twilight zone music "
With all the stuff in the truck I decided to lock the door before I went into the store.
Back with the beer I manually unlocked the truck to my surprise it locked all the doors again but the driver. So I turned the key in the opposite direction and it relocked. With a puzzled look on my face I turn the key yet again. It locked all the doors but the driver. Happy to have access to the truck I opened the door only to be greeted by the horn. The buttons on the key fob were useless so I put the key in the ignition and turned it.
..
..
..
..
..
Yep you guessed it, Nothing except for the kindly little reminder on the display saying I was screwed. Or is Land Rover puts it in a much more polite way engine immobilized.
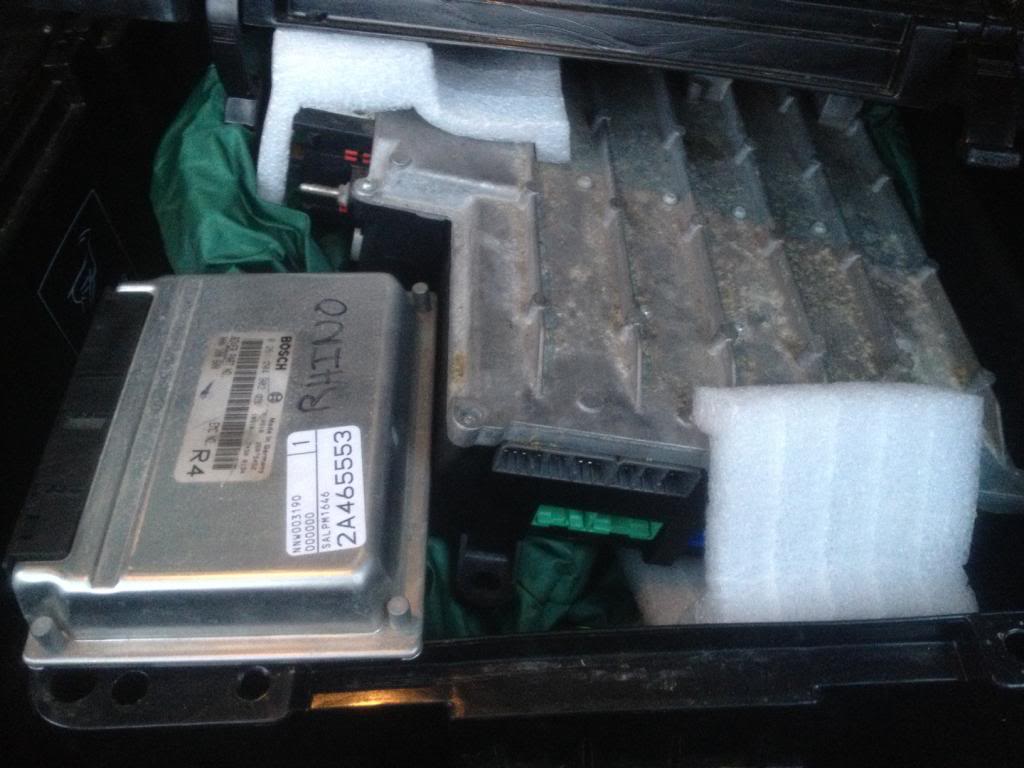
The silver lining in all of this is I had access to the drivers door. So in the parking lot I put in my spare BECM and ECU. It is a real pain in the *** when you cannot opened the passenger door.
I can only imagine how many Toyotas I sold that day as people watched me practically lying upside down with my feet out the door to take out the passenger seat. On second thought I wish I had that Crocodile Dundee hat to hide my face.
The positive side is the BECM swap is relatively fast and painless. Plus I'm really glad that did not happen during VOT.
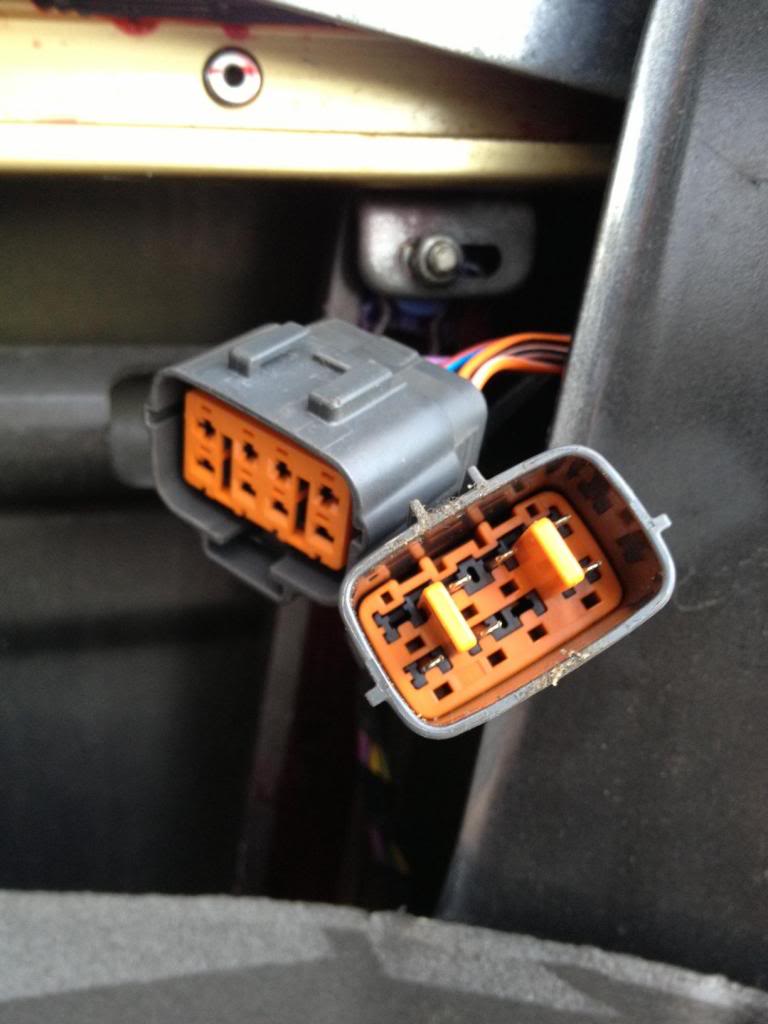
After a little research the culprit was the drivers door lock actuator. Never wanting to be locked out of the truck again I decided to disconnect the power plugs going to the two front door actuators.
I have now moved back in time and my doors were working on 1950 technology. To lock the door, push down to unlock, pull up. Perfect!! Basking in my own brilliance I went to the back of the truck to load the fridge with Corona and pushed this button.

Humbled once again. The rear hatch receives its ground through the plug in the passenger side door lock actuator. I had outsmarted myself. I could open any door except for the hatch. Off-again came the door card and I plugged in the passenger side door actuator. This granted me access to the hatch. Stripping down the hatch you'll see that Land Rover conveniently labeled all the wires the same color white.
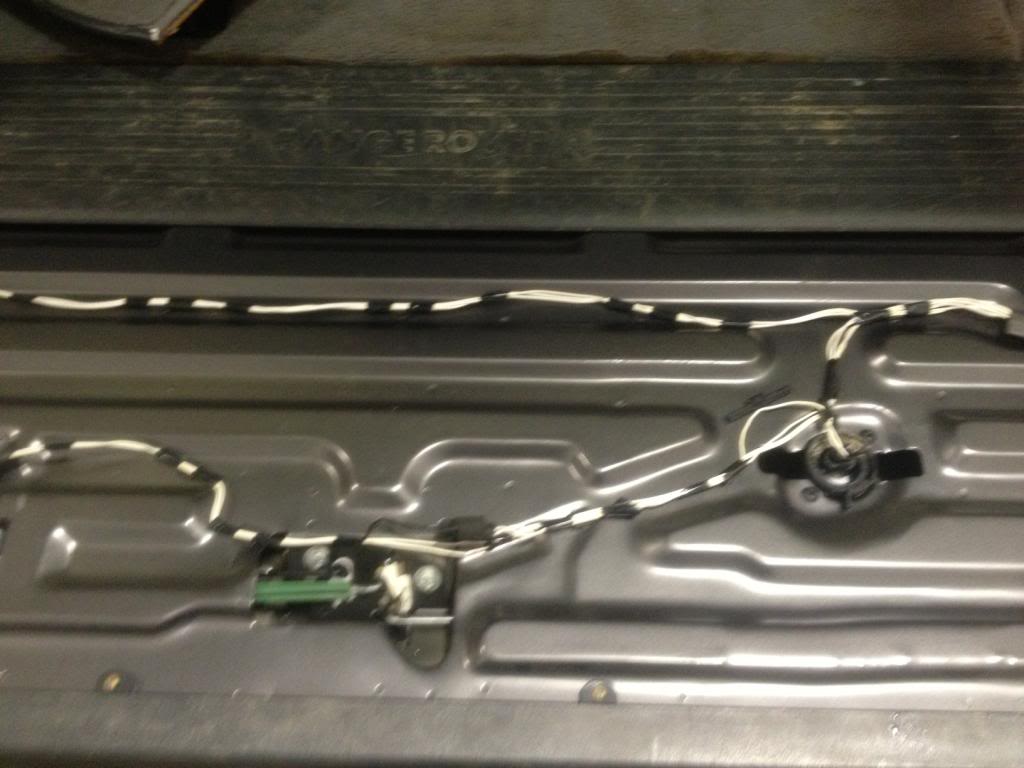
You need to trace the ground side of the hatch actuator
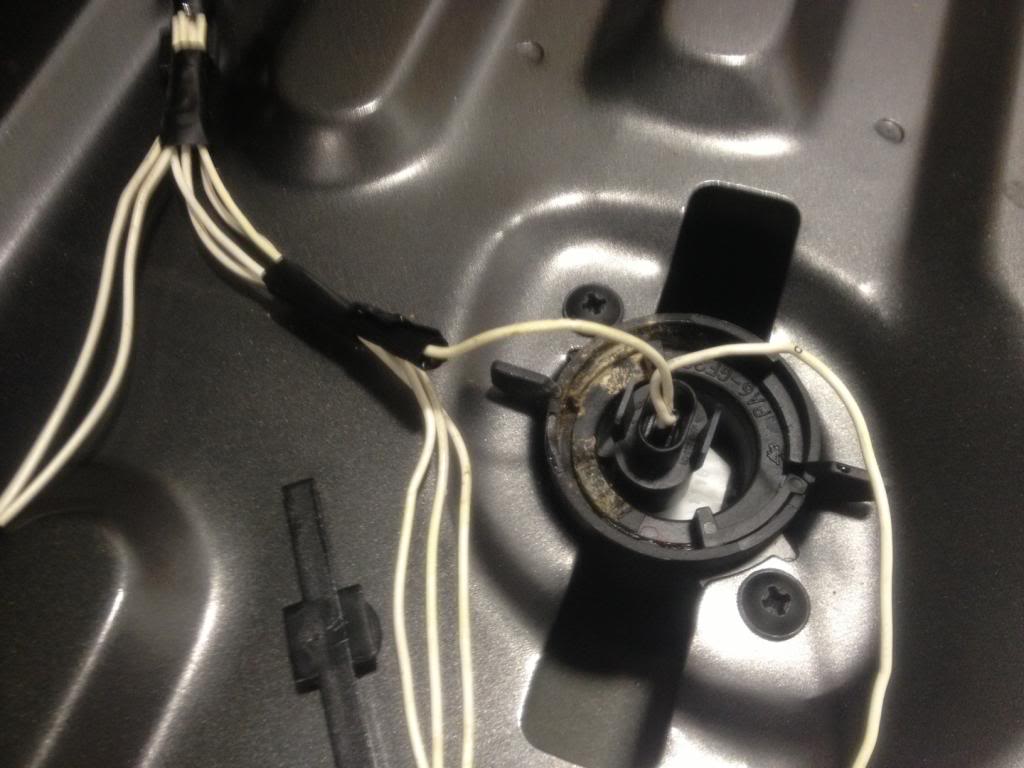
all the way back to the cubby.
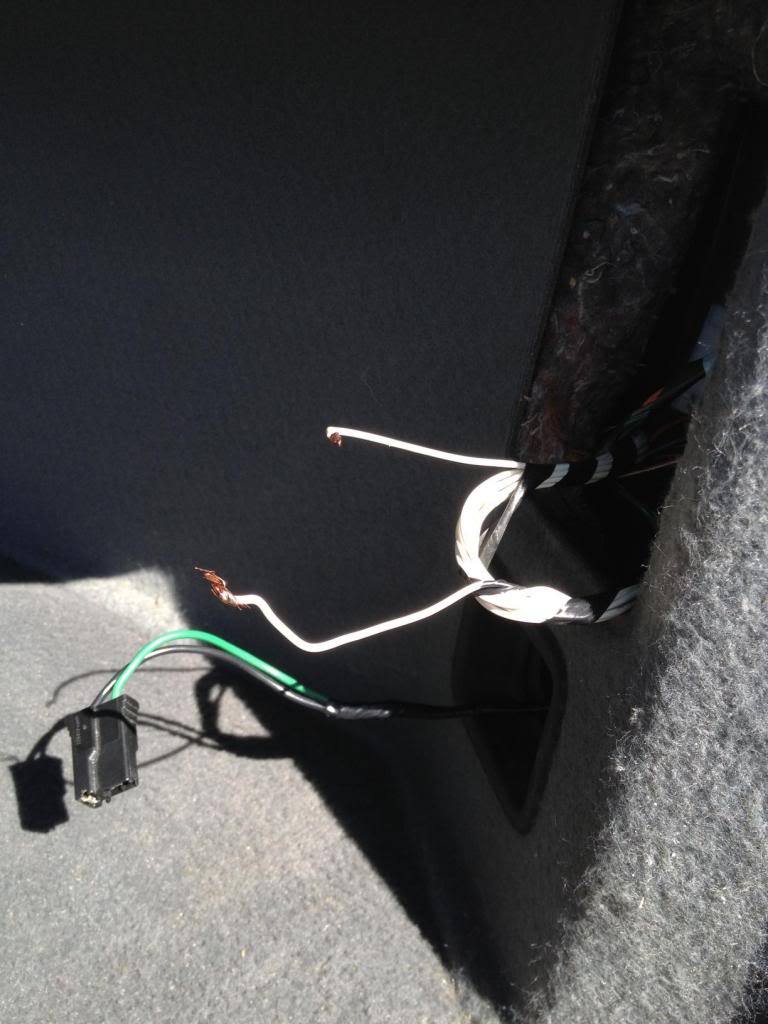
You can ground the white wire into the 12v convenience outlet like I did. With that done your hatch will always work. I have a relay idea that will allow the hatch to work only when the key is in the on position for people that need to keep the vehicle secured.
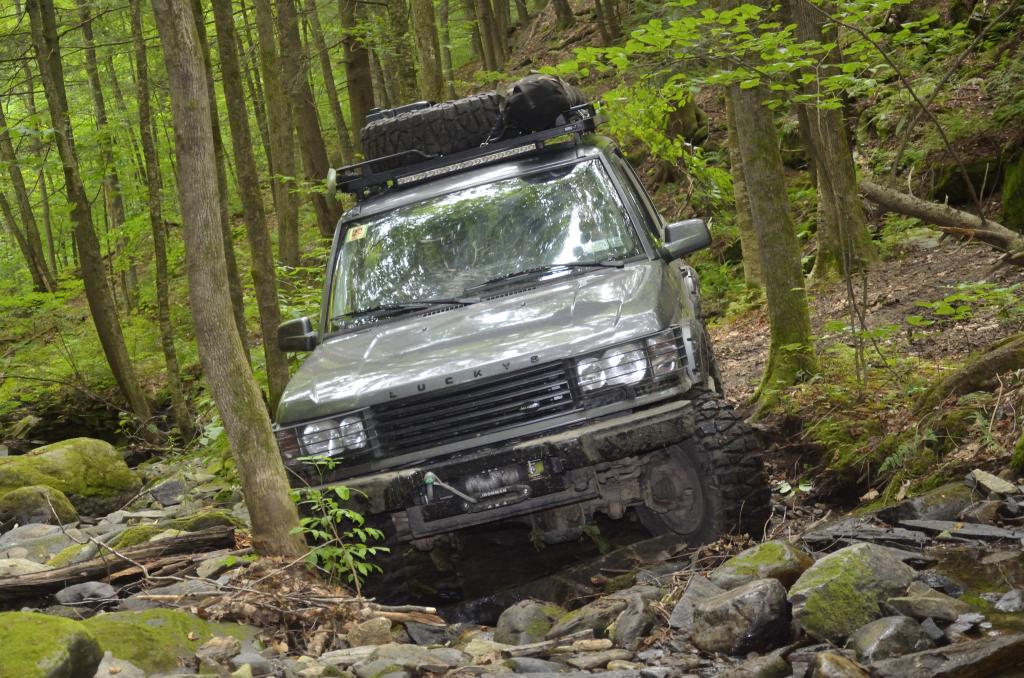
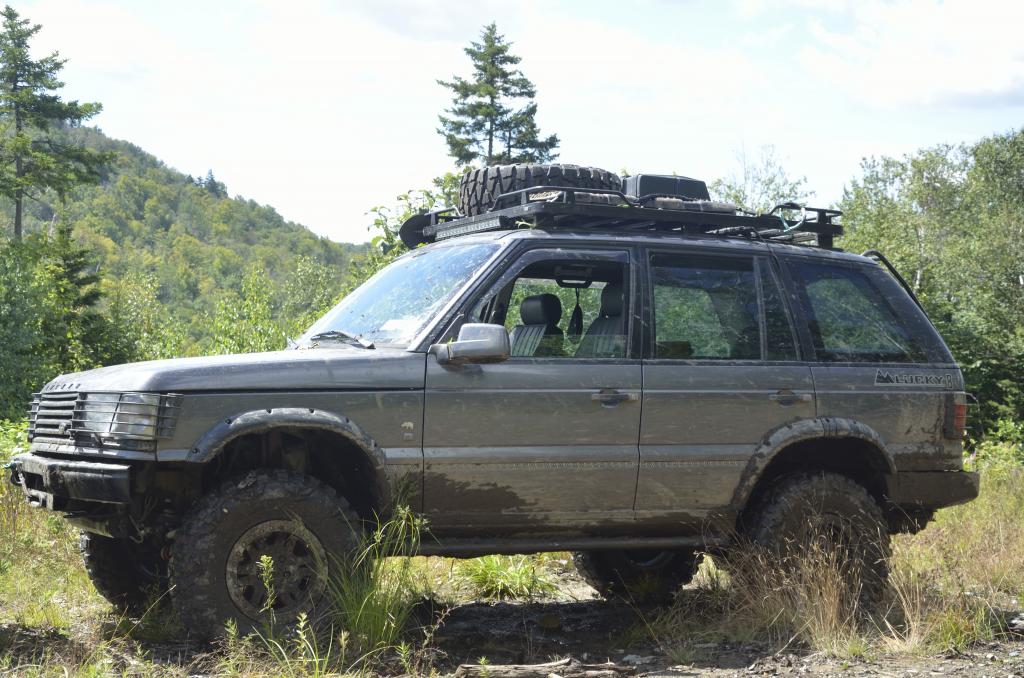
Next up will be traction action until then I leave you with this poser picture from VOT.
I bet if we took a poll for the worst thing about the P38, super lock would be the uncontested winner. I have had my fair share of P38's and never had an issue with super lock until three days before the VOT.
Let me paint the picture for you. To prep for VOT I had the truck fully loaded with everything, roof rack, tent, jerrycans, sand ladders, the whole nine and I was driving it around town looking like a complete tool. All I needed was a Crocodile Dundee hat to complete the ultimate poser look
In my defense I was trying to work out any bugs with the new truck, suspension and extra weight.

So Top Chef Dave calls me up and says he's making chicken fajitas for VOT and asked if I would pick up some Corona beer to go with the dinner. I said yes having no idea I was about to enter the…………………………….
SUPER ……………. LOCK…………………… ZONE! " cue twilight zone music "
With all the stuff in the truck I decided to lock the door before I went into the store.

Back with the beer I manually unlocked the truck to my surprise it locked all the doors again but the driver. So I turned the key in the opposite direction and it relocked. With a puzzled look on my face I turn the key yet again. It locked all the doors but the driver. Happy to have access to the truck I opened the door only to be greeted by the horn. The buttons on the key fob were useless so I put the key in the ignition and turned it.
..
..
..
..
..
Yep you guessed it, Nothing except for the kindly little reminder on the display saying I was screwed. Or is Land Rover puts it in a much more polite way engine immobilized.
The silver lining in all of this is I had access to the drivers door. So in the parking lot I put in my spare BECM and ECU. It is a real pain in the *** when you cannot opened the passenger door.
I can only imagine how many Toyotas I sold that day as people watched me practically lying upside down with my feet out the door to take out the passenger seat. On second thought I wish I had that Crocodile Dundee hat to hide my face.

The positive side is the BECM swap is relatively fast and painless. Plus I'm really glad that did not happen during VOT.

After a little research the culprit was the drivers door lock actuator. Never wanting to be locked out of the truck again I decided to disconnect the power plugs going to the two front door actuators.

I have now moved back in time and my doors were working on 1950 technology. To lock the door, push down to unlock, pull up. Perfect!! Basking in my own brilliance I went to the back of the truck to load the fridge with Corona and pushed this button.
Humbled once again. The rear hatch receives its ground through the plug in the passenger side door lock actuator. I had outsmarted myself. I could open any door except for the hatch. Off-again came the door card and I plugged in the passenger side door actuator. This granted me access to the hatch. Stripping down the hatch you'll see that Land Rover conveniently labeled all the wires the same color white.

You need to trace the ground side of the hatch actuator

all the way back to the cubby.

You can ground the white wire into the 12v convenience outlet like I did. With that done your hatch will always work. I have a relay idea that will allow the hatch to work only when the key is in the on position for people that need to keep the vehicle secured.
Next up will be traction action until then I leave you with this poser picture from VOT.

Last edited by Fivespddisco; 08-27-2013 at 08:09 AM.


#97
08-27-2013, 10:47 AM
Super Moderator
 The Rhino is one really impressive truck, it made me look like I knew what I was doing behind the wheel.
#99
08-27-2013, 10:01 PM

Super Moderator
here you go.
Outback Crocodile – Leather Australian Hat | Hatcountry
$140 of insurance, if you it acts up or if you loose the keys.....
might want to go for that big *** knife too..
Outback Crocodile – Leather Australian Hat | Hatcountry
$140 of insurance, if you it acts up or if you loose the keys.....
might want to go for that big *** knife too..
#100
08-28-2013, 07:31 PM
here you go.
Outback Crocodile – Leather Australian Hat | Hatcountry
$140 of insurance, if you it acts up or if you loose the keys.....
might want to go for that big *** knife too..
Outback Crocodile – Leather Australian Hat | Hatcountry
$140 of insurance, if you it acts up or if you loose the keys.....
might want to go for that big *** knife too..
That hat is fantastic it even comes with teeth