
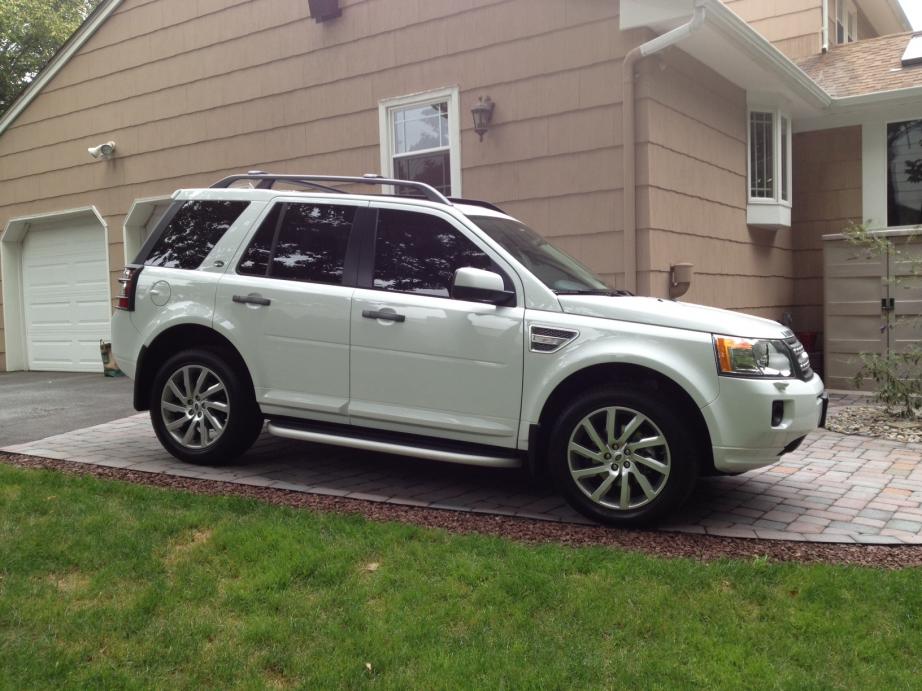
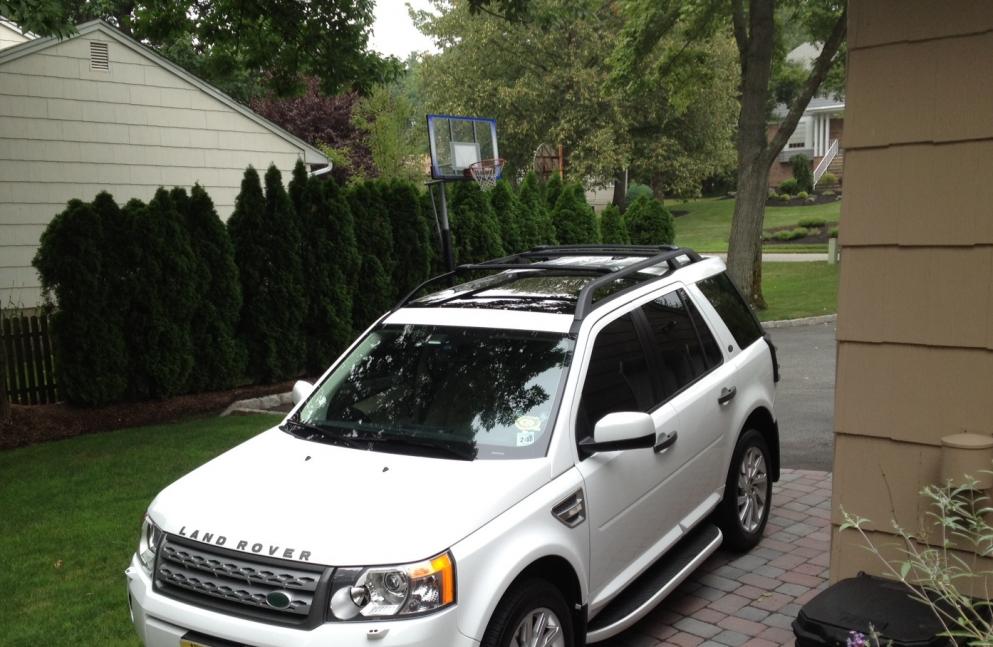
Raised roof rails + crossbars
#31
 07-25-2012, 05:31 PM


I am about to embark on this journey, and wondered if you might still have pics of your install. Any kind of guidance would help. Did you have to drill all six holes? Or did you just pop the lugs in the back, like someone mentioned earlier?
#32
07-26-2012, 10:47 AM

Overlanding
Lazerbrains,
It's no sweat! You'll be fine once you dive in! Looking over the instructions again, I have these comments:
Get a metric deep socket set, if you don't have one . I don't remember where I needed it, but I remember needing it for something on this car! Also, get a hole-saw set. Harbor Freight has a cheap kit that will do here.
- steps 1-6: the piece the want you to pry off is more clearly demonstrated in the caption on step 4 and illustrated in step 6. There is a BIGGER plastic piece the smaller one snaps on to, so make sure not to start prying off the huge one which is attached to the car.
- steps 8-9: they just want to make sure your hole saw has a nice guide hole so your big hole isn't off-center.
- step 10 & 23: They call for a 24mm hole, so I ordered one special, but I can tell you that if you have something close, it'll do. This hole doesn't have to be precise size as it it covered by the finished product. could have saved myself $15! There is a dimple already on the plastic in step 22 and this hole is just a pilot hole.
- step 26: don't take a chance in a leaky roof. Go ahead and get what they recommend. (NO Marine Silicone!)
- step 27: you'll need a torque wrench. Harbor Freight has one that will do if you don't have a nicer one already.
- step 39-41: They're saying to NOT tighten these bolts at first (0 Nm), and then to tighten them once the rack is in place (12 Nm).
- Step 55-56: I used a plastic kitchen cutting sheet to protect my car from me banging it with the wrench in step 56. This is a pain in the butt to reach, but you'll get it with the right tools. I remember being most frustrated at this point, but that support is there for a reason and isn't in the way at all on the finished product.
Good luck!!! Wish I would have taken pics of the install, but these are really detailed instructions so you'll do fine! Send pics when finished!!!
#33
07-26-2012, 10:59 AM
Thanks you douglasson so much for that very insightful info. That will help me tremendously! I am planning on taking pictures of the install to help others in the future. So as soon as I get them, I will upload them here. I am still probably a couple weeks out.
I will be installing the front and rear light guards, before the rack, within the next week, and will also take pictures of those. Anybody ever installed either of those and have pointers to share? If so, please add your helpful insight to my other thread on that topic.
I will be installing the front and rear light guards, before the rack, within the next week, and will also take pictures of those. Anybody ever installed either of those and have pointers to share? If so, please add your helpful insight to my other thread on that topic.
Last edited by lazerbrains; 07-26-2012 at 11:01 AM.
#34
08-02-2012, 02:04 PM

#35
08-02-2012, 02:15 PM
Also, I notice you have the rear lamp guards on. I am looking to do this too. As well as the front ones. Is there any reason you didn't do the front lamp guards? Just curious, as I don't see very many with the front guards (and quite a few with the rear only) and am curious if there are any negative repercussions from adding the front lamp guards?
#36
08-03-2012, 05:48 AM
I had dealer install all the aftermarket parts. I was looking to install the front light guards but was told they do not fit the 2012 model.
I have the OEM cross bars but keep them off unless I am using the rack to carry by bicycle. I find the wind noise annoying. It only takes about five minutes to install both cross bars and the Thule bike rack.
I have the OEM cross bars but keep them off unless I am using the rack to carry by bicycle. I find the wind noise annoying. It only takes about five minutes to install both cross bars and the Thule bike rack.
#38
08-15-2012, 09:39 AM

I have 2 sets of Thule non aero racks for my other vehicles. I purchased a set of feet for the LR2 and swapped out a set of rails from my other vehicle and installed it on the LR2 in about 30 minutes. Cost me $85 and looks great with the fairing. I can take the whole assembly off the vehicle when not needed in 5 minutes. Cheap alternative to the factory bars and eliminates the noise and fuel tax with keeping the bars permanently installed.
#39
08-16-2012, 06:06 AM
#40
02-12-2013, 07:01 PM

I am about to install the roof rails on my new LR2. At first the instructions look a little intimidating but after careful study of the pictures it seems to be rather simple. A lot simpler than the mud guards. My only concern is popping up the plastic pieces that have to be drilled out. I don't want to break any tabs or anything when I do it so can anyone who has done it tell me if there is anything they learned about the process that I should know so I don't break anything like I did installing the mud guards? While installing the mud guards the first pannel that I had to remove to drill holes in to it I broke a support bracket that I didn't see in the instructions. The other side was ok because I was aware of it. I assume there are some sort of tabs that hook into something to hold them in place and if I push up the plastic piece from the wrong side or something I might break off a tab or two.
I ordered a 15/16 (24mm) hole saw to make my holes. I probably could have used a 7/8 or 1 in. but I don't want to mess it up. I also bought the 3M sealer they recommend so I'm set to go.
Thanks,
Dave
I ordered a 15/16 (24mm) hole saw to make my holes. I probably could have used a 7/8 or 1 in. but I don't want to mess it up. I also bought the 3M sealer they recommend so I'm set to go.
Thanks,
Dave