When you click on links to various merchants on this site and make a purchase, this can result in this site earning a commission. Affiliate programs and affiliations include, but are not limited to, the eBay Partner Network.
Thought I would do a write up for how I replaced the head gasket in my LR3 with the engine in the vehicle. Now that its been replaced, engine performance seems to be better and after driving around for a while there is no more additional exhaust gases getting into the coolant system that I can tell when removing the coolant cap.
What lead me here: A few months back when driving up hill, 10% grade, I had a coolant hose blow off. At the time I had a shop do a leak down test which did not show a blown head but they also did not do this with a warm engine. Fast forward a few months and continuing issues related to engine power when going up hill, I had two shops diagnose that the head was leaking. The first shop used an exhaust gas analyzer and after warming up the engine, the percentage of exhaust gases in the cooling system was increasing. Then when on a short drive (5 miles) to the store and back I had coolant bubbling out of the coolant bottle. This solidified that I needed to replace the head gasket.
Looking back at all my symptoms, I should have realized that a coolant hose blowing off when driving up hill was not normal and that a reason for this happening was exhaust gases mixing with coolant.
Repair time: For the majority of the repair I used the work shop manual available on this site. I forget the user who shared it but it's on this forum as of today. There were a few things not covered in the manual that I'll highlight below, but for the most part it is very helpful. Additionally, for the engine timing, I used a youtube video from The Clay Way and the workshop manual.
For the tear down, follow the workshop manual and work your way down to the heads. Take a lot of photos and label and baggie bolts as you go. This was very helpful when it came time to route the coolant hose, LR006158, around the throttle body upon reassembly. I ended up replacing this hose since there was a small leak in it.
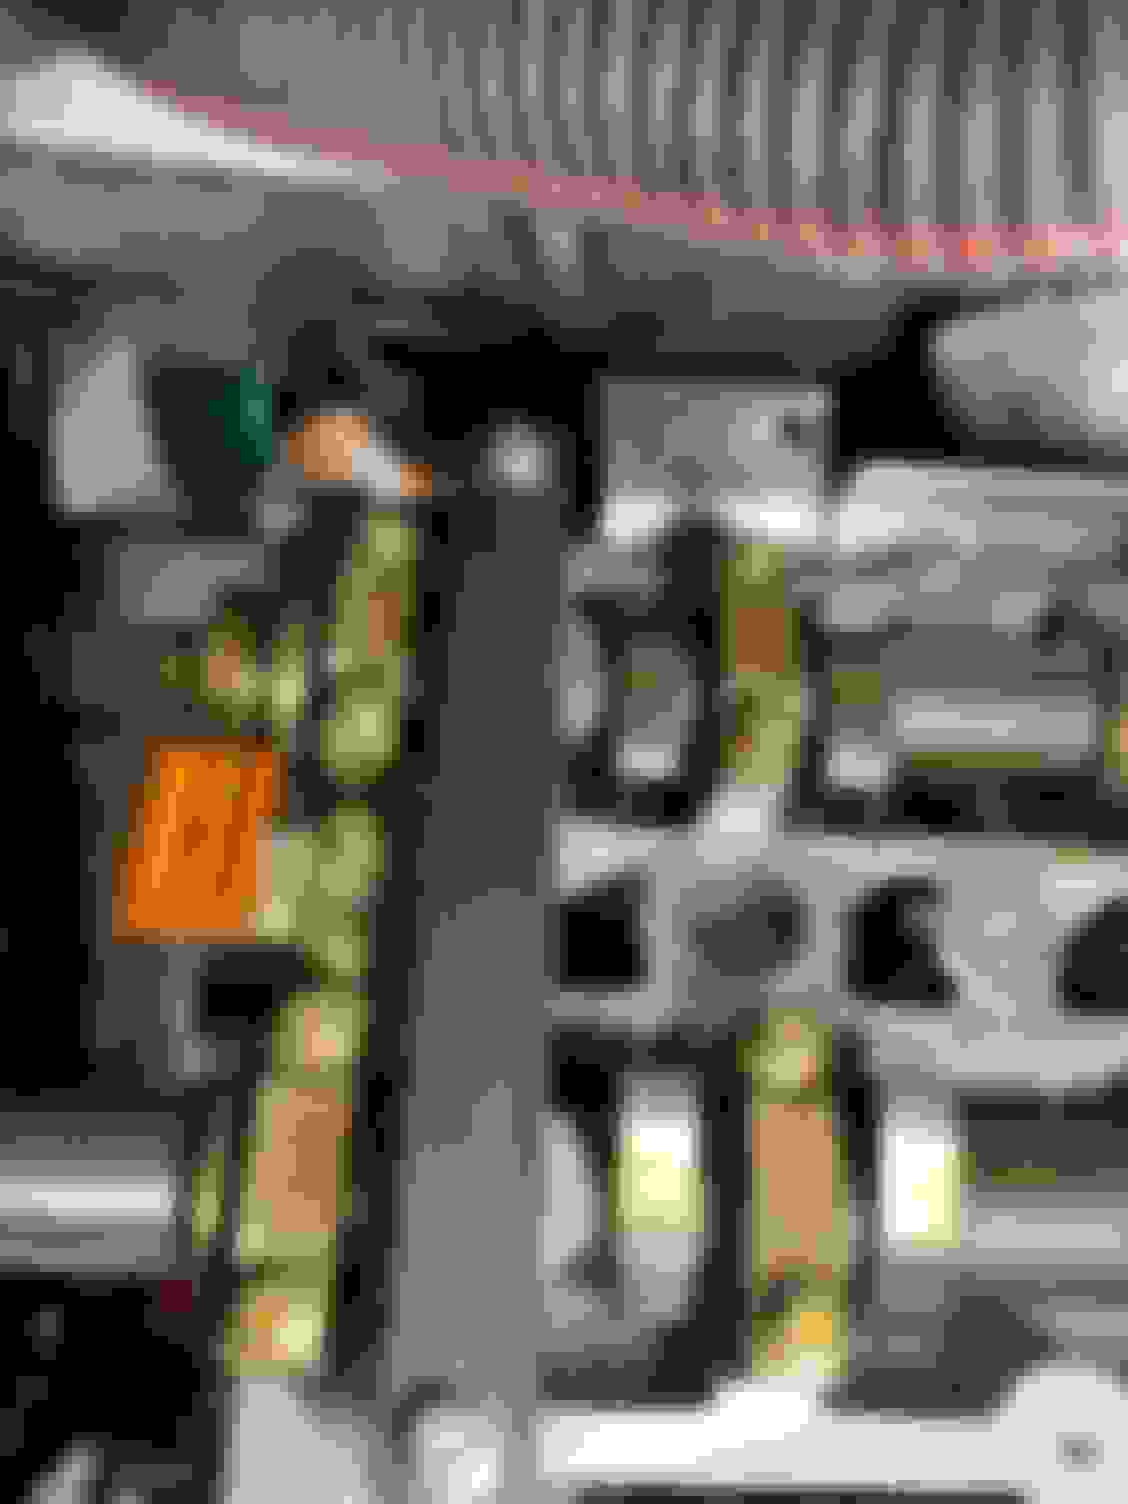
Note the location of the foam underneath the intake manifold. Driver side EGR pipe can be left in place and removed attached to the head. Broke the side of a connector going to the back of the intake manifold. Went to the junk yard and clipped another one and spliced the wires. If not I'd be asking for a short with this exposed pin Passenger side cam cover, note the bolts with a stud and those without. Take pics Passenger cover off. The cam caps are numbered. They need to go back in the same location, again, pics are crucial Driver side of engine cover. Note harness routing The AC does not need to be disconnected, unbolt the AC and push to the side. The bracket that the AC mounts through to the block is held in with two bolts. One bolt is towards the front of the engine and the 2nd bolt is about 6" back from that one. The second bolt is not visible so you'll have to feel for it. This bolt is real pain to access so to help reassembly, I only loosen the 2nd bolt enough to get the engine cover off. If you disconnect this second bolt good luck trying to reinstall it blind. This bracket it shown above in between the AC compressor and engine block. I did clean out all cylinders of coolant prior to reassembly.
The old head bolts were a normal 12 or 13mm bolt, the new head bolts are a Ribe socket. You'll need to purchase tool 303-1653 to install new head bolts. You'll also need this socket to remove the exhaust cam gear and intake VVT's. It's about $100 for the socket, that you'll hopefully never use again.
Heads were taken to CrankShafter Grinders in SLC, and they machined down about 0.02", cost was about $150 and included vacuum testing of the valve seals. I chose not to replace the valve seals so there was no need to reset the valve lash.
My cheap cam holding tool was too tall, causing it to not sit flat on the cams. Nothing a washer shim can't solve. Note the washer shims under cam holding tool. You also could try and machine down the tool, but adding a shim was easier for me. I snapped an exhaust stud, ended up drilling then welding a nut to it and it came out.
Per the manual, I pulled the heads with the exhaust manifolds attached. This would have been a great time to remove this stud, which I didn't do. In case you are wondering, yes you can remove the exhaust manifold with the heads in place, but you'll need to remove some heat shields and access the manifold bolts via the passenger wheel well. Retap all the exhaust threads now while the manifold is out and accessible!!!!! Pretty sure it is an M8 tap.
When setting timing, get all the slack in the chain on the tensioner side!
You'll also be reattaching the VVT's to the cams, use the manual here and a helper. For the passenger side it was easier to tension the exhaust cam using the special tool. The driver side requires some trickery. When you pull tension on the driver side its easy for the tool to hit the intake VVT, to get around this, leave the exhaust cam gear loose (you should have both exhaust and intake VVT/gears loose per the manual anyway) and rotate the exhaust gear such that the pins the tool goes into will allow you to pull tension. This will make more sense as you go to do it.
Flats on top of the cams shown.
After reassembly I got a bank 1 and 2 lean code. Started tracking the source of this by working from the MAF back, and quickly found my issue.
Overall, I'm glad I did this repair myself as the quote I received was $7500 and I was able to do it with parts and new tools for about $1200. You could put a new engine in but that's a risk I'm not willing to take and would rather rebuild mine. The worst parts were removing the oil dip stick, ended up bending it and got a new one at the junk yard since the dip stick tube is not available new, and the power steering pump bolts, you'll want some universals and patience.
Hopefully this helps someone in the future and keeps another LR3 from going to the junk yard.
Last edited by LR3Donkey; Jan 14, 2024 at 11:52 AM.
Great writeup, this job is a lot of work. I haven't done it on an LR3, but I have done it on a supercharged Jaguar with the same (well, left at 4.2L and not bored out to 4.4L like the LR3's) AJV8 engine and I too had watched "The Clay Way" LR3 video to get pointers on installation of the timing change on the Jaguar motor. If anyone has to replace timing chain components on an AJV8 engine that video is gold.
The Jaguar AJV8 uses the same head bolt, so I too have a $100 socket that now sits idle in the tool bin.