

Honeymoon over! Pool of water found in passenger side


Thread Starter
|
Mudding
Joined: Sep 2020
Posts: 113
Likes: 28
Hey all,
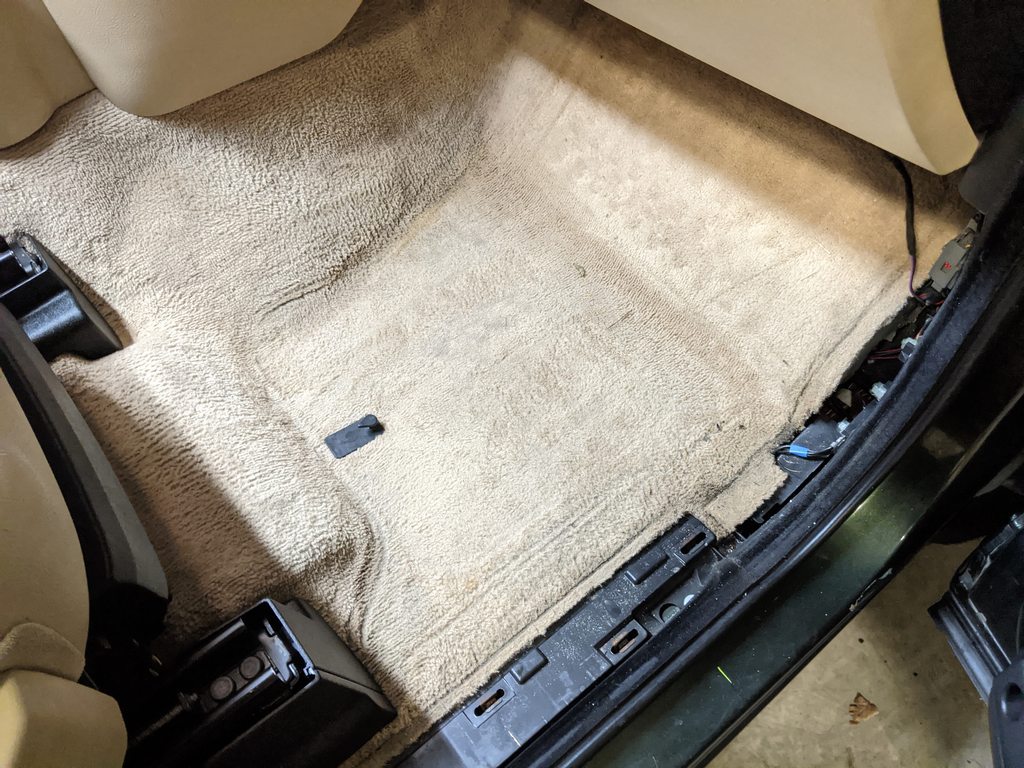
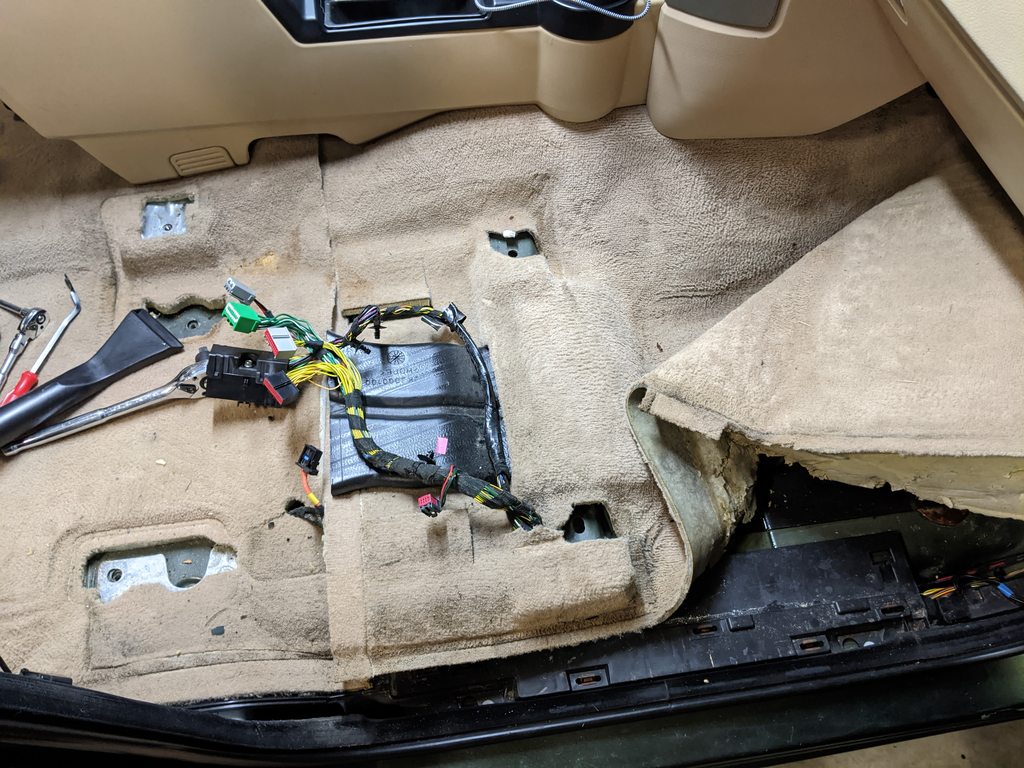
Went to do my interior detail this evening, and when the GF pulled up the rubber floor mats we found the carpet to be pretty damp on the passenger side. I pulled enough plastic out to get the carpet up a bit and see what was up, and found pools of water under there. I currently have the seat out and the carpet up, dried it out, and have a heater blowing warm air into it to dry it all out.
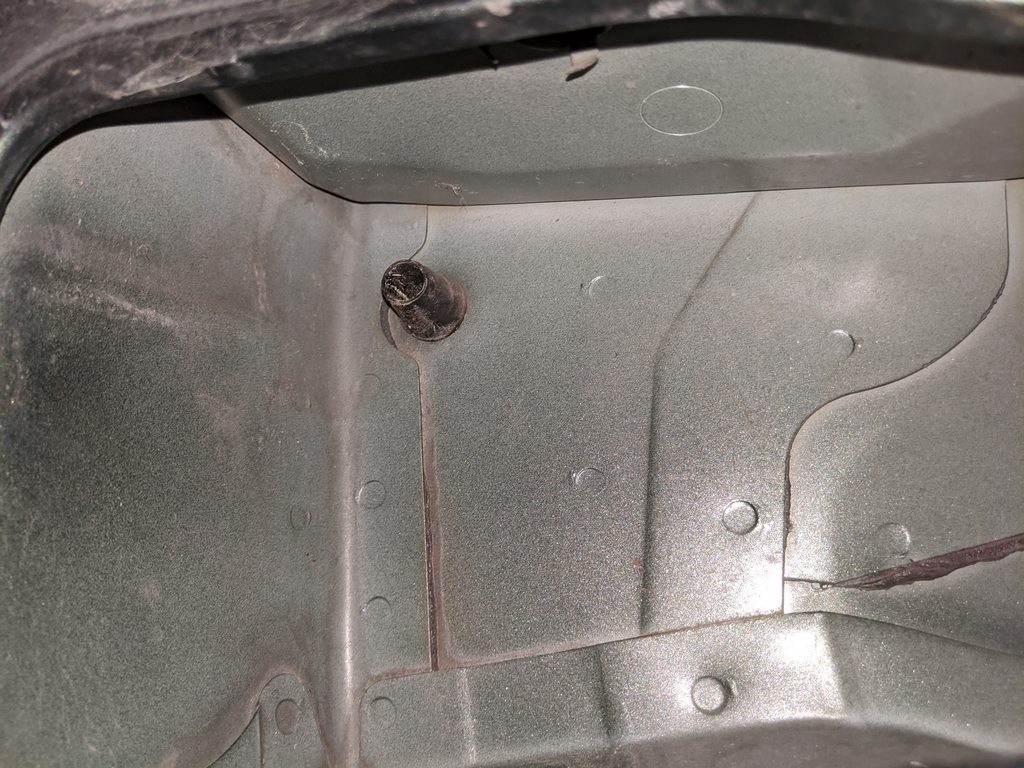
The funny thing is just a few days ago I tested the sunroof drains (fronts only), and saw water exit in the expected location. I pulled the passenger side exterior vent to see if the drain nipple was still in the right spot, and sure enough it is. I suppose it could be intact, but still leaking some water into the cab. I plan to dry it all out and tomorrow test it again and see if water comes into the passenger footwell. The water did have some soap to it, which makes me think it got water from a car wash or manual wash, which I have only done one of and used a foam cannon, so not a ton of water was used.
Any other areas of leakage I should look for besides the sunroof drain? Out of an abundance of caution, I'm going to just replace all 4 drain ends, but would love to know other culprit areas to test. I did ensure I got all of the water out of the electrical channel too, as that was pretty wet.
Photos:
Damp carpet:
Drain nipple in exterior vent:
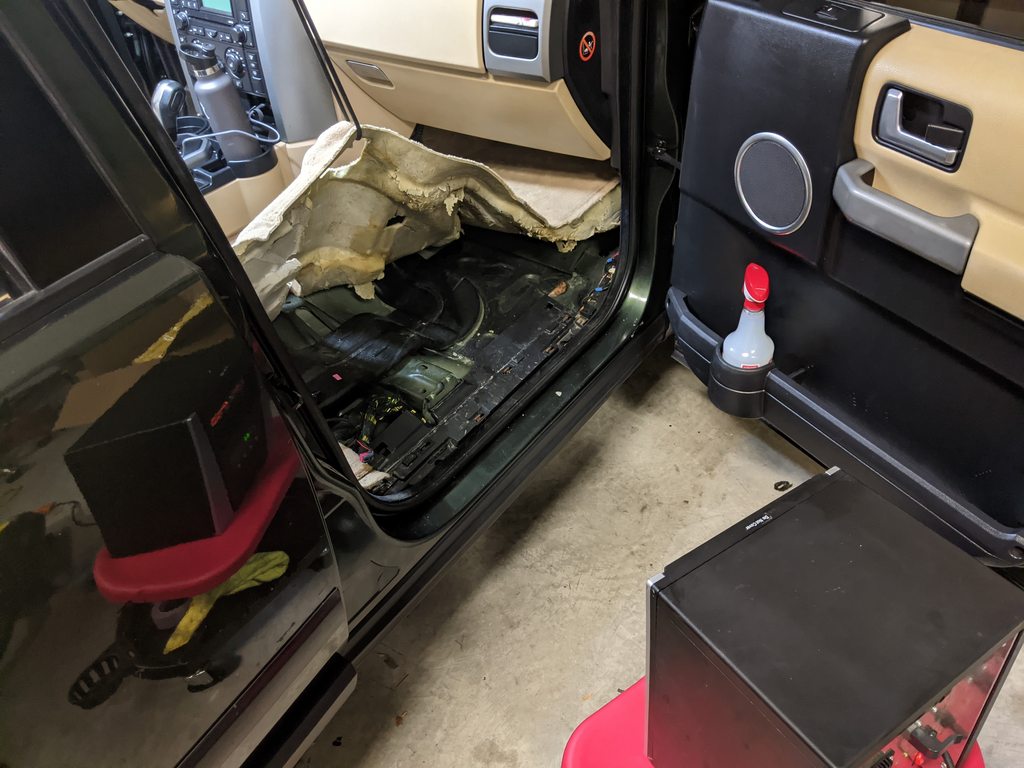
Carpet up, seat out:
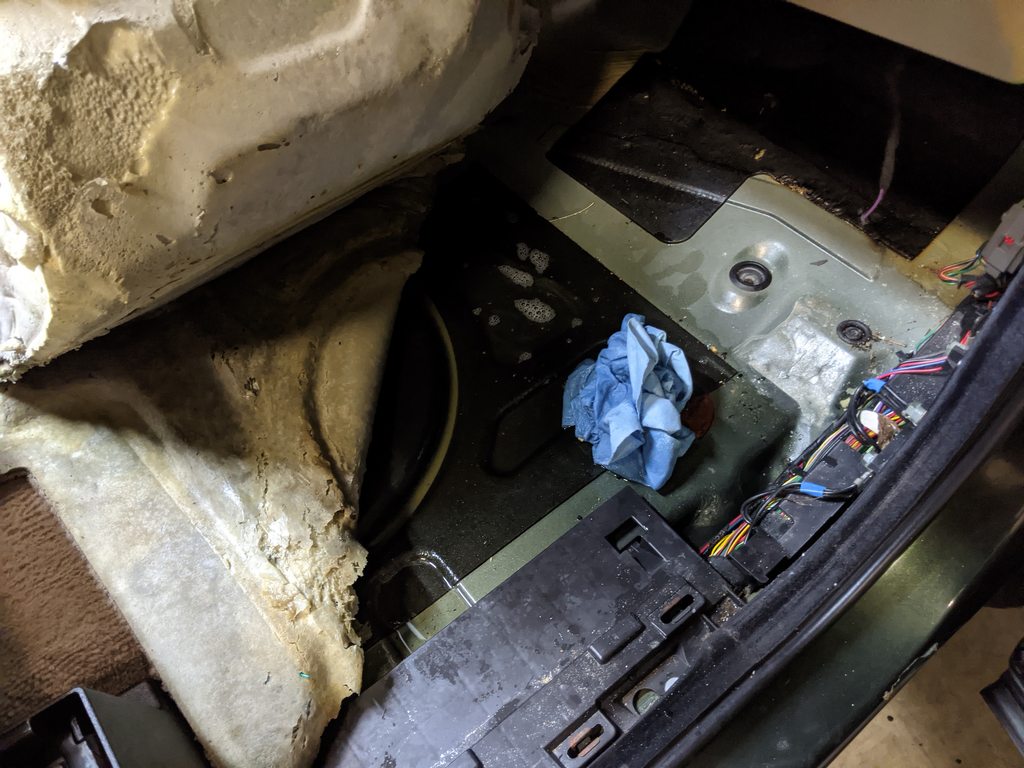
Drying:
Cheers, all!
Went to do my interior detail this evening, and when the GF pulled up the rubber floor mats we found the carpet to be pretty damp on the passenger side. I pulled enough plastic out to get the carpet up a bit and see what was up, and found pools of water under there. I currently have the seat out and the carpet up, dried it out, and have a heater blowing warm air into it to dry it all out.
The funny thing is just a few days ago I tested the sunroof drains (fronts only), and saw water exit in the expected location. I pulled the passenger side exterior vent to see if the drain nipple was still in the right spot, and sure enough it is. I suppose it could be intact, but still leaking some water into the cab. I plan to dry it all out and tomorrow test it again and see if water comes into the passenger footwell. The water did have some soap to it, which makes me think it got water from a car wash or manual wash, which I have only done one of and used a foam cannon, so not a ton of water was used.
Any other areas of leakage I should look for besides the sunroof drain? Out of an abundance of caution, I'm going to just replace all 4 drain ends, but would love to know other culprit areas to test. I did ensure I got all of the water out of the electrical channel too, as that was pretty wet.
Photos:
Damp carpet:
Drain nipple in exterior vent:
Carpet up, seat out:
Drying:
Cheers, all!

Camel Trophy
Joined: Nov 2017
Posts: 4,964
Likes: 950
From: Green Bay, WI
Well I can say the sunroof drains look updated. They are round and open. The original factory ones come to a cross which is very restrictive. The driver side drain is easy to view from the inside if you want more confirmation. Of course there is the chance that the rear was done wrong.
But there are two other common leak points. Next you will want to drop the glove box and pull the cabin filter. If its wet then your plastic windshield cowl (new is about $100 USD) is warped and letter water get behind it. If that happens in the wrong spot it can enter the cabin air intake bowl and soak the filter, fan and end up getting all over. Another location for leaks is the exterior a-pillar trim. I have attached the TSB on that one.
But there are two other common leak points. Next you will want to drop the glove box and pull the cabin filter. If its wet then your plastic windshield cowl (new is about $100 USD) is warped and letter water get behind it. If that happens in the wrong spot it can enter the cabin air intake bowl and soak the filter, fan and end up getting all over. Another location for leaks is the exterior a-pillar trim. I have attached the TSB on that one.

Camel Trophy
Joined: Nov 2017
Posts: 4,964
Likes: 950
From: Green Bay, WI
Also if you have issues with your remote locking/unlocking - there is a splice that area. I think a blue wire? Anyway, when it gets wet it can corrode and cause issues with remotes. Needs to be repaired.

Mudding
Joined: Feb 2014
Posts: 197
Likes: 55
From: Madison, WI
The photos of your LR3 look almost exact the same as mine, a few weeks ago! ...Lots of stuff removed, wet carpet lifted, and water underneath.
Anyway, hopefully the source of your water leak is the same as mine was, because it's an easy diagnosis and easy fix.
My A/C drain tube was blocked. Fortunately, there are 2 connection tubes behind the panels that connect to the left and right side of center console, down near the carpet. Remove those 2 panels, put some towels around the tubes, gently pull them off, and if you get any water coming out, that's your problem.
I did a video of this, mainly for my own future reference. I.e. when it happens again, and I am too senile to remember anything that previous happened....
You can skip all the stuff up until 8:44 of the long video if you want to. The rest of the 'long' video, and all of the shorter second video, focus on this blocked A/C drain-tube issue -
1. Long video - https://photos.app.goo.gl/WhyZBU8wHFEkR4Pq7
2. Short video - https://photos.app.goo.gl/52HFEQHvmsMyWjD46
I simply ran a piece of long plastic covered slightly flexible wire, down through each of the 2 drain tubes, and jiggled around a bit, in an attempt to loosen any potential blockage (dirt). Then crimped one tube closed, and blasted air compressor air down through the other tube, blocked this tube, ran air down through the second tube, ran water down each tube and again used some compressed air to help flush out any debris, and then took a look at the ground, below the vehicle - a nice puddle of water was present. Connected the 2 tubes, started the engine, ran the A/C on high power, and took a look for any leaks from around the black box - good news, no more leaks, and good news, water was dripping consistently onto the ground. Dried everything out, replaced a few areas of foam that were brown and nasty, beneath the carpet, ran a heater with windows open for a couple days, ran a Dehumidifier with all windows closed for a day or so, and all good. I think I will clean out the A/C tubes once a year or so, as preventive maintenance. I encourage others to do the same thing.
So, not sure if your issue has the same root cause as I did, but figured I would share my experience with y'all.
Good luck, Simon
Thread Starter
|
Mudding
Joined: Sep 2020
Posts: 113
Likes: 28
I appreciate all the comments and areas to look for. I'll start going through them one by one to get this watertight. I ordered all the drain ends anyways so I'll go through and do those. I'll check to see if the TSB was done, and if not order the stuff to do it. I'll also check the cabin filter (ordered a new one anyways since I'll be in there), and the AC drain lines.
Worst case I dry it out then take it outside with everything closed and blast it with water in different areas to see if I can locate the leak.
Glad I decided to detail the interior when I did, otherwise that could have been soaked for awhile.
Worst case I dry it out then take it outside with everything closed and blast it with water in different areas to see if I can locate the leak.
Glad I decided to detail the interior when I did, otherwise that could have been soaked for awhile.
Camel Trophy
Joined: Nov 2017
Posts: 4,964
Likes: 950
From: Green Bay, WI
Incase you are not aware, there are rear drains also:
https://landroverforums.com/forum/lr...ocation-87709/
https://landroverforums.com/forum/lr...ocation-87709/
Thread Starter
|
Mudding
Joined: Sep 2020
Posts: 113
Likes: 28
Yup I remember your post on my other thread. Ordered replacements for those too. Going to do it all! It rains too much up here in Oregon to do it half-assed. Picking up the TSB parts from the dealer in a few minutes and will get that sorted.
Thread Starter
|
Mudding
Joined: Sep 2020
Posts: 113
Likes: 28
So far I have done the TSB on the A-pillars, replaced the cowl, and created a dam around the cabin air intake using waterproof HVAC tape. The TSB was never done, though it looks like someone used silicone underneath the a-pillar trim, but not in the TSB-noted area. I covered the TSB hole, and the top-most hole (not noted in the TSB, but didn't seem to serve a purpose and could be an entrypoint for water). I used new trim clips too as some had their washers gone. One had a bunch of silicon around it too.
It'll be a bit before drain nipples arrive, but I'll let it all dry for another day or two then do a little testing, install everything, and do the nipples when they arrive.
I still need to check my AC drain as well. Hopefully with addressing all 4 possible culprits I'll have nailed it down .
.
Cheers all.
It'll be a bit before drain nipples arrive, but I'll let it all dry for another day or two then do a little testing, install everything, and do the nipples when they arrive.
I still need to check my AC drain as well. Hopefully with addressing all 4 possible culprits I'll have nailed it down
.Cheers all.