When you click on links to various merchants on this site and make a purchase, this can result in this site earning a commission. Affiliate programs and affiliations include, but are not limited to, the eBay Partner Network.
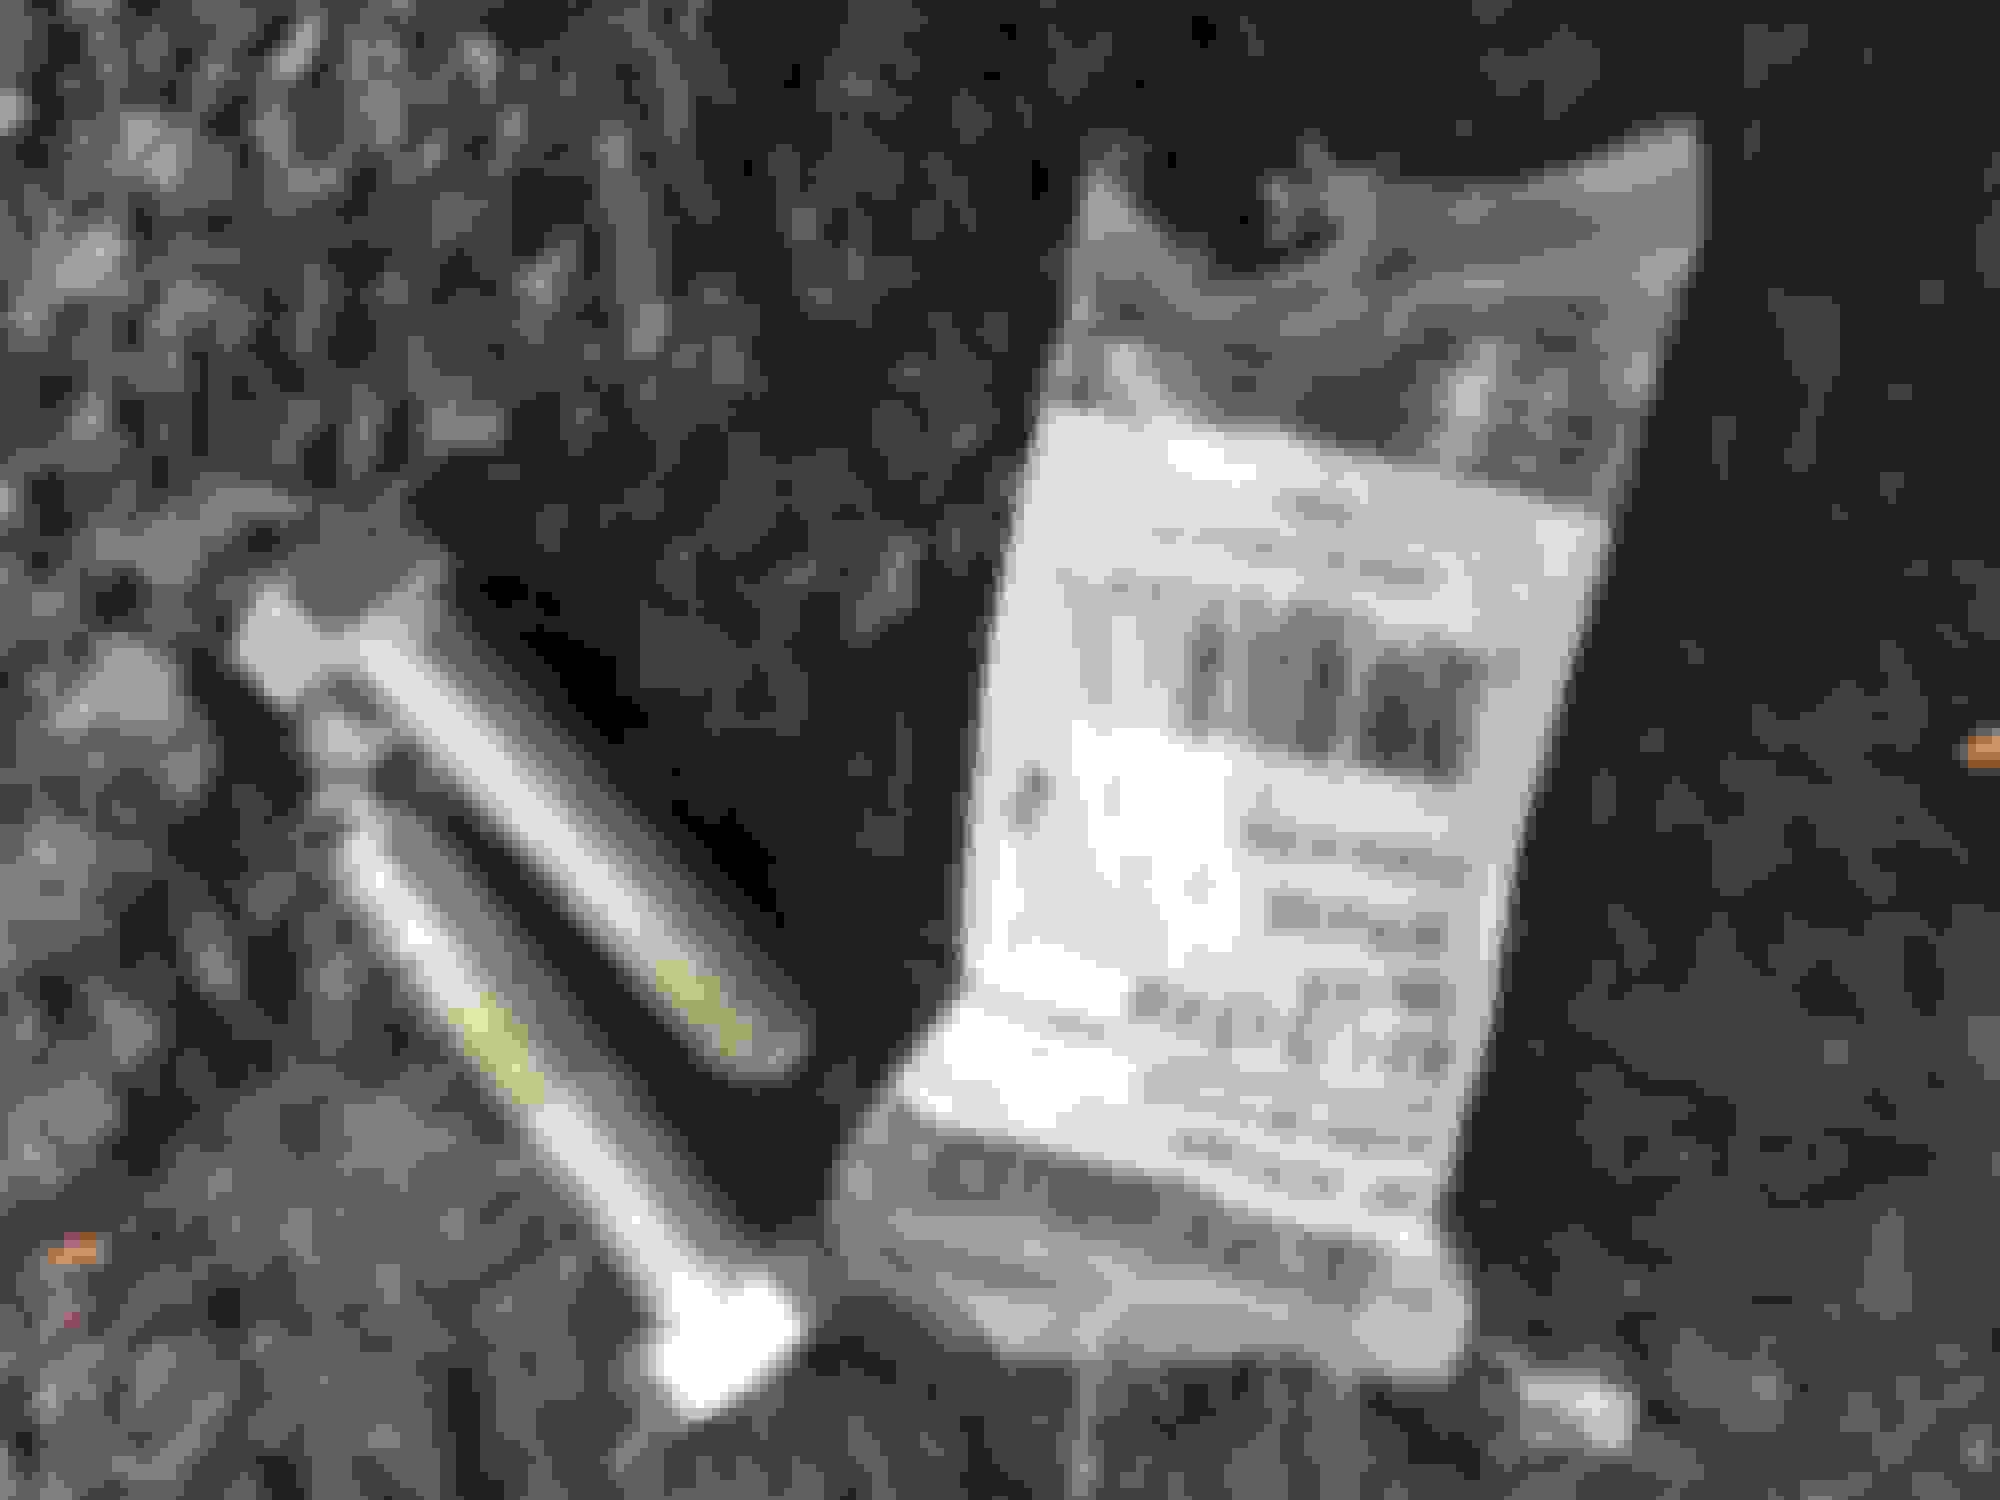
Picture of the green spacer. All the bolts are loose and moving. There is a thin metal ring blocking the head of the bolts and cant be pulled out.
Help! I am having major difficulty removing the green spacer. Anybody knows? All the bolts attached are loose but wont come off because of a thin metal ring behind the head of the bolts. Here is a photo of the spacer. Thanks
Those bolts won't come out, but I have a suggestion to remove spacer, put couple of bolts that were holding shaft to spacer back in place (180 degrees from each other but first oil the treads really good) then tighten them until they reach the flange then tighten them more while tapping spacer with a hammer to break it loose, I hope that takes care of your problem & it comes off,
Just realized holes might not be all way trough spacer, in that case wedge a thin scraper blade between spacer & flange & try tapping it in a little bit from two opposite sides to breaks spacer loose, I am guessing spacer is rusted to flange, good luck in cold weather , (I know, easier said than done),
thanks. I like the way you think through the images, brilliant. I tried exactly what you mentioned earlier but the bolts are short. I want to run hime depot but they are closed at 8 on Sunday's and get a longer bolt if they have the right thread. I have been hammer tapping the spacer every 30mins with pb blaster. If this thing wont get loose, i might endup replacing the broken joints instead. I saw a picture of the spacer and nothing but a spacer. Its 18 degrees now and its been a long day. Ill try again tomorrow. Thanks again.
Here are 2 options: First get a propane torch and heat the spacer mostly @ the shaft because that's where it's stuck. Then spray with PB Blaster and use a cold chisel between the spacer and flange. Don't go nuts or you can F up the flange. You may have to repeat the heat and PB Blaster a few times, but you'll get it. Sucks because 3 cents worth of anti-seize compound when this was installed and would have never happened.
If that doesn't work get a cheap puller set from HR, AZ, Advance like this > Bolt-Type Wheel Puller Set and just reuse the 12pt bolts to hold it in place and have at it. Even with this I would heat and spray first. I'm sure you don't need a vid to see how a puller works, but here you go>
Another option is use a slidehammer the same way as the pulley remover tool. If you have one great, but you can get a very inexpensive set again from HF. Or just rent it from AZ or Advance. That's all I got...Good Luck!
Mine didn't have a spacer but I really f'd up two of the bolt heads when I was removing my driveshaft. Seem to recall taking an angle grinder to a bolt after a few hours of frustration. Of course such stupidity leaves you having to fix your blunders and I was faced with a bolt (or three) that needed replacing.
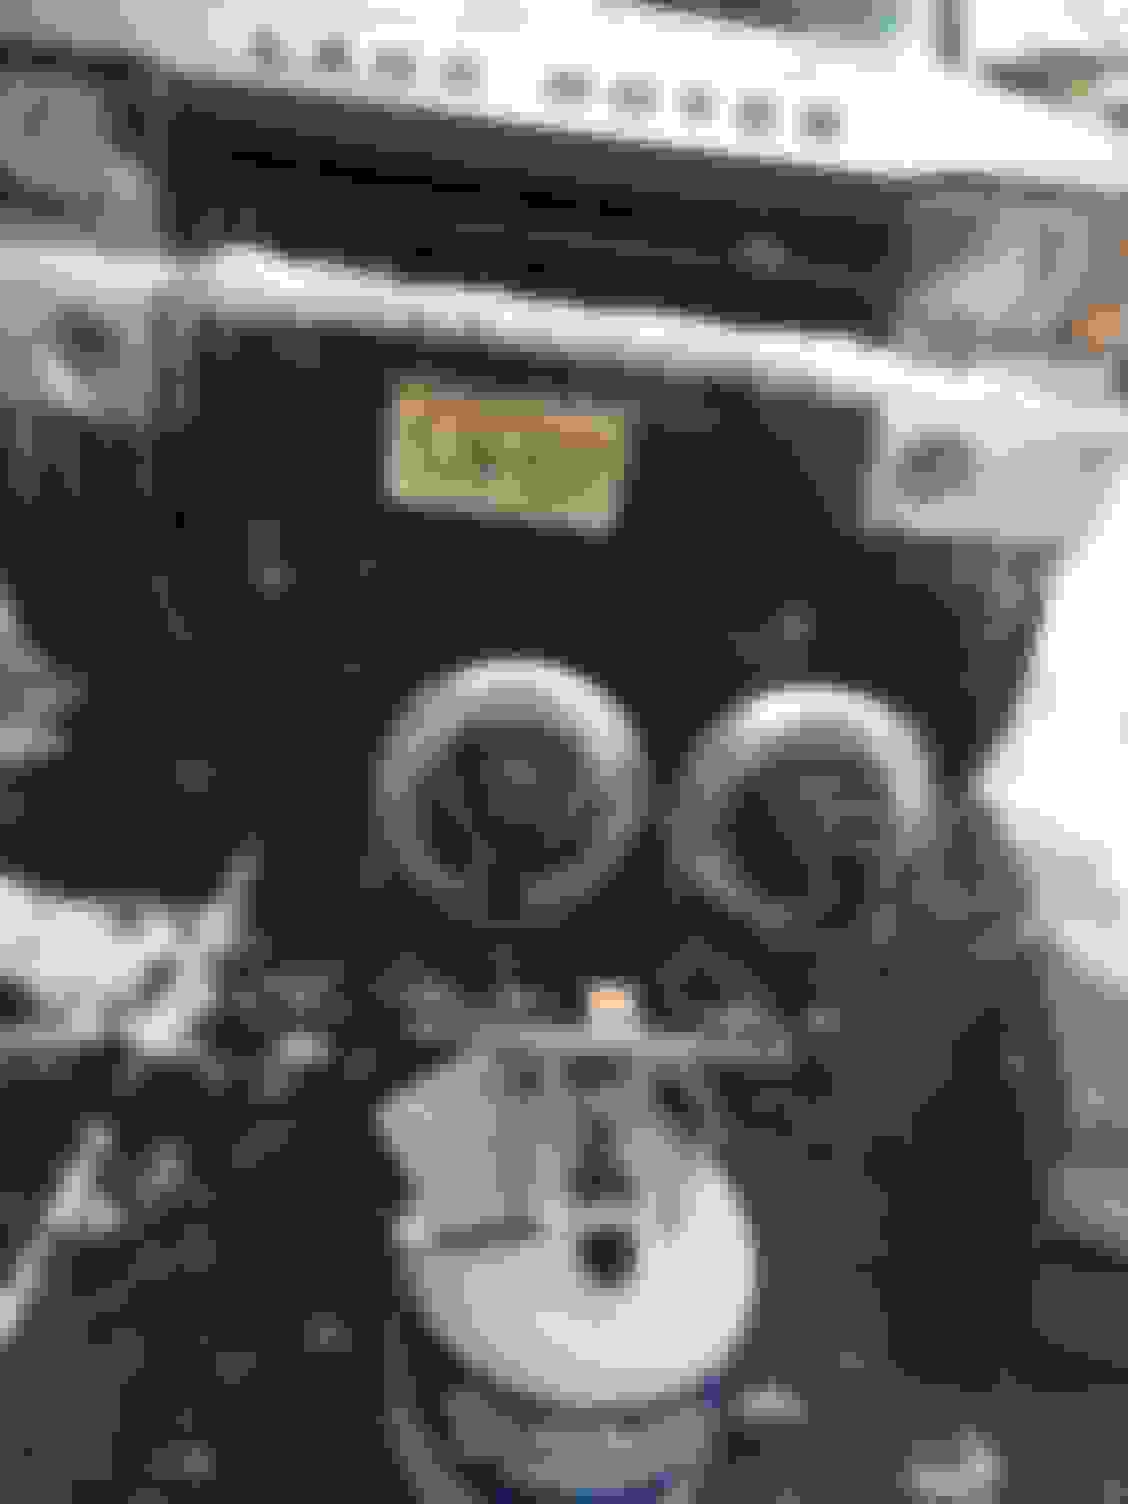
I was able to take a large flat head screwdriver and place it in the split of the split ring that is holding the bolts in place (area can be seen in the top part of the first photo that LR03NJ posted). By moving the split ring around on the shaft I was able to find spots where the bolts could be backed out and removed if you turned the head of the bolt the proper way to give it clearance.
The large split ring holding them in wasn't easy to move at first but a few taps with a screwdriver and a rubber mallet and it will move. Then by playing with the bolts and the ring you should be able to wiggle them out.
Thank you all for your help especially doing this on an 18 degree weather. I was able to get the spacer out with two M12-1.75 x50mm bolts the rest was easy. I soaked the spacer with PB Blaster overnight and tapping the part with hammer every 30mins. It was very cold and i can only stay less 10mins outside each time. Cant feel my toes most of the time. Anyway, I like the idea of the torch but I got a propane heater instead yesterday.
It took me several months of identifying the squeak and clunk. In the process, I was able to change the pulleys, service the differential and new filter in the transmission. My last resort was the drive shaft since I knew its heavy duty and maintained. This will be my 3rd shaft in 152k miles diving the truck. 1st and 2nd i got really lucky. 1st dropped on an intersection while i was stopped, the 2nd when i was greasing the nipples. The rear part of the front drive shaft deteriorated which caused the clunking and all noise possible. Replacing them is quite easy. Only problems I had was not enough tools.
I got sets of mm sockets and open wrenches, never thought I need to run for 9/16th, not just one but 2 of them.
Well, thanks again. You guys rock!
gerry