My high mileage service..
#1
 09-23-2014, 05:20 PM

Got my 04. Running just fine as I see it. Going to see how things improve or change as I tick things of the list. Here is where I am at and what I intend to do.
Ultragauge - INSTALLED
Rotella 15w/40 + Mobil M1 301 filter - DONE
Fully serviceable front drive shaft - DONE
Peak coolant + 180 grey stat - GOT
Platinum plus 4s, and 8mm Magnecor wires - GOT
Diff oil - DONE
Tranny oil + additive - DONE
Tranny gasket + filter - DONE
Seafoam - GOT
Air filter - DONE
Vac tubes - DONE
B+G44 - DONE
Think thats it. The brakes are so good on this truck that i'm not going to do much to them right now. The front pads are new. The rear will crop up first, i'll look at the fluid then.
Power steering can wait for now. Again its flawless, and one less fluid system I break into at a time the better.
Just scouted out doing the plugs and wires. I was calling it impossible, til i noticed the bracket at the back of the IM that can be taken off to allow a childrens hand behind there to get to the coils. That's just hilarious, right there. I took out an easy plug, see how stiff it was. Easy. Massive gap. I'm expecting a big change from just the plugs/wires. Looking into some kind of flexible drive to make getting the plugs out easier. Ive got a great thread saved.
First (quickly followed by a 2nd) dim question: How to locate the coolant drain plugs on the block? Underneath? Gotta remove plastic front cowl thing? Not looked that closely. But they didnt pop out at me, and the RAVE drawings are rather cryptic. To me. Defo have to use the loctite to replace those plugs? Can I use teflon tape?
Same oil in the transfer case as diffs?
Ultragauge is fantastic. Love it. Running about 180 idle. Only managed to see 194 in traffic, quite warm out. Not tried highway yet. % engine load, what is that monitoring, throttle?
So, im going to start with............... off to work away from home for a week. Bummer.
Real life kicks in. Gotta earn some cash.
Last edited by cappedup; 10-08-2014 at 04:27 PM.
#2
09-23-2014, 07:10 PM

I just undid the lower radiator hose. Talk about a messy job. Coolant everywhere and I don't care who you are flushing the engine and radiator out takes a lot of fresh water. The squeeze clamps that hold the cooling hoses take a bit of finesse to work one handed while the other hand wiggles the hose off of the engine.
The front and rear diffs are a breeze. I used one of those harbor freight pumps that took forever because of how thick that fluid is. I would do it differently next time by using a squeeze bottle. (think of a medium sized lucas oil additive bottle) The transfer case fill plug wouldn't budge for me. I had to take it to one of my trusty mechanics.
Transmission filter and fluid change was also fairly straight forward.
Good luck and keep us posted.
#3
09-23-2014, 07:56 PM

The coolant drain plugs are located on each side of the block (almost behind each engine mount, under the manifolds). Like the member above said already, you can just pull the lower radiator hose to drain the system.
Yes, use the same oil in the T-Case as diffs.
You seem to be on the correct track with your repairs and upgrades so far. Keep up the good work.
Yes, use the same oil in the T-Case as diffs.
You seem to be on the correct track with your repairs and upgrades so far. Keep up the good work.
#4
09-23-2014, 08:03 PM
I've spent 20 odd years since my first car as a teenager playing catch up with pos cars. Desperately tying to keep them on the road. Feels so good to be doing preventative maintenance for once.
And I just love this truck. Wish it would snow.
#5
10-04-2014, 11:40 AM
So, most of the bits and pieces I need are in. Here is the Motley Crew. Ive already done oil/filter change.
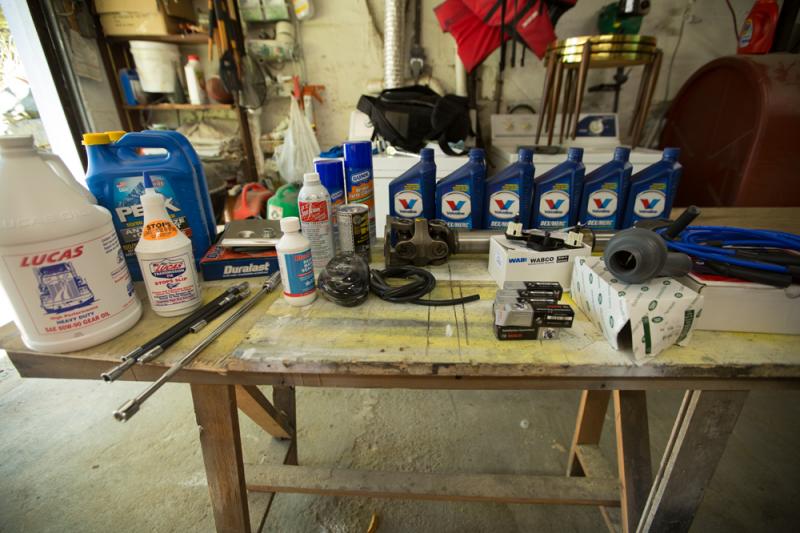
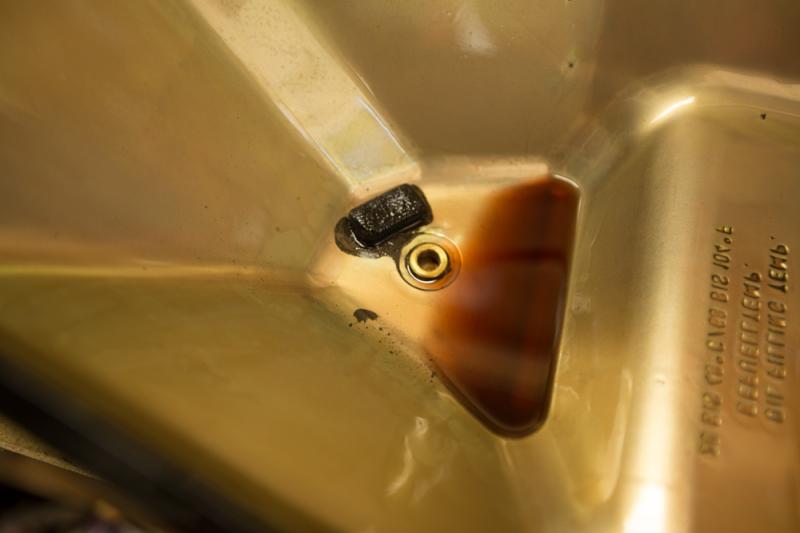
First Up drive shaft. My replacement was $250. Pretty much the same as the orig, apart from the all important fully serviceable bit.
Anyone know what this little flap is, held on by one tack weld?

Fitting is pretty straight forward. I didn't get new nuts and bolts. Had assumed they might come supplied. Refitted old ones. Will inspect at next oil change when I grease up. I put the CDL and gears in N and lifted a wheel to easily spin the shaft to get to all the bolts. Dropped the wheel on the ground to loosen/tighten them.
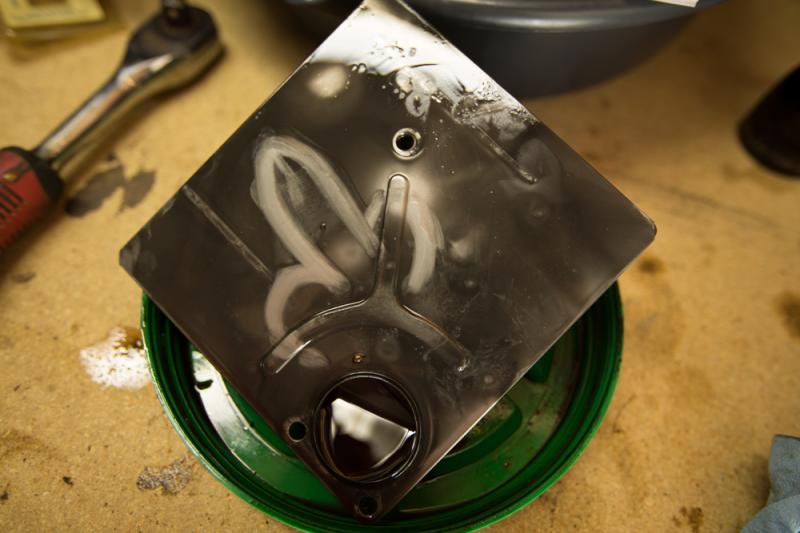
Next Tranny oil. Drained old fluid, didnt look too bad. Entered into this with all the intentions of keeping the fluid off me. I ended up wearing about a quart by the end. Pan came off easily enough. None of the stuck/sheared bolts i read about. The fill plug was very tight, but its a big allen key (8mm) in there, its possible to give it some grunt and not worry about stripping it. The drain is smaller (5mm) and i went gently with that one. Make sure the key is properly all the way in the hole.
So, dropped pan, looks clean enough.
Back under the Disco for the filter. This is where it starts to get everywhere. Fluid is still dripping from many places, not just the drain hole now. Dabbing helps, but it just keeps coming. Anyway, filter off, again no issue with bolts at all. This is where things start to get dirty.
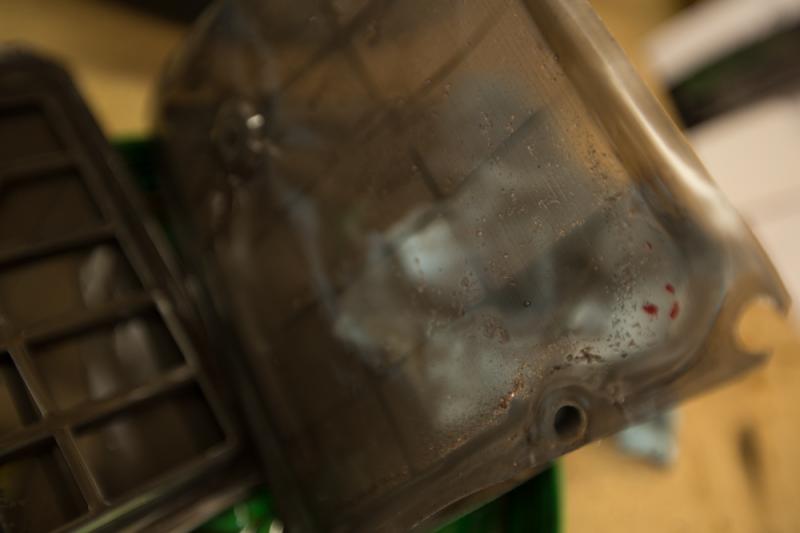
Im starting to suspect that someone changed the oil but not the filter. Curious I pull the filter apart and what i see is not pretty.
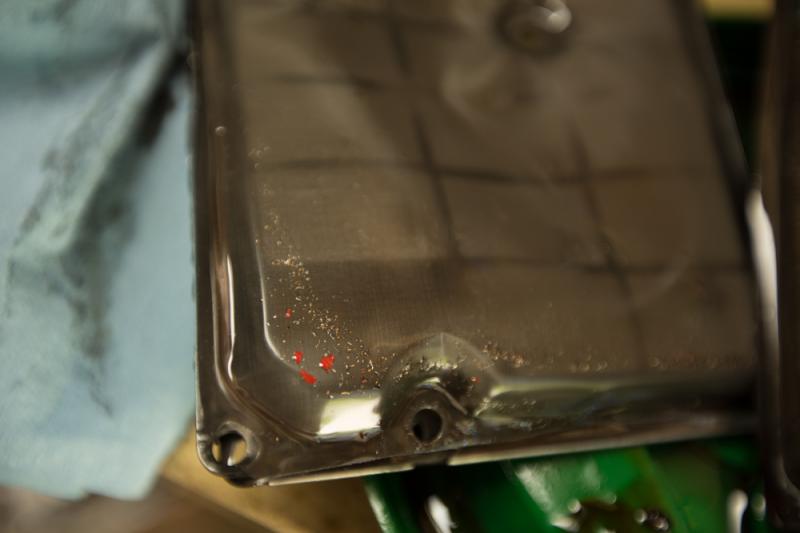
Flakes of red paint????
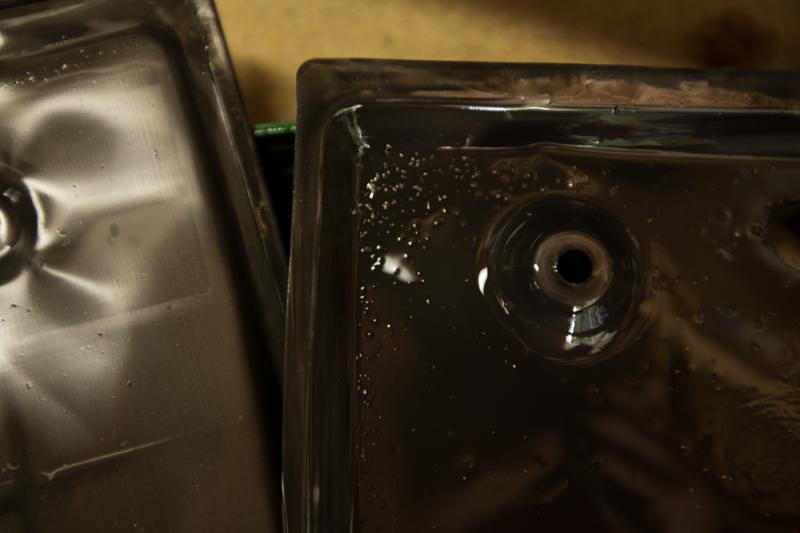
Bits of actual gritty metal. Also fluff. Which confused me a little.
The filter itself wasnt gunged up. I dont have a new one to compare it to, but it was pretty see through. Didnt look like it would restrict the flow of fluid.
So. Should I worry about what I found in there? Zipped it all back up, got about 5.5qts back in, including the Lucas trans additive. When I restarted and started slowly shifting there was a couple of nasty noises. Panicked and shut it off. Started again and it got quieter. Now its as good as new (sounding). Is that in any way normal for a trans oil swap?
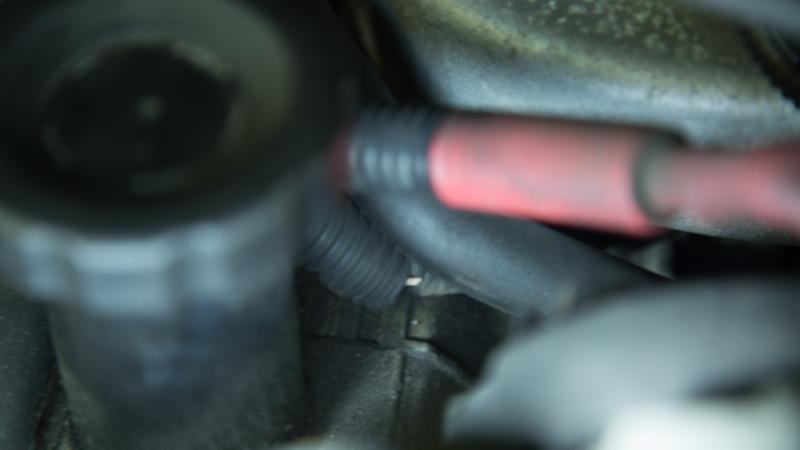
Ok, Next thing is carb cleaner. Got myself a tin of the Gunk stuff. Took the big hose off the butterfly and found this..
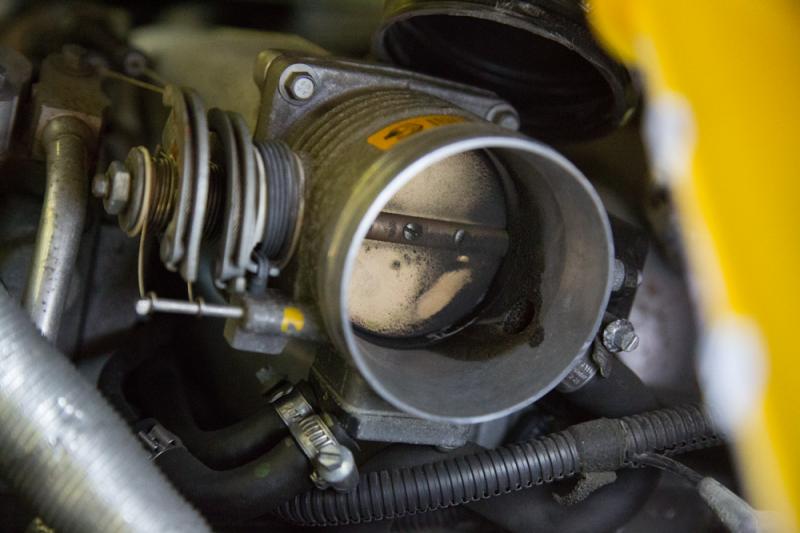
Great, i thought, 'something to clean'. Cleaning up the butterfly, easy enough. Shop rag, squirt. Then i wanted to run the engine while spraying it into the intake. Doesnt run. Cos the MAF isnt connected? Read more here and the trik s to squirt a bit in, toothbrush it, run engine, repeat. Needed more time than I had at that moment. Will come back to that.
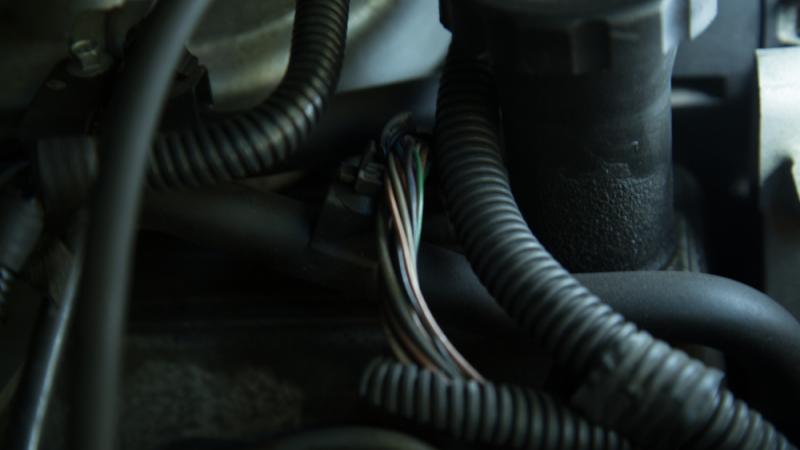
While there I spotted a potential issue. It looks like someone has re routed some wiring to be pressed against the top cover. It seems to have got hot and corroded the plastic conduit shielding. have a look.
Its to the left of the oil fill cap. and the 3/4" wire bundle is below the similar sized rubber tube. Looks to me like the wrong way round. Anyone confirm this, I have to swap them back, right? I can forsee large issues if those wires start getting compromised. Another shot of the damage to the plastic shielding. The plastic has got hot and turned very brittle. when I touch it, it breaks apart. I want to get this sorted as quick as possible. Anybody got a photo of how the wiring, and rubber tube should sit? What can I use to re-protect that wiring bundle now?
Ok, that's where I'm up to.
MOre to come. Any advice very much appreciated. I know this is very much basic stuff, but i think its great for new folk coming along to read the experiences of doing the very much recommended service. Just the shaft being swapped makes me feel much more confident.
Oh, I added the fuel treatment.
Edit. I didnt have the massive square drive tools for the transfer case and diffs. I also didnt see a fill hole for the trans case, just a drain. Off to check the rave.

First Up drive shaft. My replacement was $250. Pretty much the same as the orig, apart from the all important fully serviceable bit.
Anyone know what this little flap is, held on by one tack weld?

Fitting is pretty straight forward. I didn't get new nuts and bolts. Had assumed they might come supplied. Refitted old ones. Will inspect at next oil change when I grease up. I put the CDL and gears in N and lifted a wheel to easily spin the shaft to get to all the bolts. Dropped the wheel on the ground to loosen/tighten them.
Next Tranny oil. Drained old fluid, didnt look too bad. Entered into this with all the intentions of keeping the fluid off me. I ended up wearing about a quart by the end. Pan came off easily enough. None of the stuck/sheared bolts i read about. The fill plug was very tight, but its a big allen key (8mm) in there, its possible to give it some grunt and not worry about stripping it. The drain is smaller (5mm) and i went gently with that one. Make sure the key is properly all the way in the hole.
So, dropped pan, looks clean enough.

Back under the Disco for the filter. This is where it starts to get everywhere. Fluid is still dripping from many places, not just the drain hole now. Dabbing helps, but it just keeps coming. Anyway, filter off, again no issue with bolts at all. This is where things start to get dirty.

Im starting to suspect that someone changed the oil but not the filter. Curious I pull the filter apart and what i see is not pretty.

Flakes of red paint????

Bits of actual gritty metal. Also fluff. Which confused me a little.
The filter itself wasnt gunged up. I dont have a new one to compare it to, but it was pretty see through. Didnt look like it would restrict the flow of fluid.

So. Should I worry about what I found in there? Zipped it all back up, got about 5.5qts back in, including the Lucas trans additive. When I restarted and started slowly shifting there was a couple of nasty noises. Panicked and shut it off. Started again and it got quieter. Now its as good as new (sounding). Is that in any way normal for a trans oil swap?
Ok, Next thing is carb cleaner. Got myself a tin of the Gunk stuff. Took the big hose off the butterfly and found this..

Great, i thought, 'something to clean'. Cleaning up the butterfly, easy enough. Shop rag, squirt. Then i wanted to run the engine while spraying it into the intake. Doesnt run. Cos the MAF isnt connected? Read more here and the trik s to squirt a bit in, toothbrush it, run engine, repeat. Needed more time than I had at that moment. Will come back to that.
While there I spotted a potential issue. It looks like someone has re routed some wiring to be pressed against the top cover. It seems to have got hot and corroded the plastic conduit shielding. have a look.

Its to the left of the oil fill cap. and the 3/4" wire bundle is below the similar sized rubber tube. Looks to me like the wrong way round. Anyone confirm this, I have to swap them back, right? I can forsee large issues if those wires start getting compromised. Another shot of the damage to the plastic shielding. The plastic has got hot and turned very brittle. when I touch it, it breaks apart. I want to get this sorted as quick as possible. Anybody got a photo of how the wiring, and rubber tube should sit? What can I use to re-protect that wiring bundle now?

Ok, that's where I'm up to.
MOre to come. Any advice very much appreciated. I know this is very much basic stuff, but i think its great for new folk coming along to read the experiences of doing the very much recommended service. Just the shaft being swapped makes me feel much more confident.
Oh, I added the fuel treatment.
Edit. I didnt have the massive square drive tools for the transfer case and diffs. I also didnt see a fill hole for the trans case, just a drain. Off to check the rave.
#7
10-04-2014, 12:18 PM
Hey Rickety. I actually got the shaft you found on eBay. https://landroverforums.com/forum/di...a-69086/page7/ listing pulled now I think.
They were pretty good. I asked them a few questions and they replied with a bunch of stuff that didn't answer my questions, but apart from that, I'm happy.
Changeover was a breeze. Only one arm burn, so that can't be bad.
They were pretty good. I asked them a few questions and they replied with a bunch of stuff that didn't answer my questions, but apart from that, I'm happy.
Changeover was a breeze. Only one arm burn, so that can't be bad.
#8
10-04-2014, 12:27 PM

#9
10-04-2014, 12:28 PM

Recovery Vehicle
Great! Didn't know if that was it or not. Let us know how it works out.
1999 2000 2001 2002 2003 2004 Land Rover Discovery 2 New Upgrade ft Driveshaft | eBay
1999 2000 2001 2002 2003 2004 Land Rover Discovery 2 New Upgrade ft Driveshaft | eBay
#10
10-04-2014, 01:04 PM
Recovery Vehicle

Yea, I'm curious too! I did notice the ebay seller don't have any negative feedback and sell ALOT of driveshafts. Plus they have 1310 u-joints so, I guess we'll find out.
It probably will rust some, maybe you should spray it? I noticed some of the other like tom woods, bputah and more don't appear to be painted in the ads but, may be???
Last edited by RicketyTick; 10-04-2014 at 06:37 PM.