
Installing a Temp Gauge on a 2003 Disco II


Thread Starter
|
Three Wheeling
Joined: Jul 2010
Posts: 71
Likes: 4
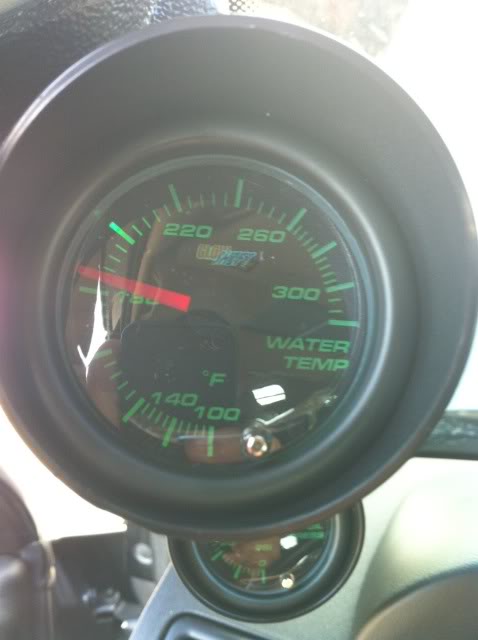
Here is a simple "how to" install a temp gauge on a 2003 Disco II. I went with the temp gauge from Glowshift. Tinted 7 Color Water Temperature Gauge
What you need:
Extra 18 Gauge Wire (Red, Black, Green, Yellow)
Splicing Pliers
3/8" Wireloom
Teflon Tape
Water Sender Attachment (32MM) 32 MM or 1 1/4 Inch Water Sender Attachment
2x "add a circuit" fuse taps
2x 3amp fuses
and some wire connectors, Everything else including the temp sender comes with the gauge out of the box.
First you need to wire up the gauge. I choose to "add a circuit" into the fuse box. The "add a circuit" connector can be purchased at your local Autoparts store for about $5 each. Dont forget to get some 3amp fuses. The red wire needs to plug into a "switched" 12v source. The black wire needs to be grounded to the vehicle, I chose to ground it to a bolt near the fuse box. The yellow wire needs to plug into an "unswitched" source, meaning a source that has constant 12v power to it when the key is not in the ignition. This is what keeps your lighting settings on the gauge when you turn the vehicle off and back on.
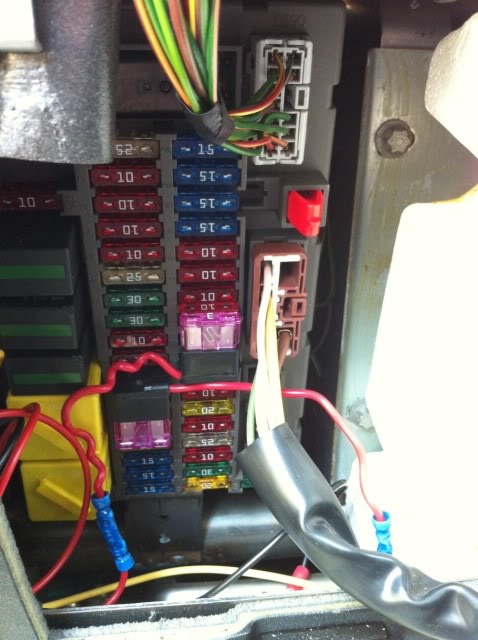
Here is my fuse box with the tap into the two fuses I chose for the red and yellow wires.
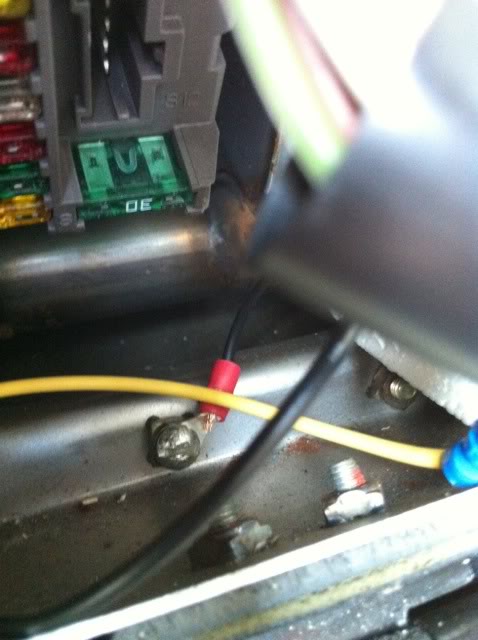
Here is where I grounded the black wire right under the fuse box.
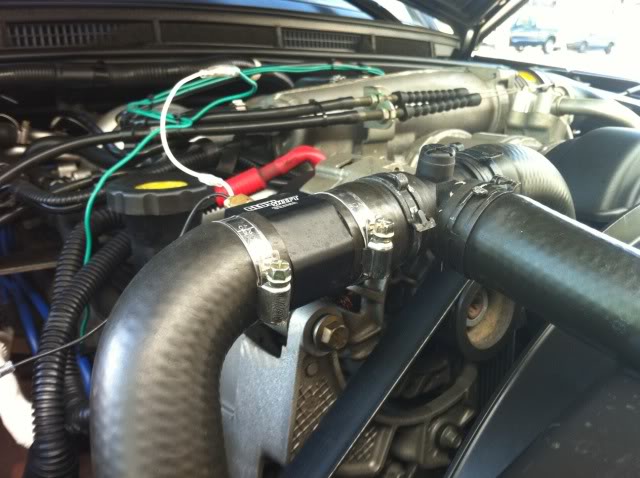
Next run the green wire through the firewall and route it neatly to the temp sender. I decided to add a wire loom for protection and neatness. The loom actually houses both of my sender wires for the water temp and oil pressure.
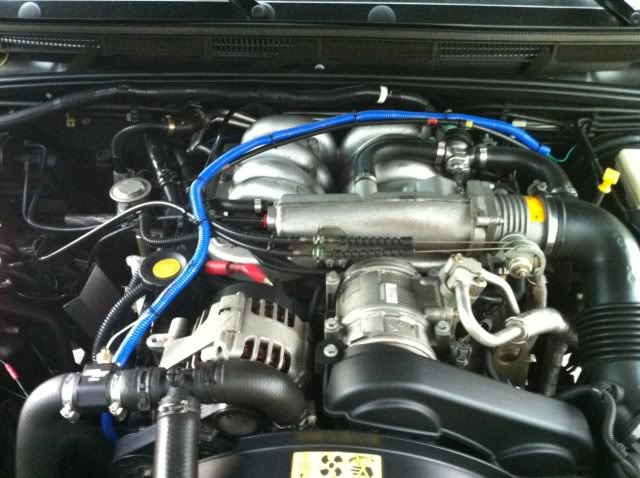
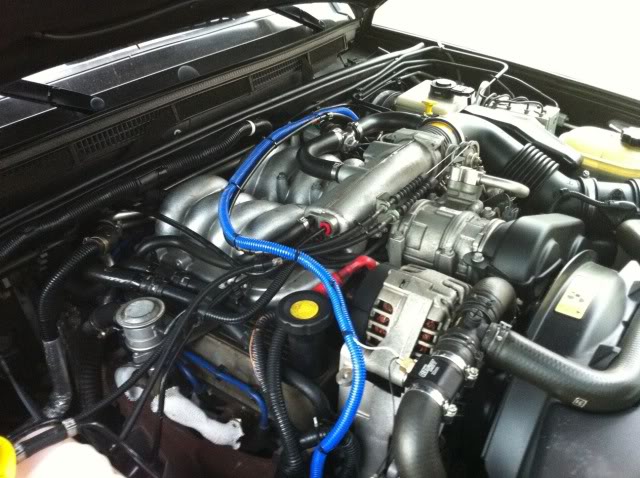
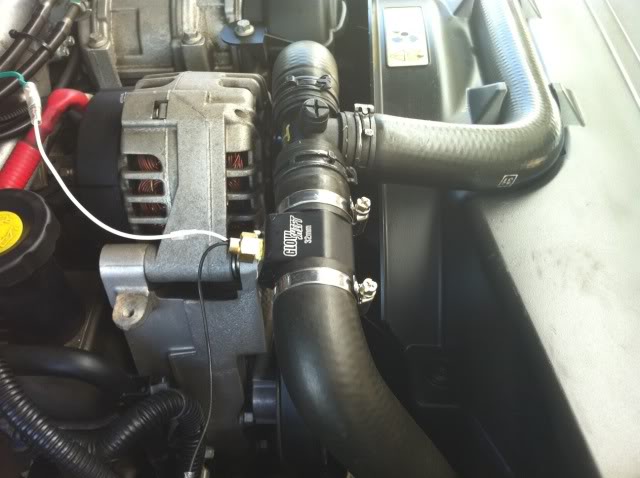
Next, cut your top radiator hose at the location shown in the picture and install the temperature sender attachment and temp sender. Dont forget to put some teflon tape on it.
Connect your green wire to the white wire from the temp sender. (wire loom was not installed yet on these pictures)
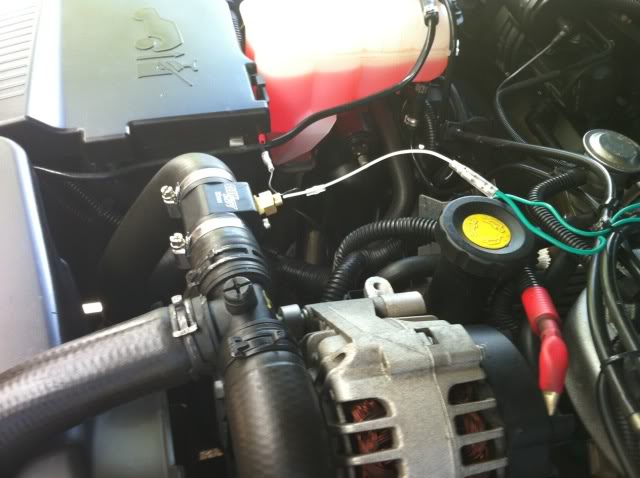

the black wire from the temp sender I grounded it to the battery.
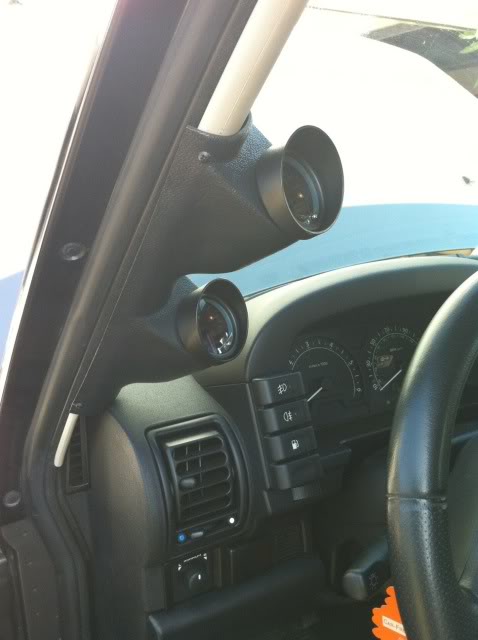
I also purchased a universal dual gauge A pillar pod and works and fits nicely! The only thing you lose is the left tweeter. I disconected it, or you can drill small holes in the A pillar pod for the sound to come out. Here it is! Universal Dual Gauge A Pillar Pod
This is what my gauges look like. In the pics the oil sender is still not hooked up, that's why its ready max.

Hope this write up was helpful.
What you need:
Extra 18 Gauge Wire (Red, Black, Green, Yellow)
Splicing Pliers
3/8" Wireloom
Teflon Tape
Water Sender Attachment (32MM) 32 MM or 1 1/4 Inch Water Sender Attachment
2x "add a circuit" fuse taps
2x 3amp fuses
and some wire connectors, Everything else including the temp sender comes with the gauge out of the box.
First you need to wire up the gauge. I choose to "add a circuit" into the fuse box. The "add a circuit" connector can be purchased at your local Autoparts store for about $5 each. Dont forget to get some 3amp fuses. The red wire needs to plug into a "switched" 12v source. The black wire needs to be grounded to the vehicle, I chose to ground it to a bolt near the fuse box. The yellow wire needs to plug into an "unswitched" source, meaning a source that has constant 12v power to it when the key is not in the ignition. This is what keeps your lighting settings on the gauge when you turn the vehicle off and back on.
Here is my fuse box with the tap into the two fuses I chose for the red and yellow wires.
Here is where I grounded the black wire right under the fuse box.
Next run the green wire through the firewall and route it neatly to the temp sender. I decided to add a wire loom for protection and neatness. The loom actually houses both of my sender wires for the water temp and oil pressure.
Next, cut your top radiator hose at the location shown in the picture and install the temperature sender attachment and temp sender. Dont forget to put some teflon tape on it.
Connect your green wire to the white wire from the temp sender. (wire loom was not installed yet on these pictures)
the black wire from the temp sender I grounded it to the battery.
I also purchased a universal dual gauge A pillar pod and works and fits nicely! The only thing you lose is the left tweeter. I disconected it, or you can drill small holes in the A pillar pod for the sound to come out. Here it is! Universal Dual Gauge A Pillar Pod
This is what my gauges look like. In the pics the oil sender is still not hooked up, that's why its ready max.
Hope this write up was helpful.
Last edited by tito5590805; Sep 7, 2010 at 11:47 PM. Reason: added wire loom pictures


Recovery Vehicle
Joined: Feb 2009
Posts: 1,151
Likes: 30
From: Denver, CO
Thats a great writeup. I am hoping to do this on Friday for the oil pressure gauge. I was going to pull off the beige A-pillar covers and paint it black. to match the gauge pillar pods . I looked all over eBay for black Discovery's interiors but looks like they are all beige A-pillar arms in Discoverys. I'll be going for the all black look. Thanks for the wiring directions. I will have to find the add a circuit at the auto parts store. I'm now waiting for your oil pressure write up. Are you going with the Sandwich oil adapter or making a brass T fitting on the front cover to incorporate the current pressure gauge?
Thread Starter
|
Three Wheeling
Joined: Jul 2010
Posts: 71
Likes: 4
Thats a great writeup. I am hoping to do this on Friday for the oil pressure gauge. I was going to pull off the beige A-pillar covers and paint it black. to match the gauge pillar pods . I looked all over eBay for black Discovery's interiors but looks like they are all beige A-pillar arms in Discoverys. I'll be going for the all black look. Thanks for the wiring directions. I will have to find the add a circuit at the auto parts store. I'm now waiting for your oil pressure write up. Are you going with the Sandwich oil adapter or making a brass T fitting on the front cover to incorporate the current pressure gauge?
Recovery Vehicle
Joined: Feb 2009
Posts: 1,151
Likes: 30
From: Denver, CO
tito5590805 Where did you find the dimming wire to patch into? The positive and ground wires are pretty simple.
Recovery Vehicle
Joined: Feb 2009
Posts: 1,151
Likes: 30
From: Denver, CO
Here is a kit worth considering for the small sender (oil) hose off the front cover and a tricked out CND'd connector for the factory oil sender & electric pressure gauge. The 10,000 psi hydraulic hose included in this kit seems trustworthy. I knew there had to be a lot of race guys doing this mod.
http://www.namotorsports.net/detail....-022/xref/base
http://www.namotorsports.net/detail....-022/xref/base
Last edited by bosshogt; Sep 2, 2010 at 12:54 AM.

Banned
Joined: Jun 2010
Posts: 1,368
Likes: 4
Here is a kit worth considering for the small sender (oil) hose off the front cover and a tricked out CND'd connector for the factory oil sender & electric pressure gauge. The 10,000 psi hydraulic hose included in this kit seems trustworthy. I knew there had to be a lot of race guys doing this mod.
http://www.namotorsports.net/detail....-022/xref/base
http://www.namotorsports.net/detail....-022/xref/base
Thread Starter
|
Three Wheeling
Joined: Jul 2010
Posts: 71
Likes: 4
tito5590805 Where did you find the dimming wire to patch into? The positive and ground wires are pretty simple.