When you click on links to various merchants on this site and make a purchase, this can result in this site earning a commission. Affiliate programs and affiliations include, but are not limited to, the eBay Partner Network.
As much as I want to return to RVa, I think the only option Sarek has is to install at his shop. Great option for the east Coasters (and maybe a great reason for me to revisit the ROAV's Mid-Atlantic Rally some day), but if you want to install them yourselves or ship them - don't think it's an option.
@Poco I installed mine last week and have driven a few hundred kms without the undergarments. Noticeably better cornering and no real increase in noise.
I see from your photos that you did not reinstall the wind deflectors? What are your plans for underbody protection? Will you cut the felt liners or go for armour?
I started to cut/reinstall the liners but they hang so much lower than the sliders, so I've left them off for now.
�What are your plans for underbody protection? Will you cut the felt liners or go for armour?
I started to cut/reinstall the liners but they hang so much lower than the sliders, so I've left them off for now.
@VillaDazzler TuffAnt are developing underbody protection, so will install that once ready.
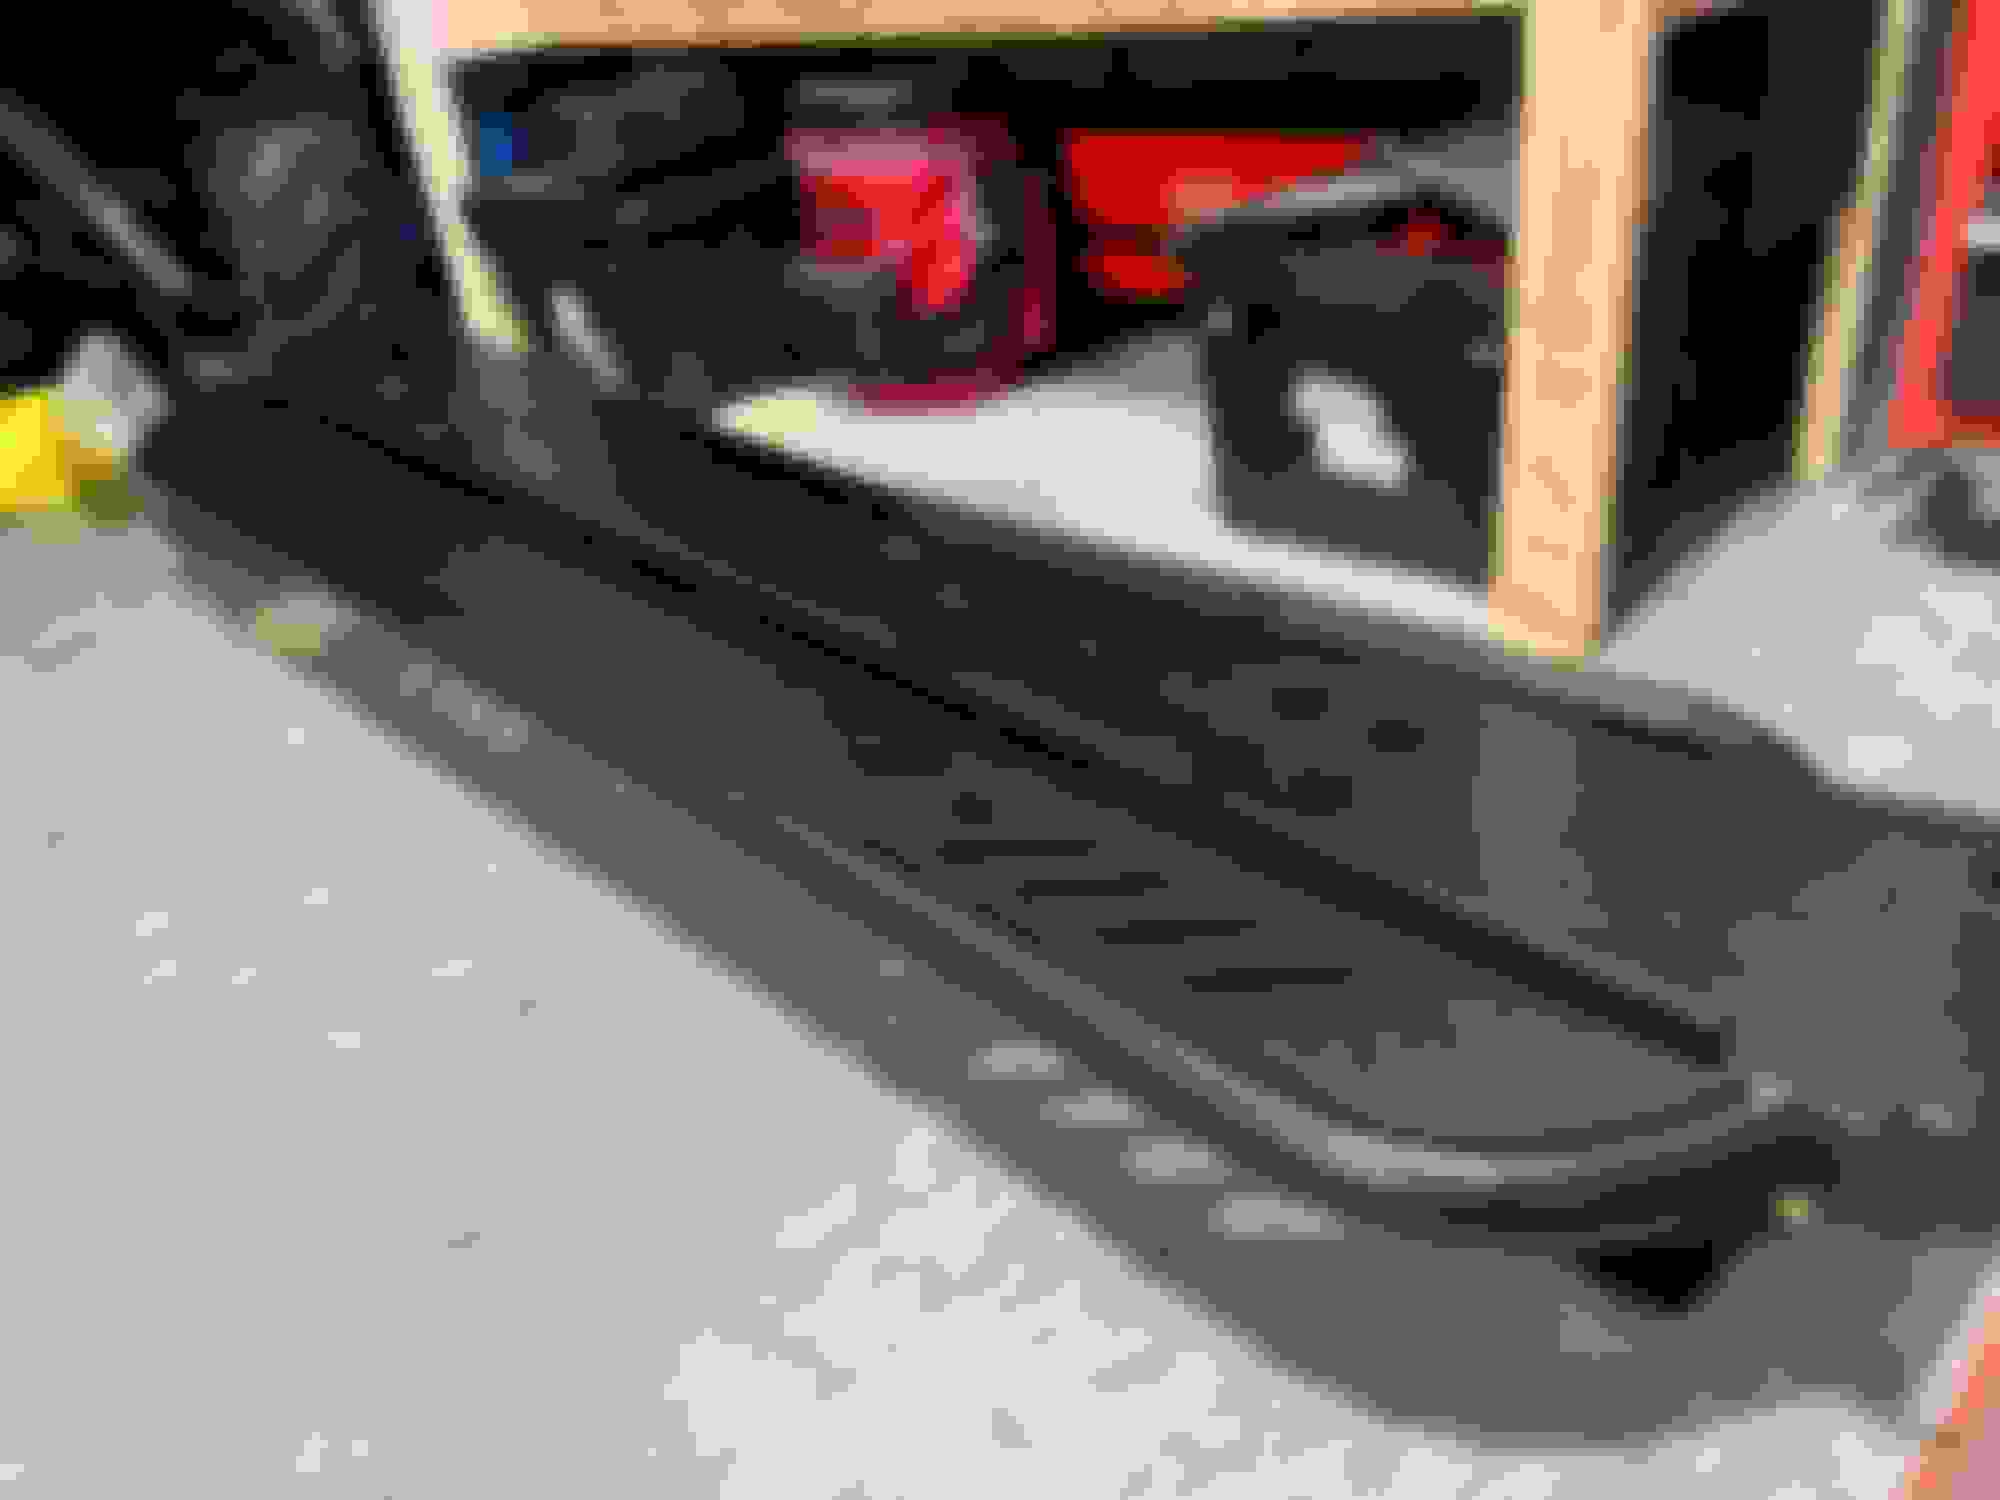
Update on my original post. I received the Lucky8 sliders and had them installed by a local installer in the LA area. My goal was to preserve some portion of the underbody sound panels after the install. The shop did an "okay" job trying to accomplish that but not quite what I had hoped for. Some pieces are simply tucked back up on top of the slider (meh okay, it's out of the way) and others were sort of lopped off and left hanging under the meat of the slider without any fasteners - this makes no sense. I haven't had time to get under there and see if there's a better way.
As for the Lucky 8 sliders themselves, they're heavy, sturdy and as advertised. The tube bars are however slippery has hell when wet, snowy or otherwise lubricated. Makes trusting them to get up to the ski rack difficult in snowy conditions. I'm hoping Lucky 8 comes out with a better non-skid platform to bolt onto them. If they don't I'm going to explore some grip tape or maybe even some super rough bed liner spray to cover the round bars. If anyone's tried anything I'd love to hear about how it worked for you.
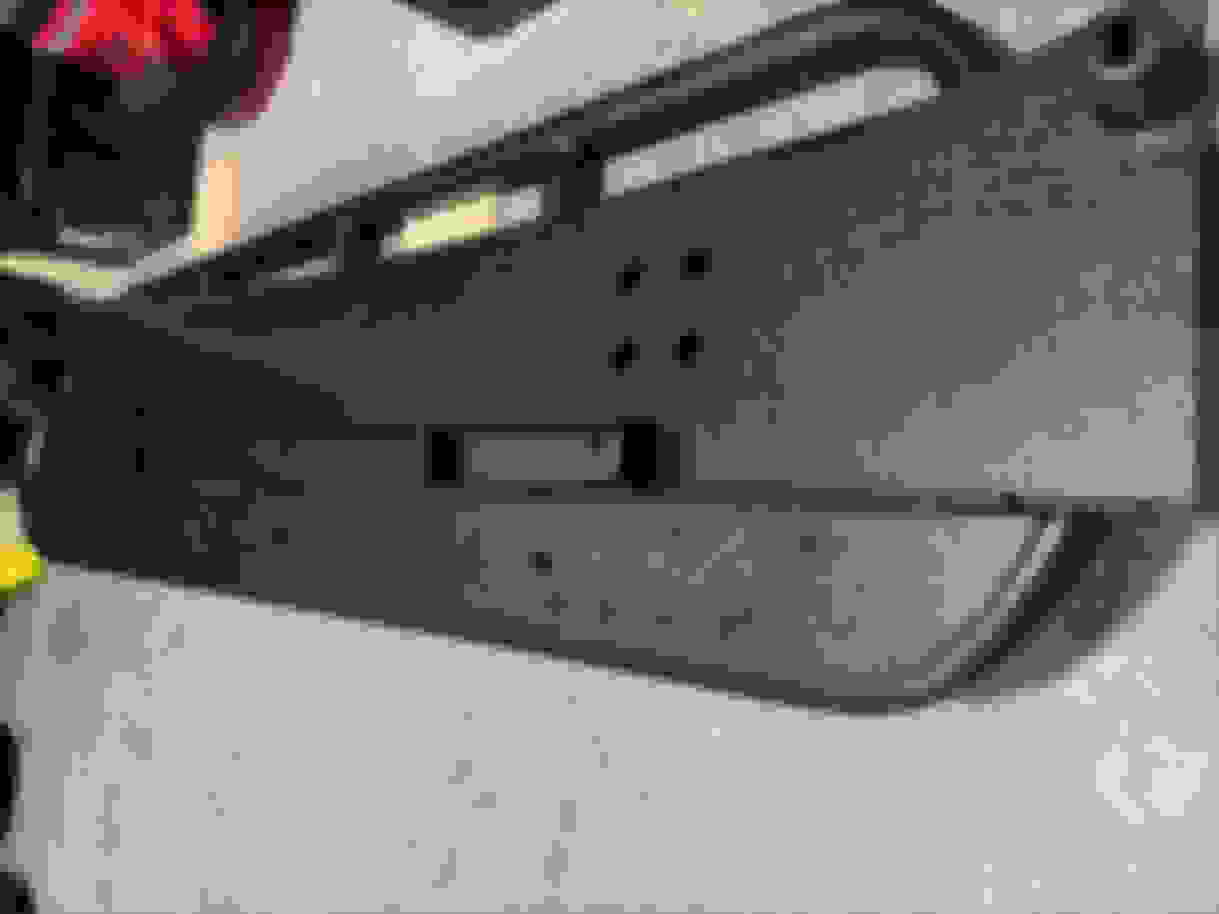
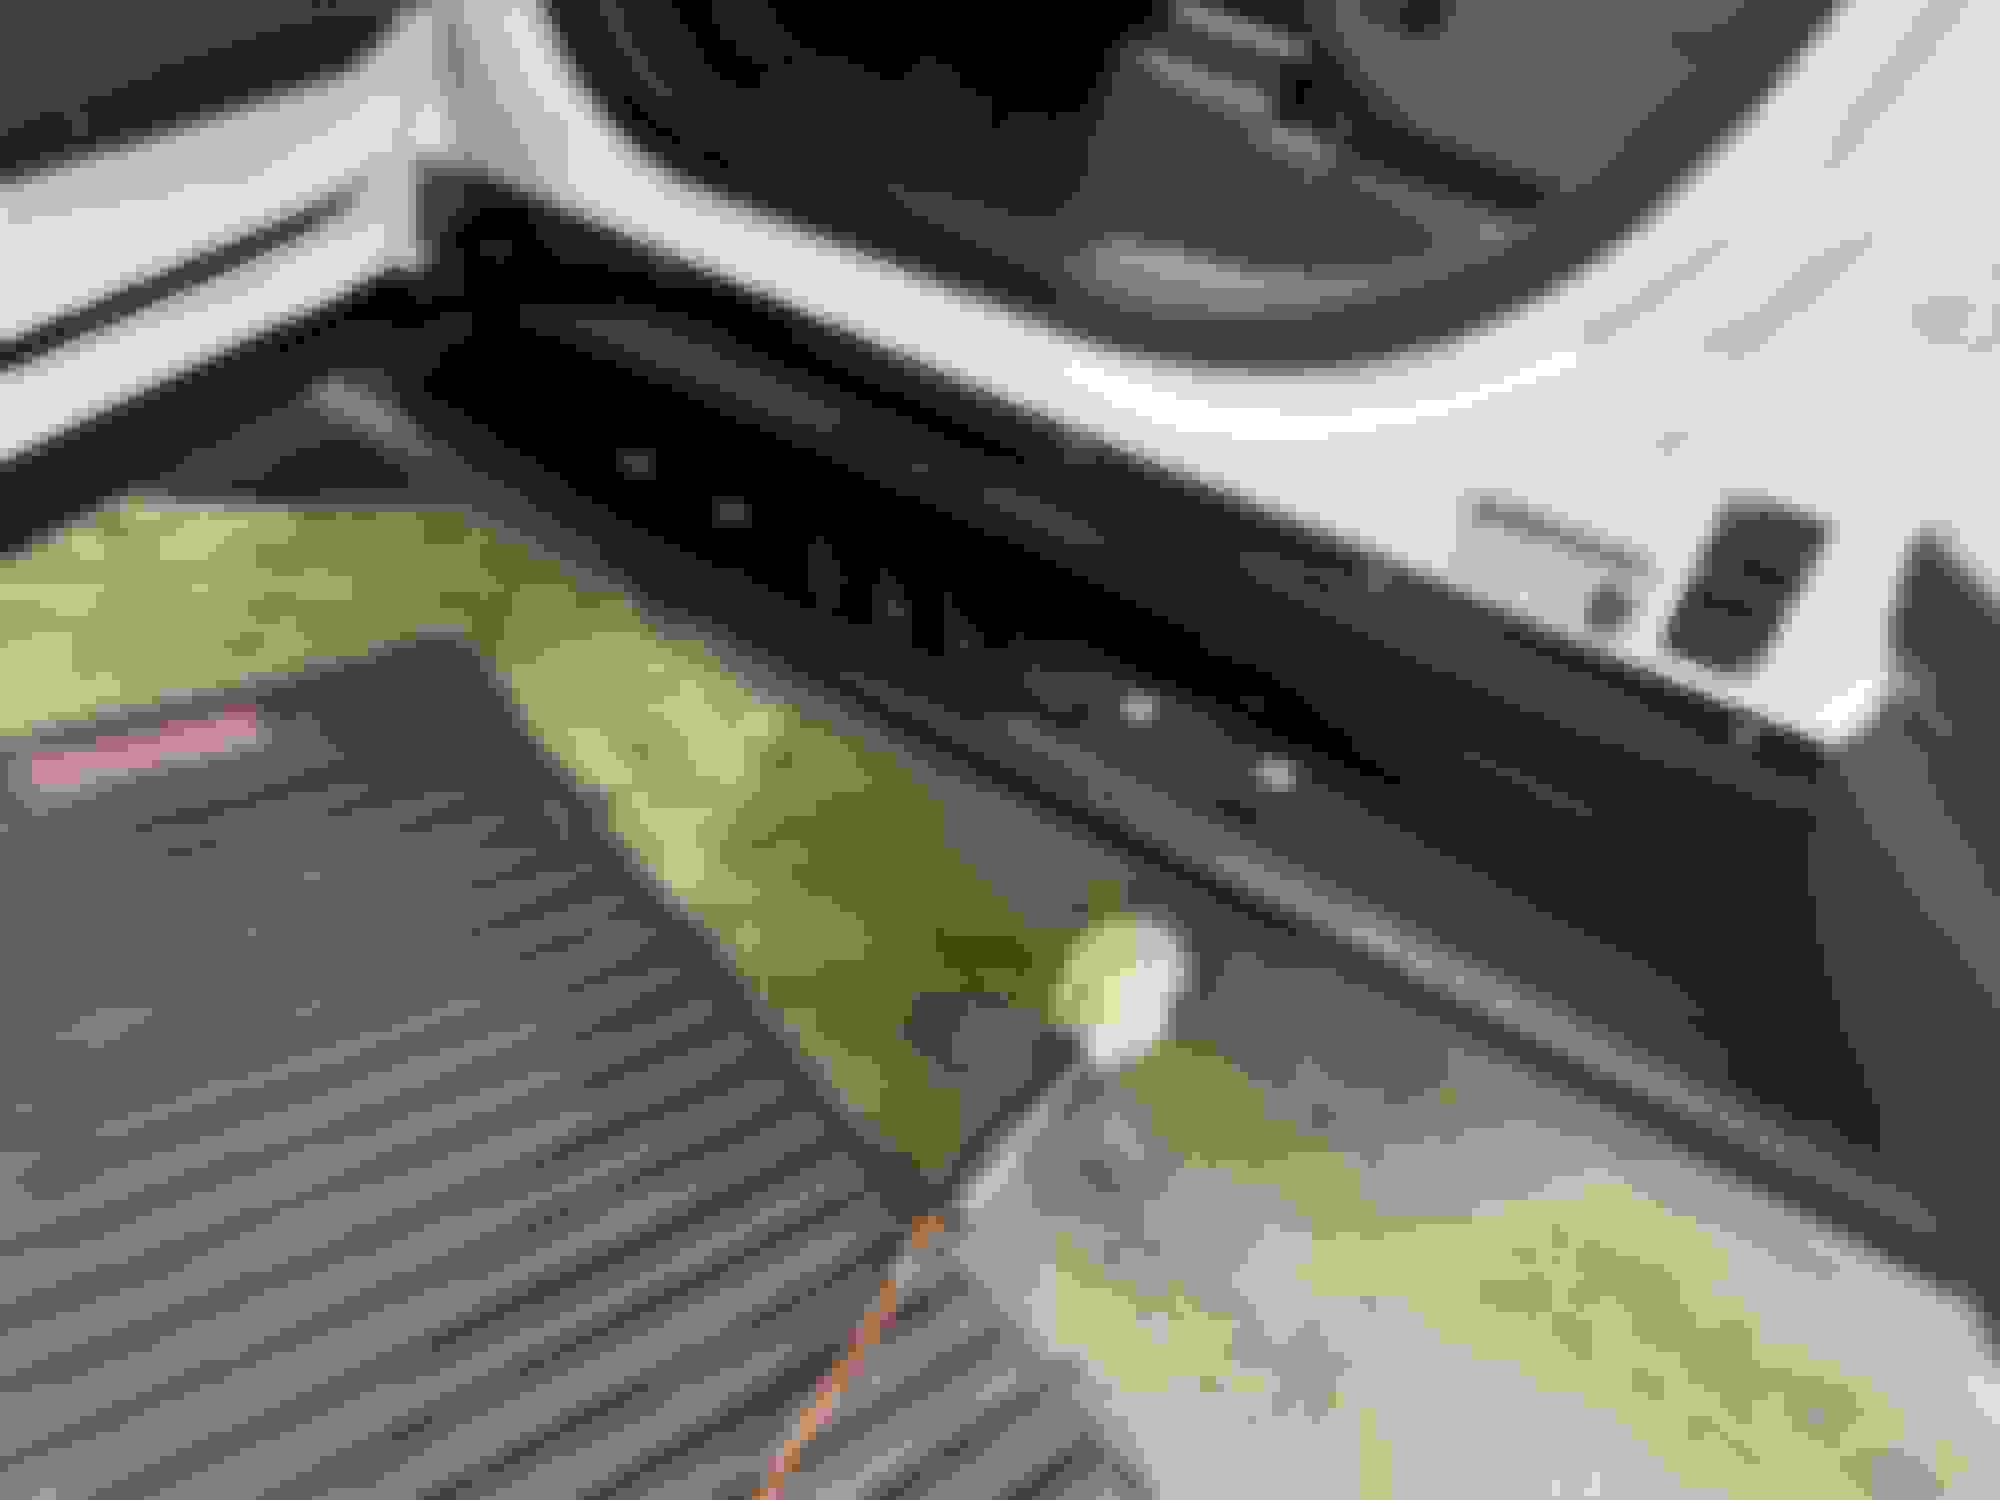
One thing I'm not confident about is the metal Lucky 8 door sill replacement. The factory plastic door sills came off and the metal replacements put on per the instructions - easy enough. However the metal replacement clangs when getting in and out of the vehicle if I hit my foot on it. Like there's a gap at the bottom of it. This feels sloppy to me and I'm pretty sure when I pull it off in the next few weeks to put some weather stripping under it I'm going to find two weeks worth of dirt and salt under there from a recent trip into the mountains. The other issue I have, and I'm not sure how the factory part sealed, but the light weather stripping along the very bottom of the door doesn't touch the strip. It leaves just a bit of space between the rubber and the new metal sill. So much in fact I can reach under the door and stick a finger up into the space between the rubber seal and the main gasket that runs inboard of the edge of the door. This doesn't seem right to me and I'm already seeing road dirt penetration up into the negative space between the two weather seels. Does this seem right or wrong to anyone? Can anyone with the OEM plastic door sills check theirs to see how tight that seel is?
On a side note, I did manage to install the front mud flaps with the Lucky 8 Sliders on. As installed, the flaps won't go on. The sill holes and mount points are gone for the flaps lower mount points (because the sill comes off) and the flap's lower crease bumps into the slider. Now I'm sure you'll say, "yeah, but if you drive over a rock then slide over that rock you'll probably rip that flap off..." Yeah, maybe. My only defense is the flap will do more work ultimately than the slider for my driving. But be that what it is, here's a rough explanation of how I got them mounted for anyone who wants to do the same. Figuring out how to do it took a day for one side, the second side took less than an hour. I hope this saves someone some time.
Part of the instructions can be followed from LRJ's site - LAND ROVER ACCESSORY FITTING INSTRUCTIONS
But in order to get the non OEM bits lined up for cutting and drilling I had to mount them into the attached body panels like our friends at Powerful UK LTD did - without removing the body panels
Safety first, there's actually two jack stands under the truck plus the floor jack that's been backed off a bit to put the weight on the stands. Check your manual for proper floor stand placement - this truck is sensitive to stand placement.
meaning - you can drill and mount the flap to the body panel without removing it and breaking the fasteners!
Sorry, no pic of the hand mount and marking -
It's easier if the metal OEM bracket is not attached to the flap at this point.
Using the first mark on the flap, you'll need to cut the slot in the flap to get the flap to overlap with the slider's protruding edge. This way you can get the flap into position with the silver bracket. You need to mark the underside of the silver bracket through hole in the flap itself, then remove the flap and the silver bracket in the next step.
After you mark the silver bracket, remove these pieces by taking out the two bolts.
It helps to have a second person holding the flap while you wiggle the bolts to get them started. It's pretty tight and a bit of a PITA.
I Line-X'ed my Lucky 8 sliders before installation as well as the tread plates ($300 at my local Line-X dealer), I did not Line-X the sills. I went with the Line-X Platinum product line with the advise from the Line-X tech. With the Line-X the sills sit very flush and do not "clang" against the sliders when they are hit with my foot. The install was straight forward, the front mud flaps was a bit of a pain but over all the install was easy. I did re-attach most of the fiber boards (sides and the fiber board under the skid plate) with extensive trimming and re-use of the factory brackets and hardware, I have to modify the brackets but the underside of the defender had a lot of unused riv-nuts that came in handy. I used blind stainless hardware for the tread please and painted all of the hardware with a black textured paint that can be easily touched up when needed.
The extra weight added to the defender downlow, it changed the center of gravity. I feel it drives more "planted" and feels less top heavy. Furthermore, it feels smoother over small bumps around town. I really like the way it drives now.
Overall I am very impressed with the Lucky 8 sliders especially with the Line-X and tread plates. I plan on adding the side brush bars from New Defender Mods soon to complete my bar work.

 11-29-2022, 08:23 AM