When you click on links to various merchants on this site and make a purchase, this can result in this site earning a commission. Affiliate programs and affiliations include, but are not limited to, the eBay Partner Network.
Well, as many of you may know...my Dll adventures have come to an end (for now), and l'm focusing my attentions elsewhere. Mainly on a new project build, 1990 Defender 110. Needed to step away from the Discovery's for a bit, no hard feelings...just wanted to go low tech/old school. I've been a mechanic for forty some years and watched the industry change, and have progressed with it. But, there is something pleasant about getting back to your roots.
So, over the 4th of July weekend my wife and l drove to Vermont to acquire the 110 (just short of 2000 miles). She's a little rough around the edges, but is very mechanical sound. Former owner had done a 2" lift - coils/bilstein shocks, bump-stops, tires and rims and a few other odds and ends. He also threw in a new radiator, hoses, some lights, HD adjustable tracking bar, tie-rods/bar and draglink. She has exceptionally good bones and is worth whatever happens to her in the future, as far as improvements go.
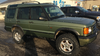
Her first day at home.
The "real" Deputy watched as l drove up the drive.
Obviously, he was not impressed...
Some pictures...
Hopefully, this topic has a happier ending than the last couple build topics l've started.
First order of business was removing decals. Eventually, fresh paint will be added, so they had to go sooner or later. Plus, l really didn't care for them...and was already tired of being asked what it stood for (which l have no idea).
So, county, county, county, county is gone for good.
Installed steering components. New HD track bar, draglink, tie-rods and tie bar. Pretty straight forward job, no snags.
Forgot to mention, the previous owner put the TF rock sliders on.
Took the old girl out back through the field and drainage ditch, wanted to see how the low range and CDL worked. Well, she's a beast...ever bit as capable as my old 01. It is absolutely amazing the difference CDL makes, on both rovers.
Especially since l was trying to get away from all of the electrical issues going old school. Anyhow, took the 110 to my parents to show them the day after buying. Sister was there and asked if all of the lights work. Since l hadn't checked them before buying, we checked them there. Left rear tail light was out...no biggy...right? Get home and find a loose wire that had grounded out and blew the fuse for tail light, make repair and seems good. Next morning, before leaving for work...check them again. Well lowandbehold...the right rear tail light is out now. Remove lens, bulb good, wiring in back, behind panel is good...so l go to the fuse box again. Just touch the fuse for the right rear tail light...and it arcs slightly...hmmm...loose connection, check light...working. Next morning, l'm running through the lights again (paranoia starting to set in) and another light is out...but it's the right front marker light this time. Remove lens, bulb is just laying loose inside, wedge it back in socket and it works. The previous owner had given me a complete set of new marker lights, so l grabbed one to replace this bad one once l got to work. Get to work and at lunch l go out to change complete light assembly...but when l turn on the lights...the left front marker light is now out! I'm like???...what in tarnation is going on with this thing...lol. So, the left marker light gets replaced instead. Day four...all lights were working!!!
I wish I could one for under 25000 - 30000 up here, anything under that is a restoration project mostly Just a heads up frame and body rust is real issue on older Defenders, when you get a chance give the underside a really good inspection.
But looks good, our local Rover group has a lot of them they go everywhere
Awesome.
Im patiently waiting for that day I pick up my first defender.
Ironically, I�ve seen plenty in the last month (and seemingly only in the past month or so) with that decal application. I was also thinking the like; I don�t care for it, wonder what time period it was popular & what it�s significance, design execution was.
Sorry about the picture quality, three in the morning is the only time l can find for shooting photos.
Still undecided about front bumper. Part of me wants a full brushguard model (ARB), but then the basic lines of a normal bumper with just a winch mount attracts my eye too. I've got time to decide...my wallet is about as slim as a pancake lately.