
Disco won't start without a jump.


Thread Starter
|
Winching
Joined: Mar 2010
Posts: 749
Likes: 4
From: Briar, TX
Ok so the title makes it kinda sound like a dumb question but here's the full Monty. The battery is a year old and is carrying a full charge when tested. When it starts there is no dragging from the starter. I have cleaned up the battery connections and all my ground points. The disco acts dead when the key is turned as in no click no cabin lights nothing. And I mean nothing. Hook up the jumper cables and she fires right up. Doesn't even need a second. Connect the cables, walk around to drivers seat, turn the key, fires right up. So given the above I want to see what other suggestions you guys have to figure this out. I really thought it was gonna be a grounding issue since it starts so easily when the cables are hooked up. Anyway start throwing out suggestions.

My vote is a bad ground. When you hook the jumpers up you are getting a good ground via the other battery. Are you going directly from post to post or clamping the neg cable to a body/frame ground? I will bet it works post to post but not grounded to the frame. I was going to guess battery, but if it holds a charge it should at least light the dome light or something.
How odd.
How odd.
Last edited by photocrimes; Feb 14, 2011 at 09:48 PM.

Thread Starter
|
Winching
Joined: Mar 2010
Posts: 749
Likes: 4
From: Briar, TX
That's what I thought to guys but I redid them again today just to rule it out. It just occurred to me that maybe my negative cable is corroded internally. I am gonna replace it and see if that takes care of the problem. I will report back. Thanks guys.

Baja
Joined: Mar 2010
Posts: 5,584
Likes: 7
From: Pittsburgh PA suburbs.
I was going to suggest an internal problem with that negative battery cable. I have a new battery cable on mine and cut the existing ground tab off my starter ground cable, stripped it and crimped a new lug on it. I then attached the new lug in a new location directly to the side of the frame with a large self drilling body bolt.
It works great now.
It works great now.

Baja
Joined: Sep 2007
Posts: 5,232
Likes: 52
From: Georgia, USA
I always remove the starter to chassis cable and make a new one running from the starter to the chassis where the battery to chassis cable attaches.
Brandon, what type of terminals did you use?
If these:
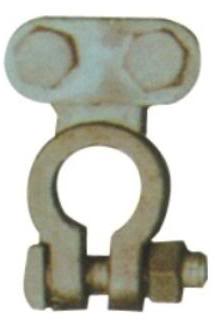
consider them a temporary repair.
For permanent cables lugs you want ends something like this:
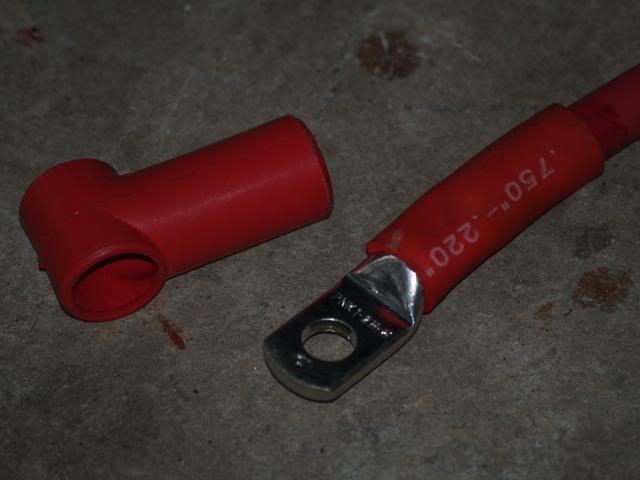
With a milspec terminal.
Brandon, what type of terminals did you use?
If these:
consider them a temporary repair.
For permanent cables lugs you want ends something like this:
With a milspec terminal.

Mudding
Joined: Apr 2010
Posts: 140
Likes: 2
From: With the boss
Before changing the + and - wires, use your volt meter!
Connect the volt meter from the battery post to the other end of the wire
Like -'ve at the battery to the groung and when you crank, if you see voltage increasing you have found the problem. (and the +'ve to the starter post)
Often there is corrosion inside the wire. If the corrosion is between the wire and the connector, it burns out under high current and breaks the connection for high current but ok for low current drain. This also causes a problem with charging: the voltage that the regulator reads is higher than the battery actually is and it undercharges.
I always solder my connections, anything else is unacceptable.
SD
Thread Starter
|
Winching
Joined: Mar 2010
Posts: 749
Likes: 4
From: Briar, TX
Hey Antichrist I didn't put new ends on the existing cable just redid the ground/frame connection like DannyLee. When I do the new negative cable I will go with the lugs. Soccerdad thanks for the tip. I will test it again just to make sure. DannyLee thanks for the tip. I did that about a year ago when she stranded me in the Wal-Mart parking lot and redid it yesterday. Thanks for all the help guys. Gonna be a few days before I can get around to working on her again. I will report back. Thanks again.
Baja
Joined: Mar 2010
Posts: 5,584
Likes: 7
From: Pittsburgh PA suburbs.
I guess you could solder it with a torch. A solid crimp will usually more than suffice when properly crimped. Not everyone has access to a good crimper for that size. And most soldering irons would be inadequate.
I think Tom will sell you a great set of cables (best bet).
I think Tom will sell you a great set of cables (best bet).
Mudding
Joined: Apr 2010
Posts: 140
Likes: 2
From: With the boss
Danny, put a piece of fiberglass ("pink" will do, else a piece of glass cloth) inside the torch burner. Light it up as usual and when the glass is red hot, blow the flame out. The red hot glass will keep the propane burning without a flame.
PS: use a tin can to shield the wire insulation from melting.
Try it, you'll love it.
SD
PS: use a tin can to shield the wire insulation from melting.
Try it, you'll love it.
SD