
Refinishing Your Rear Bumper

Thread Starter
|
4wd Low
Joined: Sep 2012
Posts: 14
Likes: 0
From: Salt Lake
I'm sure there are many people like me who have a rusted and/or dented bumper so I thought I would share the simple process of bringing back the luster of your rear bumper. Note that if the rust is too bad or it is really dented you will need a replacement.
Tools and Supplies
1. Socket Set to Remove Old Bumper
2. Xylene or Xylol
3. 150 grit Sandpaper
4. 600 grit sand paper
5. Self-Etching Primer
6. Chassis Paint w/primer (your choice of color)
7. Clear Coat (for gloss and seal)
8. Plastic Adhesion Paint
9. Cheap microfiber rags that can be thrown away
Directions
1. Obtain a replacement bumper from your local salvage yard. I got mine for 30.00 and it came with the end caps and lights (it was a lucky find)
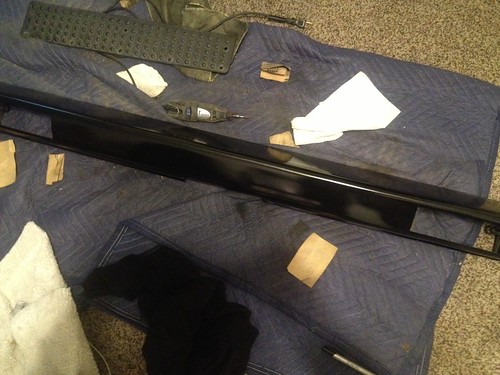
2. First prep the new bumper by coating the rags with xylene and rubbing until the black outer coating is gone and you will be left with a greenish primer. This will take about 45min.
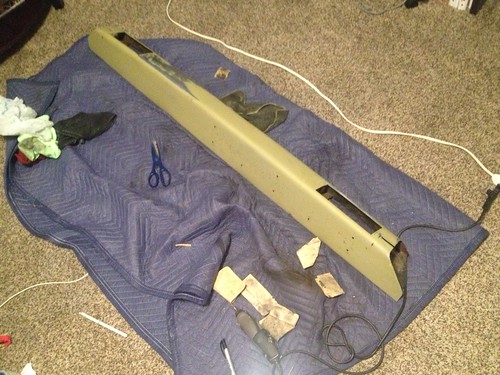
3. Now begin to sand down the surface to bare metal so that you find all of the rust spots. This will take about 1 hour.
4. Now sand down the rust spots until the rust is no longer visible. I used a dremel for the really difficult parts. This will take about 30min.
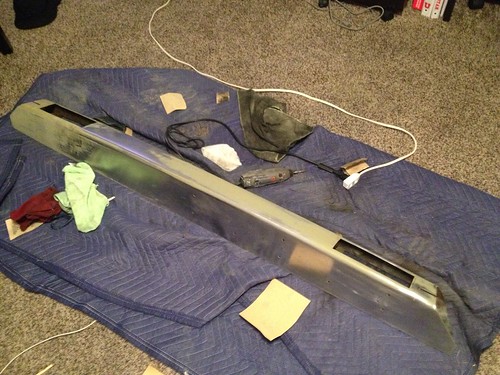
5. Again take the Xylene and really clean and prep the surface to remove all dust and dirt. (do not use water since you just removed all of the rust)
6. With in 30min of sanding lay down the primer (follow the directions on the can). Timing is very important because if you leave it out with bare metal the rust will return.

7. Next lay down 2-3 coats of the Chassis paint with in 35-40 min for best adhesion.
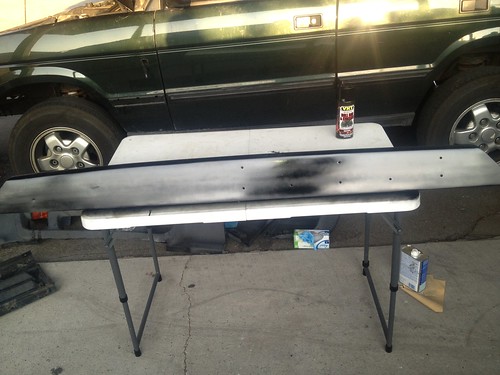
8. Lastly lay down final clear coat and let bumper set over night.
9. End caps should now be lightly sanded with 600 grit sandpaper and cleaned thoroughly.
10. Using a good plastic adhesion paint do 2-3 coats and let sit at least overnight if not 24 hours.
11. Lastly Remove and install bumper by reading the Rave Manual or watch this youTube video:
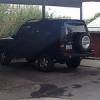
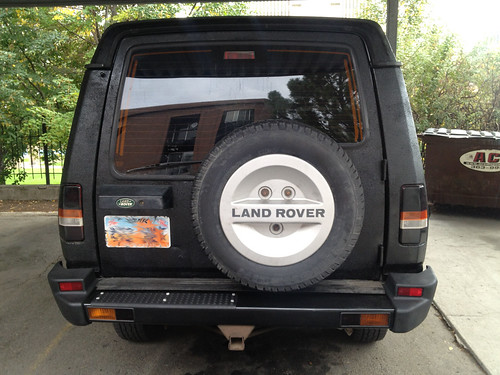
Here it is installed:
I hope this was helpful, if you have any questions PM me.
Tools and Supplies
1. Socket Set to Remove Old Bumper
2. Xylene or Xylol
3. 150 grit Sandpaper
4. 600 grit sand paper
5. Self-Etching Primer
6. Chassis Paint w/primer (your choice of color)
7. Clear Coat (for gloss and seal)
8. Plastic Adhesion Paint
9. Cheap microfiber rags that can be thrown away
Directions
1. Obtain a replacement bumper from your local salvage yard. I got mine for 30.00 and it came with the end caps and lights (it was a lucky find)
2. First prep the new bumper by coating the rags with xylene and rubbing until the black outer coating is gone and you will be left with a greenish primer. This will take about 45min.
3. Now begin to sand down the surface to bare metal so that you find all of the rust spots. This will take about 1 hour.
4. Now sand down the rust spots until the rust is no longer visible. I used a dremel for the really difficult parts. This will take about 30min.
5. Again take the Xylene and really clean and prep the surface to remove all dust and dirt. (do not use water since you just removed all of the rust)
6. With in 30min of sanding lay down the primer (follow the directions on the can). Timing is very important because if you leave it out with bare metal the rust will return.
7. Next lay down 2-3 coats of the Chassis paint with in 35-40 min for best adhesion.
8. Lastly lay down final clear coat and let bumper set over night.
9. End caps should now be lightly sanded with 600 grit sandpaper and cleaned thoroughly.
10. Using a good plastic adhesion paint do 2-3 coats and let sit at least overnight if not 24 hours.
11. Lastly Remove and install bumper by reading the Rave Manual or watch this youTube video:
Here it is installed:
I hope this was helpful, if you have any questions PM me.
Last edited by Rover_Mike; Sep 25, 2012 at 11:22 PM.


Pro Wrench
Joined: Oct 2010
Posts: 1,669
Likes: 2
From: San Juan, Puerto Rico
no but i want to see more of it.

Rock Crawling
Joined: May 2006
Posts: 303
Likes: 0
From: Fairfax, VA
Geat write-up, thanks ! I need to do this. Everything that's steel on my truck has begun to rust. The stock running boards went by the boards first. They rusted out right under the rubber coating. Fortunately, most of the body is aluminum, otherwise I'd be in deep doo-doo.

Thread
Thread Starter
Forum
Replies
Last Post
maxman
Discovery II
24
Jan 28, 2015 08:08 PM
bcolins
Retired - Private 'Wanted' Classifieds
5
Jun 22, 2013 08:55 PM
DiscoWest
Discovery II
9
Sep 23, 2009 10:15 AM