
ARB bumper 99 to 02 versus 03 to 04


Super Moderator
Joined: Nov 2009
Posts: 5,847
Likes: 106
From: Arkansas
Yeah you have to splice those connectors on the 03 too. It should have come with pigtails. I don't think I ever hooked mine up, but I did put them in to fill the hole.
I'll send you a pm about the washers.
I'll send you a pm about the washers.


Thread Starter
|
Camel Trophy
Joined: Nov 2012
Posts: 3,717
Likes: 248
From: Longview, Texas
Only reservation is that if you have to take the bottom off, as I did, for a bumper, what is left on the bottom of the grill is not very substantial. I've already driven on the highway and it was fine but I am going to affix a metal strip across the inside of the bottom of the grill next time I take it off. If you don't have to cut the bottom off it is very substantial. And, in any case, if you have to replace the metal part it is just another 2.49 cents.
Last edited by Charlie_V; Jan 28, 2015 at 06:25 AM.
Thread Starter
|
Camel Trophy
Joined: Nov 2012
Posts: 3,717
Likes: 248
From: Longview, Texas
I probably should have put the turn signals in when I had it off but the installation was not immediately apparent to me and I didn't want to bother with the instructions just then (cold, late, cussing too much). It did come with pigtails. I put it all back in the envelope with the unused instructions for future study.
Exclusive of adhesive drying time that grill took maybe 45 minutes. Easiest modification I have ever made. The expanded metal is on the roofing aisle at home Depot and costs 2.49 cents. I didn't have to cut it at all. The metal is a pretty close match for the lower radiator metal. It comes with two little hinges that come off easily with pliers.
Only reservation is that if you have to take the bottom off, as I did, for a bumper, what is left on the bottom of the grill is not very substantial. I've already driven on the highway and it was fine but I am going to affix a metal strip across the inside of the bottom of the grill next time I take it off. If you don't have to cut the bottom off it is very substantial. And, in any case, if you have to replace the metal part it is just another 2.49 cents.
Only reservation is that if you have to take the bottom off, as I did, for a bumper, what is left on the bottom of the grill is not very substantial. I've already driven on the highway and it was fine but I am going to affix a metal strip across the inside of the bottom of the grill next time I take it off. If you don't have to cut the bottom off it is very substantial. And, in any case, if you have to replace the metal part it is just another 2.49 cents.
Thread Starter
|
Camel Trophy
Joined: Nov 2012
Posts: 3,717
Likes: 248
From: Longview, Texas
 . . I was going to get one for Christmas but then the price changed and I am in Texas so I have to pay sales tax on top of that. I had a 'cheap" twinge. It is a nice looking bumper and DiscoMike said they are well built. I really like his bumper but I couldn't get anyone to make it. Now that the oilfield has idled so many welders where I live I might have had better luck now or soon. But if you look at my before picture you'll probably understand why I was in such a hurry.

Three Wheeling
Joined: Nov 2014
Posts: 76
Likes: 2
From: Midland, TX
Are the horizontal slots on the front on each side for the turn signals you mentioned? Do you know the approx, size of these holes? I'm leaning towards this bumper now and curious if I can throw some small LED light bars on each side.
Thread Starter
|
Camel Trophy
Joined: Nov 2012
Posts: 3,717
Likes: 248
From: Longview, Texas
I'll just put a tape measure in front of it tomorrow (in the light) and snap a shot of the included light.
Thread Starter
|
Camel Trophy
Joined: Nov 2012
Posts: 3,717
Likes: 248
From: Longview, Texas
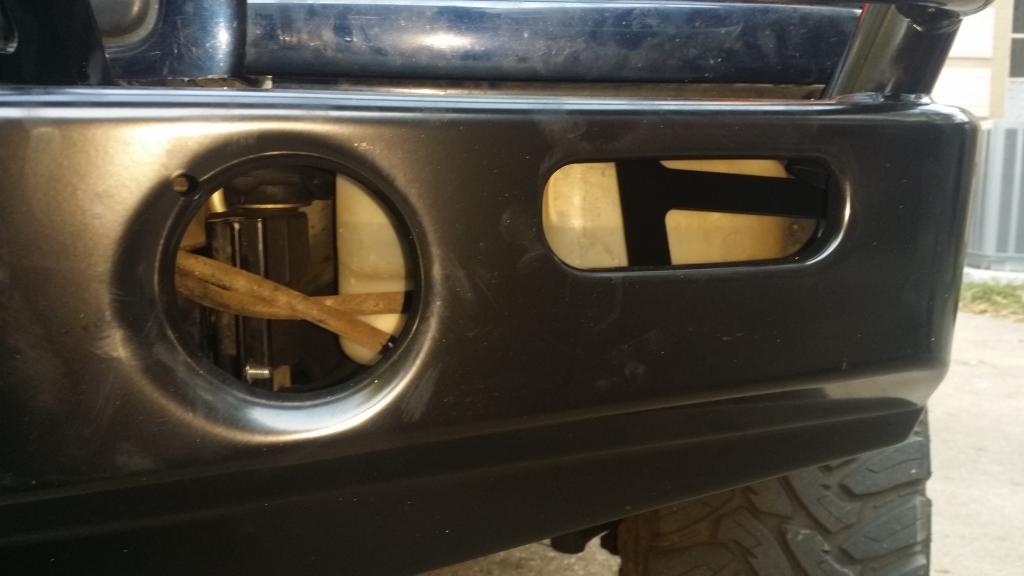
Okay here is what I have. First, the openings for lights in the face of the bumper.
I've taken some measurements (best I could do... Flash ruins pictures but without it you can't see anything).
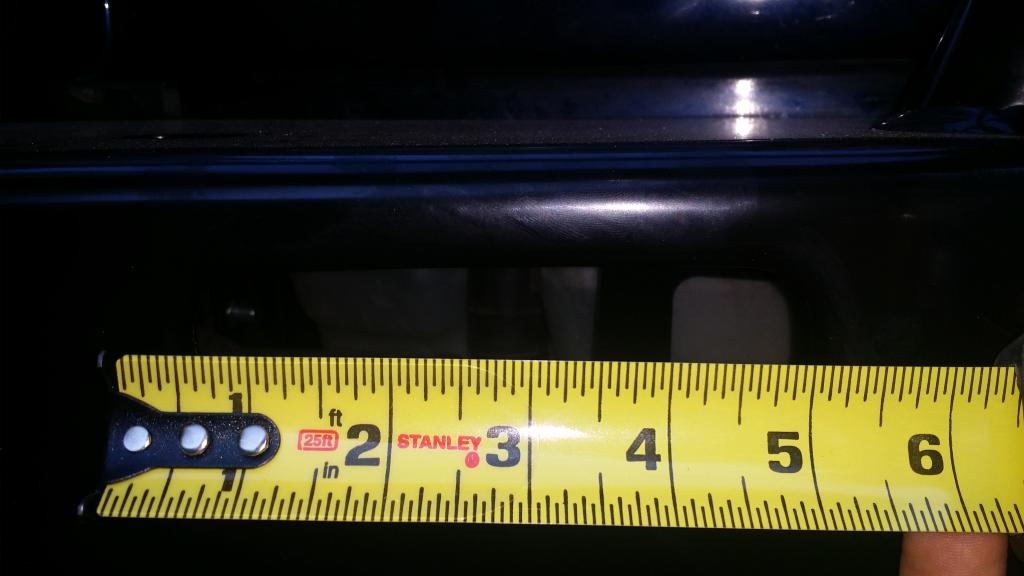
That is 5 inches wide. Now for the circular opening.
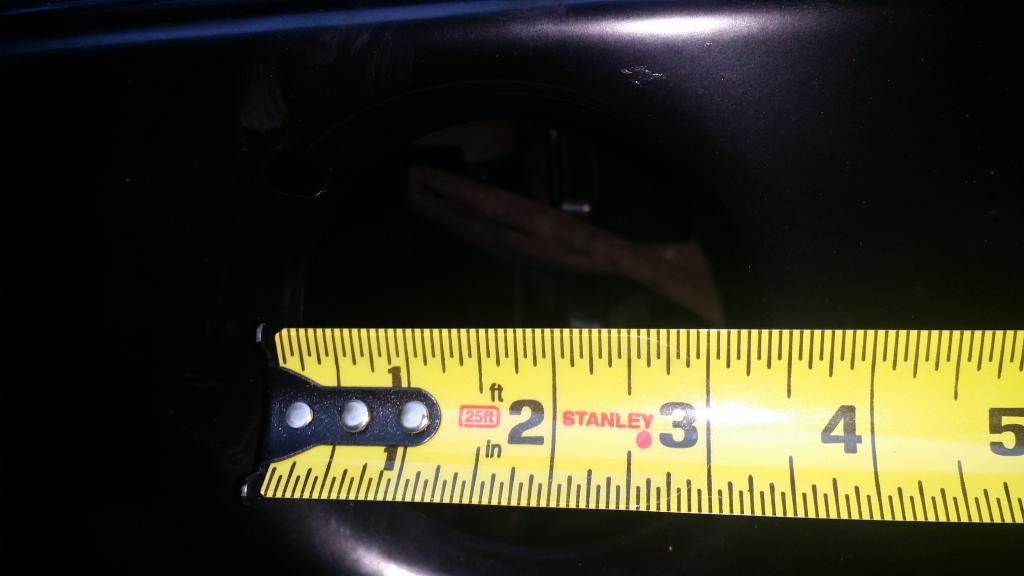
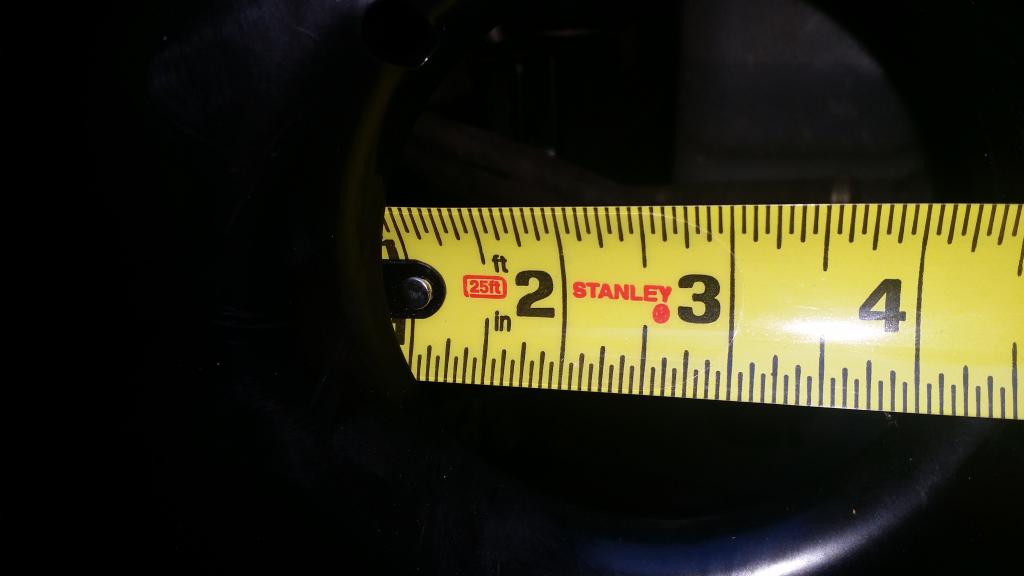
That is 4 inches wide. There is a bracket inside, recessed 1 inch.
And here is a picture of the included lights. 6.5 inches wide.
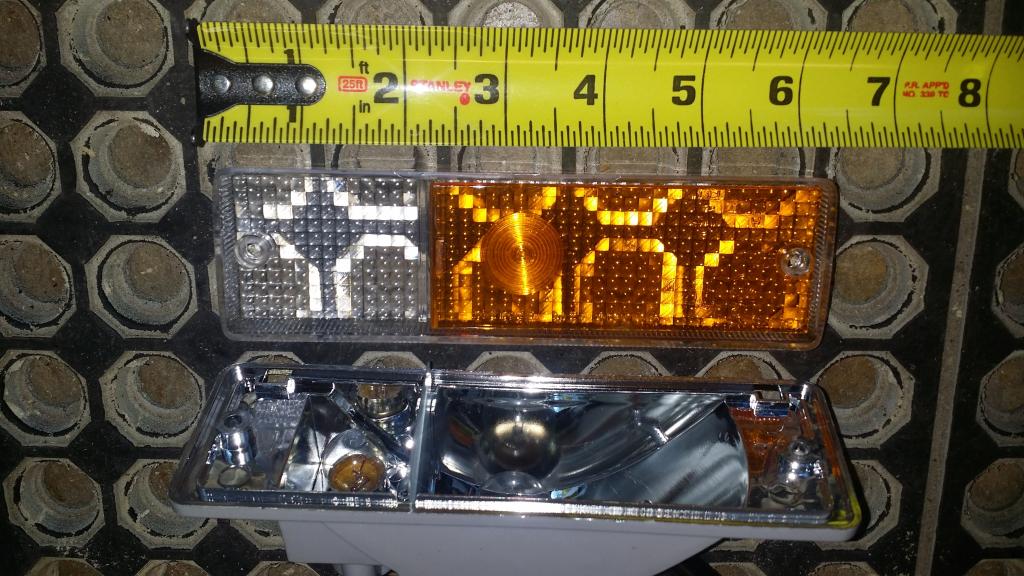
Hope that helps!
I've taken some measurements (best I could do... Flash ruins pictures but without it you can't see anything).
That is 5 inches wide. Now for the circular opening.
That is 4 inches wide. There is a bracket inside, recessed 1 inch.
And here is a picture of the included lights. 6.5 inches wide.
Hope that helps!
Last edited by Charlie_V; Jan 29, 2015 at 09:04 AM.
Thread Starter
|
Camel Trophy
Joined: Nov 2012
Posts: 3,717
Likes: 248
From: Longview, Texas
Also, I found the can I used to spray the grill. It is called flexidip.
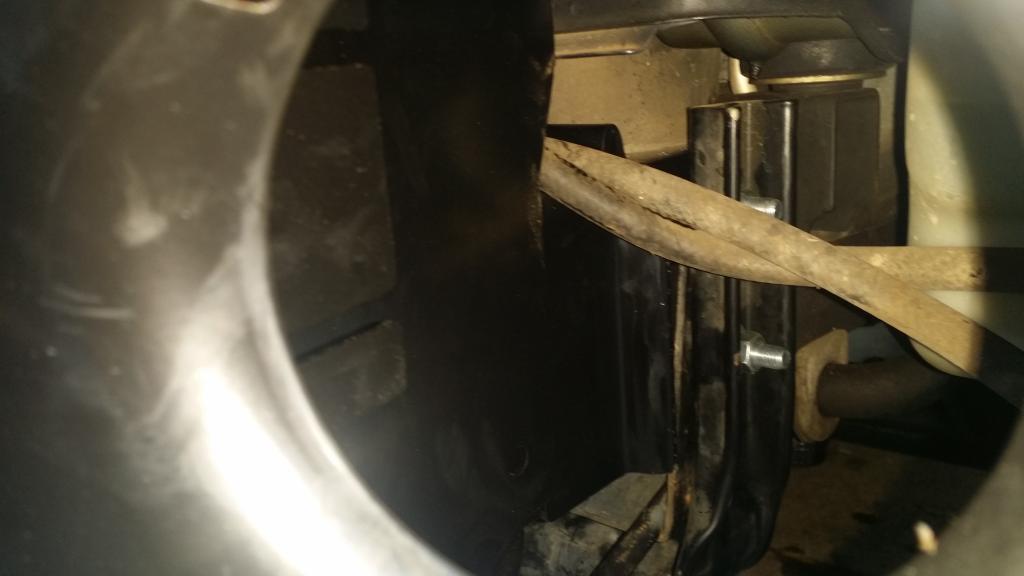
Finally, I failed to mention that standard length drill bits will not work for the two pins that are actually bolts that go vertically through the frame. They are just too short. That is a major problem. I have one pin on each side at the moment but I need to finish the holes for the additional ones.
I have chassis paint from Harbor freight for all of my new holes (3.99).