
Big project coming up: radiator, hoses, heater plate & Vale Covers


Thread Starter
|
TReK
Joined: Aug 2011
Posts: 3,167
Likes: 87
Money is slowly flowing in again and now Im getting things up to date on my 2004 D2. I want to replace the radiator, cooling hoses, heater plate and the valve cover gaskets. I'm hoping to do it all on my own over the span of 2 days. Im going to do a engine flush on the engine and a distilled water flush on the cooling system. Ive looked over the rave a bit and ive been browsing the forums and videos on youtube for guidance. BUT I'm still pretty nervous about doing all this work on my own. I depend on my D2 to get me to and from work and cannot call out of work so I want to do everything right the first time. So can anyone here provide me with some further support? Instructions or tips?
I think Ill be fine getting the radiator out and replaced, I read all about the oil cooler line that needs to be disconnected from the radiator. The heater plate looks like an easy job to and should not take me long to do. Ive done an engine flush before on other vehicles so thats good. But im worried about the cooling hoses. The big hoses near at the top of the engine bay seem easy enough but the thinner hoses that go around the back and down in the engine bay concern me. Will I need any special tools to remove/replace those hoses? What about the valve cover gaskets? How much of my engine will I have to tear apart to replace them? Will I need to use any special tools or do any sanding before I install the new gaskets? I will be doing the cooling flush the old fashioned way without any water hose.....
PS: Already have the 180 grey thermostat and UG installed and so far my temps are around 188-195 and no known coolant leaks. 145k.
Last edited by TRIARII; Aug 5, 2014 at 08:02 PM.

Recovery Vehicle
Joined: Jan 2012
Posts: 1,064
Likes: 16
From: San Antonio,Tx
For the valve cover gaskets you will have to take the upper intake off. You will need to replace the plenum gasket (gasket between upper and lower intake manifolds). A tip for the valve cover gaskets: I could never get my passenger side gasket to seal right because it is harder to get the cover back on than the drivers side, and the gasket would never stay in place during install. I used RTV on the gaskets this last time and I have been leak free for 20K now.
There is a channel in the gasket that the valve cover sits in. I put RTV in that channel and then put it on the valve cover while it was off the truck. The RTV helped hold the gasket onto the cover while I moved it into place. I also put a small amount of RTV all around the head where the gasket sits. (Don't over do it with the RTV)
Use loctite on the valve cover bolts to help stop them from coming loose.
_______________________________________
Which coolant hoses are you worried about? The ones that run to the water pump or the thin plastic hose that go to the TBH.
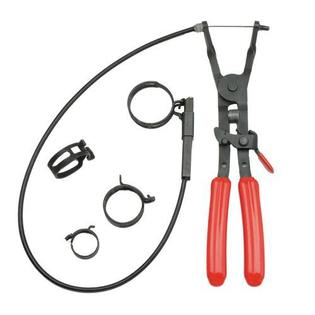
Some cable operated hose clamp pliers will make removing and installing the hose clamps easy. Sears.com
There is a channel in the gasket that the valve cover sits in. I put RTV in that channel and then put it on the valve cover while it was off the truck. The RTV helped hold the gasket onto the cover while I moved it into place. I also put a small amount of RTV all around the head where the gasket sits. (Don't over do it with the RTV)
Use loctite on the valve cover bolts to help stop them from coming loose.
_______________________________________
Which coolant hoses are you worried about? The ones that run to the water pump or the thin plastic hose that go to the TBH.
Some cable operated hose clamp pliers will make removing and installing the hose clamps easy. Sears.com
Last edited by Jared9220; Aug 5, 2014 at 08:41 PM.
Thread Starter
|
TReK
Joined: Aug 2011
Posts: 3,167
Likes: 87
Is the plenum gasket the same thing as the "inlet manifold gasket"? GASKET INLET MANIFOLD V8 3.5/3.9/4.0/4.2, PLV004, LKJ500020 - Rovers North - Classic Land Rover Parts
Also I have new exhaust manifold gaskets, I was going to have a mechanic install those for me but depending on the location maybe I could do those while I have the upper intake off?
Also I have new exhaust manifold gaskets, I was going to have a mechanic install those for me but depending on the location maybe I could do those while I have the upper intake off?
Recovery Vehicle
Joined: Jan 2012
Posts: 1,064
Likes: 16
From: San Antonio,Tx
Is the plenum gasket the same thing as the "inlet manifold gasket"? GASKET INLET MANIFOLD V8 3.5/3.9/4.0/4.2, PLV004, LKJ500020 - Rovers North - Classic Land Rover Parts
Also I have new exhaust manifold gaskets, I was going to have a mechanic install those for me but depending on the location maybe I could do those while I have the upper intake off?
Also I have new exhaust manifold gaskets, I was going to have a mechanic install those for me but depending on the location maybe I could do those while I have the upper intake off?
No that is the Valley pan gasket. That is under the lower intake and you are not going that far.
This is the plenum gasket I was talking about.
GASKET INLET UPPER-LOWER 4.0/4.6 1999 ON, PLD308, ERR6621 - Rovers North - Classic Land Rover Parts
Do you have the y-pipe to manifold, or manifold to heads gaskets?
Neither are really hard to replace in my opinion. Some people have reported breaking the manifold bolts, but I soaked everything with liquid wrench and never had and issue. If the mechanic is going to charge you $50 then have him do it, but if it's in the $100's then save the money and fix it yourself.
Last edited by Jared9220; Aug 5, 2014 at 10:24 PM.
Thread Starter
|
TReK
Joined: Aug 2011
Posts: 3,167
Likes: 87
No that is the Valley pan gasket. That is under the lower intake and you are not going that far.
This is the plenum gasket I was talking about.
GASKET INLET UPPER-LOWER 4.0/4.6 1999 ON, PLD308, ERR6621 - Rovers North - Classic Land Rover Parts
Do you have the y-pipe to manifold, or manifold to heads gaskets?
Neither are really hard to replace in my opinion. Some people have reported breaking the manifold bolts, but I soaked everything with liquid wrench and never had and issue. If the mechanic is going to charge you $50 then have him do it, but if it's in the $100's then save the money and fix it yourself.
I have all the gaskets for the manifold ready to be installed and i dont mind ordering new bollts, cause I live in New England - no point in hoping bolts wont snap cause they always do. Thanks for the input on the manifold upper gasket thing, I will have to order that then. Sounds like i have work cut out for me then but it will be a pleasant learning experience. Yeah the mechanic quoted me $250 for the exhaust manifold gaskets and another $150 to have my front and rear pinion axle seals replaced. So Im trying to figure out what things I can learn/do on my own to save money.
Recovery Vehicle
Joined: Jan 2012
Posts: 1,064
Likes: 16
From: San Antonio,Tx
I have all the gaskets for the manifold ready to be installed and i dont mind ordering new bollts, cause I live in New England - no point in hoping bolts wont snap cause they always do. Thanks for the input on the manifold upper gasket thing, I will have to order that then. Sounds like i have work cut out for me then but it will be a pleasant learning experience. Yeah the mechanic quoted me $250 for the exhaust manifold gaskets and another $150 to have my front and rear pinion axle seals replaced. So Im trying to figure out what things I can learn/do on my own to save money.
I just replaced my Catalytic converter with a Magnaflow replacement and I had to replace those gaskets also. I found that after I install the new gaskets I had a pretty good exhaust leak making a lot of noise. To help find where the leak was coming from and tighten it up I used a little trick.
If you crawl under the truck and have someone (with gloves on) put a towel over the exhaust. It will force air out of any of the gaskets that aren't sealed tight and make them easier to find. I reached my hand up by the y-pipe to manifold gasket and when my wife put the towel over the exhaust I could really feel the air leaking. I would tighten the botls up a little and have her put the towel over it again and check for more air. I kept tightening and checking until I felt and heard no more air. Now the truck runs much better, is super quite, there is no more exhaust smell.
(Don't hold the towel over the exhaust for more than 10-15 seconds at a time and take care not to burn yourself on the hot exhaust.)
Pro Wrench
Joined: Apr 2013
Posts: 1,626
Likes: 325
From: BC, Canada
I was working on my radiator replacement today: https://landroverforums.com/forum/di...acement-68516/
Word of advice..... there is no need to disconnect the oil cooler lines. This will save you time from having to top up the transmission fluid. Plus, you will not have to deal with an oil mess.
You simply remove the mounting points between the radiator and the oil cooler.... then slip the oil cooler and oil lines from under the radiator. You will most likely need another pair of hands when doing this, that is, one person to lift the radiator while another person tries to move the oil cooler/oil lines from under the radiator.
Mounting oil cooler to the new radiator is a little tricky. I was lucky to have two pairs of hands while I did this.
One useful tip.... the oil cooler mounts to the radiator at two bottom points of the radiator. The passenger side mounting point held on by a screw into the plastic brackets on the radiator. The other mounting point of the oil cooler is at the same bottom level on the driver side. This particular mounting point has a L-shaped flange which slots into a plastic joint on the radiator at the bottom. The plastic joint is rectangular in shape with a very tiny slit where the L-shaped flange fits in. I used a hacksaw to cut an opening at the top of the plastic slip joint. This allows the L-shape flange to "drop" into the slit. The top slit will make it easier to maneuver the L-shaped flange into the plastic slip joint as you have limited movement with the oil cooler lines wrapped around the outer edges of the radiator. I hope this makes sense.
Good luck with your project!
Last edited by acg; Aug 6, 2014 at 12:45 AM.

Thread
Thread Starter
Forum
Replies
Last Post
Corrigan
Retired - Private For Sale/Trade Classifieds
0
Apr 26, 2013 02:38 PM
dinandan
Retired - Private For Sale/Trade Classifieds
6
Jun 12, 2007 05:36 PM
dinandan
Retired - Private For Sale/Trade Classifieds
0
Jun 6, 2006 09:26 AM