
Bleeder Screw for Radiator T-hose fitting


I know this is older thread. Before I saw this I build my own without the Bleeder.
I have few questions.
the 3 extension pipe what sizes were they? did you keep the Thread on the pipe end or cut it off?
Any part numbers would be helpful too. this is what I have now.
Thanks
I have few questions.
the 3 extension pipe what sizes were they? did you keep the Thread on the pipe end or cut it off?
Any part numbers would be helpful too. this is what I have now.
Thanks

TReK
Joined: Feb 2009
Posts: 2,186
Likes: 200
From: Linden, NJ
I know this is older thread. Before I saw this I build my own without the Bleeder.
I have few questions.
the 3 extension pipe what sizes were they? did you keep the Thread on the pipe end or cut it off?
Any part numbers would be helpful too. this is what I have now.
Thanks
I have few questions.
the 3 extension pipe what sizes were they? did you keep the Thread on the pipe end or cut it off?
Any part numbers would be helpful too. this is what I have now.
Thanks

If you decide to go for a smooth ends, get the copper one and drill and tap the valve on the Tee. Dont forget to solder or use jb weld after. Copper and brass material can be soldered together but not the regular pipe youre using. Cheers!
Last edited by LR03NJ; Jan 24, 2017 at 05:00 PM.

Three Wheeling
Joined: Jun 2008
Posts: 67
Likes: 4
I bypassed my factory thermostat after trying to bleed the cooling for days and two attempts with Airlift II.
The complex or complicated flow passage of these coolant system combined with trapped air does not allow the thermostat to open when needed causing things to get hot.
I bypassed the thermostat but did not put any bleed screw. I have put about 2000 miles with no ill effect other than running solid 188.6 or under.
Discovery 2 system is supposed to self bleed from the top of the block through the throttle body warmer and top of the radiator to the reservoir. With in line (bypassed thermostat) system the one directional flow forces the air travel with the coolant and self bleeds better.
Well, I am going to keep the way it is now but will work on the T connector and Bleeder for now. I have never had issues so far.
I need to understand more what happens to the other hoses. I saw some bypass pic but from the top. May be something I will work on the side down the road.
Thanks
I need to understand more what happens to the other hoses. I saw some bypass pic but from the top. May be something I will work on the side down the road.
Thanks

Pro Wrench
Joined: Apr 2015
Posts: 1,387
Likes: 111
From: Dallas, TX
Its not easy to get all of the air out. I know there is still air trapped if I'm getting a slight 3-5 degree fluctuation that theoretically shouldn't be occurring, and this is at least 1-week after the refill & initial coolant bleed via RAVE procedure and all other variants. There are many owners out there thinking that they completely purged the air out but its just highly unlikely. The engine won't overheat or anything drastic but you will still be getting a fluctuation up at operating temp that would otherwise be non-existent. I don't have the factory coolant hose routing any longer, but when I did it took a half-dozen or more attempts over the course of a week before I felt confident the air was out.
At full operating temp and getting those small 3-5 degree spikes, I would pull the truck over and crack that bleeder valve just enough where it starts spraying scalding hot antifreeze all over the place for 30 seconds or 40 seconds, heater on, heater off, parked uphill, parked downhill, parked on a curb front wheels up, and any other scenario you have read or heard about. Like I said, after about 6-8 times of doing this well above thermostat threshold and coolant at full flow, you are bound to push what little air out that remains and the full operating temp will be more consistent.
I was reading the theory on D2 self-bleeding via TB and radiator return outlets, and although practical, its just not so. At least not in any of my cases and that's quite a few...probably a dozen in the past 1.5 years. I started using another method which involves getting the engine up to temp with the catch tank propped up on the bottle jack, pressure cap removed in order to push every bit of air out. The procedure is much more detailed and extensive but that's the short version.
Last edited by chubbs878; Jan 26, 2017 at 10:42 AM.
Pro Wrench
Joined: Apr 2015
Posts: 1,387
Likes: 111
From: Dallas, TX
Well, I am going to keep the way it is now but will work on the T connector and Bleeder for now. I have never had issues so far.
I need to understand more what happens to the other hoses. I saw some bypass pic but from the top. May be something I will work on the side down the road.
Thanks
I need to understand more what happens to the other hoses. I saw some bypass pic but from the top. May be something I will work on the side down the road.
Thanks
Thank you Joe. couple of questions.
do you have a complete part list ?
I see a step by step here but missing all pic. (https://landroverforums.com/forum/di...d-32216/page2/)
I see Glowshift water sender did it have temp sensor? or is it just for bleeding purpose only?
what other hoses did you have to get?
Thanks
do you have a complete part list ?
I see a step by step here but missing all pic. (https://landroverforums.com/forum/di...d-32216/page2/)
I see Glowshift water sender did it have temp sensor? or is it just for bleeding purpose only?
what other hoses did you have to get?
Thanks
Pro Wrench
Joined: Apr 2015
Posts: 1,387
Likes: 111
From: Dallas, TX
Thank you Joe. couple of questions.
do you have a complete part list ?
I see a step by step here but missing all pic. (https://landroverforums.com/forum/di...d-32216/page2/)
I see Glowshift water sender did it have temp sensor? or is it just for bleeding purpose only?
what other hoses did you have to get?
Thanks
do you have a complete part list ?
I see a step by step here but missing all pic. (https://landroverforums.com/forum/di...d-32216/page2/)
I see Glowshift water sender did it have temp sensor? or is it just for bleeding purpose only?
what other hoses did you have to get?
Thanks
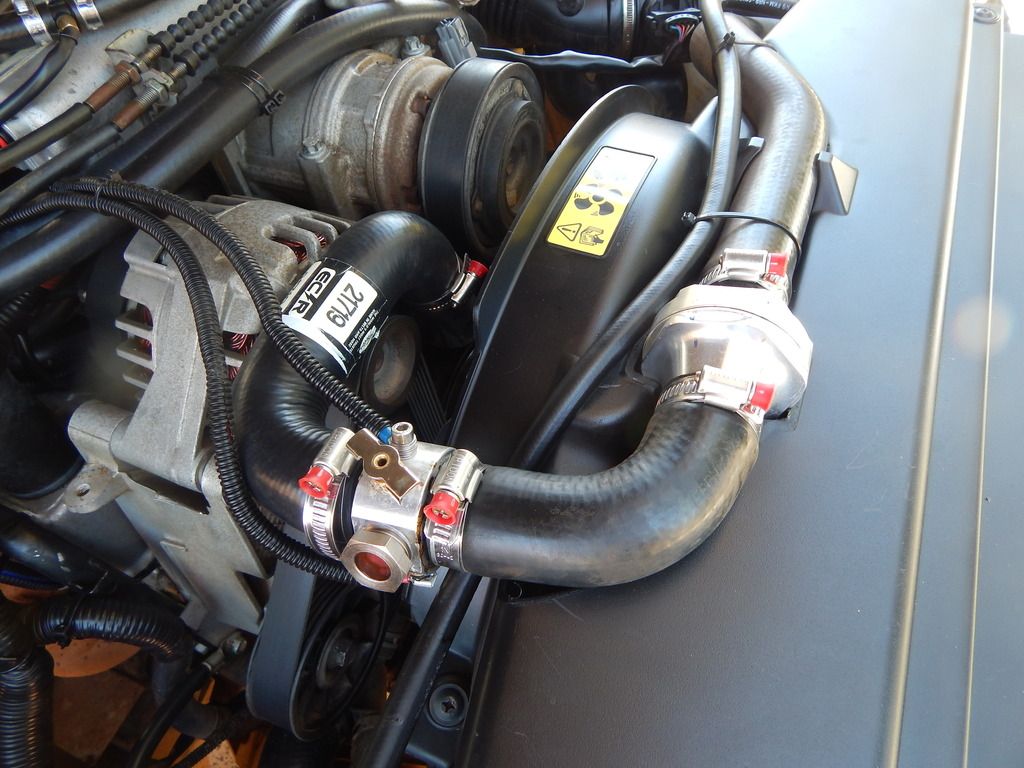
Stant Superstat 45358
1.25 / 32mm Glowshift sender (comes with threaded sensor, purchase the extended wiring and ACT standard expandable fuses x5 pack)
water temp gauge (MaxTow is the best, white 7-color is next best)
A-pillar pod
Meziere WN0071, 1.25-inch inline housing
buy these 2 hoses. the small 1 with 90-degree bend is cut out of your original hose.
*** I just found these pictures so when you research them and look up the part numbers make sure that they are 1.25-inch like your original top hoses. I haven't investigated the hoses myself but they are the best for this modification that I have yet to see. If they are 1.5 it will probably still work with a Meziere WN0072 1.5-inch housing, but then the water temp sender adapter become the issue as you still have to adapt over to the 1.25 inch original hose that goes over the radiator cowling. Just look into it is all that I'm saying. I will be looking for these hoses 1 day, myself. The thermostat should really be closer to the water outlet and then the sender after it. I have actually since changed mine from the picture I previously posted.


Last edited by chubbs878; Jan 27, 2017 at 08:04 AM.
Stant Superstat 45358
1.25 / 32mm Glowshift sender (comes with threaded sensor, purchase the extended wiring and ACT standard expandable fuses x5 pack)
water temp gauge (MaxTow is the best, white 7-color is next best)
A-pillar pod
Meziere WN0071, 1.25-inch inline housing
buy these 2 hoses. the small 1 with 90-degree bend is cut out of your original hose.
*** I just found these pictures so when you research them and look up the part numbers make sure that they are 1.25-inch like your original top hoses. I haven't investigated the hoses myself but they are the best for this modification that I have yet to see. If they are 1.5 it will probably still work with a Meziere WN0072 1.5-inch housing, but then the water temp sender adapter become the issue as you still have to adapt over to the 1.25 inch original hose that goes over the radiator cowling. Just look into it is all that I'm saying. I will be looking for these hoses 1 day, myself. The thermostat should really be closer to the water outlet and then the sender after it. I have actually since changed mine from the picture I previously posted.
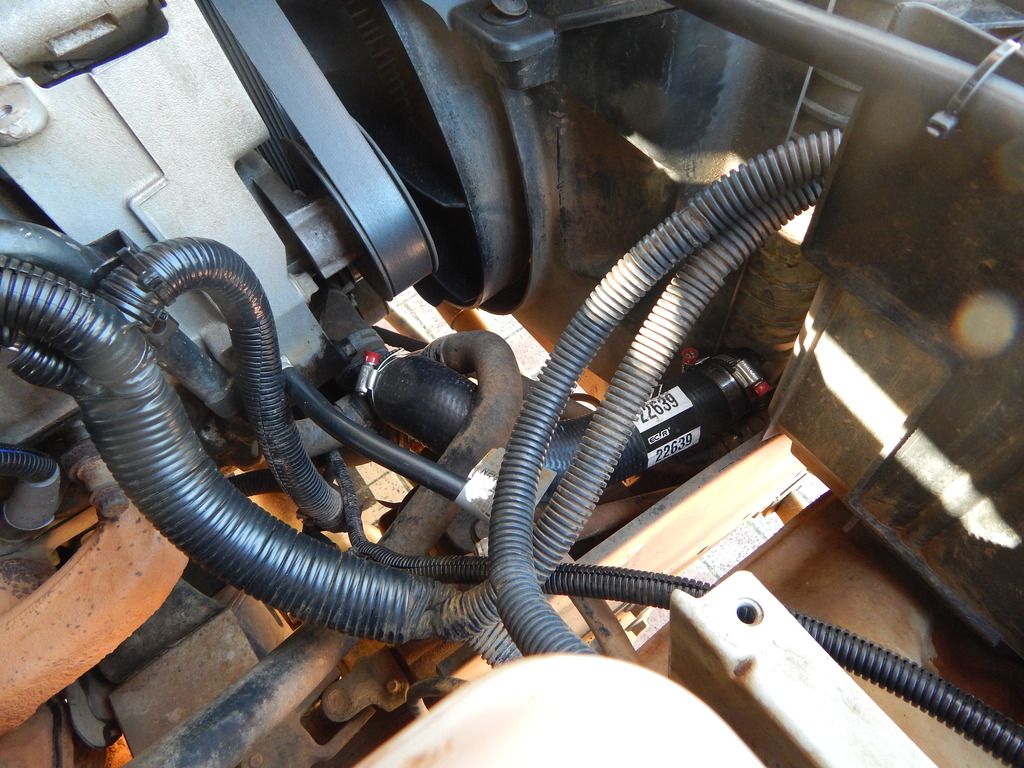
In the pic the lower hose looks standard. but some of the post I saw using BMW hose but that Hose has strange ends.
Also in the last pic I see 2 wires coming out for temp??
Thanks again for your in depth description
Pro Wrench
Joined: Apr 2015
Posts: 1,387
Likes: 111
From: Dallas, TX
I no longer have the petcock drain in the sender adapter, there is a temp sender with 1 set of wires going to the gauge. I don't know about the other guy in these last pictures. For all I know, 1 set of wires could be going to the fan. I just don't know...Australians.
The BMW hose is garbage; it doesn't work. I spliced some factory hoses together with a plastic spa coupler with barbs that I found at neighborhood HomeDept that works excellently. I can't tell you exactly which hoses I cut up and spliced together to make mine but that's what is in the earlier pictures that I first posted. These last pics just happen to show a great set of hoses for the mod that I know nothing about as of yet. My plan is to redesign the factory manifold to accept the thermostat and housing directly, just like a Disco-1 or any old engine block. I thought about getting some different hoses to make the whole thing look seamless like it was made that way but I hate the inline housing and all variations. the thermostat should be in the engine and not hanging out some other place in the engine bay. The inline housing is just a cheap, lazy method of what I discuss here but I have spoken to a local machinist that said he would be happy to fabricate a factory manifold to accept a thermostat where that gawd-awful coolant elbow comes flying out. LOL, its so stupid; I've never seen anything like it. I mean anything...
I will be getting that bottom hose shown in the last pic, though. Its nice but up top, I'm cleaning that out and will have stat in the manifold & 1 hose to the radiator. then I'm tapping the manifold for the temp sender and none of that $hit will be chilling next to the alternator like everyone else's.
Last edited by chubbs878; Jan 27, 2017 at 10:47 AM.