
Bumper Light Bar Project


Thread Starter
|
Mudding
Joined: Nov 2014
Posts: 230
Likes: 53
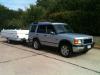
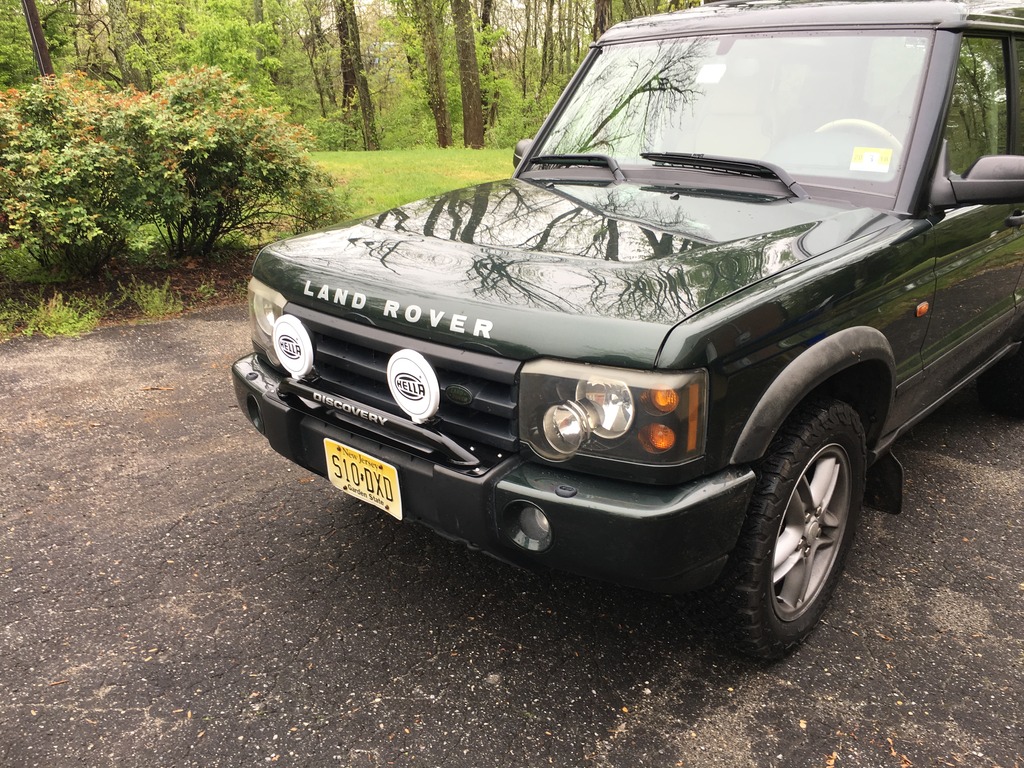
Some of you may remember that I was looking for a "A" frame to attach driving lights to the front of my 2003DII.
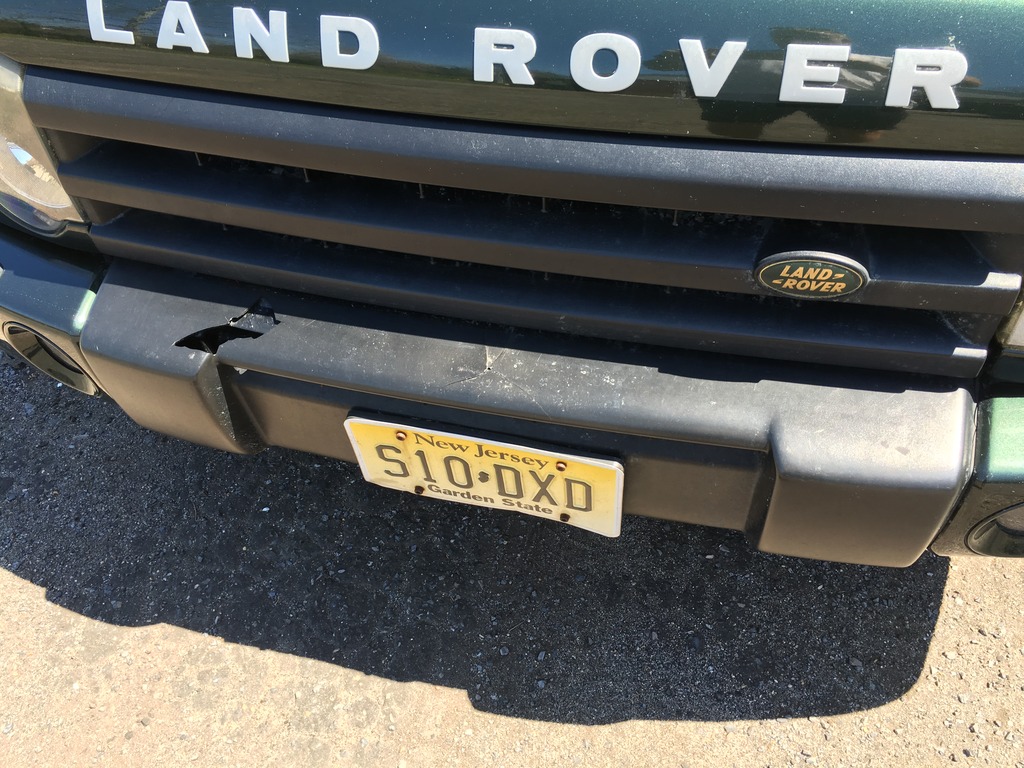
I was never able to find exactly what it was that I wanted in the way of an "A" bar, so I decided to take a different route. I decided to buy the bumper bar from John Craddock, and mount it with a pair of Hella 500's, directly to the bumper. My bumper was damaged in two places, one crack, and a complete hole right through where I had the battery slip out of my hand.
Looking at the mounting instructions from LR, I was not sold on the idea of mounting the bar, and two brand new lights, directly through the plastic bumper with only two bolts. I thought it might be a better idea to fabricate a bumper/bar plate that would add additional mounting locations to spread the load, add some structural rigidity to the plastic bumper, as well as cover over the damage to the top of the bumper.
I asked a friend who does custom metal work if he could fab me a plate. He said, "make me template and I'll rough cut it out of sheet aluminum." So, I made him a template, ordered the bar and lights, and got started.
You can see the existing damage to the bumper, as well where I would mount the plate & bar.
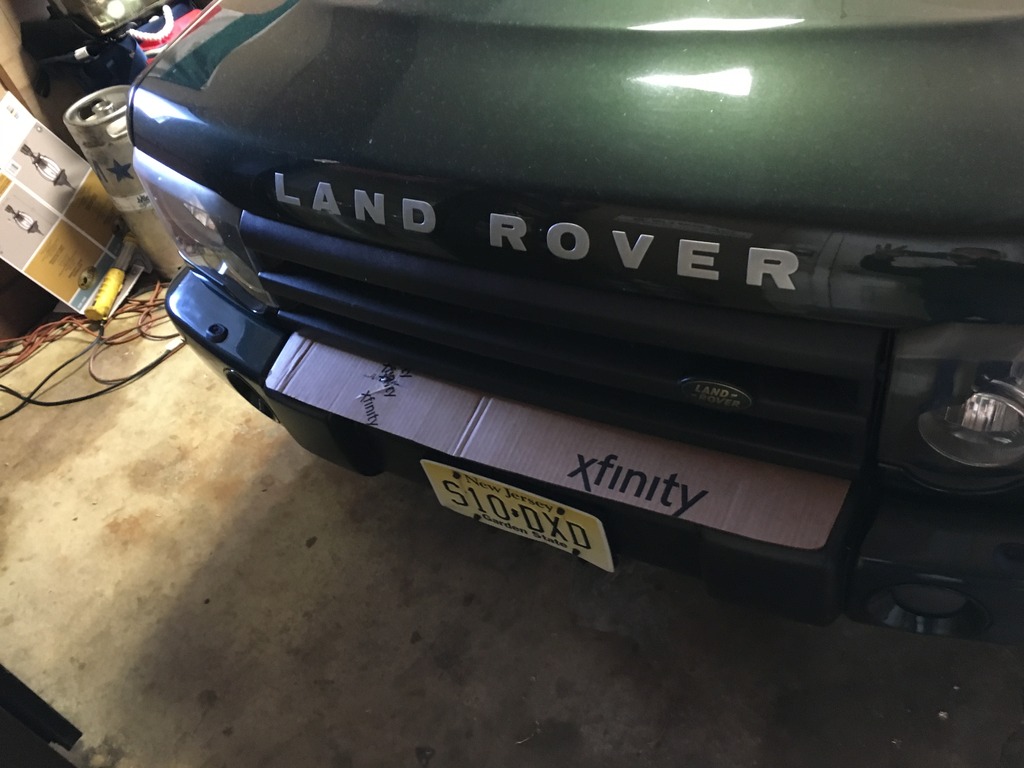
I cut a rough template out of a cardboard box that followed the contours of the center section of the bumper.
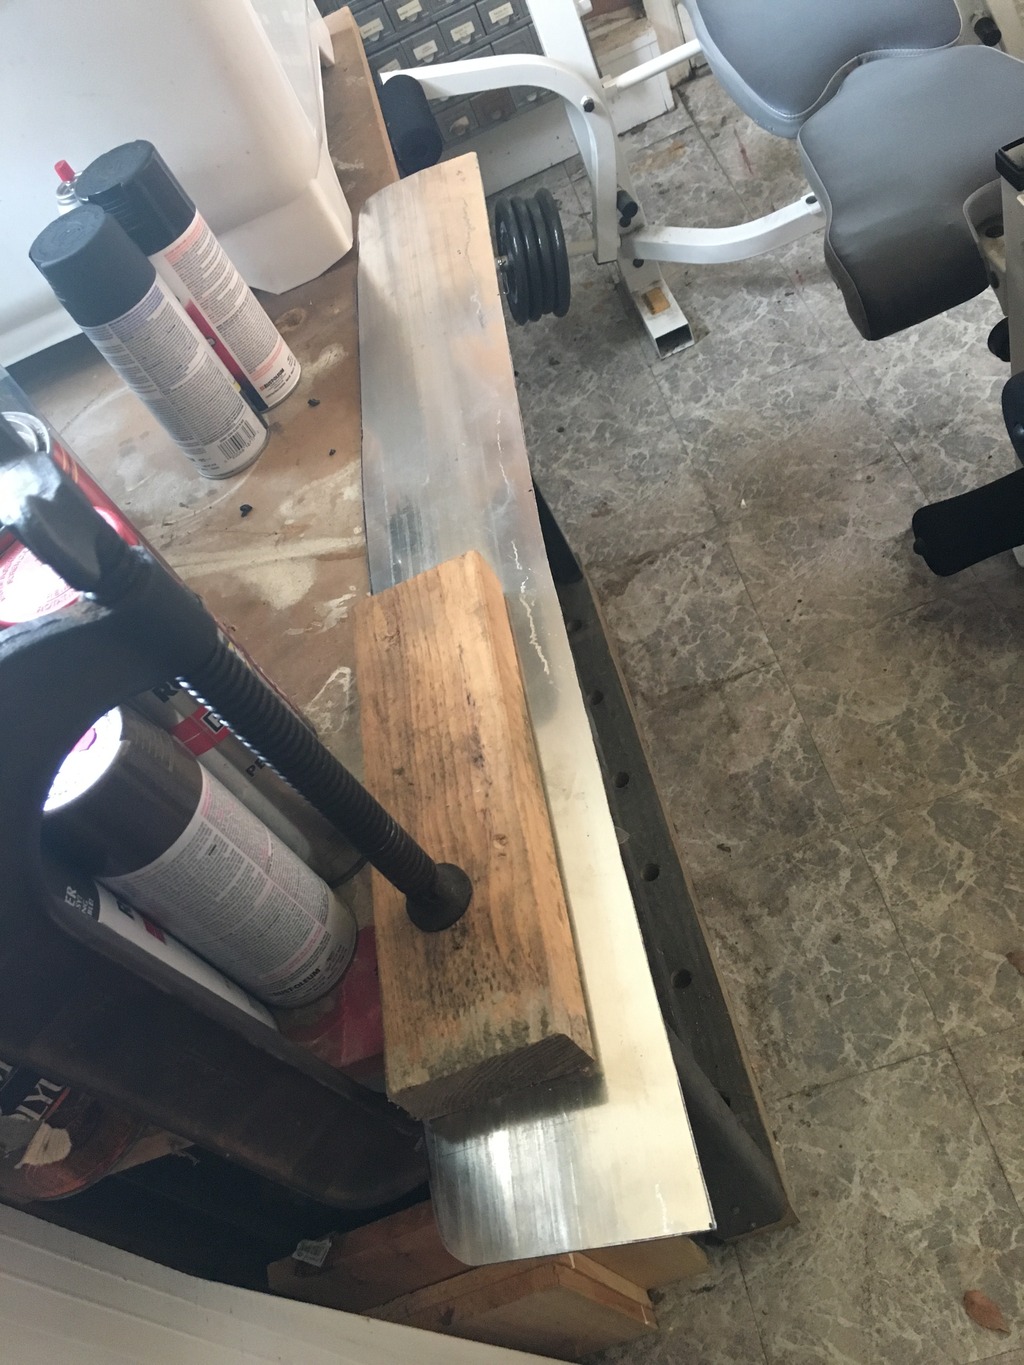
Rough cut of the aluminum plate. It is 1/8 aluminum. I figured that would be strong enough to help mount the lights, but would crush fairly easily in a real collision.

Plate, bar and lights.

Test fitted together.

Mounting plate ready for finish cut trim, contour bending, template drilling, sanding, and painting.
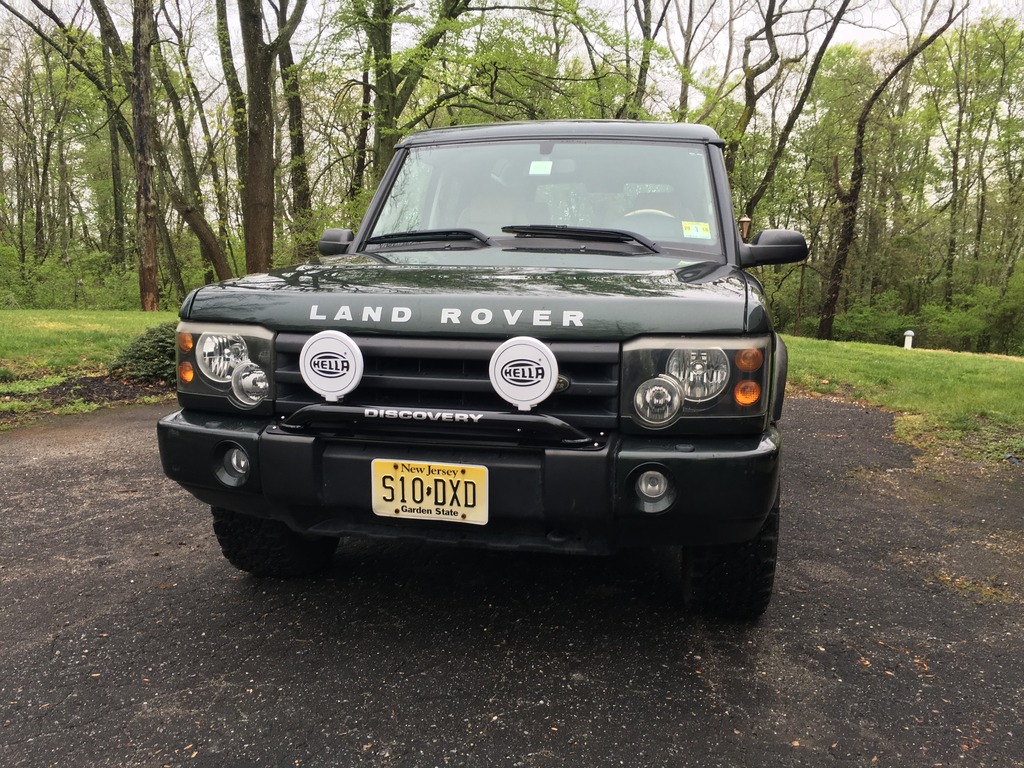
Test fitting on the front end.
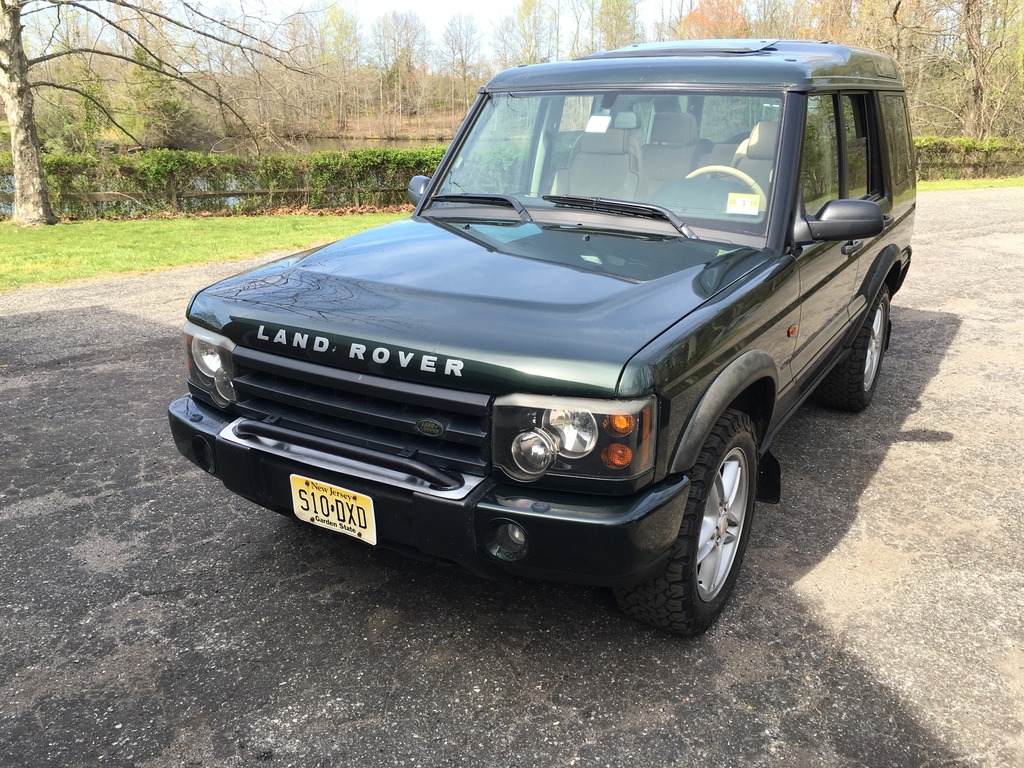
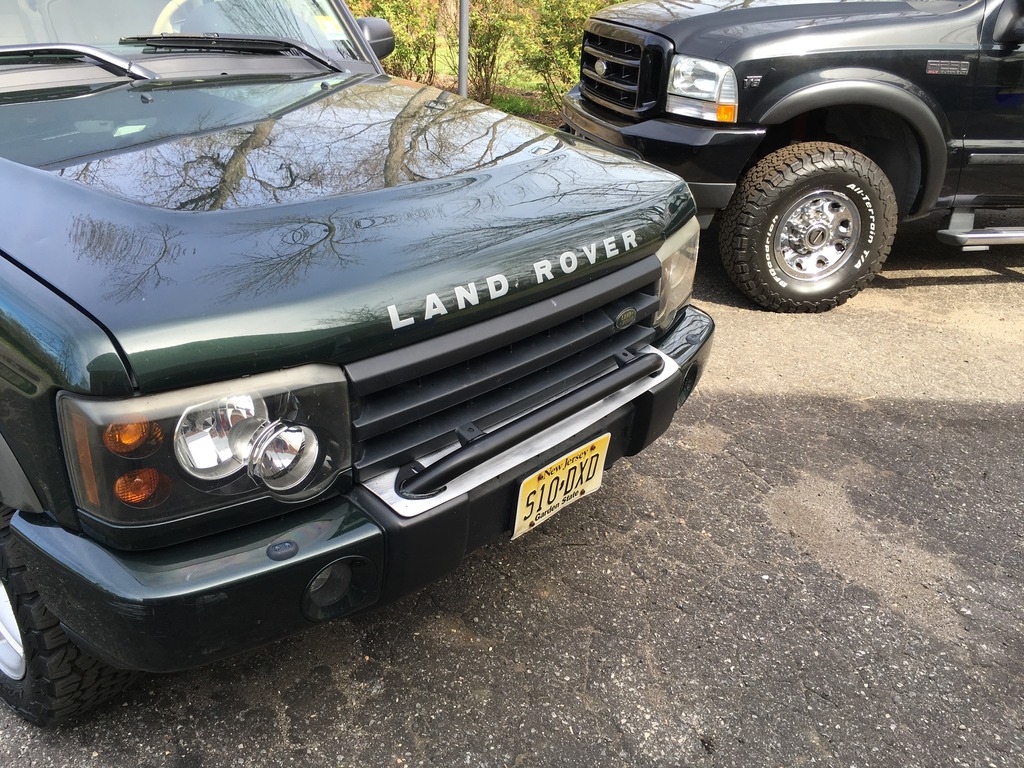
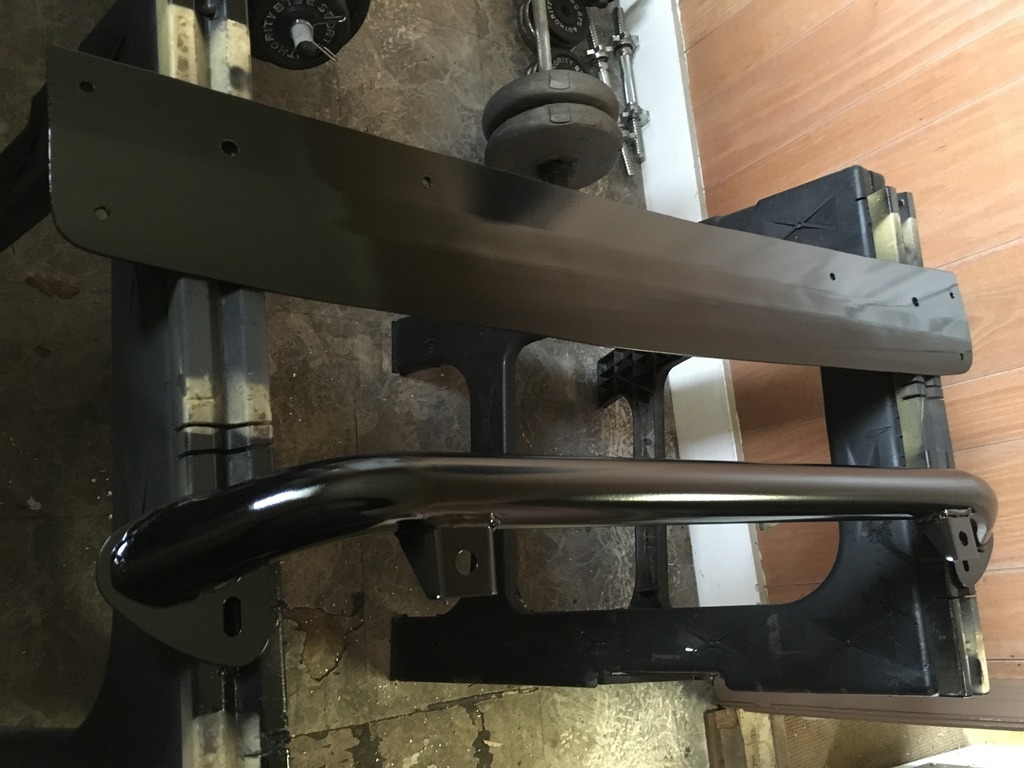
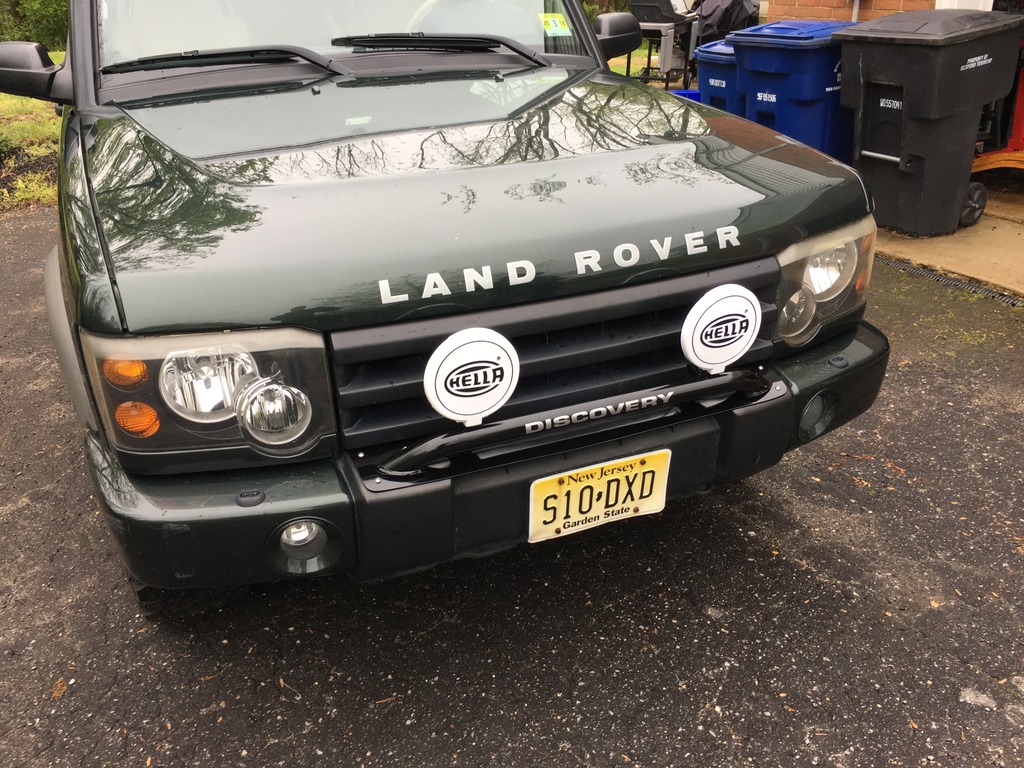
Plate "templated" and drilled for mounting to six points on the bumper, and two points through the bar, plate and bumper. Test fitting all the hardware. Bought matching hardware to the mount bar to create as much of a factory look as possible.
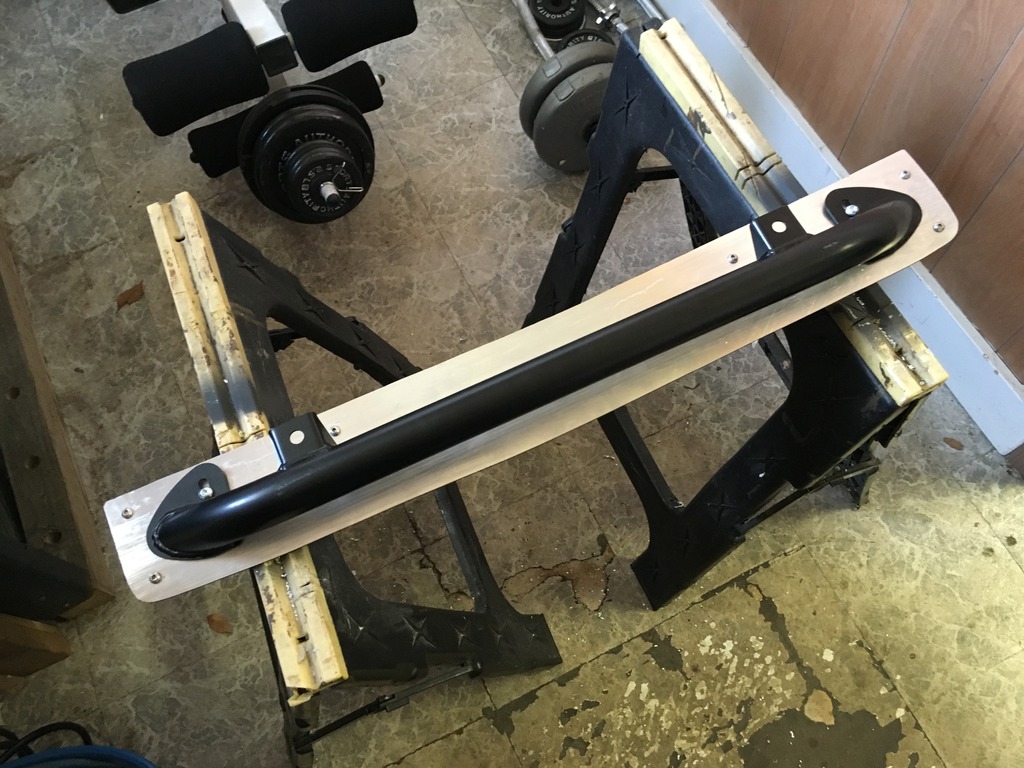
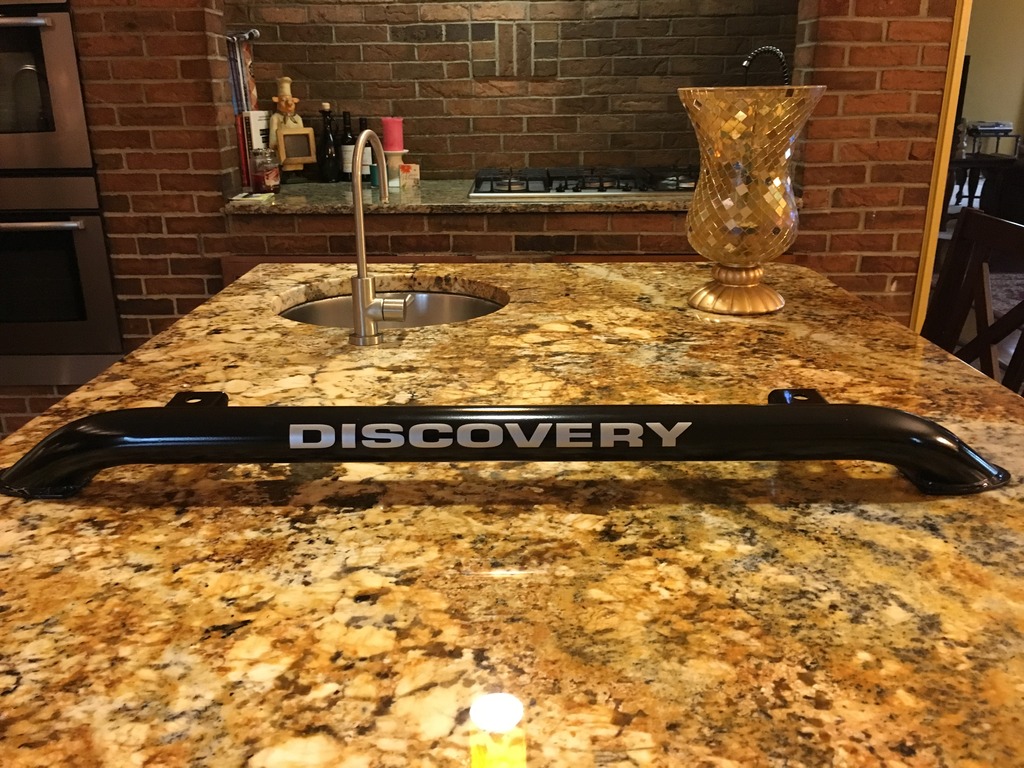
Plate and bar primered and painted in VHT chassis satin black
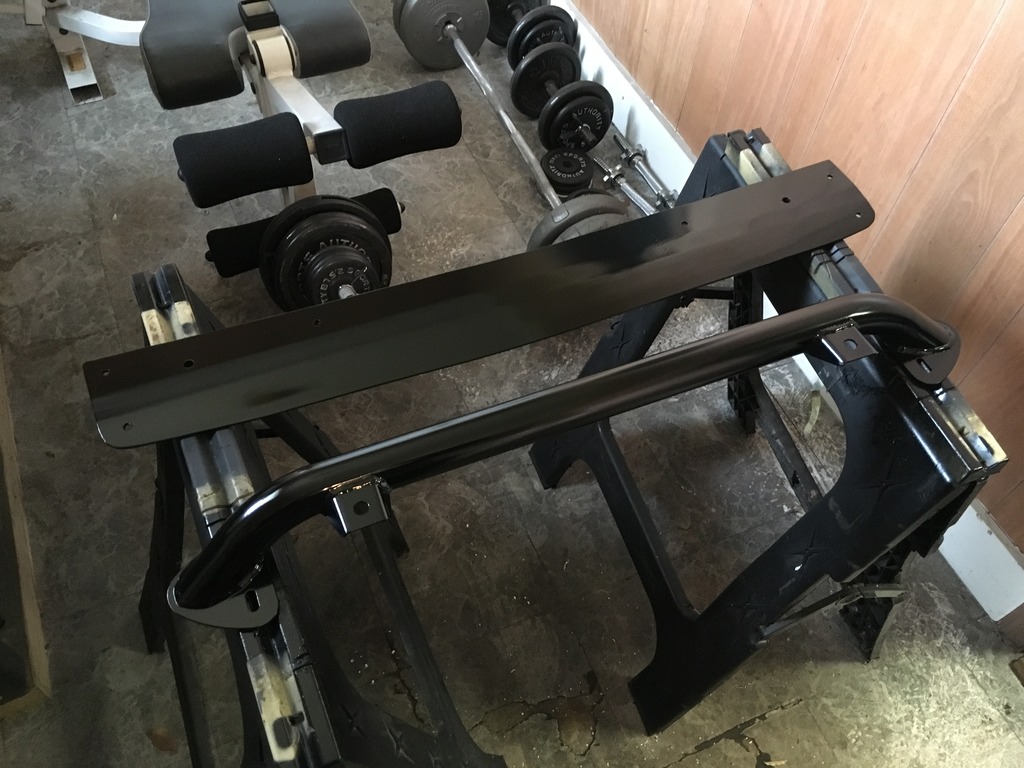
Factory "Discovery" decal added to the bar.
Hella 500's soldered and shrinked. Ready to mount.
Hoping to finish the mounting up this weekend. Then I'll have to figure out exactly what route I want to go to do the wiring. I'll post more pics and edit the thread as I finish the mounting and wiring.
I was never able to find exactly what it was that I wanted in the way of an "A" bar, so I decided to take a different route. I decided to buy the bumper bar from John Craddock, and mount it with a pair of Hella 500's, directly to the bumper. My bumper was damaged in two places, one crack, and a complete hole right through where I had the battery slip out of my hand.
Looking at the mounting instructions from LR, I was not sold on the idea of mounting the bar, and two brand new lights, directly through the plastic bumper with only two bolts. I thought it might be a better idea to fabricate a bumper/bar plate that would add additional mounting locations to spread the load, add some structural rigidity to the plastic bumper, as well as cover over the damage to the top of the bumper.
I asked a friend who does custom metal work if he could fab me a plate. He said, "make me template and I'll rough cut it out of sheet aluminum." So, I made him a template, ordered the bar and lights, and got started.
You can see the existing damage to the bumper, as well where I would mount the plate & bar.

I cut a rough template out of a cardboard box that followed the contours of the center section of the bumper.

Rough cut of the aluminum plate. It is 1/8 aluminum. I figured that would be strong enough to help mount the lights, but would crush fairly easily in a real collision.

Plate, bar and lights.

Test fitted together.

Mounting plate ready for finish cut trim, contour bending, template drilling, sanding, and painting.

Test fitting on the front end.


Plate "templated" and drilled for mounting to six points on the bumper, and two points through the bar, plate and bumper. Test fitting all the hardware. Bought matching hardware to the mount bar to create as much of a factory look as possible.

Plate and bar primered and painted in VHT chassis satin black


Factory "Discovery" decal added to the bar.

Hella 500's soldered and shrinked. Ready to mount.

Hoping to finish the mounting up this weekend. Then I'll have to figure out exactly what route I want to go to do the wiring. I'll post more pics and edit the thread as I finish the mounting and wiring.
Last edited by gulfstream69xr7; May 3, 2016 at 05:02 PM.


Rock Crawling
Joined: Mar 2015
Posts: 284
Likes: 53
From: Madison, wi
One spot, one flood light?
Thread Starter
|
Mudding
Joined: Nov 2014
Posts: 230
Likes: 53
Got it done today. Came out better than I expected. Six mounting points through the bumper with 1" washers and locking nuts, two mounting points through the light bar and plate. Now I just have to run the wiring. I tried to make it look as close to LR over the counter parts install as possible.


Thread Starter
|
Mudding
Joined: Nov 2014
Posts: 230
Likes: 53
Yes, I plan to add another aux light switch in the blank spot in the steering binnacle, and have them as an independent lighting option.

Thread
Thread Starter
Forum
Replies
Last Post
acamato
Discovery II
2
Mar 11, 2016 12:07 PM
Corrigan
Retired - Private For Sale/Trade Classifieds
0
Apr 26, 2013 02:38 PM
perkj
Retired - Private 'Wanted' Classifieds
0
Apr 26, 2011 10:34 AM
kpl1228
Discovery II
6
Nov 20, 2010 11:05 PM

